Set up Coaching in a Viva Glint survey
Use the Coaching section of Microsoft Viva Glint survey setup to customize the content that managers use to view and interpret results on their Team Summary dashboard.
Edit default Coaching content
To edit the default content for Interpretation, Top Strengths, and Top Opportunities guidance:
Select Edit next to the item to be updated.

In the edit pane that appears, make updates to the Header, Coaching Text, and Select Resource fields to customize content for strengths and opportunities. The Select Resource option is the only editable content for the Interpretation guide.

If needed, use the Language dropdown menu to make updates in all available dashboard languages.
Select Save Changes.


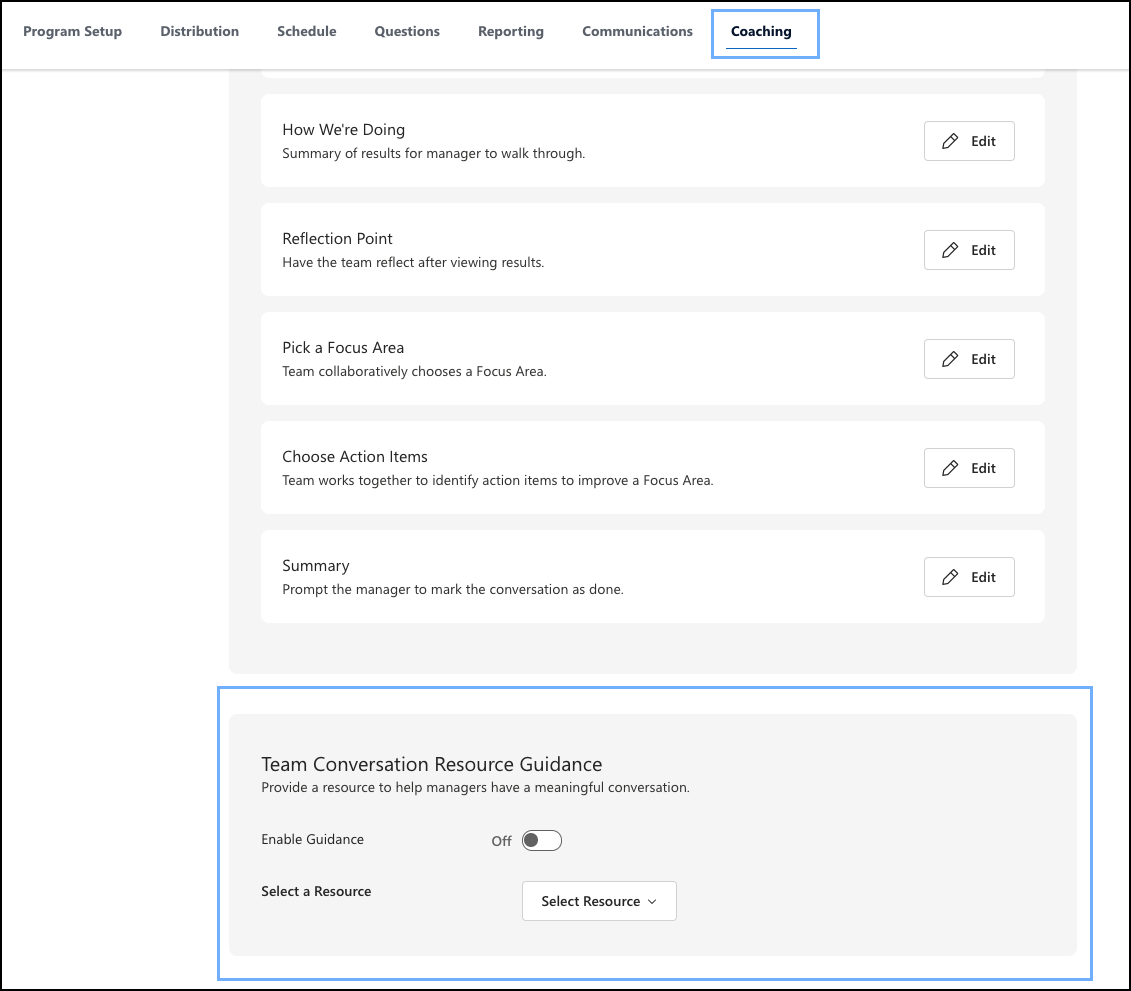
Manage Team Conversations content
When Viva Glint Admins enable Team Conversations for a Recurring survey, there are two other sections in Coaching to select resources for conversations presentations and in-platform guidance.
Team Conversation Presentation Guidance
Use this section to customize the Team Conversations presentation that managers use to share results and choose Focus Areas with their teams.

Note
Make all changes to the presentation kit before releasing survey results to managers. Viva Glint Admins can customize the kit, but can't delete sections.
Use the Edit option to open an edit pane and make changes to each part of the conversation presentation:
- Title
- Section Name: The label that appears in the conversation menu
- Conversation Title: The title that appears on the first slide
- Introduction
- Section Name: The label that appears in the conversation menu
- Slide Heading: The title that appears on the first slide
- Step 1-3 Header: The bold-faced header for the step
- Step 1-3 Body: The plain text description of the step
- Reflection point
- Show Reflection: Enable or disable this item with the toggle
- Section Name: The label that appears in the conversation menu
- Reflection Text: Instructional and descriptive text for the reflection point
- How we're doing
- Section Name: The label that appears in the conversation menu
- Slide Headings: The bold-faced header for the Thank you, High-Level Results, Biggest Changes, Relative Strengths, Relative Opportunities, and Multiple Choice Questions slides
- Thought Starters: The plain text description for the Thank you, High-Level Results, and Biggest Changes slides
- Subtexts: The plain text description for the Relative Strengths and Relative Opportunities slides
- Description & Thought Starter: The plain text description for the Multiple Choice Questions slide
- Reflection point
- Show Reflection: Enable or disable this item with the toggle
- Section Name: The label that appears in the conversation menu
- Reflection Text: Instructional and descriptive text for the reflection point
- Pick a focus area
- Section Name: The label that appears in the conversation menu
- Slide Heading: The bold-faced title for the slide
- Subtext: The plain text description of the slide
- Choose Action Items
- Section Name: The label that appears in the conversation menu
- Slide Heading: The bold-faced title for the slide
- Subtext: The plain text description of the slide
- Button Text: Label for the button on this slide
- Summary
- Section Name: The label that appears in the conversation menu
- Slide Headings: The bold-faced title for the slide before and after a conversation
- Subtexts: The plain text description of the slide before and after a conversation
- Title
Use the Language dropdown menu to make edits in other dashboard languages, if needed. Changes autosave when switching from one language to another.
Select the Save and Preview option to preview presentation changes.
Team Conversation Resource Guidance
Optionally, include guidance to help managers as they have conversations with their teams. These resources appear in the bottom of the left menu of the conversation preview when Viva Glint Admins enable and select a resource.
To enable Team Conversation Resource Guidance:
Switch the Enable Guidance toggle to On.
Use the Select a Resource dropdown menu to select a resource.
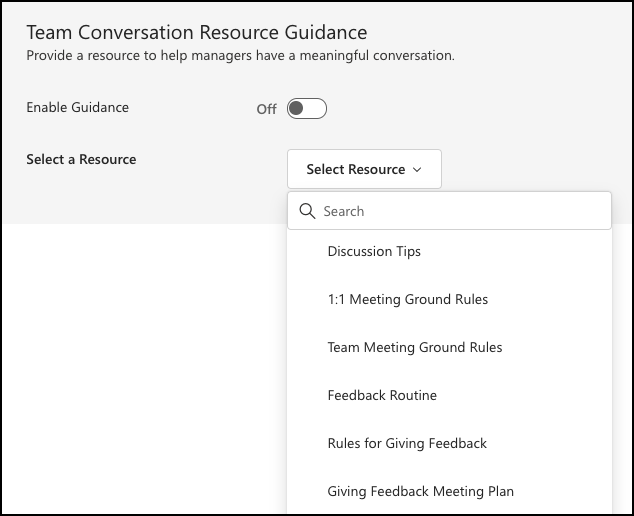
Use the Save and Preview option to view edits to selected resources. After completing changes to content, select the right-facing arrow symbol to Save & Continue.
Tip
View suggested Content Resources by navigating from the admin dashboard to Content Resources in the Action Taking section. You can also add your own resources.