Troubleshoot a Windows VM by attaching the OS disk to a repair VM through the Azure portal
Applies to: ✔️ Windows VMs
If your Windows virtual machine (VM) in Azure encounters a startup or disk error, you might need to perform troubleshooting steps on its OS disk offline. Attaching the OS disk to a second VM for offline repair might be required, for example, if a failed application update prevents a VM from starting successfully. This article describes how to connect a failed OS disk to a repair VM to fix any errors and then re-create your original VM.
Determine which method to use for offline repair
The steps you should use to attach a failed OS disk to a repair VM depend on whether the disk is encrypted with Azure Disk Encryption (ADE), whether it's managed or unmanaged, and some other factors.
If the OS disk is unmanaged, see Attach an unmanaged disk to a VM for offline repair for instructions on attaching the disk to a repair VM. If you're unsure, see Determine if the OS disk is managed or unmanaged.
If the OS disk is managed,
Not encrypted, see Repair a Windows VM by using the Azure Virtual Machine repair commands. This is the automated (preferred) method to attach a failed OS disk to a repair VM by using az vm repair. If you're unsure if the OS disk is encrypted, see Confirm that ADE is enabled on the disk.
Encrypted with ADE single-pass encryption (with or without KEK), see Repair a Windows VM by using the Azure Virtual Machine repair commands. This is the automated (preferred) method to attach a failed OS disk to a repair VM by using az vm repair.
Encrypted with ADE using a method other than single-pass encryption, see Unlocking an encrypted disk for offline repair for instructions on attaching and unlocking the disk.
Manually attach a failed OS disk to a repair VM
Use the following process to fix a failed VM with the help of a repair VM.
- Take a snapshot of the OS disk.
- Create a disk from the snapshot.
- Create a repair VM with the new disk attached as a data disk.
- Repair the failed VM's OS disk.
- Swap the failed VM's OS disk with the repaired disk.
Take a snapshot of the OS disk
A snapshot is a full, read-only copy of a virtual hard disk. We recommend that you cleanly shut down the VM before taking a snapshot, to clear out any processes that are in progress. To take a snapshot of an OS disk, follow these steps:
Go to the Azure portal and navigate to the VM that has the problem.
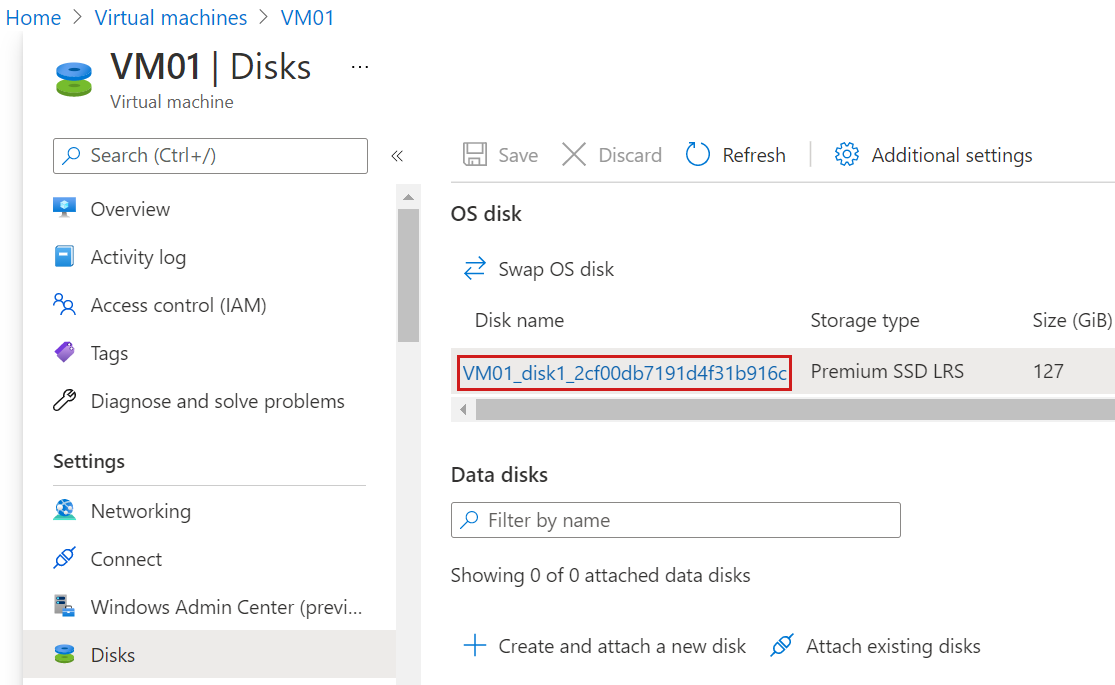
Select the Disks blade, and then select the OS disk to open its Overview blade.

On the Overview blade of the OS disk, select Create snapshot.

Proceed to create a snapshot with the default settings.
Create a disk from the snapshot
To create a disk from the snapshot, follow these steps:
After the deployment of the disk snapshot is complete, navigate to the new resource in the Azure portal.
On the Overview blade of the new disk snapshot, select Create Disk.

On the Basics page of the "Create a Managed Disk" wizard, assign a descriptive name to the disk, such as "MyVMOsDiskCopy."
On the Basics page, select a region and Availability zone, and record these choices. You will assign these same values to the repair VM.
Complete the "Create a Managed Disk" wizard with the default options.
Create a repair VM with the new disk attached as a data disk
In the Azure portal, begin the process of creating a new VM based on Windows Server.
On the Basics page of the "Create a Virtual Machine" wizard, specify the same region and availability zone that you chose for the new disk you just created from the snapshot.
Complete the "Create a Virtual Machine" wizard with the default settings.
Start and connect to the repair VM. Ensure the repair VM is operating correctly.
Attach the disk to the repair VM as a data disk.
- On the Virtual machine pane, select Disks.
- On the Disks pane, select Attach existing disks.
- Under Disk name, select the expected disk from the drop-down menu.
- Select Save.
Repair the failed VM's OS disk
With the copy of the OS disk mounted on the repair VM, you can now perform any maintenance and troubleshooting steps as needed. After you've fixed the errors on the disk that have prevented it from starting, continue with the following steps.
Swap the failed VM's OS disk with the repaired disk
Azure portal supports changing the OS disk of the VM. To do this, follow these steps:
After you repair the disk, open the Disks blade for the repair VM in the Azure portal. Detach the copy of the source VM OS disk. To do this, locate the row for the associated disk name under Data Disks, select the "X" at the right side of that row, and then select Save.

In the Azure portal, navigate to the source (failed) VM and open the Disks blade. Click Swap OS disk to replace the existing OS disk with the one you have just repaired.

Choose the new disk that you repaired, and then enter the name of the VM to confirm the change. If you don't see the disk in the list, wait 10 to 15 minutes after you detach the disk from the troubleshooting VM.
Next Steps
If you're having problems connecting to your VM, see Troubleshoot Remote Desktop connections to an Azure VM. For problems with accessing applications running on your VM, see Troubleshoot application connectivity issues on a Windows VM.
Contact us for help
If you have questions or need help, create a support request, or ask Azure community support. You can also submit product feedback to Azure feedback community.