Plan for Viva Connections Dashboard, Feed and Resources
Now that you've identified your key stakeholders and have completed a needs assessment, it's time to plan and design the Dashboard, Feed, and Resources. The plan process is an important time to think critically about how you want your users to experience Viva Connections.
The plan process will involve:
Using insights from the needs assessment to decide which cards to use on the Dashboard and links to include in Resources.
Personalizing the experience by considering which roles and regions need access to information and using audience targeting to create custom views.
Testing the experience with real users before deploying more broadly.
Determining with metrics your organization will use to confirm Viva Connections is helping resolve issues identified in the needs assessment.
Plan for the Dashboard
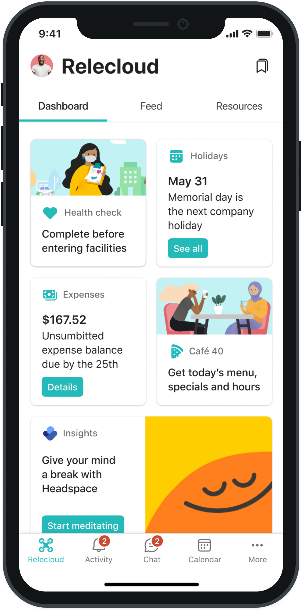
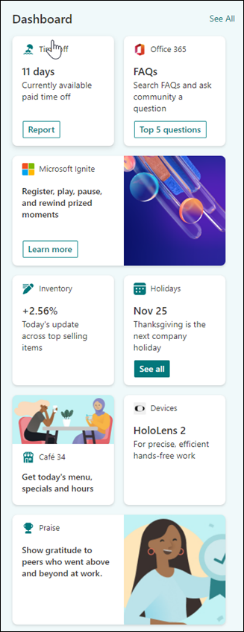
| Dashboard mobile experience | Dashboard web part for the desktop experience |
|---|---|
|
|
Most of your time will be spent planning the Dashboard. Use insights from the needs assessment to determine which scenarios and tasks can be supported by a card on the Dashboard. Not every task should be turned into a card. Start with the most important workflows, then focus on the most impactful tasks that can be executed within a short amount of time.
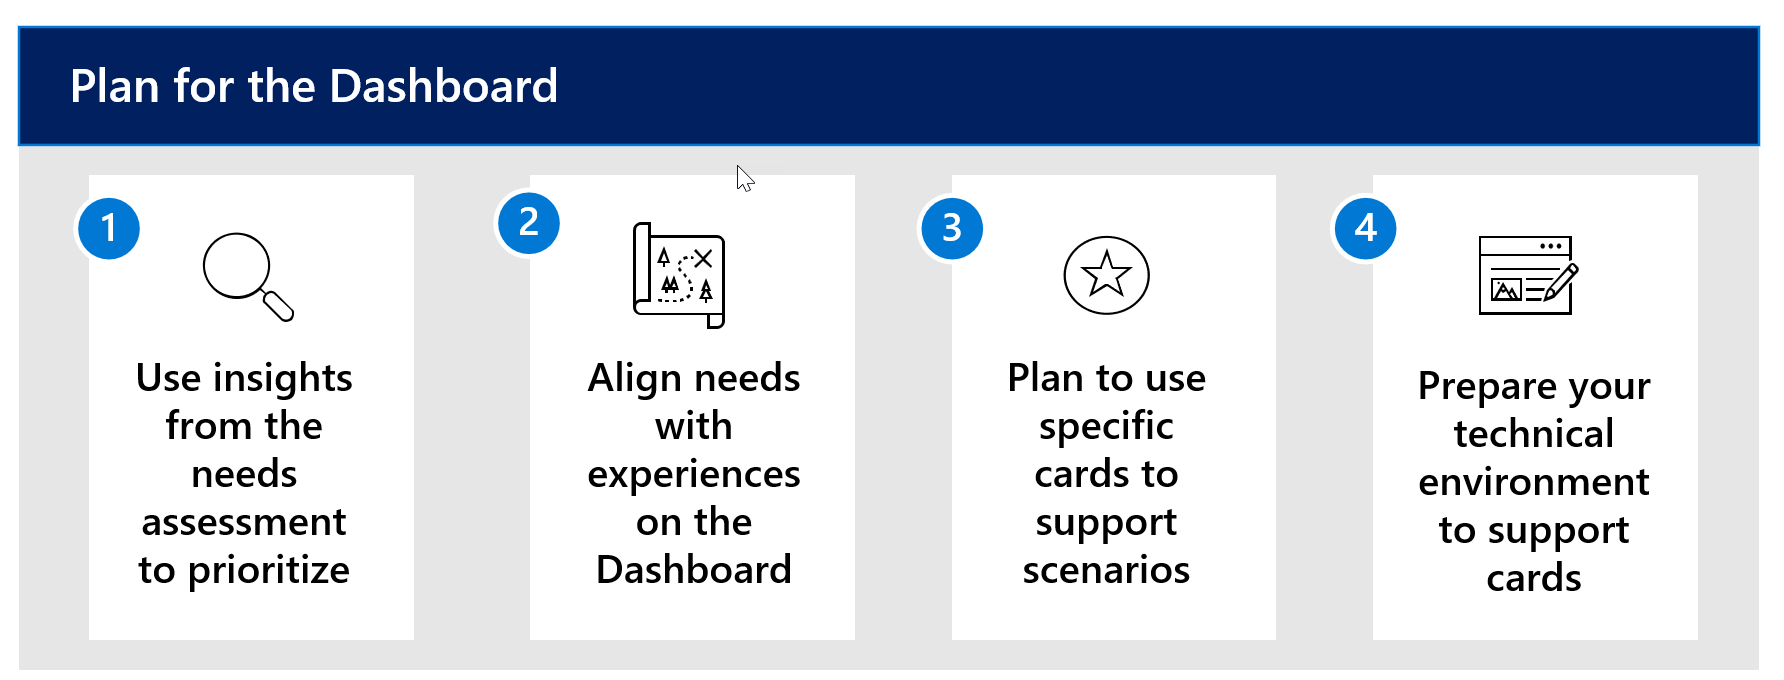
Step 1 is to use insights from the needs assessment; step 2 is to align needs with experiences on the Dashboard; Step 3 is to plan use specific cards to support scenarios; step 4 is to prepare your technical environment to support cards.
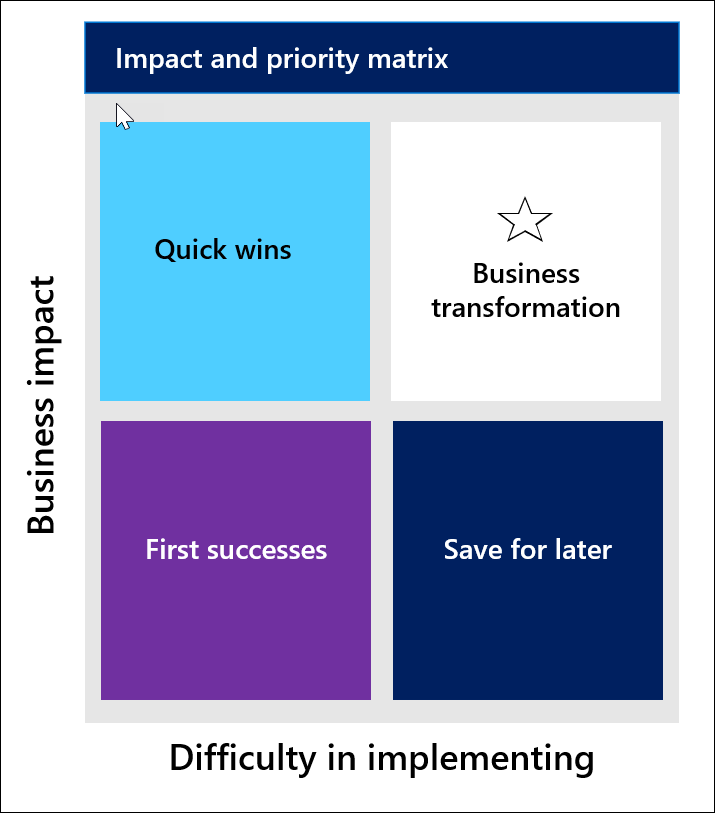
Find opportunities that align with the fields "Quick wins" and "First successes" in the decision matrix below as a start:
Within the Dashboard, you'll have the opportunity to incorporate three types of cards:
Out of box cards, which are already included in the Dashboard card toolbox
Custom cards, which are highly customizable to user needs
Third-party cards, which come from outside sources
Consider each end user's experience and how their Dashboards will be displayed and accessed. As a Dashboard author, you can decide how you want users' Dashboards to look, how many cards display on a user's Dashboards, and their layout. Additionally, consider if the card should display on a desktop, mobile device, or both. Plan to apply audience targeting to cards as they relate to different roles and regions. Lastly, if people at your organization speak more than one language at work, you'll want to plan on creating a Dashboard in more than one language.
Plan to use out-of-the-box cards
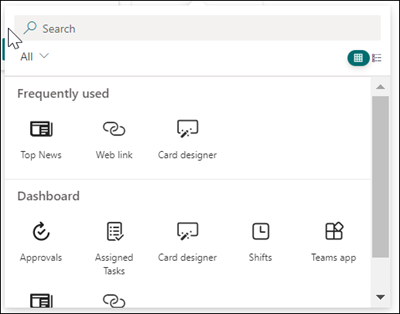
We have reviewed out-of-the-box cards in unit 2. These cards are card templates that can be easily customized to fit the needs of your organization. They can be accessed from the card toolbox without any extra configuration like third-party cards or custom cards.
Plan to use third-party cards
Within your Viva Connections Dashboard, you can add third-party tools that connect to services that help manage payroll, IT tickets, and wellness in the workplace. Your organization will need to have a service plan with the third-party service before the card can be used. Third-party services are outside of the Microsoft 365 suite. Learn more about third-party integrations.
You can incorporate third party tools and services into the Viva Connection dashboard using the Microsoft AppSource,SharePoint store, or directly from the third-party card developer. You can get third-party cards from either location and then add them to the card toolbox so Dashboard authors can add and customize them.
Plan for custom cards for the Dashboard
You can customize cards for the Dashboard to meet the unique needs of your organization. For example, booking a shuttle or viewing holiday schedules. There are two ways cards can be customized--using the Card designer card or using the Adaptive Card Extensions (ACEs) framework. Both options require custom code solutions using JSON. Both kinds of customizations allow you to create high-impact experiences by creating cards with quick views. Quick views are secondary panels that display dynamic information.
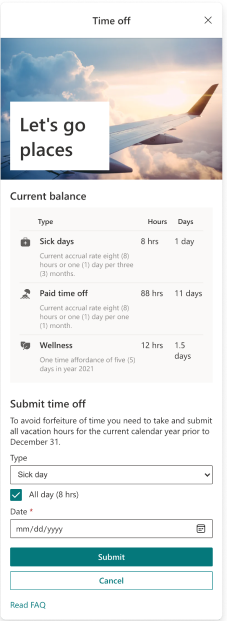
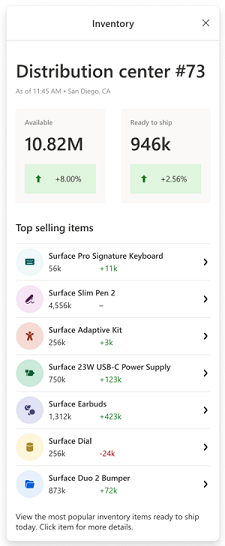
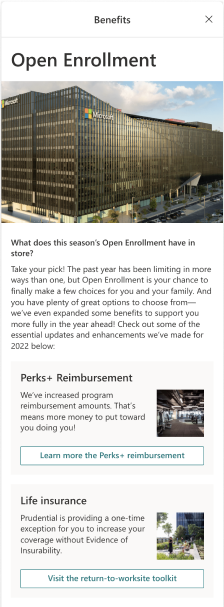
Here are examples of custom quick views:
| Scheduling time off | Keep track of inventory | Open enrollment for benefits |
|---|---|---|
|
|
|
The Card designer option enables IT admins in your organization to create low-code customizations using JSON. Developers can take the steps further by extensibility opportunities to create cards using the ACE framework. Learn more about the different capabilities for cards using the ACE framework.
Fully customized cards that use the ACE framework are typically outsourced to roles that have experience developing apps. View getting started guidance to use the ACE framework, the benefits of Adaptive Cards Templating, and sample Adaptive Cards templates.
Plan for the Feed
| The Feed mobile experience | The Feed web part for the desktop experience |
|---|---|
|
|
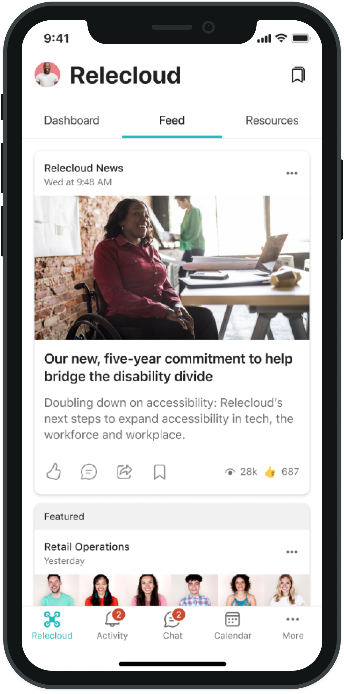
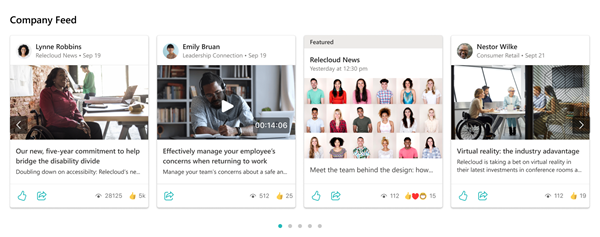
The Feed aggregates SharePoint news posts, video news links, and conversations in Viva Engage into one central place. In the mobile app, the Feed displays as its own tab. On desktop, the Feed can be included by adding the Feed web part to the home site, which will be covered in an upcoming unit. Technically, you don't need to do anything for content to populate in the Feed if your organization already uses SharePoint news posts and Viva Engage. There are ways to influence the hierarchy of content in the Feed. Learn more about the Feed.
Content in the Feed comes from three sources:
SharePoint news published from organizational news sites and sites that the user follows
Viva Engage community posts from communities the user follows
Stream videos built on SharePoint in the form of a video news link
How to influence content in the Feed:
Promote important communications - Use News boost to raise the visibility of the most important news posts.
Highlight community discussions - Feature posts in Viva Engage communities that you'd like seen by the entire organization.
Publish from official news sources - Post news from organizational news sites in SharePointto impact content ranking.
Use video news links in SharePoint. Rather than sharing a written news story, you might want to use a Video news link in SharePoint to share an update, rebroadcast an all-hands meeting, or provide reusable training materials.
Get started using SharePoint news and Viva Engage:
If your organization isn't already using SharePoint news posts or Viva Engage, include adopting these tools in your plan to generate a healthy flow of content in the Feed. Content in the Feed can be accessed for up to 30 days. Consider creating a content schedule each month to ensure organizational and departmental communications are synced on a schedule that creates the ideal viewing experience.
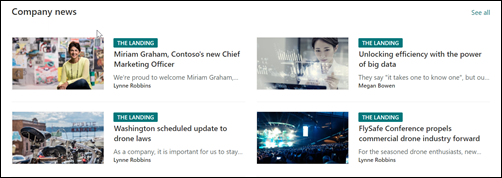
Use organization news sites for authoritative news sources: To make SharePoint sites "official" or "authoritative," mark them as organization news sites. You can specify up to 250 organization news sites to keep your partners, team, and colleagues in the loop with the information that is important to them. Learn more about organizational news.
Use video news links: Once your organization has set up the structure for publishing authoritative news, consider using video news links. Video news links get prioritized in the Feed and will display in a higher position than a typical news post published from a nonauthoritative site. Learn more about video news links.
Use Viva Engage for announcements and conversations: Content from Viva Engage will display in the Feed based on the communities the viewer follows. Viva Engage posts and announcements set to "All company" will appear prominently in the Feed. Learn more about how to start using Viva Engage in your organization.
Plan for Resources
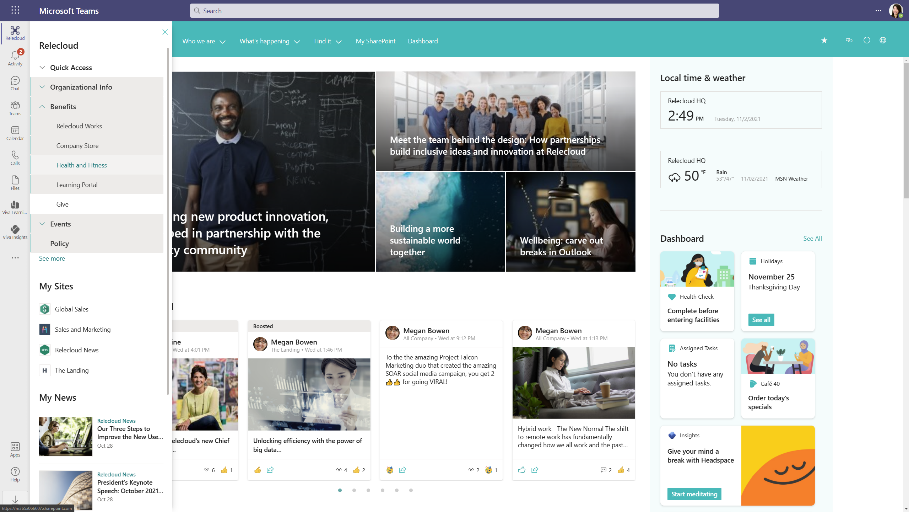
| Resources mobile experience | Resources desktop experience |
|---|---|
|
|
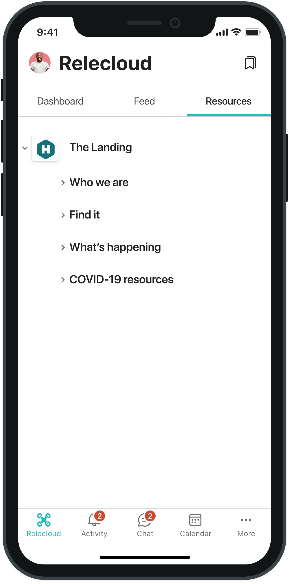
Resources are navigational links that get setup in SharePoint global navigation You must enable global navigation for Resources to display in the Viva Connections experience. On the mobile experience, Resources displays as its own tab. One the desktop and web experiences, Resources can be accessed by selecting your organization's Viva Connections icon twice from the Teams app bar.

Learn how Lamna Healthcare uses insights from the needs assessment
After conducting the needs assessment, you set up a meeting for the Viva Connections planning team at Lamna Healthcare meet and review the findings. Planning team members start to prioritize the highest impact experiences. High-impact experiences will provide the greatest value for large groups of roles and help solve known issues identified in the needs assessment. Then, technical team members provide feedback on how each experience could be implemented and other technical considerations.
Next, the planning team determines the timeline and release schedule for the first version of Viva Connections. The first version will include the highest priority experiences. You know you'll build on this platform over time and plan to include more tools and resources as they learn more.
You organize insights from the needs assessment and include which component is the best fit to support the experience. Priority level 1 indicates a high impact area that will be implemented in the first version of Viva Connections. Areas with a priority level of 2 will be implemented sometime soon after the release of the first version.
| Insights from needs assessment | Viva Connections component | Solution | Technical consideration | Priority level |
|---|---|---|---|---|
| Clock in and out | Dashboard | Use the Shifts card | 1 | |
| Get approvals | Dashboard | Use the Approvals card | Need to set up the Teams Approval before launching this card | 1 |
| Submit IT tickets | Dashboard | Use the third-party card from ServiceNow | 2 | |
| Accessing HR benefits and payroll information | Dashboard and Resources | Use the ACE framework and add links to global navigation | Customized card should be used to call existing APIs | 1 |
| Accessing popular SharePoint portals | Resources | Links in global navigation | 1 | |
| Accessing organizational news | Dashboard and the Feed | Use the Top news card and organizational news posts in SharePoint | 1 | |
| Work-life balance and wellness | Dashboard and Resources | Use the Third-party card that connects to Headspace and more links in Resources | Need to get a license to Headspace before launching on the Dashboard | 1 |
| Submit time-off requests | Dashboard | Use the ACE framework and add links to global navigation | 2 | |
| Track inventory | Dashboard | Use the ACE framework | 2 | |
| View holiday schedules | Dashboard and Resources | Use the Card designer card | Need to create API for holiday schedules | 1 |
| View cafe menus | Dashboard | Use the Link card | Create workflow to update cafe menus every seven days | 1 |
To prepare for the Dashboard, priority level 1 items from the list above are organized into a separate spreadsheet for the Dashboard authors. The Dashboard planning spreadsheet also considers which audiences need access to the cards and which devices the card will likely be viewed on to craft the ideal viewing experience.
| Card function | Roles impacted | Regions impacted | Card type | Desktop/mobile |
|---|---|---|---|---|
| Clock in and out | Nurses, nurse practitioners, custodial staff | All | Shifts card | Mobile |
| Approvals for purchase orders | People managers and finance professionals | All | Approvals card | Desktop |
| Access to self-service HR benefits | Employees who work more than 30 hours a week | All | ACE framework | Desktop and mobile |
| Work-life balance and wellness | All | All | Third party card | Desktop and mobile |
| Organization news posts need to be viewed by certain roles and regions | Physicians, surgeons, nurse practitioners, and office administrators | Regions A and D | Top news card | Desktop |
| View holiday schedules | All | All | Card designer | Desktop and mobile |
| View café menus | All | All | Link card | Desktop and mobile |