Integrate with an existing desktop flow
Watch the following demo video of the steps that you'll complete in this unit.
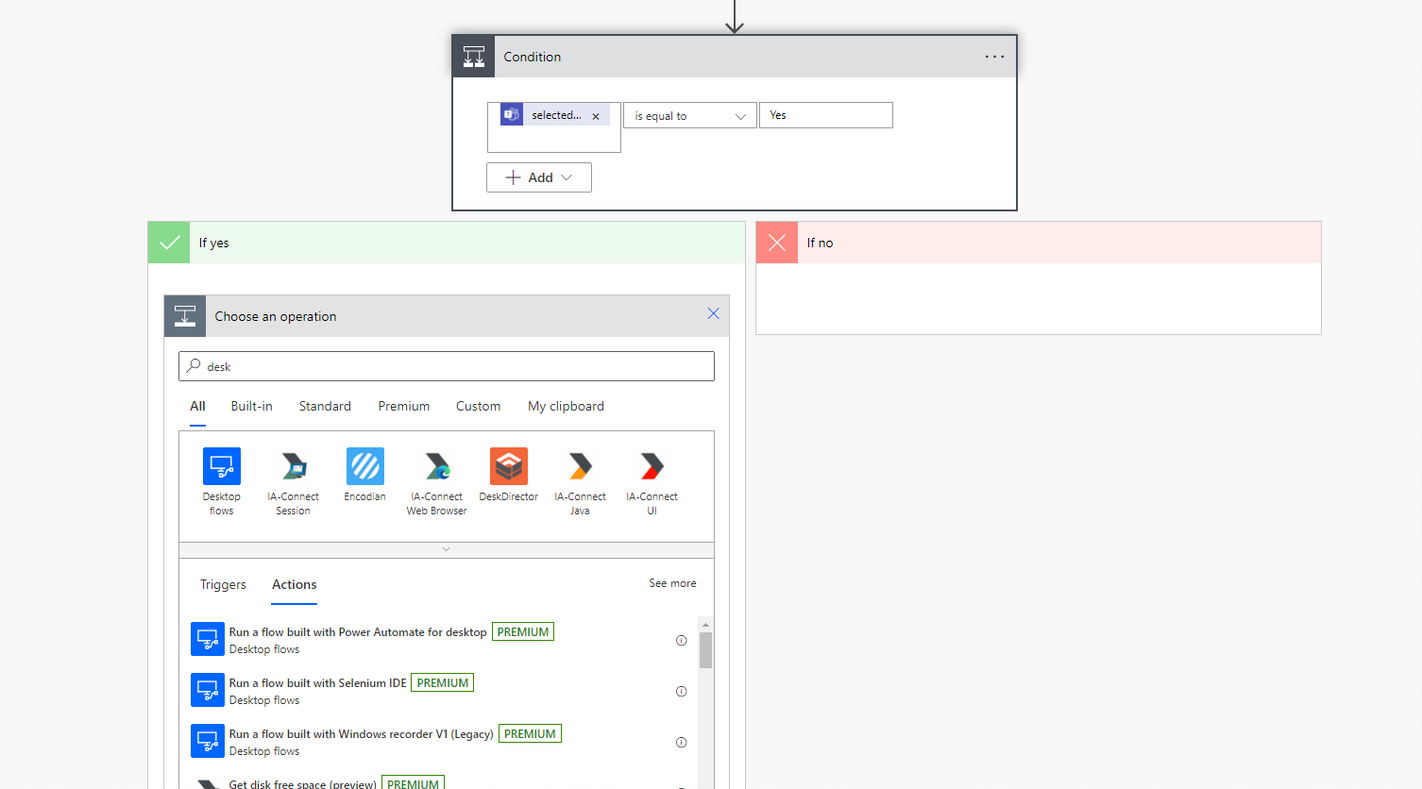
If an invoice is approved, the first step is to enter the invoice into the legacy desktop application. To accomplish this task, select Add an action under the If yes branch and then search for and select the Run a flow built with Power Automate for desktop option.
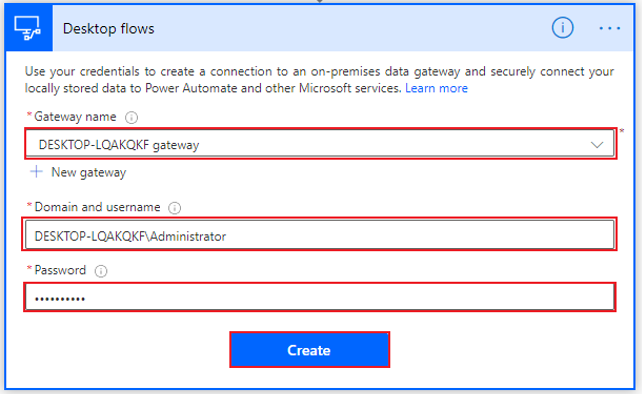
If you haven't already set up your gateway connection, use the Gateway name dropdown menu to select the appropriate gateway.
Note
If you can't find your gateway, you might need to delete this step and then re-create it to refresh the list. If your gateway still doesn't appear, you might need to restart the gateway on your PC and then retry the process.
The next two fields will request your credentials to sign in to your computer. If you're unsure of what to put in the Domain and username field, you can open a command prompt window by opening the Start menu, entering CMD, and then pressing the Enter key. When the command prompt opens, enter Set user and then press the Enter key.
Several lines of code will appear. Separate the user domain and the username by a backslash (\), as shown in the following screenshot. When you're finished, select Create.
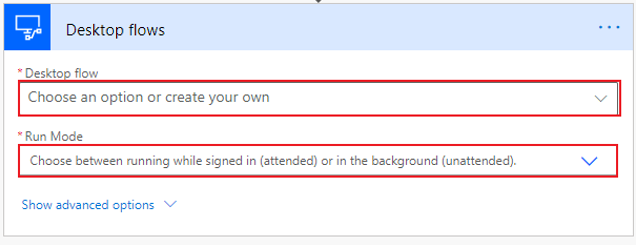
When you've connected to your desktop, Power Automate will prompt you for information that's specific to your desktop flow. In the Desktop flow dropdown menu, select the name of your flow (in this case Invoicing), and then in the Run Mode dropdown menu, select Attended - Runs when you're signed in.
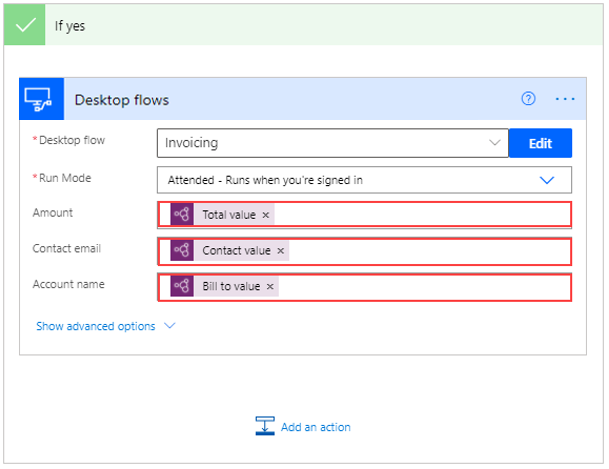
After you've chosen your desktop flow, the input variables that you've defined in your flow will be requested. Notice that, in the following screenshot, the invoice flow is requesting an Amount, a Contact email, and an Account name to feed into the Contoso Invoicing app. You can use the dynamic content from the AI model at this point. You can search through dynamic content to isolate the values that you need.
Now, your desktop flow can use the values from the emailed and approved invoice to create the invoice in your desktop app. The only remaining step is to alert the sender of the approval or rejection.


