Exercise - Use database services to persist data from a .NET Aspire project
In this exercise, you replace the current data stores for your company's in-development cloud-native app. At the moment, the app uses a locally stored SQLite database for catalog data and an in-memory Redis cache for customer's shopping baskets. You replace the existing data stores with PostgreSQL and MongoDB.
Install prerequisites
The prerequisites for .NET Aspire are:
- .NET 8
- Visual Studio 2022 Preview
- Docker Desktop or Podman
- .NET Aspire workload in Visual Studio
If you already have the prerequisites installed, you can skip ahead to cloning the existing app.
Install .NET 8
Follow this .NET 8 link, and select the correct installer for your operating system. For example, if you're using Windows 11, and a modern processor, select the x64 .NET 8 SDK for Windows.
After the download is complete, run the installer and follow the instructions. In a terminal window, run the following command to verify that the installation was successful:
dotnet --version
You should see the version number of the .NET SDK you installed. For example:
8.0.300-preview.24203.14
Install Visual Studio 2022 Preview
Follow this Visual Studio 2022 Preview link, and select Download Preview. After the download is complete, run the installer and follow the instructions.
Install Docker Desktop
Follow this Docker Desktop link, and select the correct installer for your operating system. After the download is complete, run the installer and follow the instructions.
Open the Docker Desktop application and accept the service agreement.
Install the .NET Aspire workload in Visual Studio
Install the .NET Aspire workload using the .NET CLI:
Open a terminal.
Install the .NET Aspire workloads with these commands:
dotnet workload update
dotnet workload install aspire
dotnet workload list
You should see the details of the .NET Aspire workload.
 Installed Workload Id      Manifest Version      Installation Source
---------------------------------------------------------------------------------------------
aspire                     8.0.0/8.0.100         SDK 8.0.300-preview.24203, VS 17.10.34902.84

Use `dotnet workload search` to find additional workloads to install.
Clone and modify the Northern Mountains app
Let's use git to obtain the current Northern Mountains app:
In the command line, browse to a folder of your choice where you can work with code.
Execute the following command to clone the Northern Mountains eShop sample application:
git clone -b aspire-databases https://github.com/MicrosoftDocs/mslearn-aspire-starterStart Visual Studio and then select Open a project or solution.
Browse to the folder where you cloned the eShop, open the start folder and select the eShop.databases.sln file, and then select Open.
In Solution Explorer, expand the eShop.AppHost project, then open Program.cs.
// Databases

var basketStore = builder.AddRedis("BasketStore").WithRedisCommander();

// Identity Providers

var idp = builder.AddKeycloakContainer("idp", tag: "23.0")
    .ImportRealms("../Keycloak/data/import");

// DB Manager Apps

builder.AddProject<Projects.Catalog_Data_Manager>("catalog-db-mgr");

// API Apps

var catalogApi = builder.AddProject<Projects.Catalog_API>("catalog-api");

var basketApi = builder.AddProject<Projects.Basket_API>("basket-api")
        .WithReference(basketStore)
        .WithReference(idp);

// Apps

// Force HTTPS profile for web app (required for OIDC operations)
var webApp = builder.AddProject<Projects.WebApp>("webapp")
    .WithReference(catalogApi)
    .WithReference(basketApi)
    .WithReference(idp, env: "Identity__ClientSecret");
The previous code shows the current configuration for the app. The app uses a Redis cache for the basket store.
Explore the rest of the app, focus on the Catalog.Data.Manager and Catalog.API projects, and see how they use a locally stored SQLite database.
To start the app, press F5 or select Debug > Start Debugging.
If the Start Docker Desktop dialog appears, select Yes.
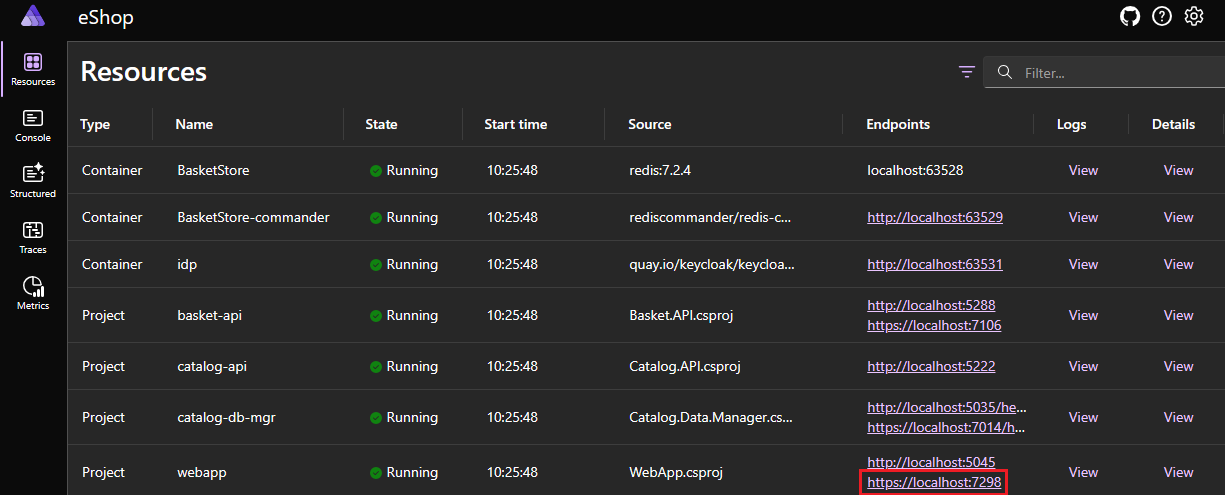
When the eShop .NET Aspire dashboard appears, for the webapp resource, select the secure endpoint:
The app opens in a browser. You can explore the app and see how it works.
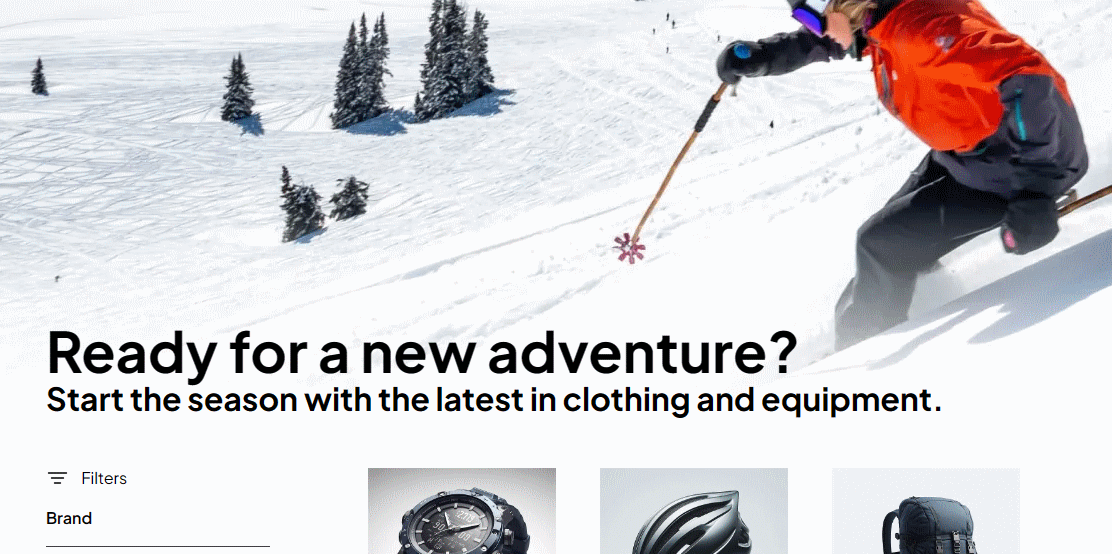
The test user credentials are test@example.com and P@$$w0rd1.
To stop debugging, press Shift+F5, or select Debug > Stop Debugging.
Add a .NET Aspire PostgreSQL integration
The team responsible for the catalog microservices built the app to use a locally stored SQLite database. This approach is fine for development, but the team wants to use a more robust database for production.
Two projects connect to the SQLite database, the Catalog.Data.Manager and Catalog.API projects. The data manager is only used to seed the database with data, so you should focus on the Catalog.API project.
In Solution Explorer, right-click the Catalog.API project, select Add > .NET Aspire package.
In the Search box, add Npgsql.EntityFramework to the end, and press Enter.
On the left, in the results, select Aspire.Npgsql.EntityFrameworkCore.PostgreSQL.
On the right, select the version dropdown and then select the latest 8.0.0 release.
Select Install.
If the Preview Changes dialog appears, select Apply.
In the License Acceptance dialog, select I Accept.
In Solution Explorer, select the Catalog.API project to view the content of the Catalog.API.csproj file.
Delete the
PackageReferencefor Microsoft.EntityFrameworkCore.Sqlite:<PackageReference Include="Microsoft.EntityFrameworkCore.Sqlite" Version="8.0.3" />
Register the new PostgreSQL DbContext
In Solution Explorer, expand the Catalog.API project, and then open the Program.cs file.
Replace the SQLite DbContext:
builder.Services.AddDbContext<CatalogDbContext>(
     options => options.UseSqlite(builder.Configuration.GetConnectionString("sqlconnection")
 	    ?? throw new InvalidOperationException(
 		    "Connection string 'sqlconnection' not found.")));
With the new PostgreSQL DbContext:
builder.AddNpgsqlDbContext<CatalogDbContext>("CatalogDB");The app no longer needs to read the Database.db file, so remove the associated strings in appsettings.json.
In Solution Explorer, under Catalog.API, select appsettings.json.
Delete the
ConnectionStringsentries, the file now looks like this:{ "Logging": { "LogLevel": { "Default": "Information", "Microsoft.AspNetCore": "Warning" } }, "OpenApi": { "Endpoint": { "Name": "Catalog.API v1" }, "Document": { "Description": "The Catalog Microservice HTTP API. This is a Data-Driven/CRUD microservice sample", "Title": "eShop - Catalog HTTP API", "Version": "v1" } }, "CatalogOptions": { "PicBasePathFormat": "items/{0}/pic/" } }Right-click the Catalog.Data.Manager project, and then select Remove.
In the dialog, select OK.
The database team creates a PostgreSQL database backup for you to use to create and seed the catalog database. You can view the backup in the Catalog.API/Seed folder.
Seed the PostgreSQL database using a bound volume
The AppHost project can create a PostgreSQL database container, seed it with data from a bound volume, and then through dependency injection pass references to the Catalog.API.
In Solution Explorer, right-click the eShop.AppHost project, select Add > .NET Aspire package.
In the Search box, add PostgreSQL to the end, and press Enter.
On the left, in the results, select Aspire.Hosting.PostgreSQL.
On the right, select the version dropdown and then select the latest 8.0.0 release.
Select Install.
If the Preview Changes dialog appears, select Apply.
In the License Acceptance dialog, select I Accept.
In Solution Explorer, expand the eShop.AppHost project, and then open the Program.cs file.
Under the
//Databasescomment, add the following code:// Databases var basketStore = builder.AddRedis("BasketStore").WithRedisCommander(); var postgres = builder.AddPostgres("postgres") .WithEnvironment("POSTGRES_DB", "CatalogDB") .WithBindMount("../Catalog.API/Seed", "/docker-entrypoint-initdb.d").WithPgAdmin(); var catalogDB = postgres.AddDatabase("CatalogDB");The previous code creates a PostgreSQL database container, adds a database named CatalogDB, and binds the /docker-entrypoint-initdb.d directory to the ../Catalog.API/Seed directory. The code also creates a container for the pgAdmin tool that lets you manage the PostgreSQL database.
Pass the
catalogDBreference to the Catalog.API project by adding.WithReference(catalogDB), the code is now:// API Apps var catalogApi = builder.AddProject<Projects.Catalog_API>("catalog-api") .WithReference(catalogDB);The Catalog.Data.Manager project is no longer needed, so remove the project from the AppHost. Delete this code:
// DB Manager Apps

builder.AddProject<Projects.Catalog_Data_Manager>("catalog-db-mgr");
Test the app
Using .NET Aspire allowed your team to remove a whole project. Also, the catalog API only needs a single line of code to add the PostgresSQL database context. Dependency injection and service discovery from the AppHost mean no other code changes are needed to allow the API to connect to the new database.
Compile and start the app, press F5, or select Debug > Start Debugging.
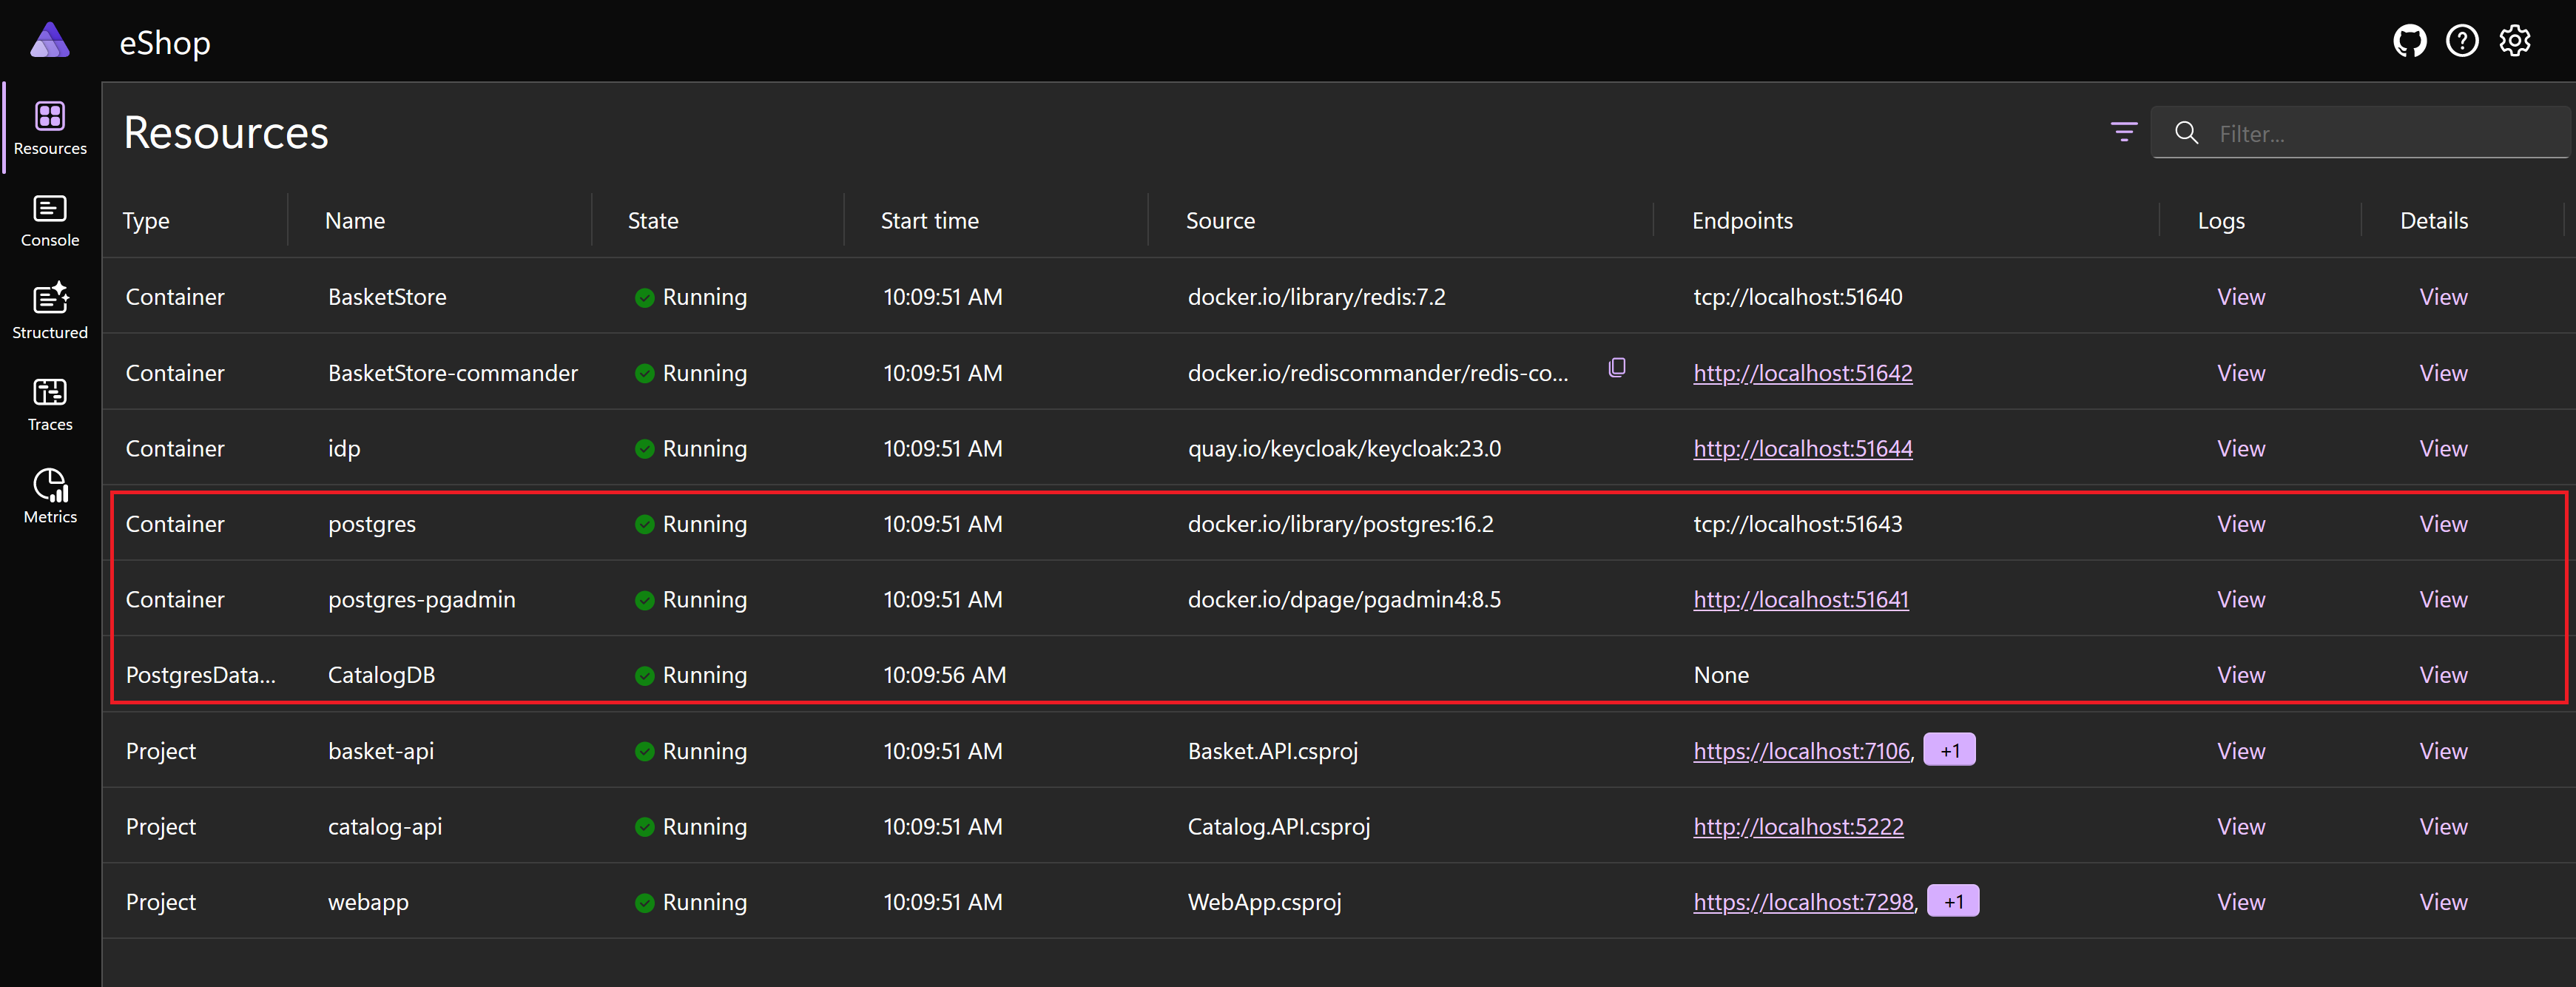
There are two new containers in the dashboard that host the PostgreSQL database server and pgAdmin tool. There's also a PostgreSQL database resource that hosts the CatalogDB database.
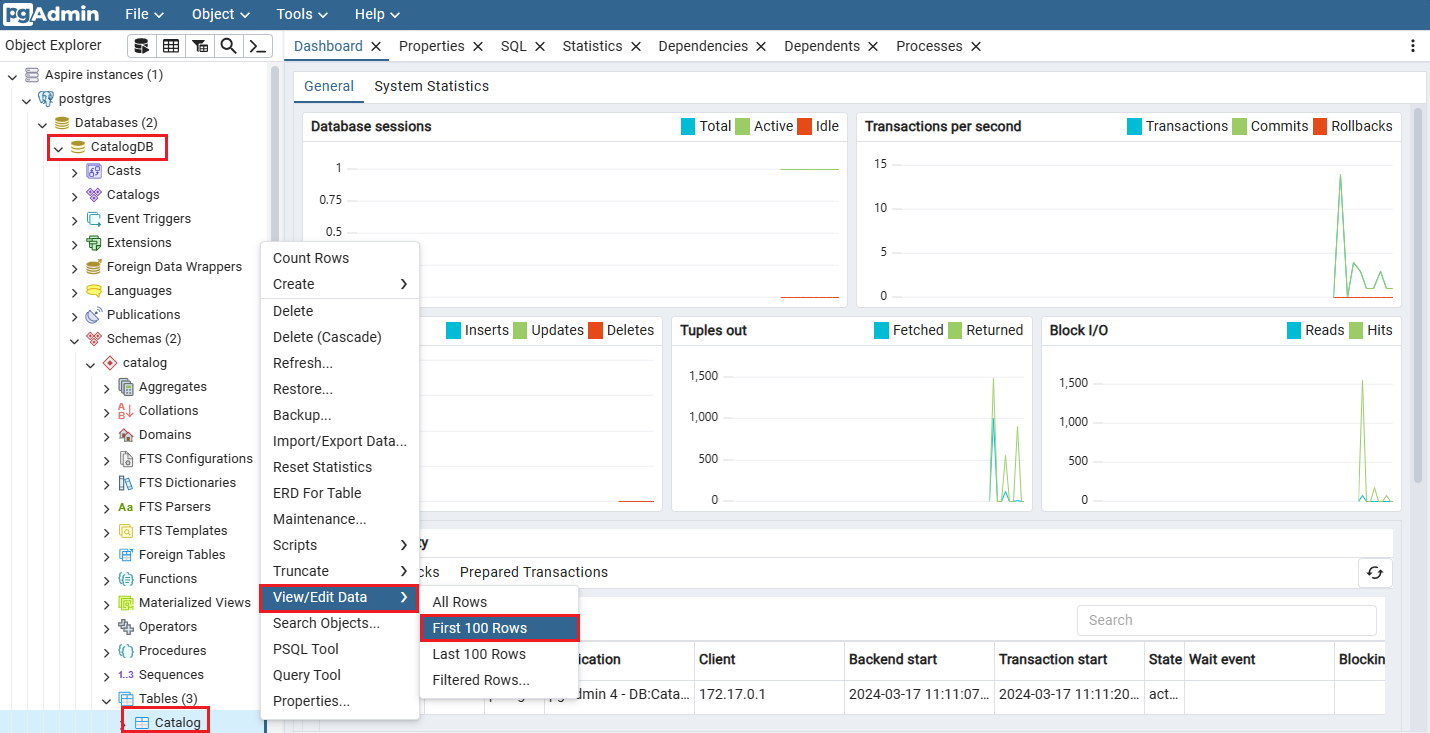
Use pgAdmin to connect to the PostgreSQL database and explore the data. Select the postgres pgadmin endpoint.
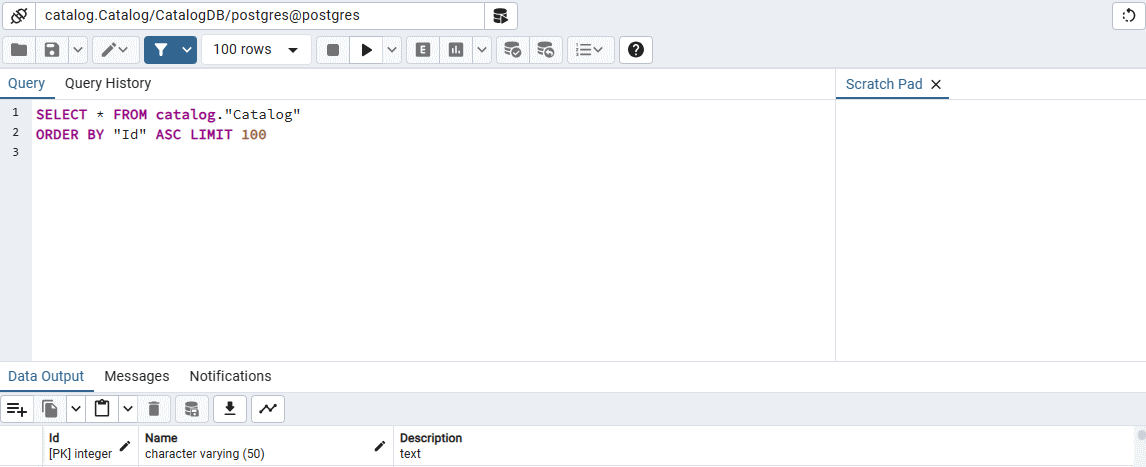
Expand Aspire instances > postgres > Databases > CatalogDB > Schemas > catalog > Tables. Then right-click the Catalog table, and select View/Edit Data > First 100 Rows.
You can see the data loaded by the AppHost.
Select the eShop resources dashboard tab in your browser, then select the webapp endpoint.
The app opens and works as before.
To stop debugging, press Shift+F5, or select Debug > Stop Debugging.
Add the .NET Aspire MongoDB integration to the app
The current app uses Redis as an in-memory data store for a customer's shopping basket. The team wants to use a more robust and durable data store for the basket. Replace the Redis cache with a MongoDB database.
Change the Basket.API to use MongoDB
- In Solution Explorer, right-click the Basket.API project, select Add, and then select Add>.NET Aspire package.
- In the Search box, enter MongoDB at the end, and press Enter.
- Select the Aspire.MongoDB.Driver, and then select the latest 8.0.0 version.
- Select Install.
- If the Preview Changes dialog appears, select Apply.
- In the License Acceptance dialog, select I Accept.@
Create a MongoDB basket store
The basket microservice uses HostingExtensions to manage the Redis data store. Replace the Redis data store with a MongoDB data store.
In Solution Explorer, expand the Basket.API project, then the Storage folder, and then select the RedisBasketStore.cs file.
There are two asynchronous methods,
GetBasketAsyncandUpdateBasketAsync, that use the Redis cache. Lets create MongoDB versions of these methods.In Solution Explorer, right-click the Storage folder, and then select Add > Class.
In the Add New Item dialog, name the file MongoBasketStore.cs, and then select Add.
Replace the code in the MongoBasketStore.cs file with the following code:
using eShop.Basket.API.Models;
using MongoDB.Driver;
using MongoDB.Driver.Linq;

namespace eShop.Basket.API.Storage;

public class MongoBasketStore
{
  private readonly IMongoCollection<CustomerBasket> _basketCollection;

  public MongoBasketStore(IMongoClient mongoClient)
  {
    // The database name needs to match the created database in the AppHost
    _basketCollection = mongoClient.GetDatabase("BasketDB").GetCollection<CustomerBasket>("basketitems");
  }

  public async Task<CustomerBasket?> GetBasketAsync(string customerId)
  {
    var filter = Builders<CustomerBasket>.Filter.Eq(r => r.BuyerId, customerId);

    return await _basketCollection.Find(filter).FirstOrDefaultAsync();
  }

  public async Task<CustomerBasket?> UpdateBasketAsync(CustomerBasket basket)
  {
    var filter = Builders<CustomerBasket>.Filter.Eq(r => r.BuyerId, basket.BuyerId);

    var result = await _basketCollection.ReplaceOneAsync(filter, basket, new ReplaceOptions { IsUpsert = true });

    return result.IsModifiedCountAvailable ? basket : null;
  }
}
The previous code creates a
MongoBasketStoreclass that works with theCustomerBasketmodel. The collection handles the CRUD operations for the customers shopping baskets in a MongoDB database.In Solution Explorer, expand the Basket.API > Extensions , and then select the HostingExtensions.cs file.
Replace the Redis code:
builder.AddRedis("BasketStore");

builder.Services.AddSingleton<RedisBasketStore>();
With the MongoDB code:
builder.AddMongoDBClient("BasketDB");

builder.Services.AddSingleton<MongoBasketStore>();
In Solution Explorer, expand the Grpc folder, and then open the BasketService.cs file.
Change the class to accept a
MongoBasketStore, replace:public class BasketService(RedisBasketStore basketStore) : Basket.BasketBaseWith:
public class BasketService(MongoBasketStore basketStore) : Basket.BasketBase
Add a MongoDB database to the AppHost
In Solution Explorer, right-click the eShop.AppHost project, and select Add > .NET Aspire package.
In the Search box, enter MongoDB at the end, and press Enter.
Select the Aspire.Hosting.MongoDB package, and then select the latest 8.0.0 version.
Select Install.
If the Preview Changes dialog appears, select Apply.
In the License Acceptance dialog, select I Accept.@
In Solution Explorer, expand the eShop.AppHost project, and then open the Program.cs file.
In the Databases section, add a MongoDB integration:
var mongo = builder.AddMongoDB("mongo")
  .WithMongoExpress()
  .AddDatabase("BasketDB");
The previous code creates a MongoDB database container, adds a database named BasketDB. The code also creates a container for the Mongo Express tool that lets you manage the MongoDB database.
Delete the Redis container:
var basketStore = builder.AddRedis("BasketStore").WithRedisCommander();The code should now look like this:
// Databases

var postgres = builder.AddPostgres("postgres")
    .WithEnvironment("POSTGRES_DB", "CatalogDB")
    .WithBindMount("../Catalog.API/Seed", "/docker-entrypoint-initdb.d")
    .WithPgAdmin();
var catalogDB = postgres.AddDatabase("CatalogDB");

var mongo = builder.AddMongoDB("mongo")
    .WithMongoExpress()
    .AddDatabase("BasketDB");
The Basket.API project needs a reference to the new MongoDB database, and you should remove the Redis reference:
var basketApi = builder.AddProject<Projects.Basket_API>("basket-api")
        .WithReference(mongo)
        .WithReference(idp);
The Basket.API project is now ready to use the MongoDB database. Let's test the app to see if it works.
Test the app
Compile and start the app, press F5, or select Debug > Start Debugging.
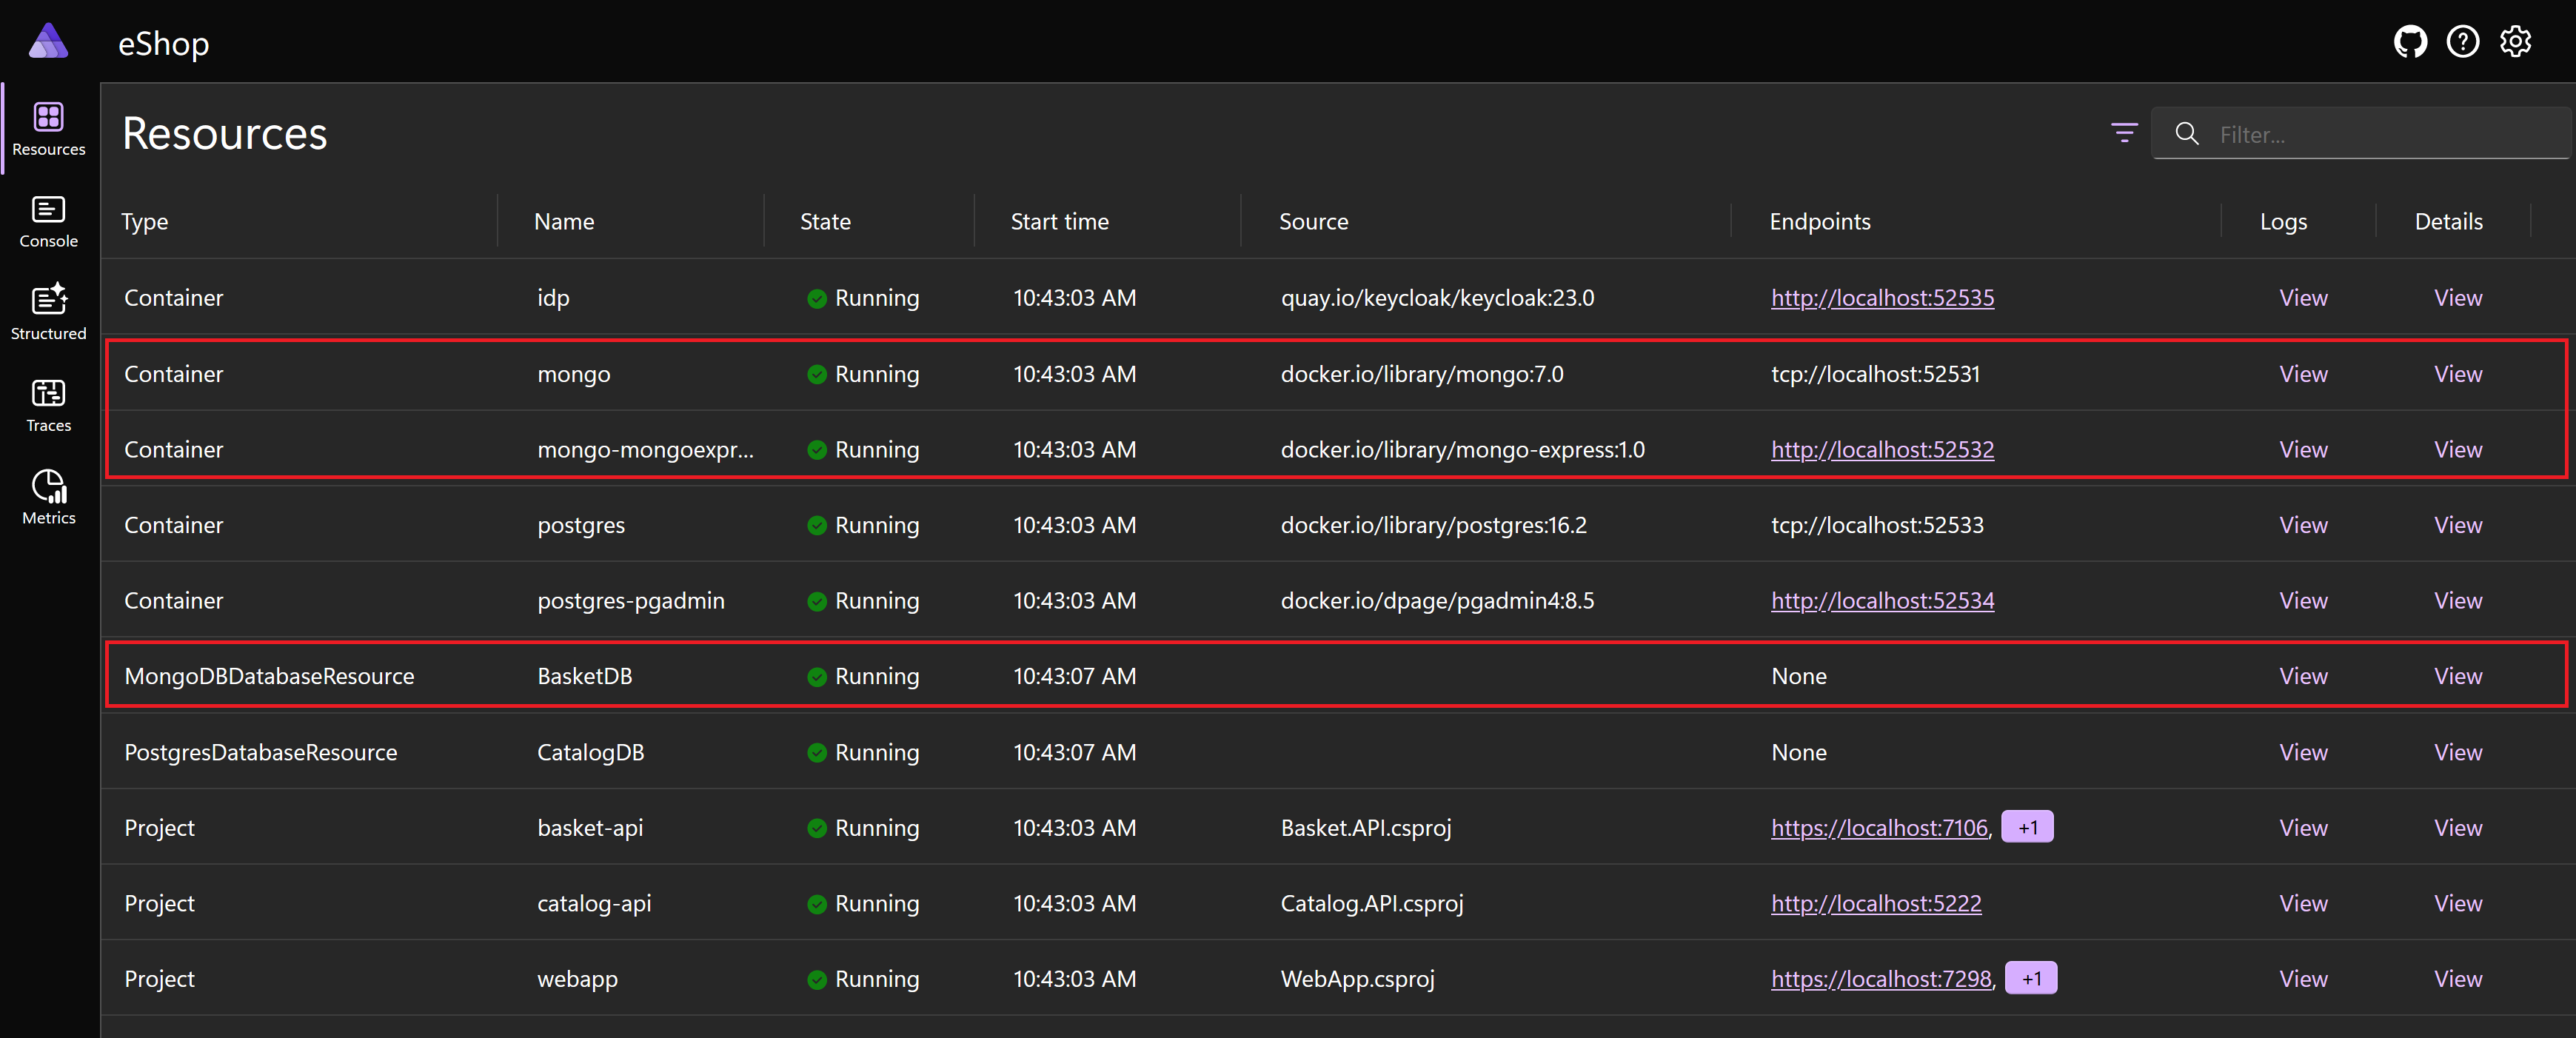
You can see the new MongoDB containers, one for the database server the other for Mongo Express, in the dashboard. There's also a new MongoDBDatabase resource that hosts the BasketDB database.
Select the webapp endpoint.
To sign in with the test user credentials, select the user icon in the top right. The email is test@example.com and the password is P@$$w0rd1.
Select the Adventurer GPS Watch from the home page.
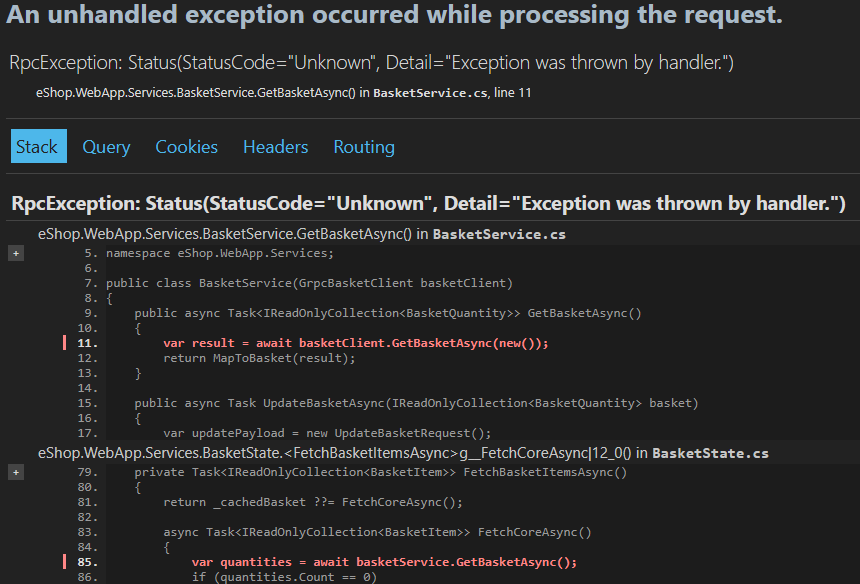
Select Add to shopping bag, you should see an exception:
Debug the app
The app is throwing an exception when you try to add an item to the shopping basket. You can use the dashboard to help debug the issue.
Select the eShop resources dashboard tab in your browser.
The dashboard shows errors in the basket-api and webapp. Review the logs for the basket-api.
For the basket-api resource, in the Logs column, select View.
There's an exception:
System.FormatException: Element '_id' does not match any field or property of class eShop.Basket.API.Models.CustomerBasket.Select the Resources menu item, then select the mongo-mongoexpress endpoint.
In the Databases section, next to BasketDB, select View.
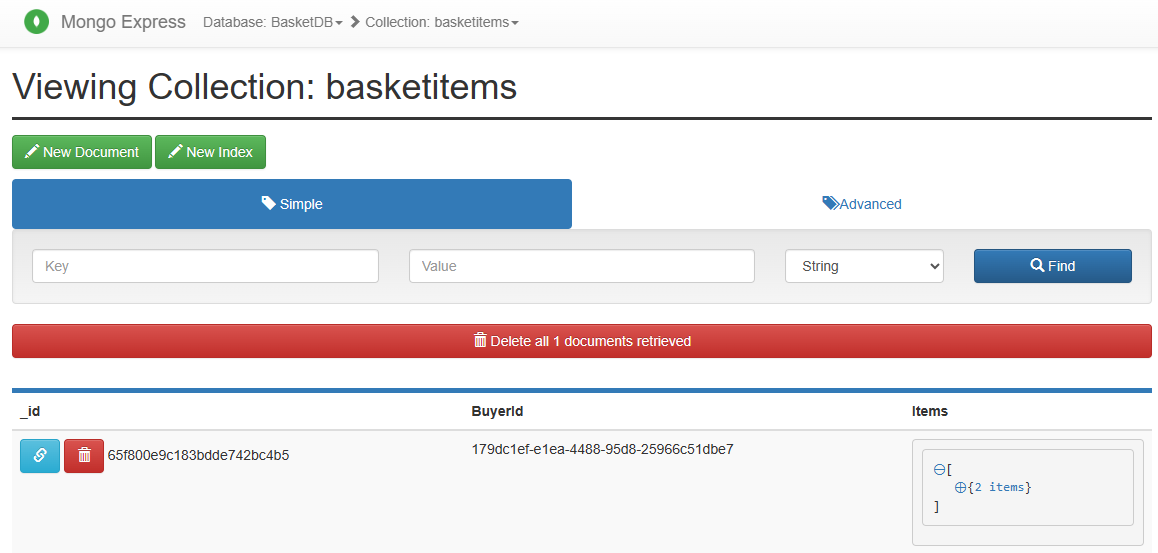
In Collections, next to basketitems, select View.
Documents stored in a MongoDB have an _id field. Every document stored in a MongoDB collection must have a unique _id field.
To stop debugging, press Shift+F5, or select Debug > Stop Debugging.
Review the code and fix the issue
Let's look at the CustomerBasket, and see if we can find the issue.
In Solution Explorer, expand the Basket.API > Models folder, and then open the CustomerBasket.cs file.
public class CustomerBasket
{
    public required string BuyerId { get; set; }

    public List<BasketItem> Items { get; set; } = [];
}
The CustomerBasket model doesn't have a field or property that matches the _id field. Entity framework is trying to map the _id field to the CustomerBasket model, and it can't find a match.
Update the
CustomerBasketmodel to include an _id field:public class CustomerBasket { /// <summary> /// MongoDB document identifier /// </summary> public string _id { get; set; } = ""; public required string BuyerId { get; set; } public List<BasketItem> Items { get; set; } = []; }
Test the fixed app
To compile and start the app, press F5, or select Debug > Start Debugging.
For the webapp, in the Endpoints column, right-click the URL, then select Open link in InPrivate Window.
Using an InPrivate window ensures that the browser doesn't use the previous session cookie for authentication.
To sign in with the test user credentials, select the user icon in the top right. The email is test@example.com and the password is P@$$w0rd1.
Select the Adventurer GPS Watch from the home page.
Select Add to shopping bag.
The Northern Mountains app basket functionality is now working.
You successfully replaced the SQLite database with a PostgreSQL database and the Redis cache with a MongoDB database. You used .NET Aspire to manage the databases and explore the data in them, and you used the dashboard to help debug an issue with the app.
