Exercise - Add spatial audio to your unity project
Through this module series, you'll learn how to use spatial audio on HoloLens 2 with the Microsoft Spatializer plugin. The MixedRealityLearning repository has a completed Unity project of this tutorial sequence.
Create and prepare the Unity project
In this section, you'll create a new Unity project and get it ready for MRTK development.
First, follow the steps in this tutorial, excluding the Build your application to your device instructions. This includes the following steps:
- Create the Unity project and give it a suitable name; for example, MRTK Tutorials.
- Switch the build platform.
- Import the TextMeshPro Essential Resources.
- Import the Mixed Reality Toolkit.
- Configure the Unity project.
- Create and set the scene and give the scene a suitable name; for example, SpatialAudio.
Add the spatializer package via the Mixed Reality Feature Tool
Download the Mixed Reality Feature Tool from the Microsoft Download Center.
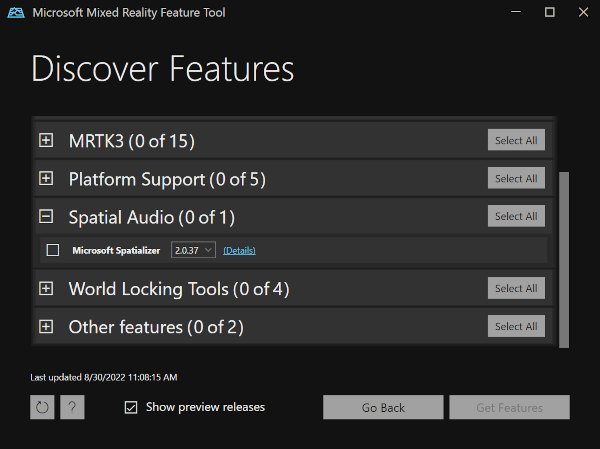
Select the Microsoft Spatializer component from the Spatial Audio group and integrate the plugin into your project using the Get Features button.
Enable the Microsoft Spatializer plugin
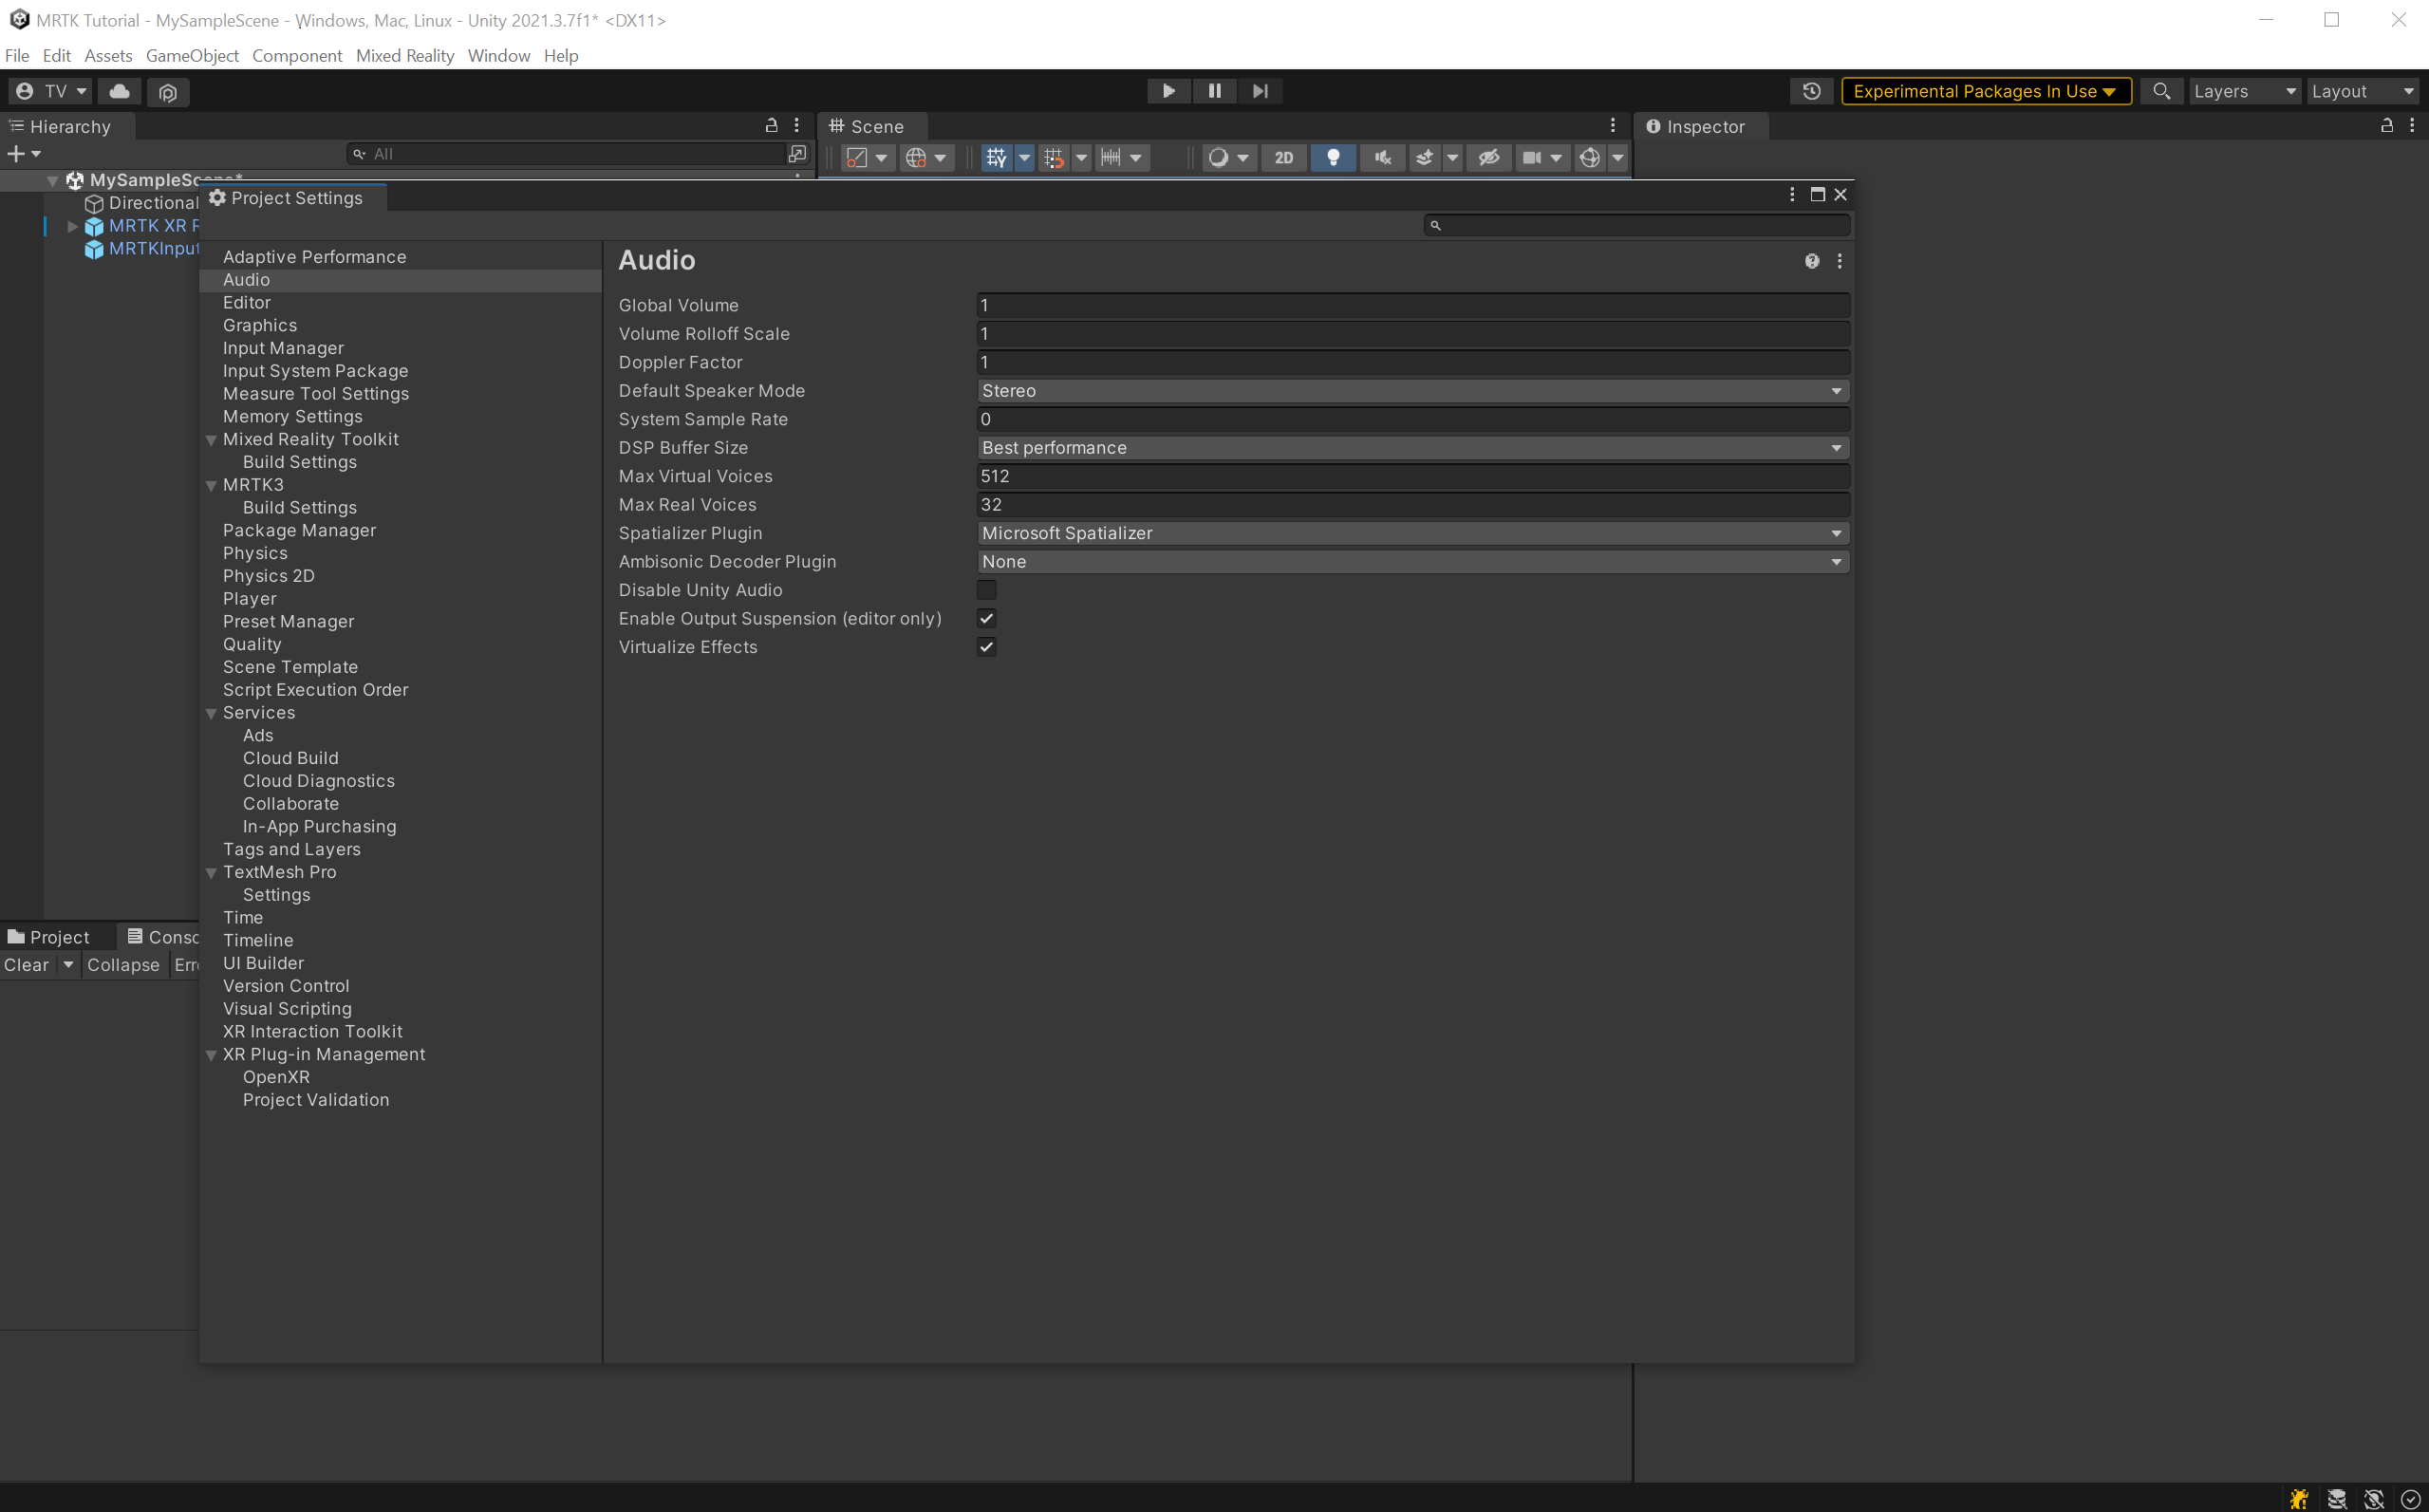
After importing the Microsoft Spatializer, you need to enable it. Open Edit > Project Settings > Audio and change Spatializer Plugin to Microsoft Spatializer.
Enable Spatial audio on your workstation
On desktop versions of Windows, Spatial audio is disabled by default. Enable it by right-clicking the volume icon in the taskbar to get to sound settings. From there, navigate to More sound settings > Properties > Spatial sound. To get the best representation of what you'll hear on HoloLens 2, choose Windows Sonic for Headphones. Select Apply, then select OK.
:::image type="content" source="../media/spatial-audio-settings.png" alt-text="Screenshot of Desktop spatial audio settings." lightbox="../media/spatial-audio-settings.png":::
Note
This setting is only required if you plan to test your project in the Unity editor.

