Deploy Retail data solutions in Microsoft Fabric (preview)
In this exercise, you assume the role of Jessie and enable the Retail data solutions feature in the Microsoft Fabric admin portal. You then deploy Retail data solutions in Microsoft Fabric.
Task - Enable Microsoft Fabric and Retail data solutions on your tenant
To enable Retail data solutions in your Power BI environment, complete the following steps:
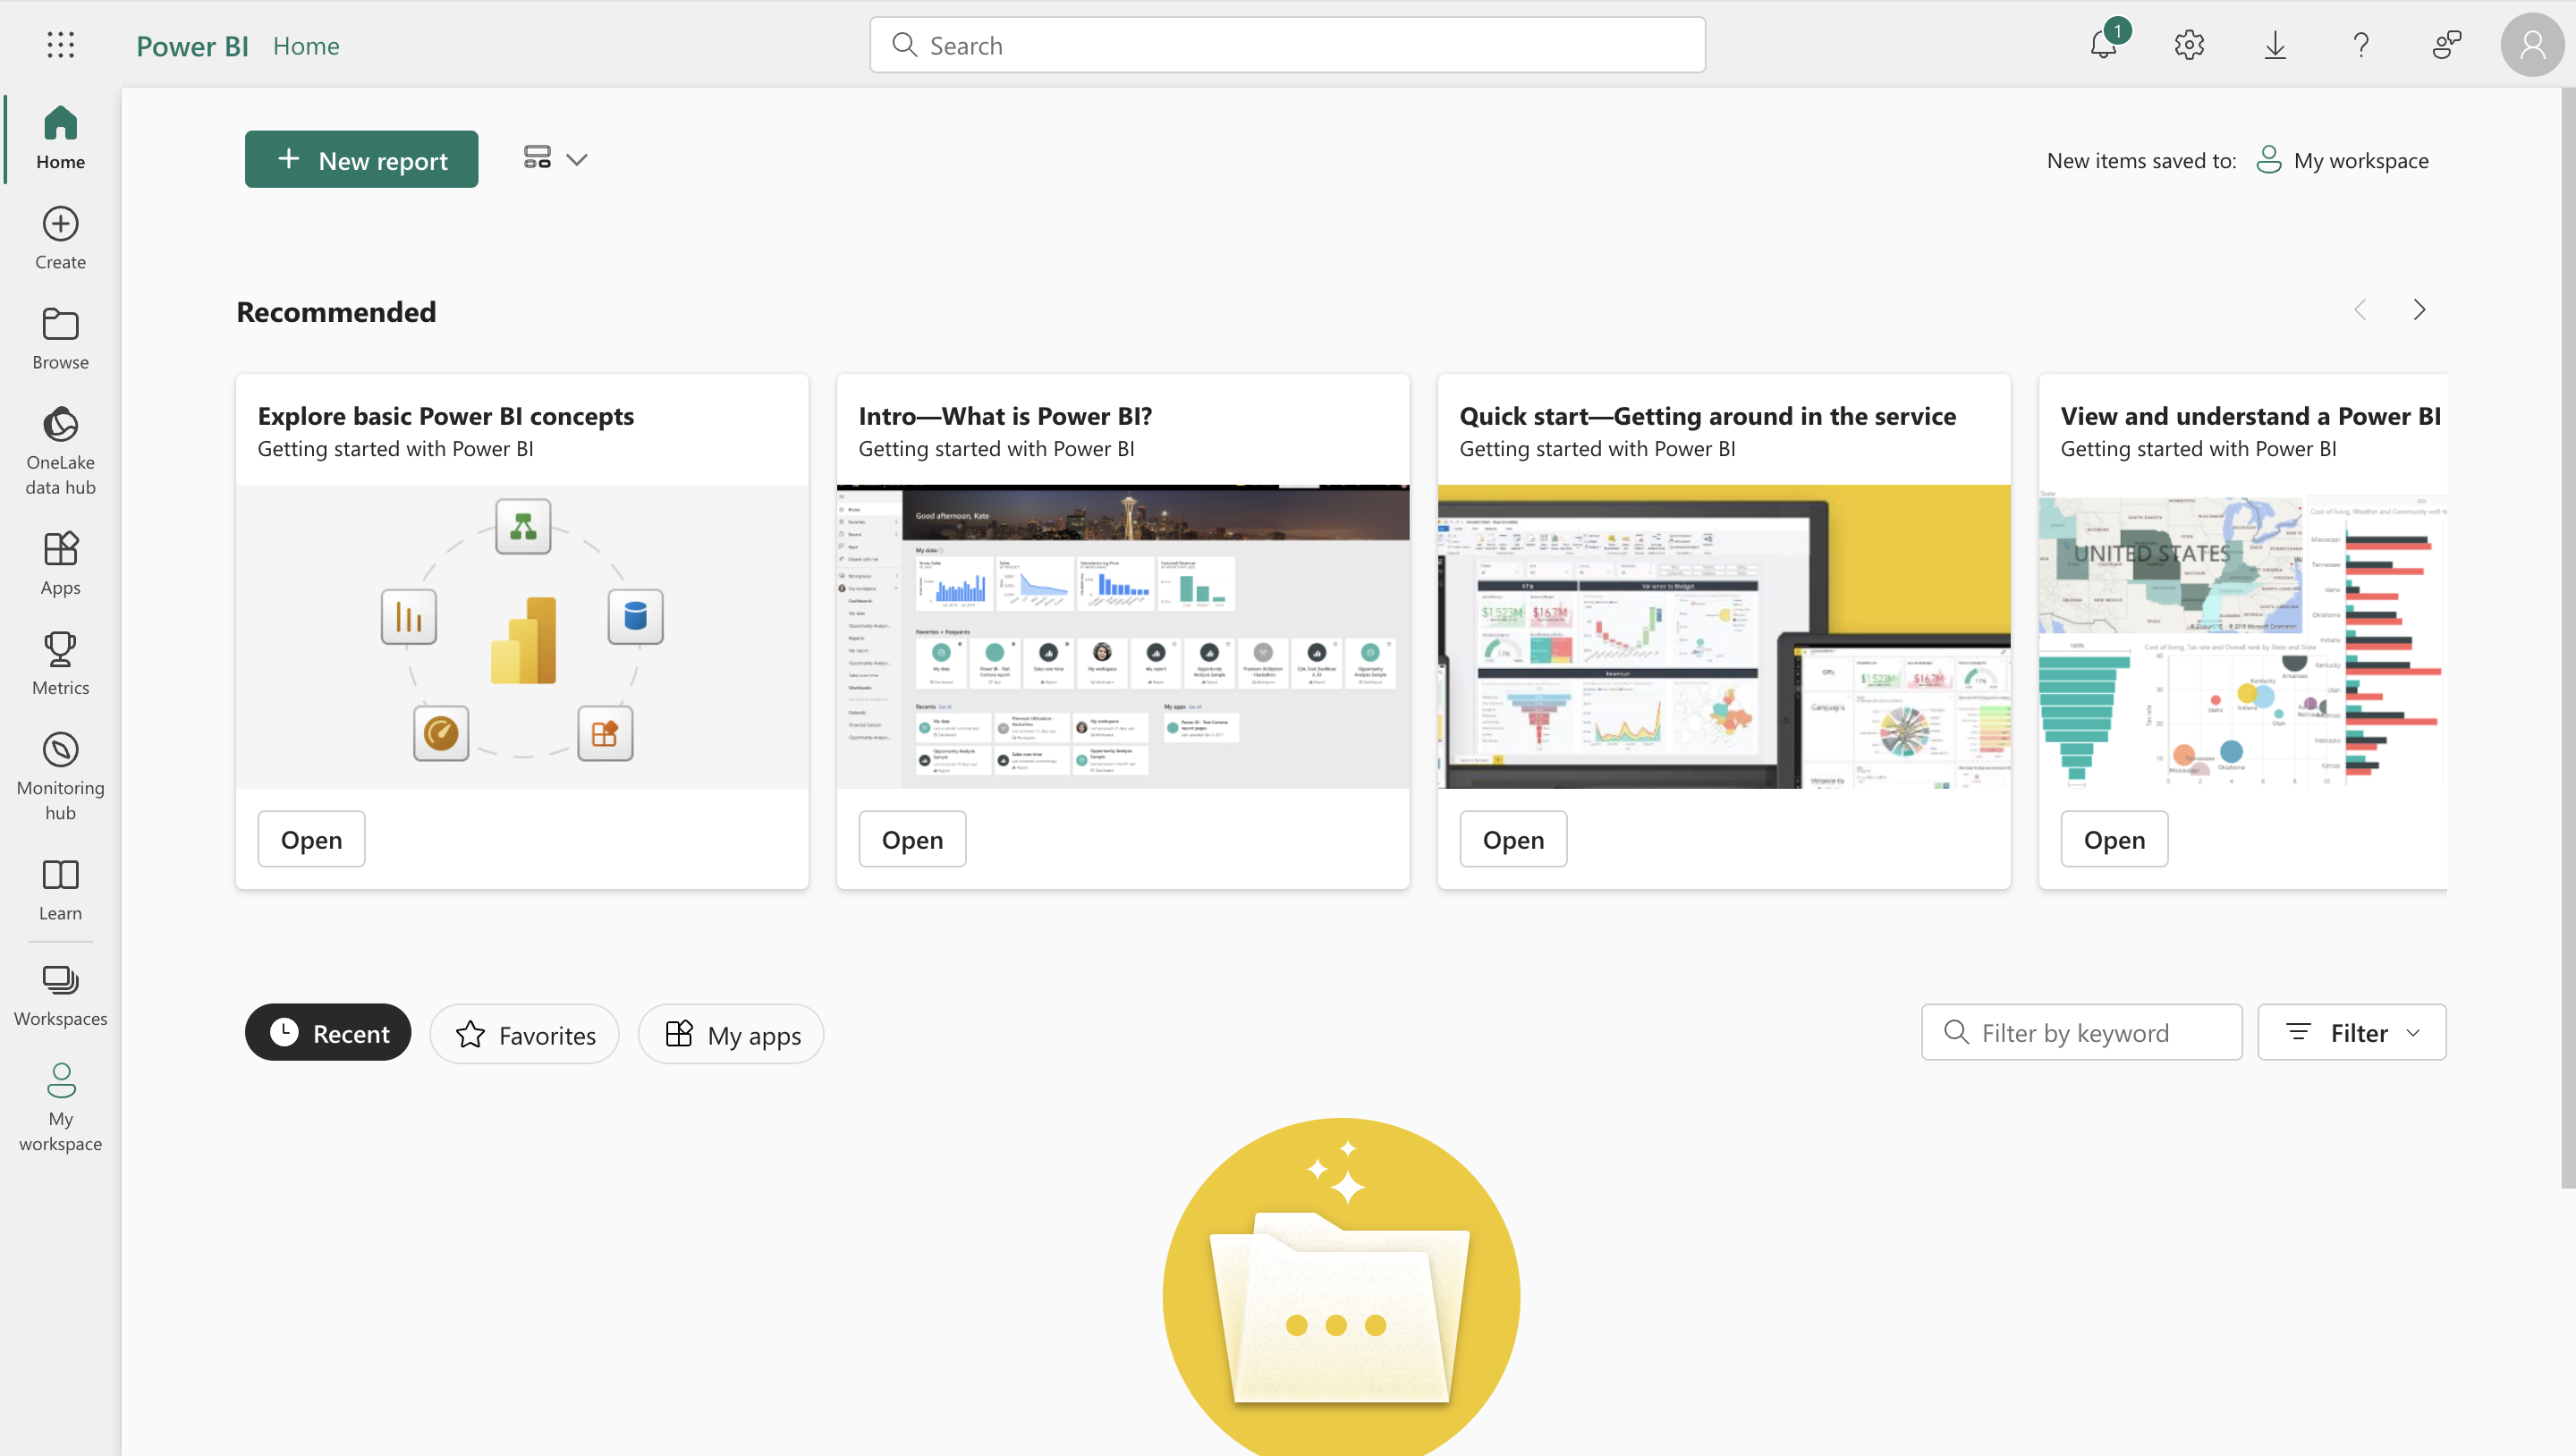
Sign in to your Microsoft Power BI home page with Jessie Irwin's credentials.
Select the settings icon from the upper-right corner of the home page. Then, select Admin portal.
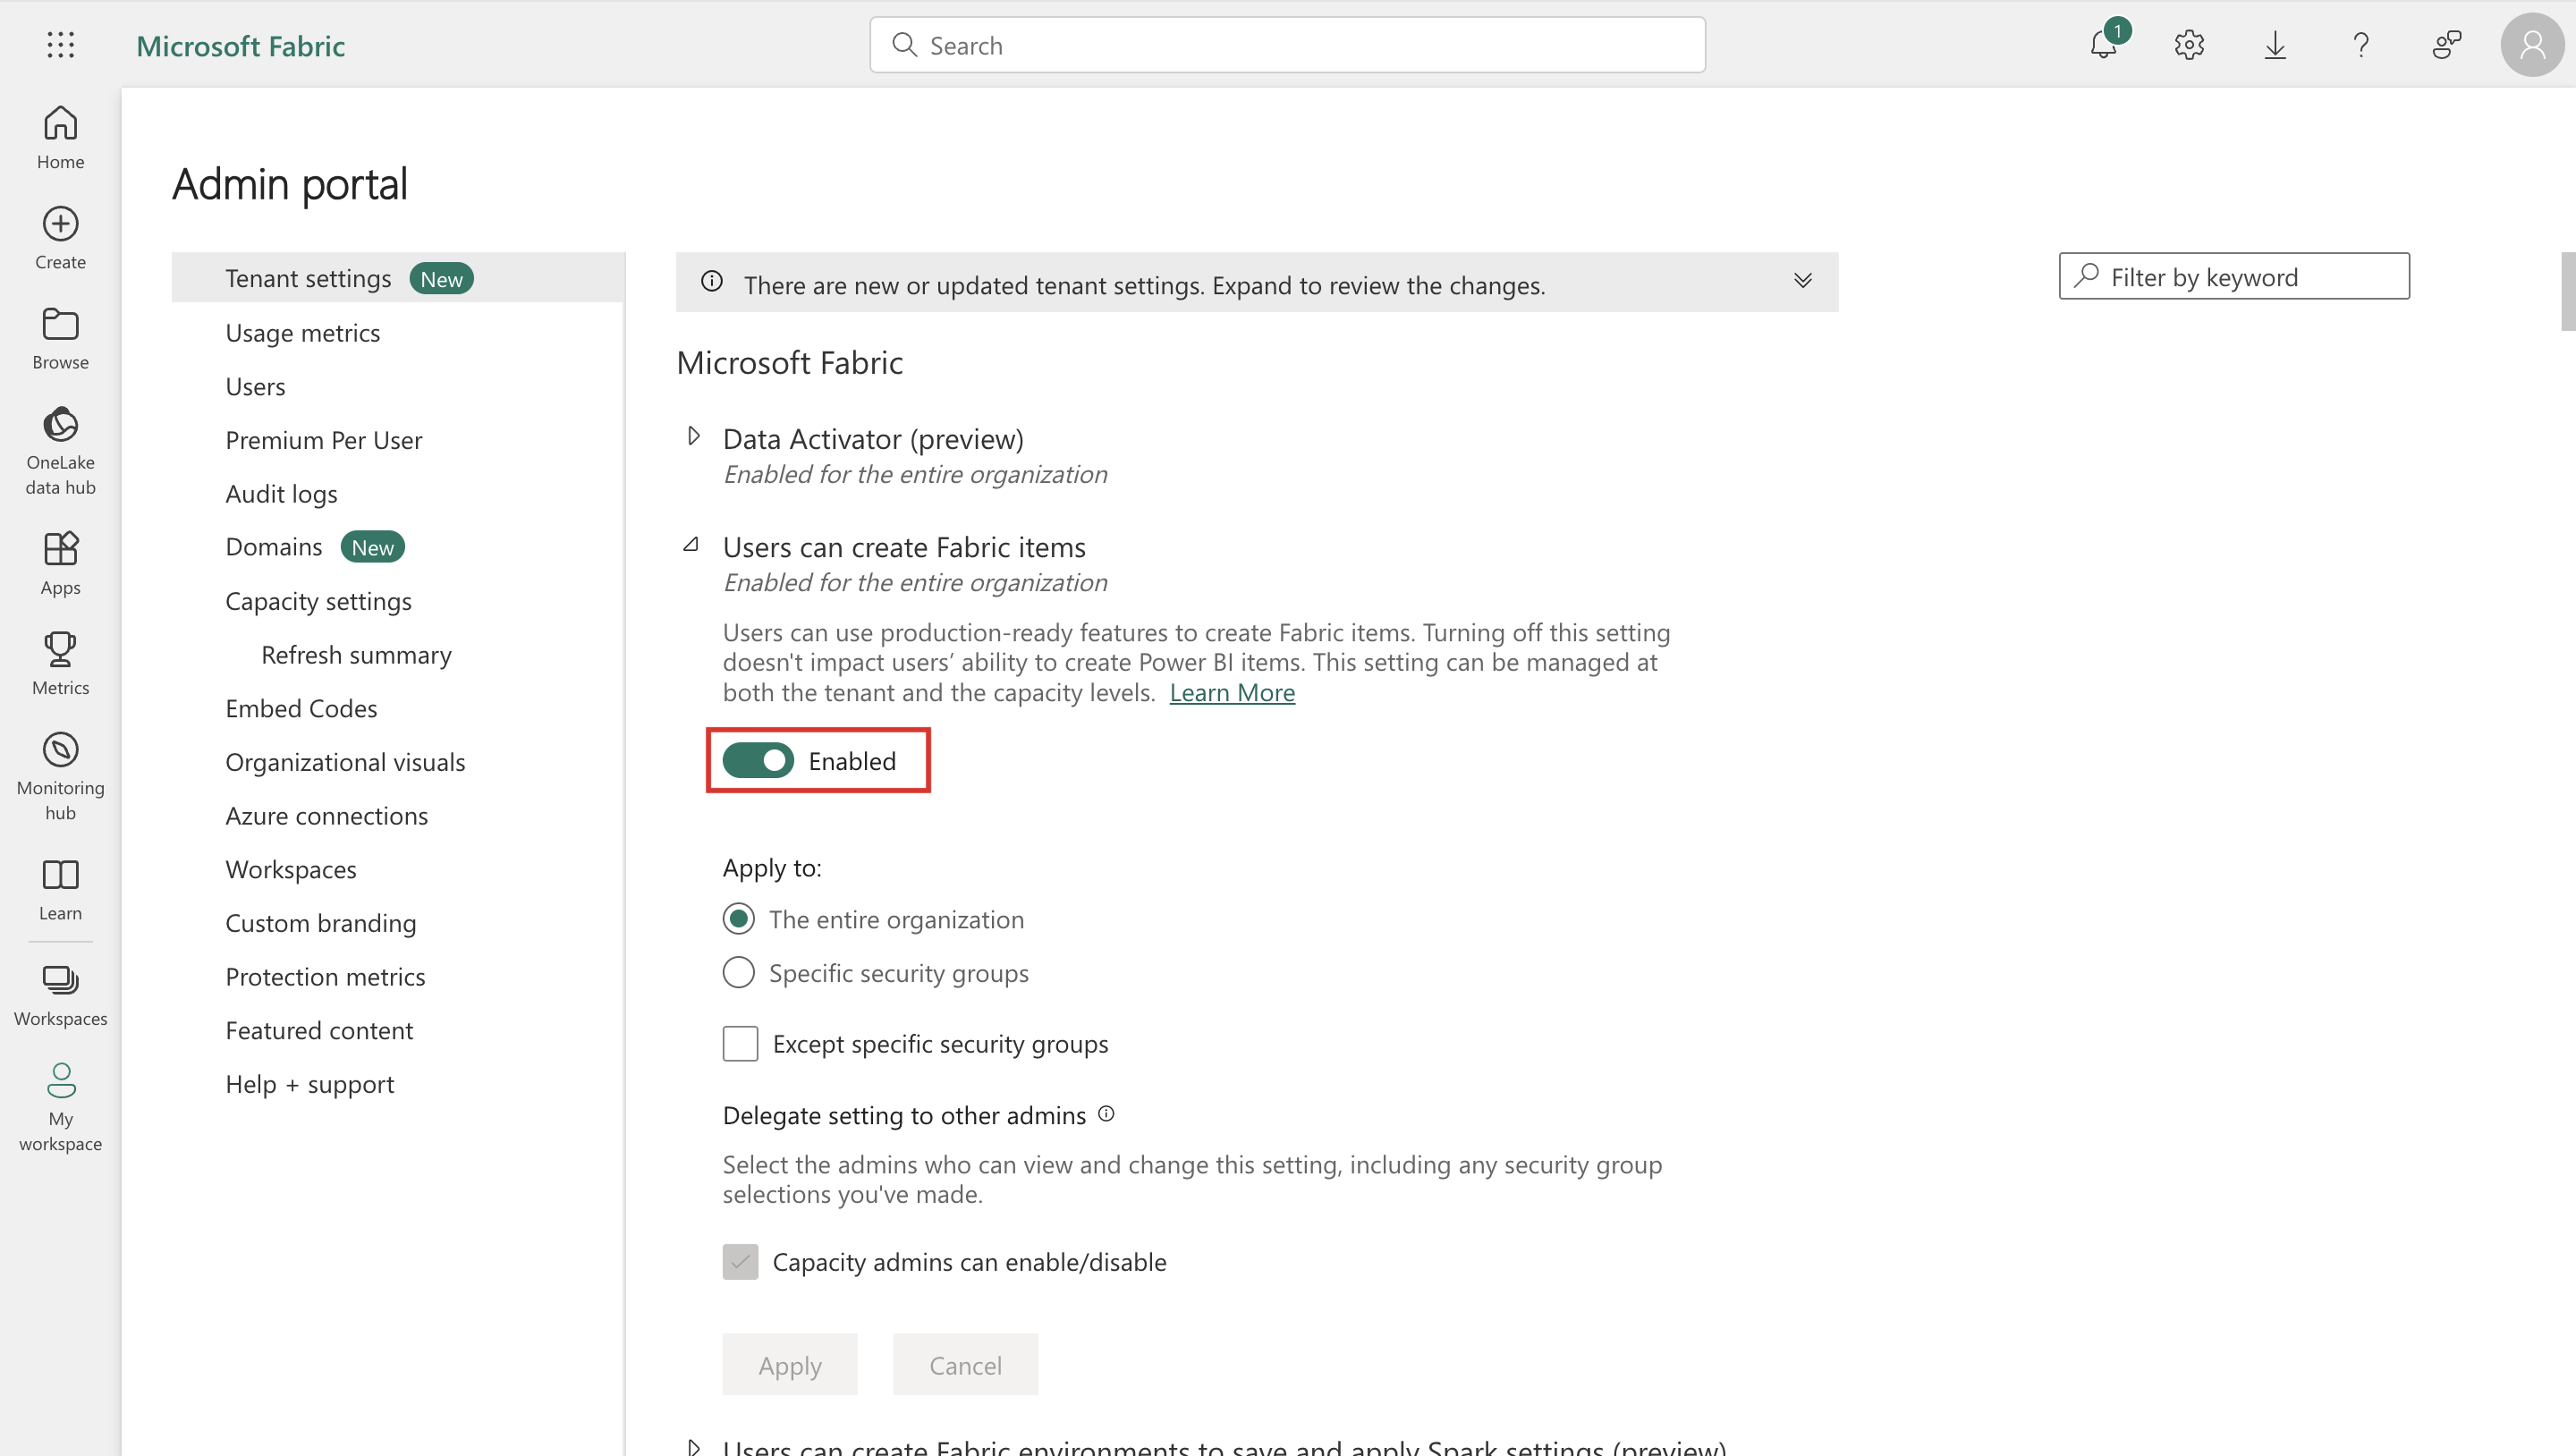
Expand the Users can create Fabric items menu. Select the Enabled option and then select The entire organization under the Apply to section.
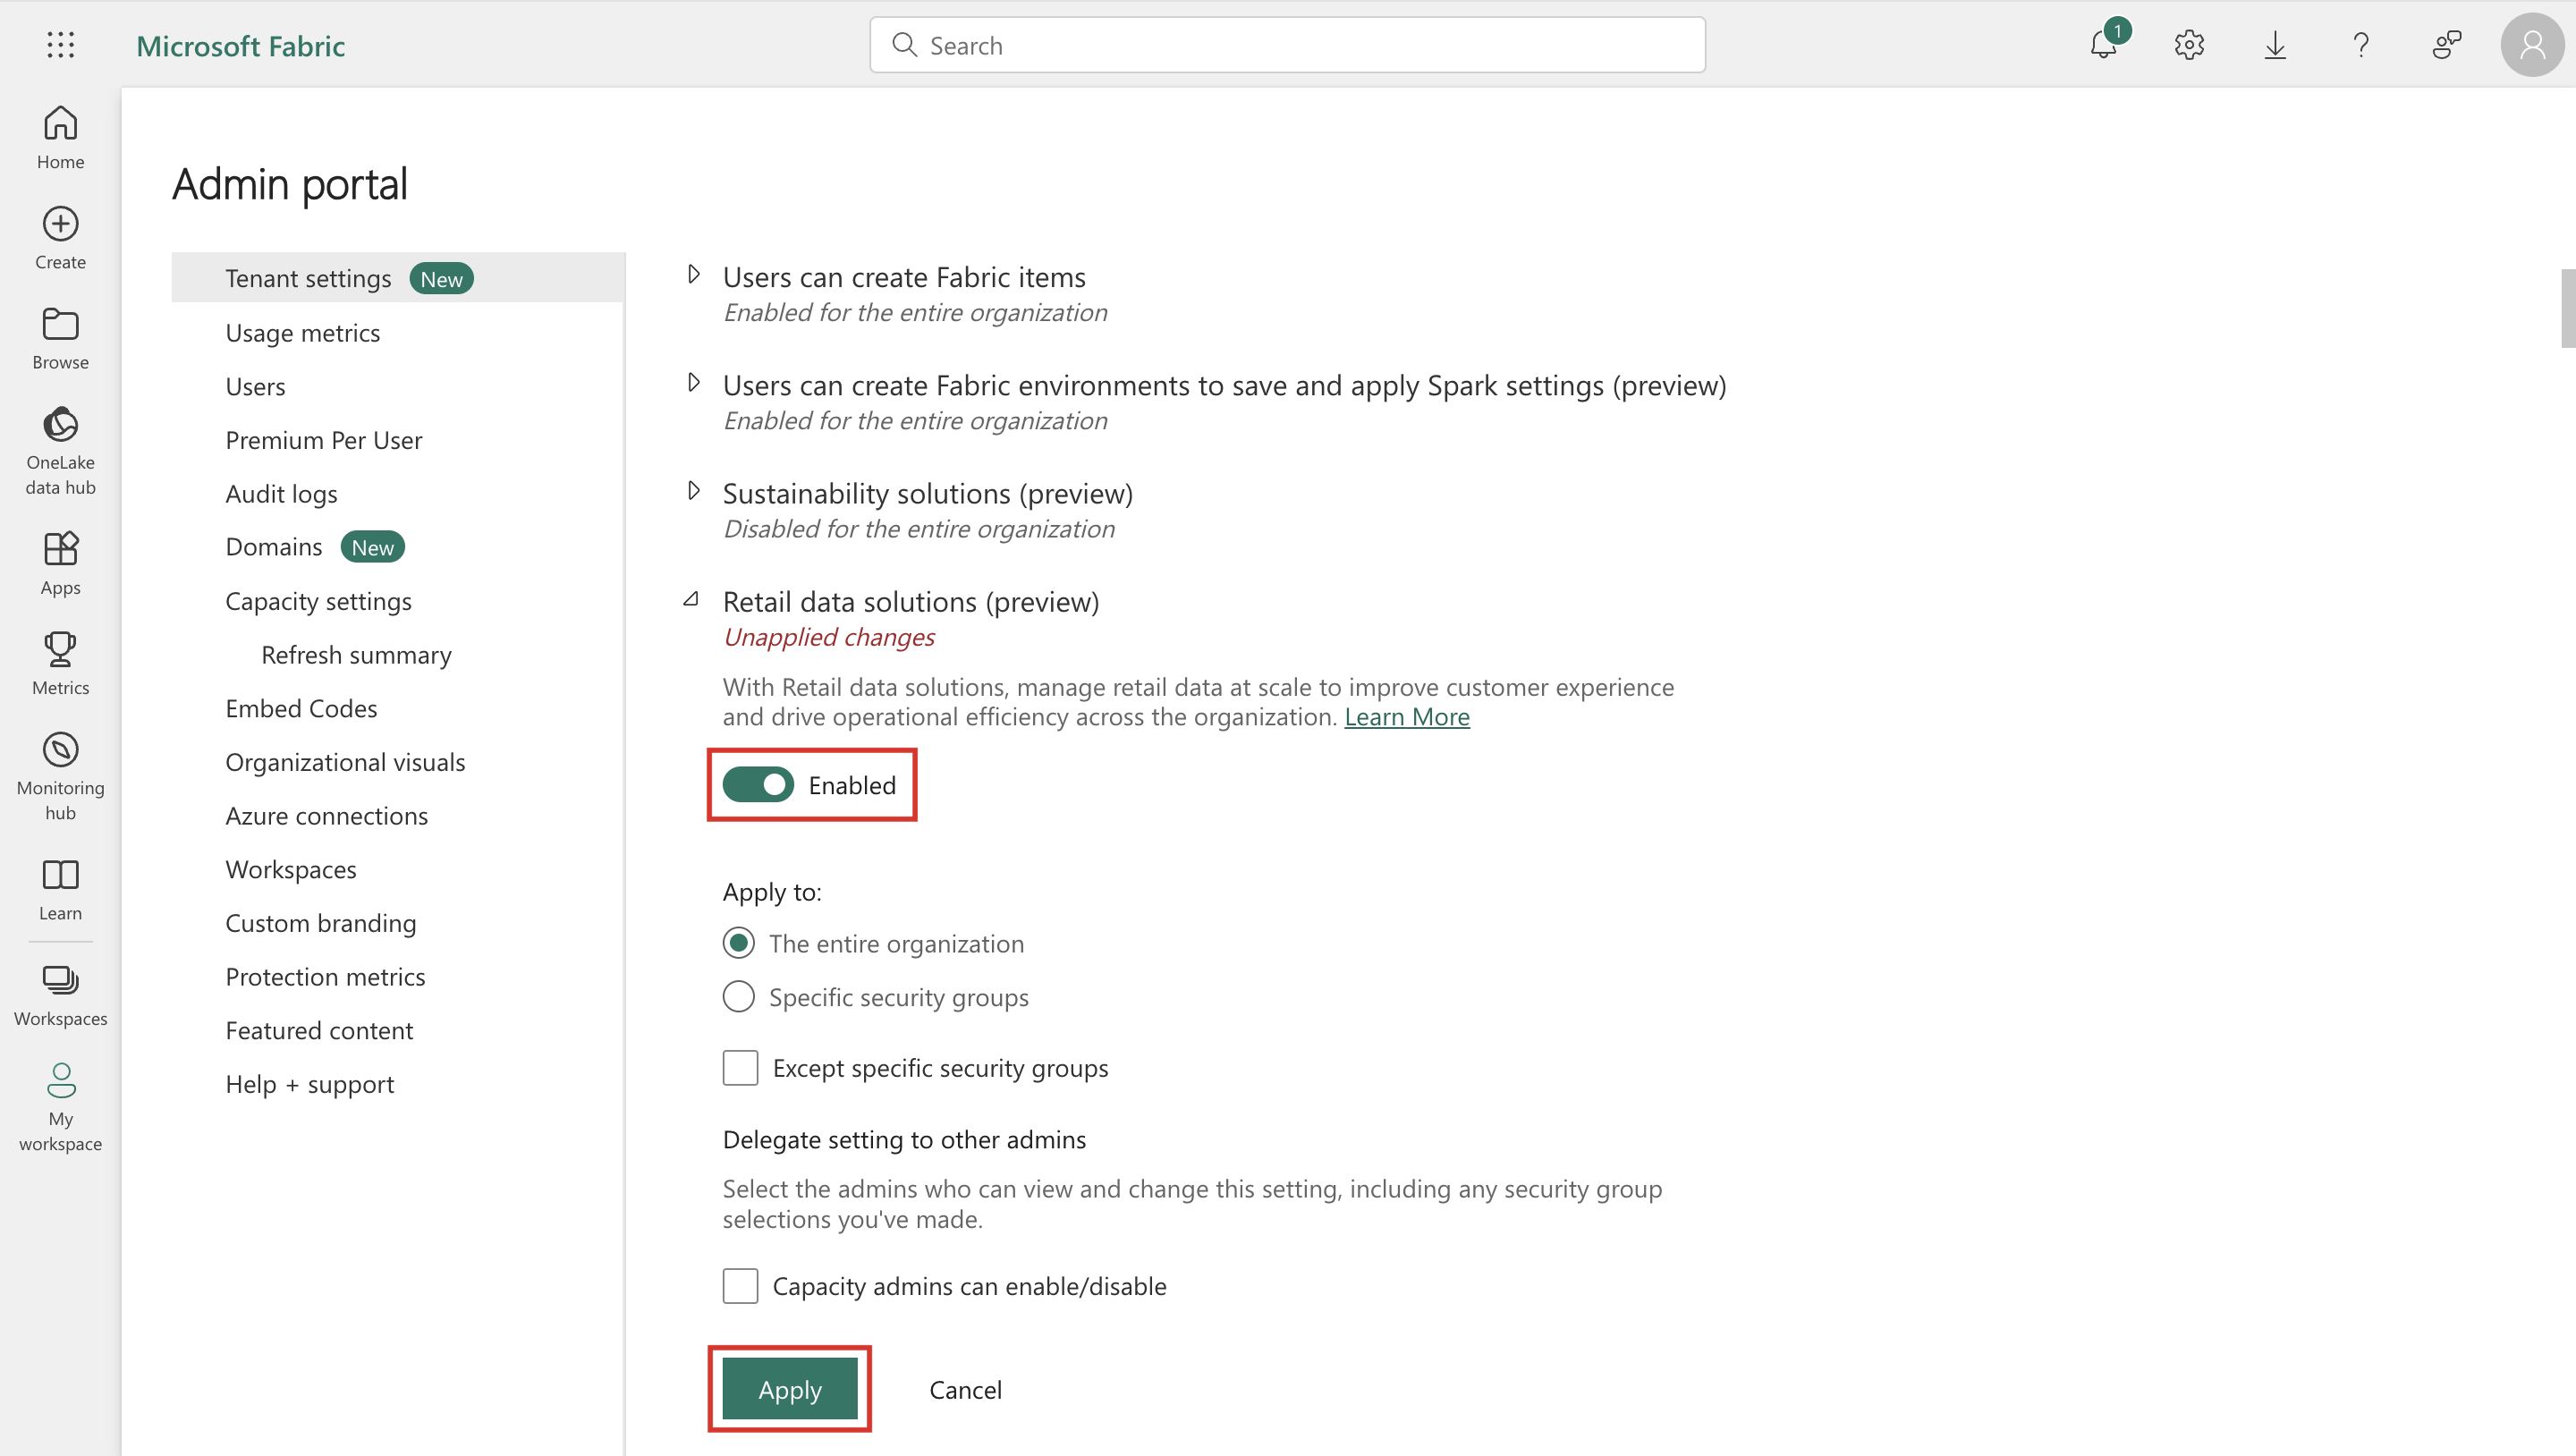
Expand Retail data solutions (preview). Select the Enabled option and then select The entire organization under the Apply to section. Select Apply.
You should get a notification stating that your Tenant settings changes will be applied within the next 15 minutes.
After the system applies the changes, you can move on to the next task.
Task - Deploy Retail data solutions (preview)
To deploy Retail data solutions in Power BI, complete the following steps:
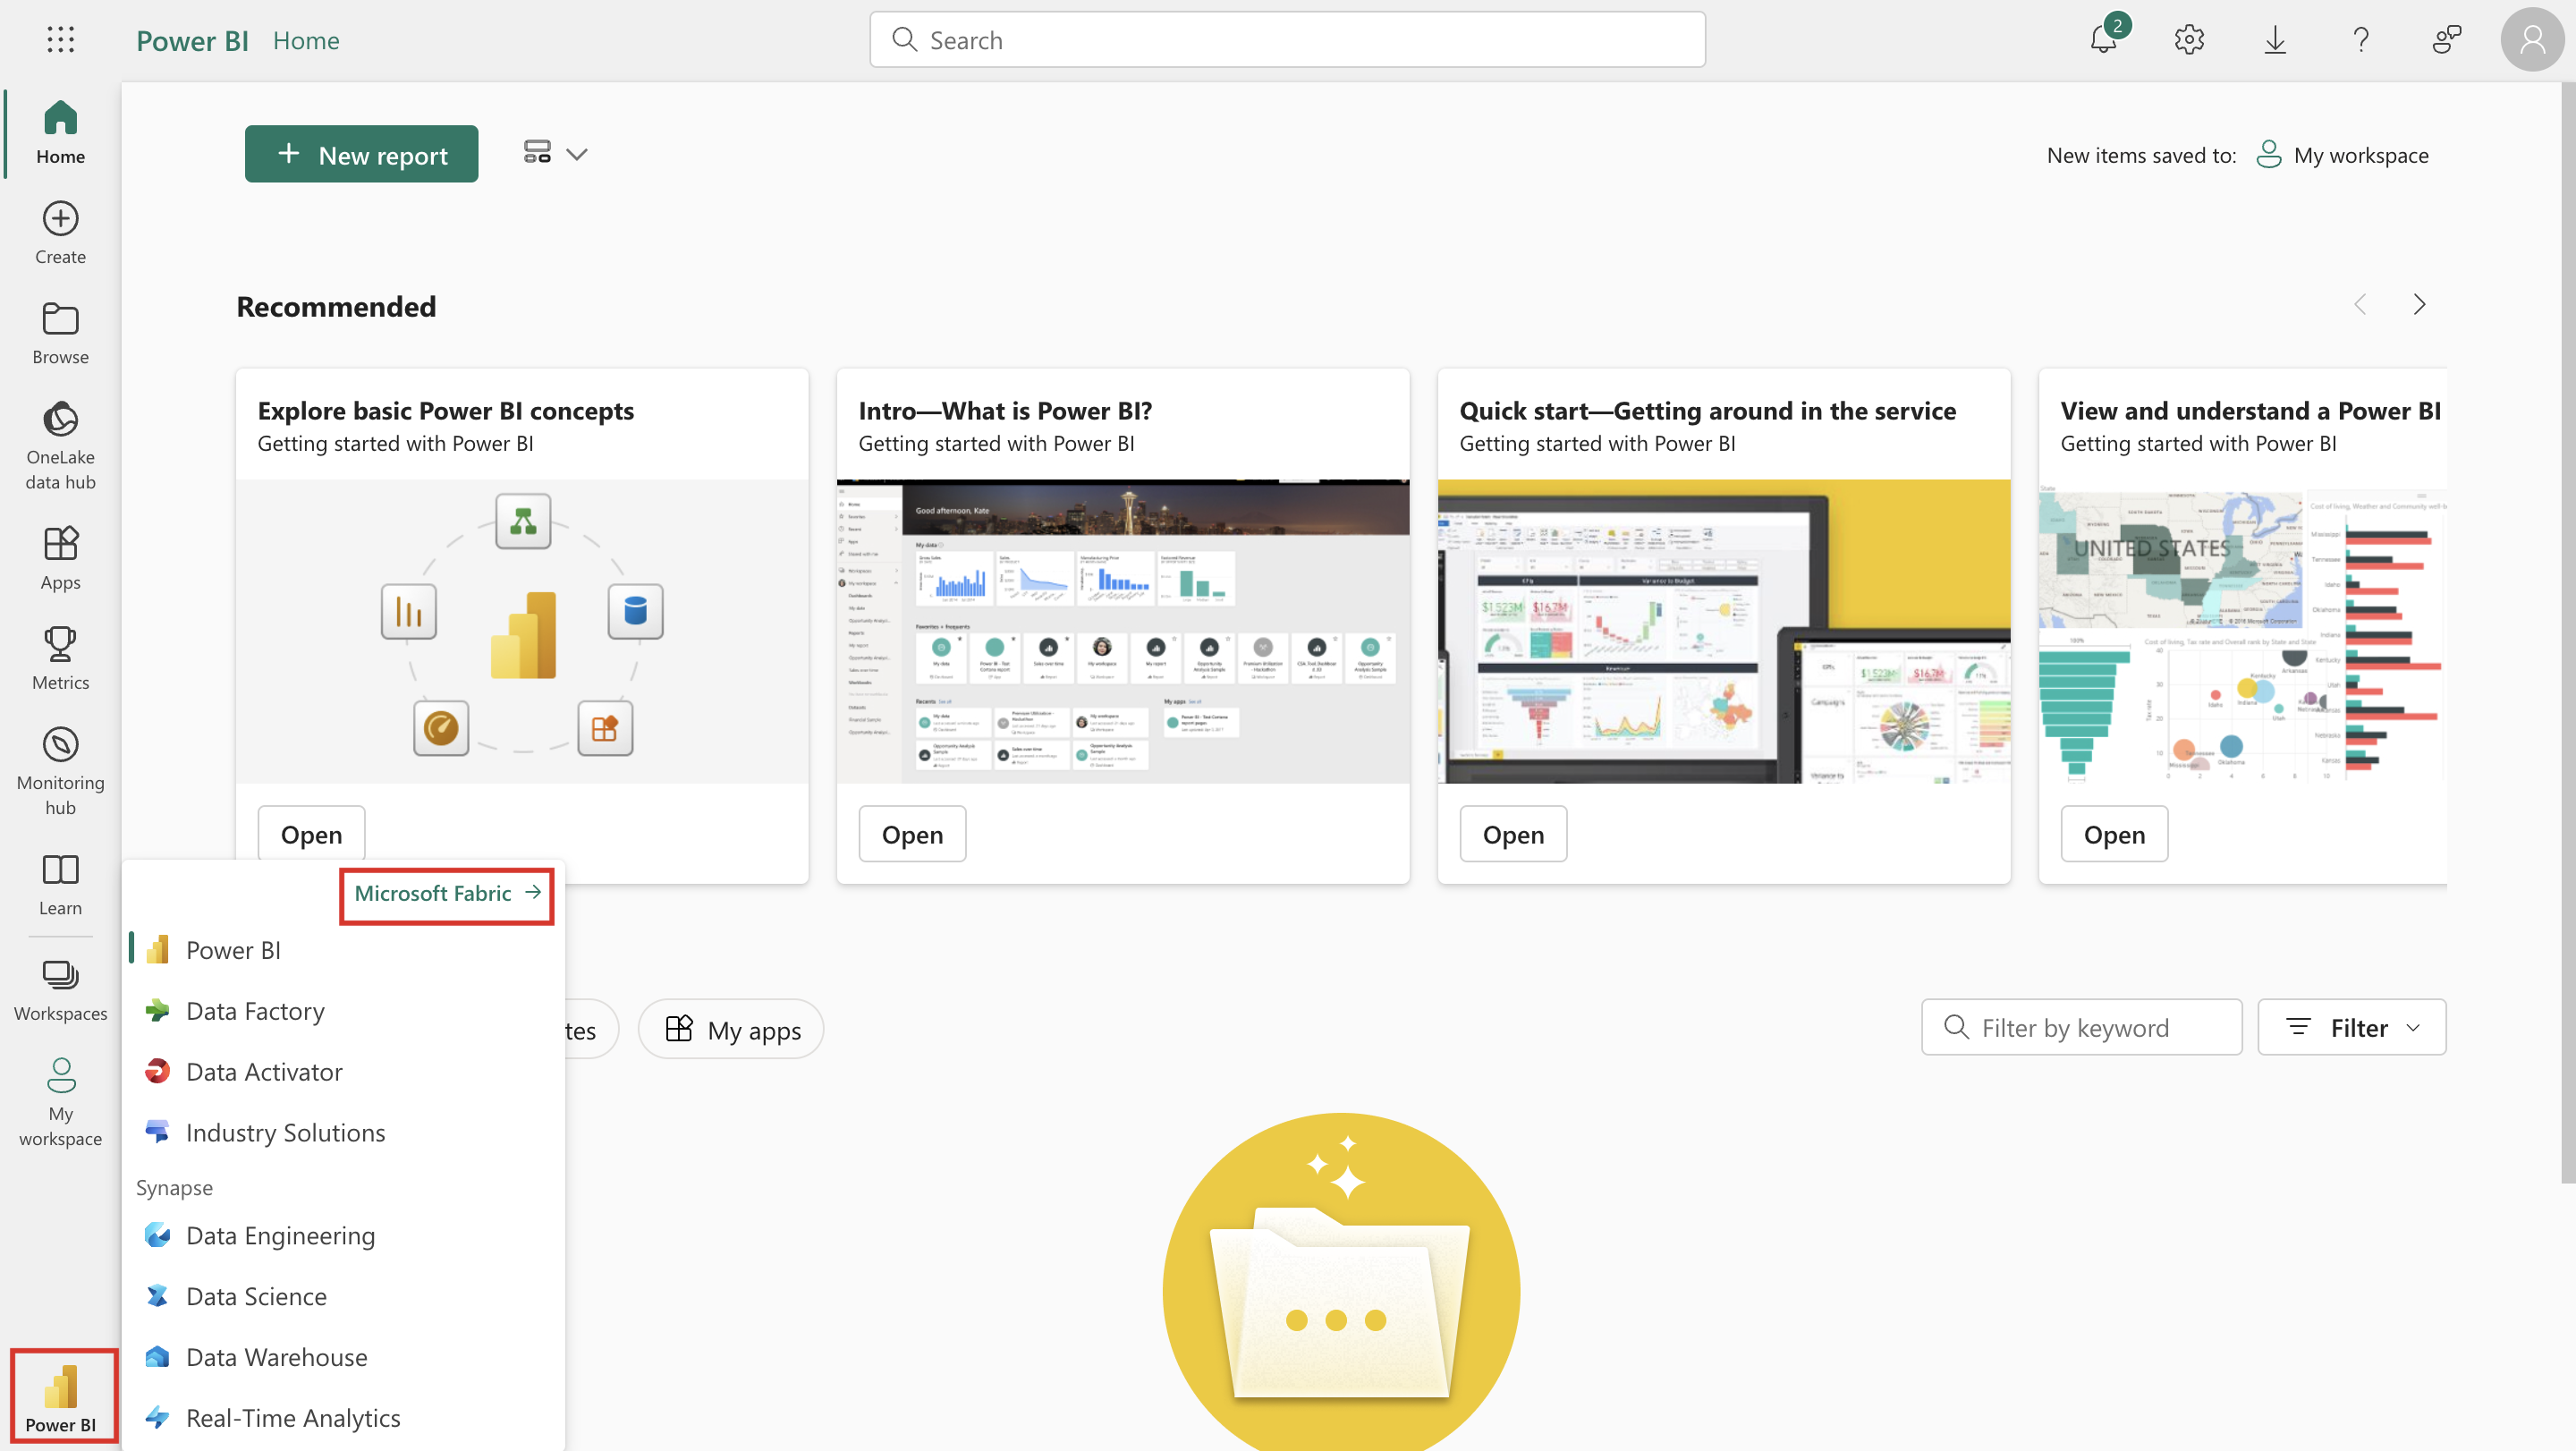
Sign in to your Microsoft Power BI home page with Jessie Irwin's credentials. From the lower-left corner, select the Power BI icon and then select Microsoft Fabric.
Note
If the icon doesn't appear immediately, wait for the changes that you made in the previous task to be effective.
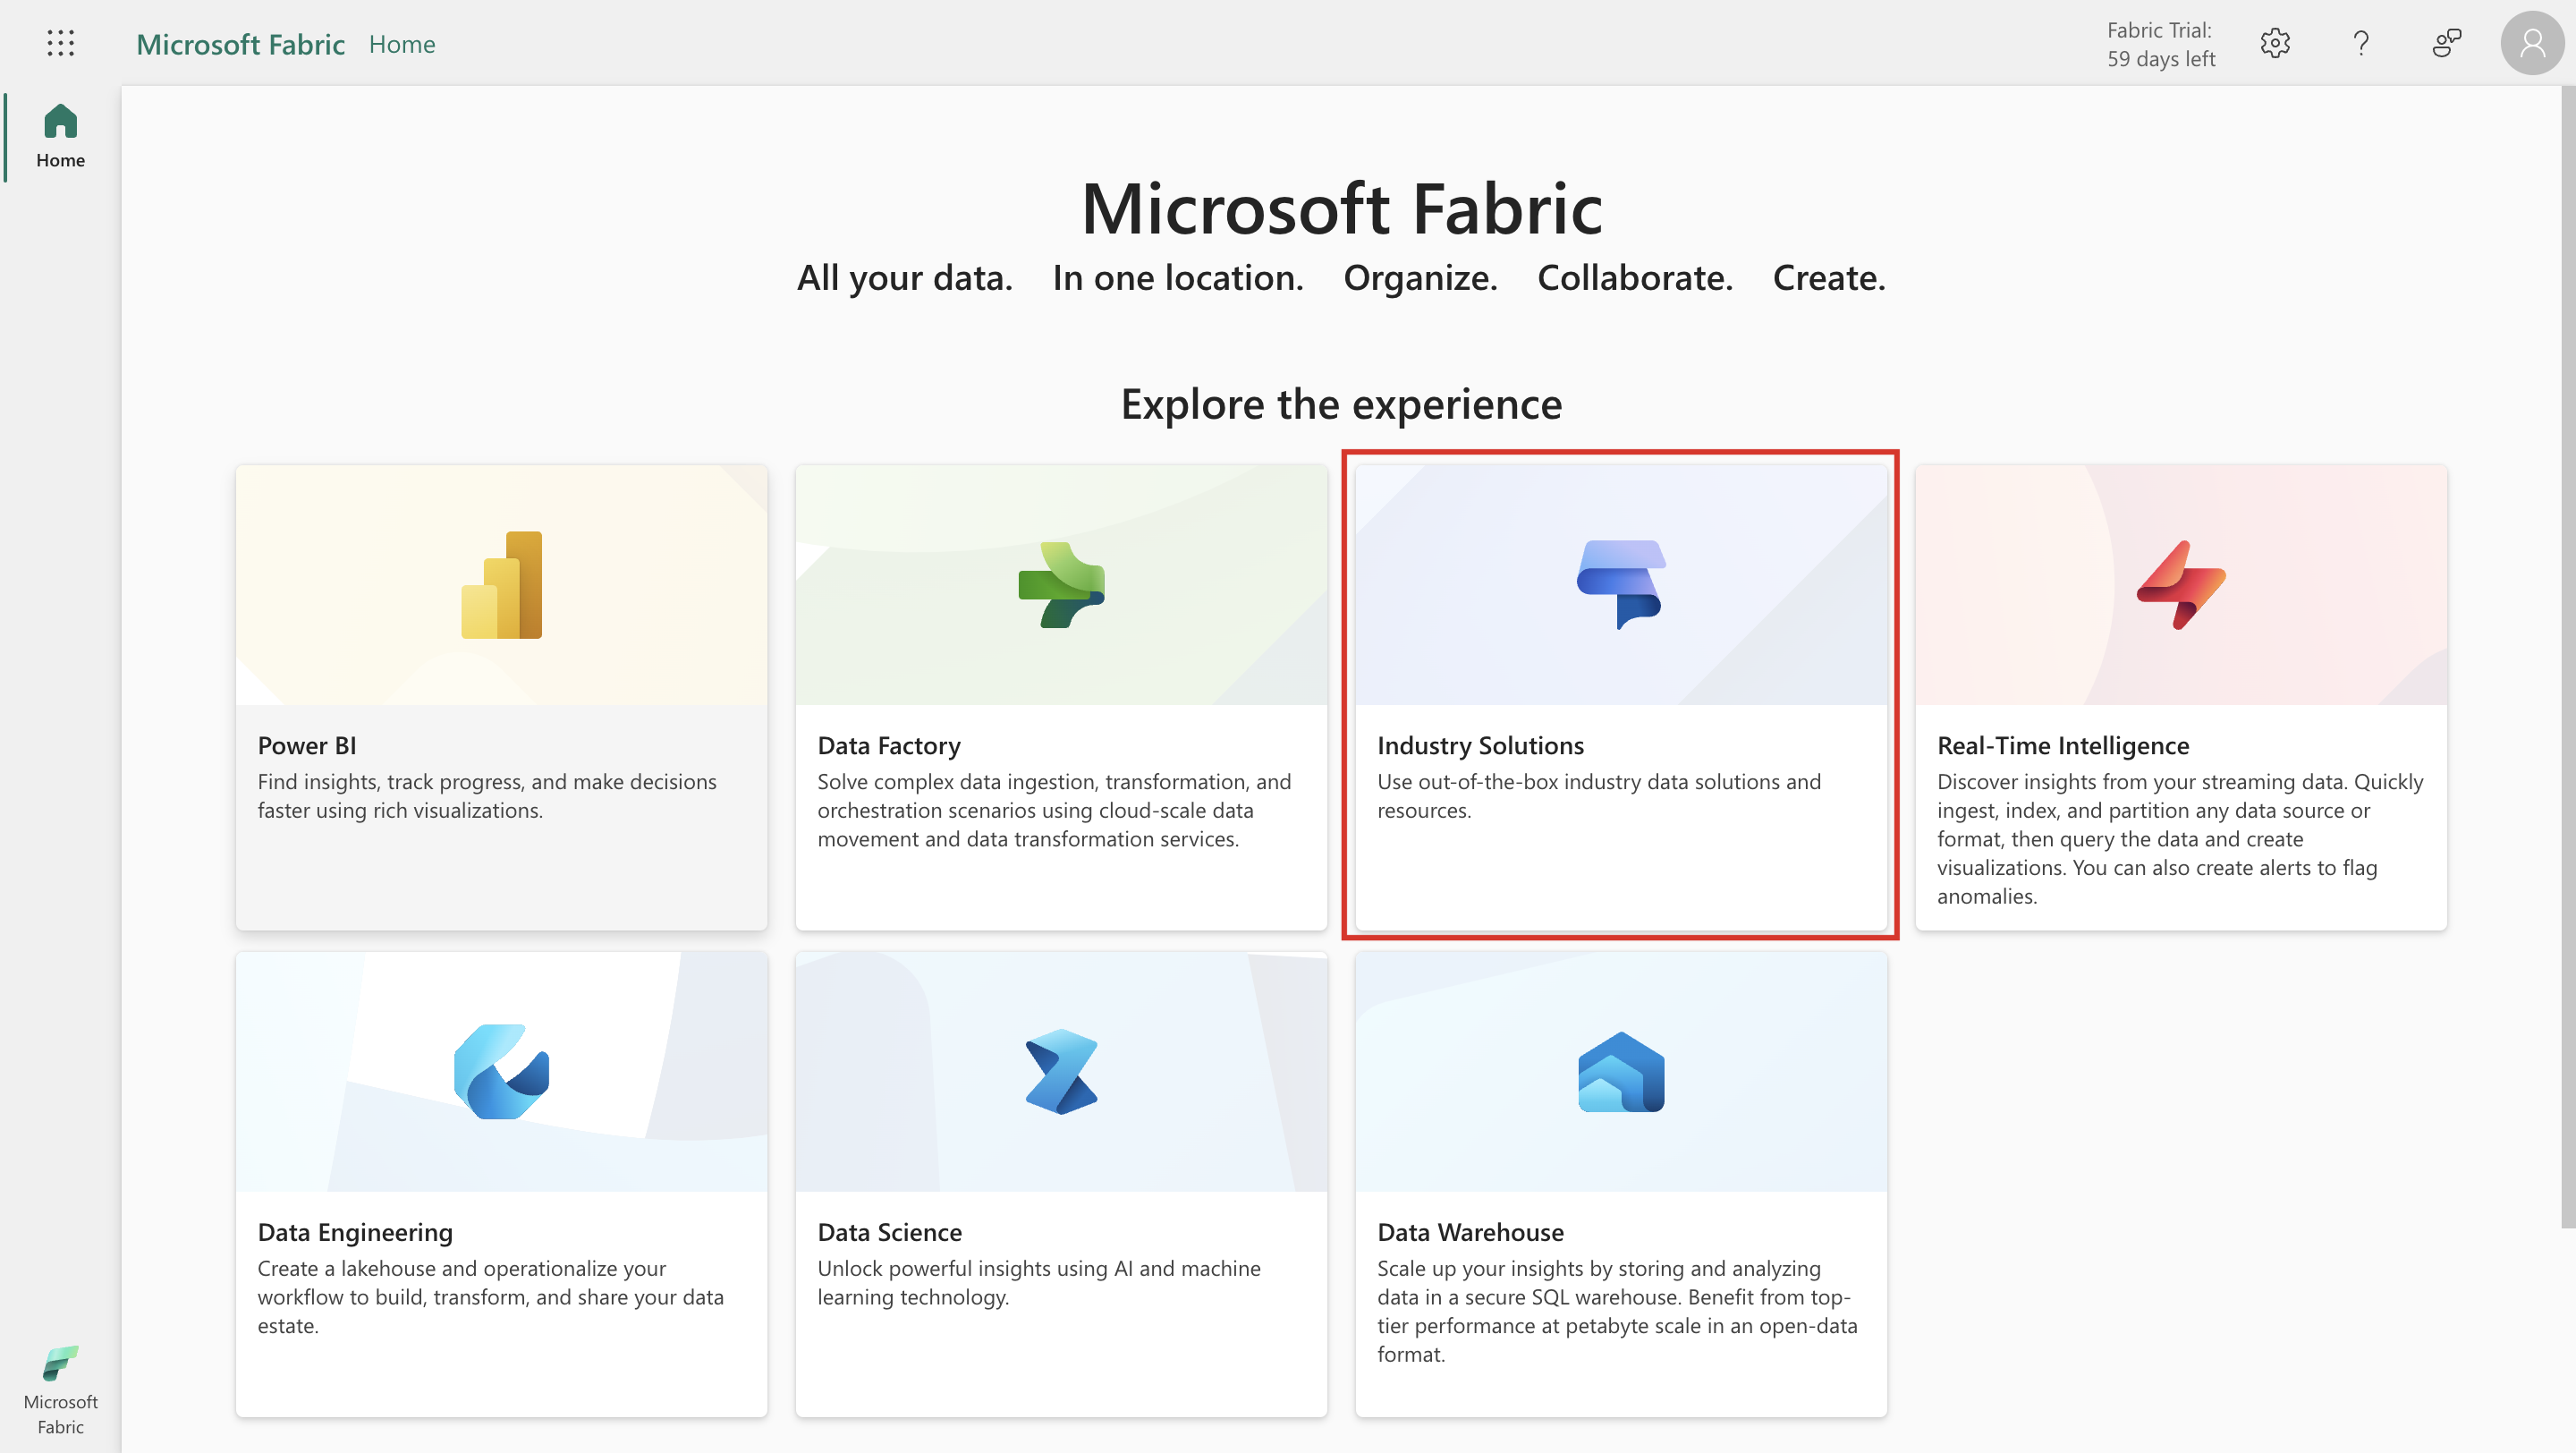
Select the Industry Solutions card.
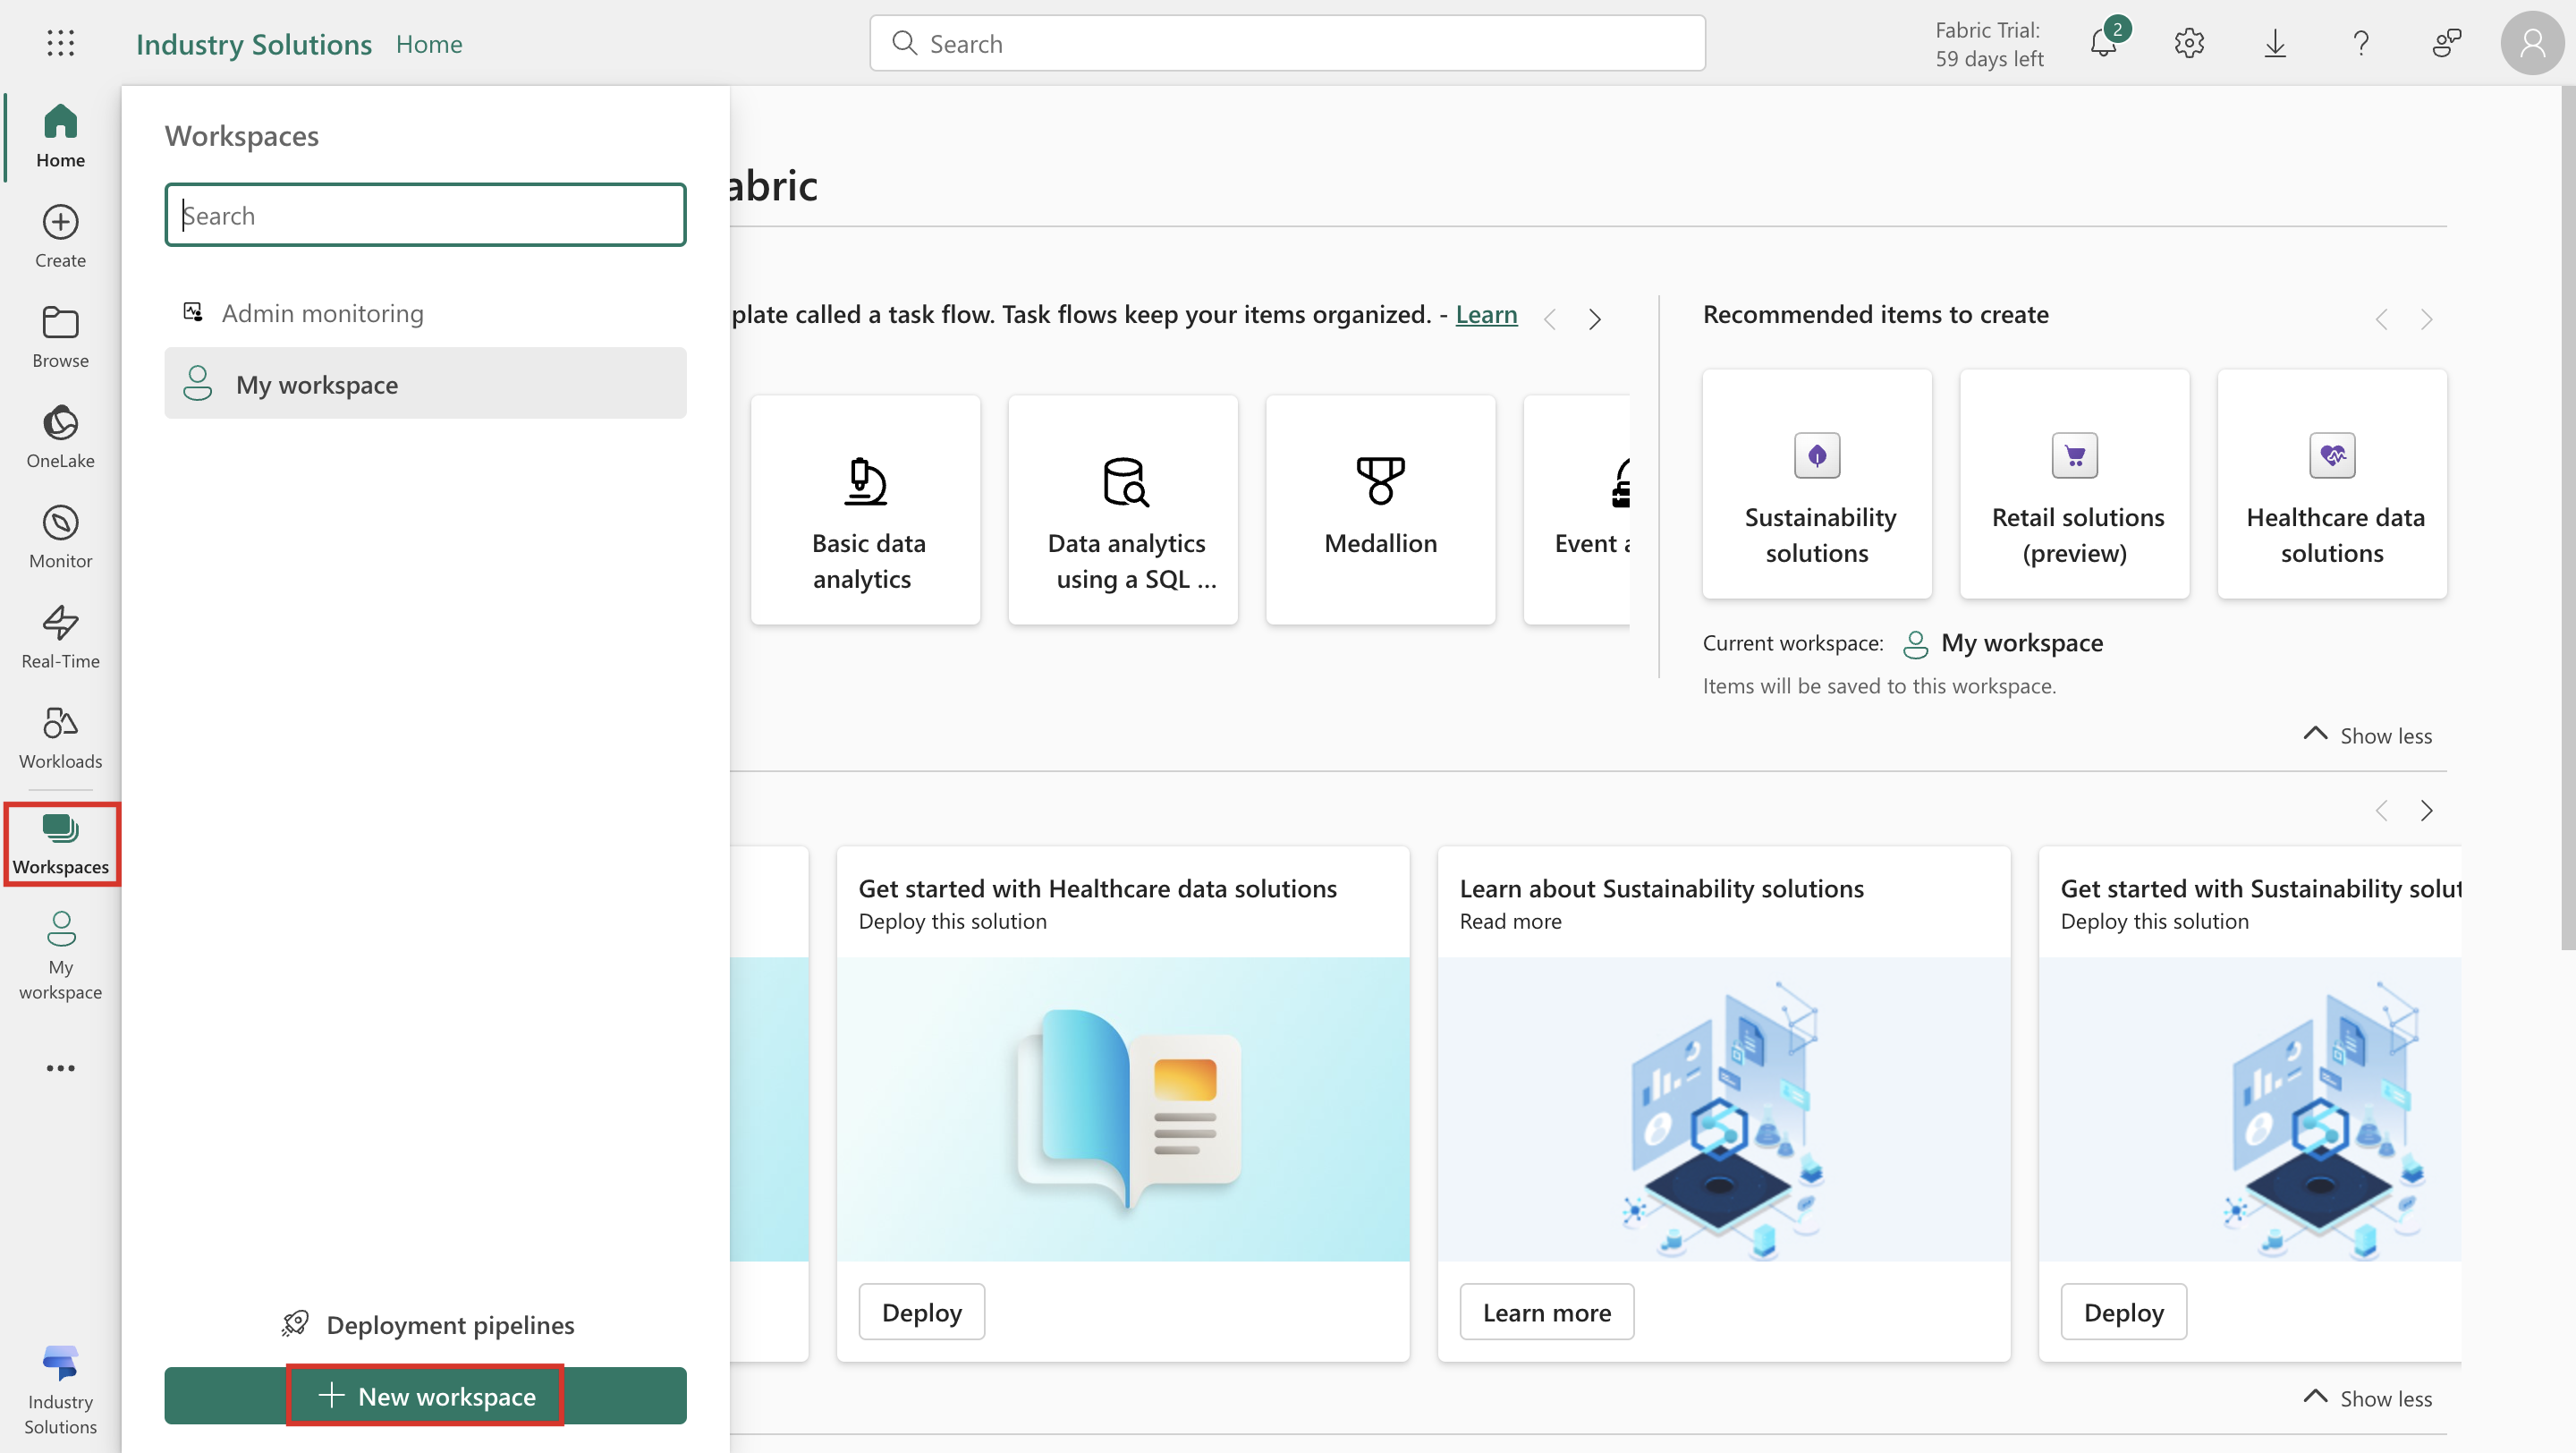
From the left navigation pane, select Workspaces > New workspace.
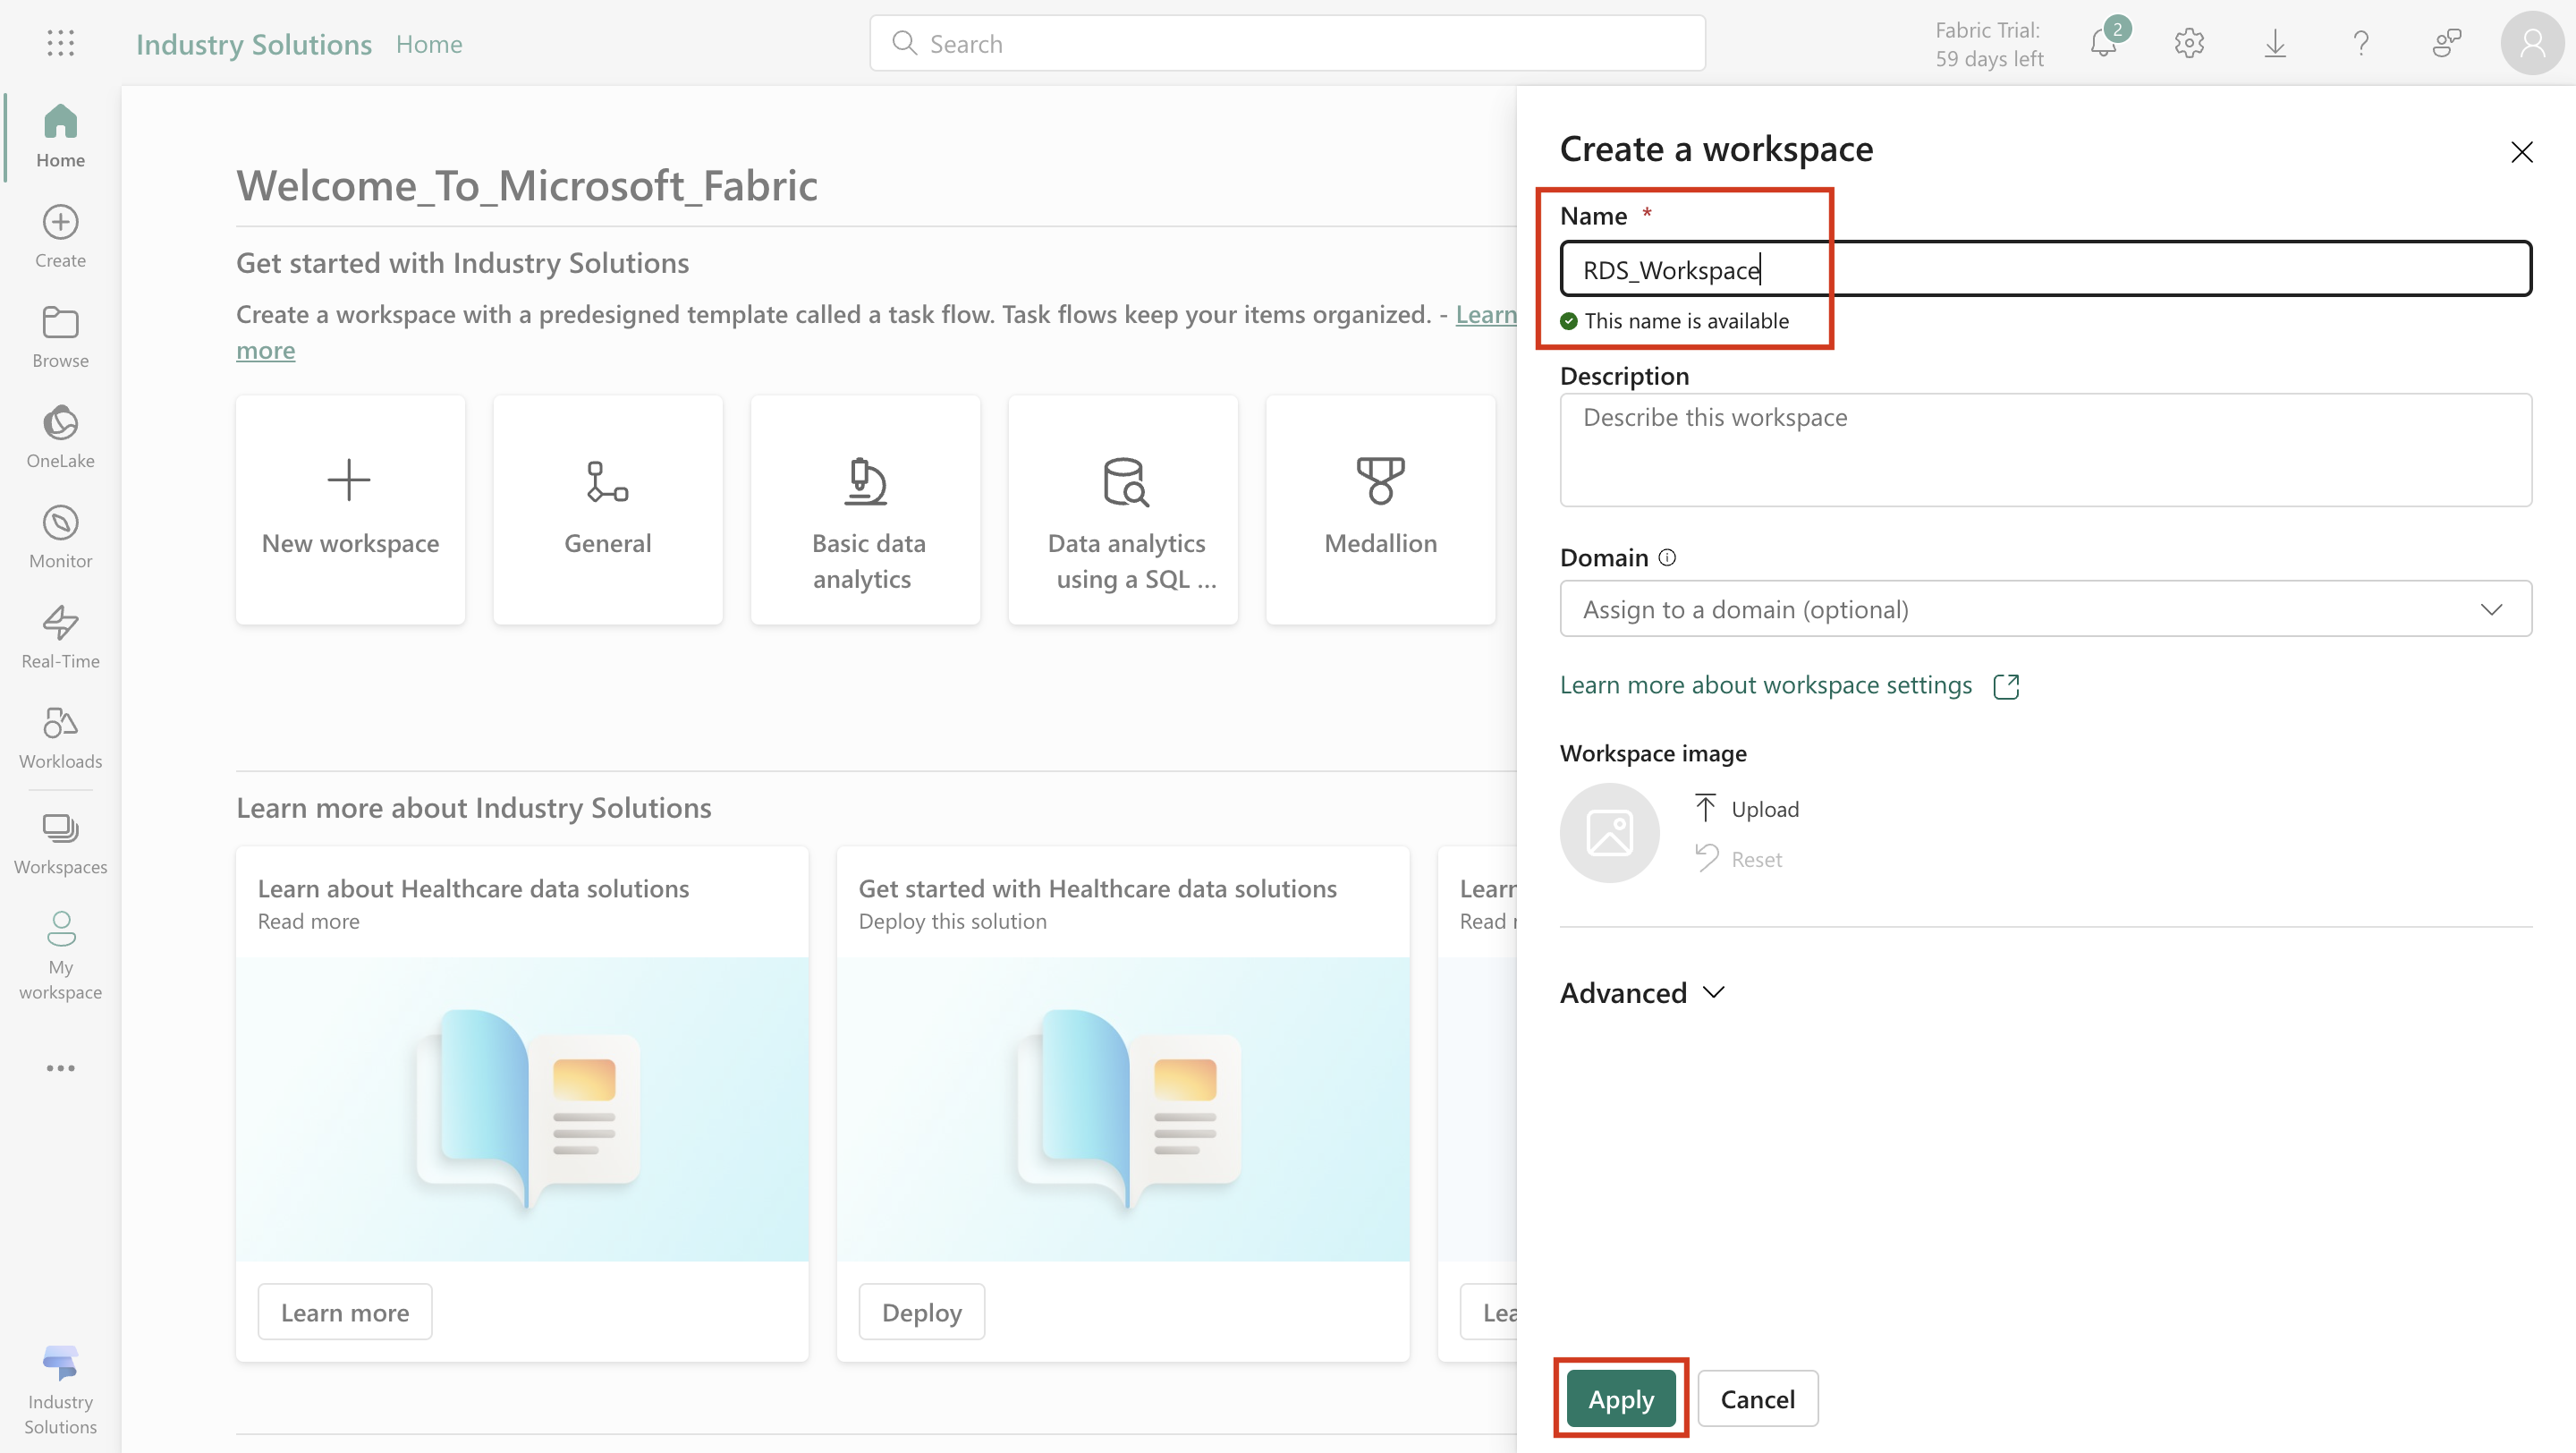
Enter RDS_Workspace as the Name of the workspace. Select Apply. For more information, see Workspaces.
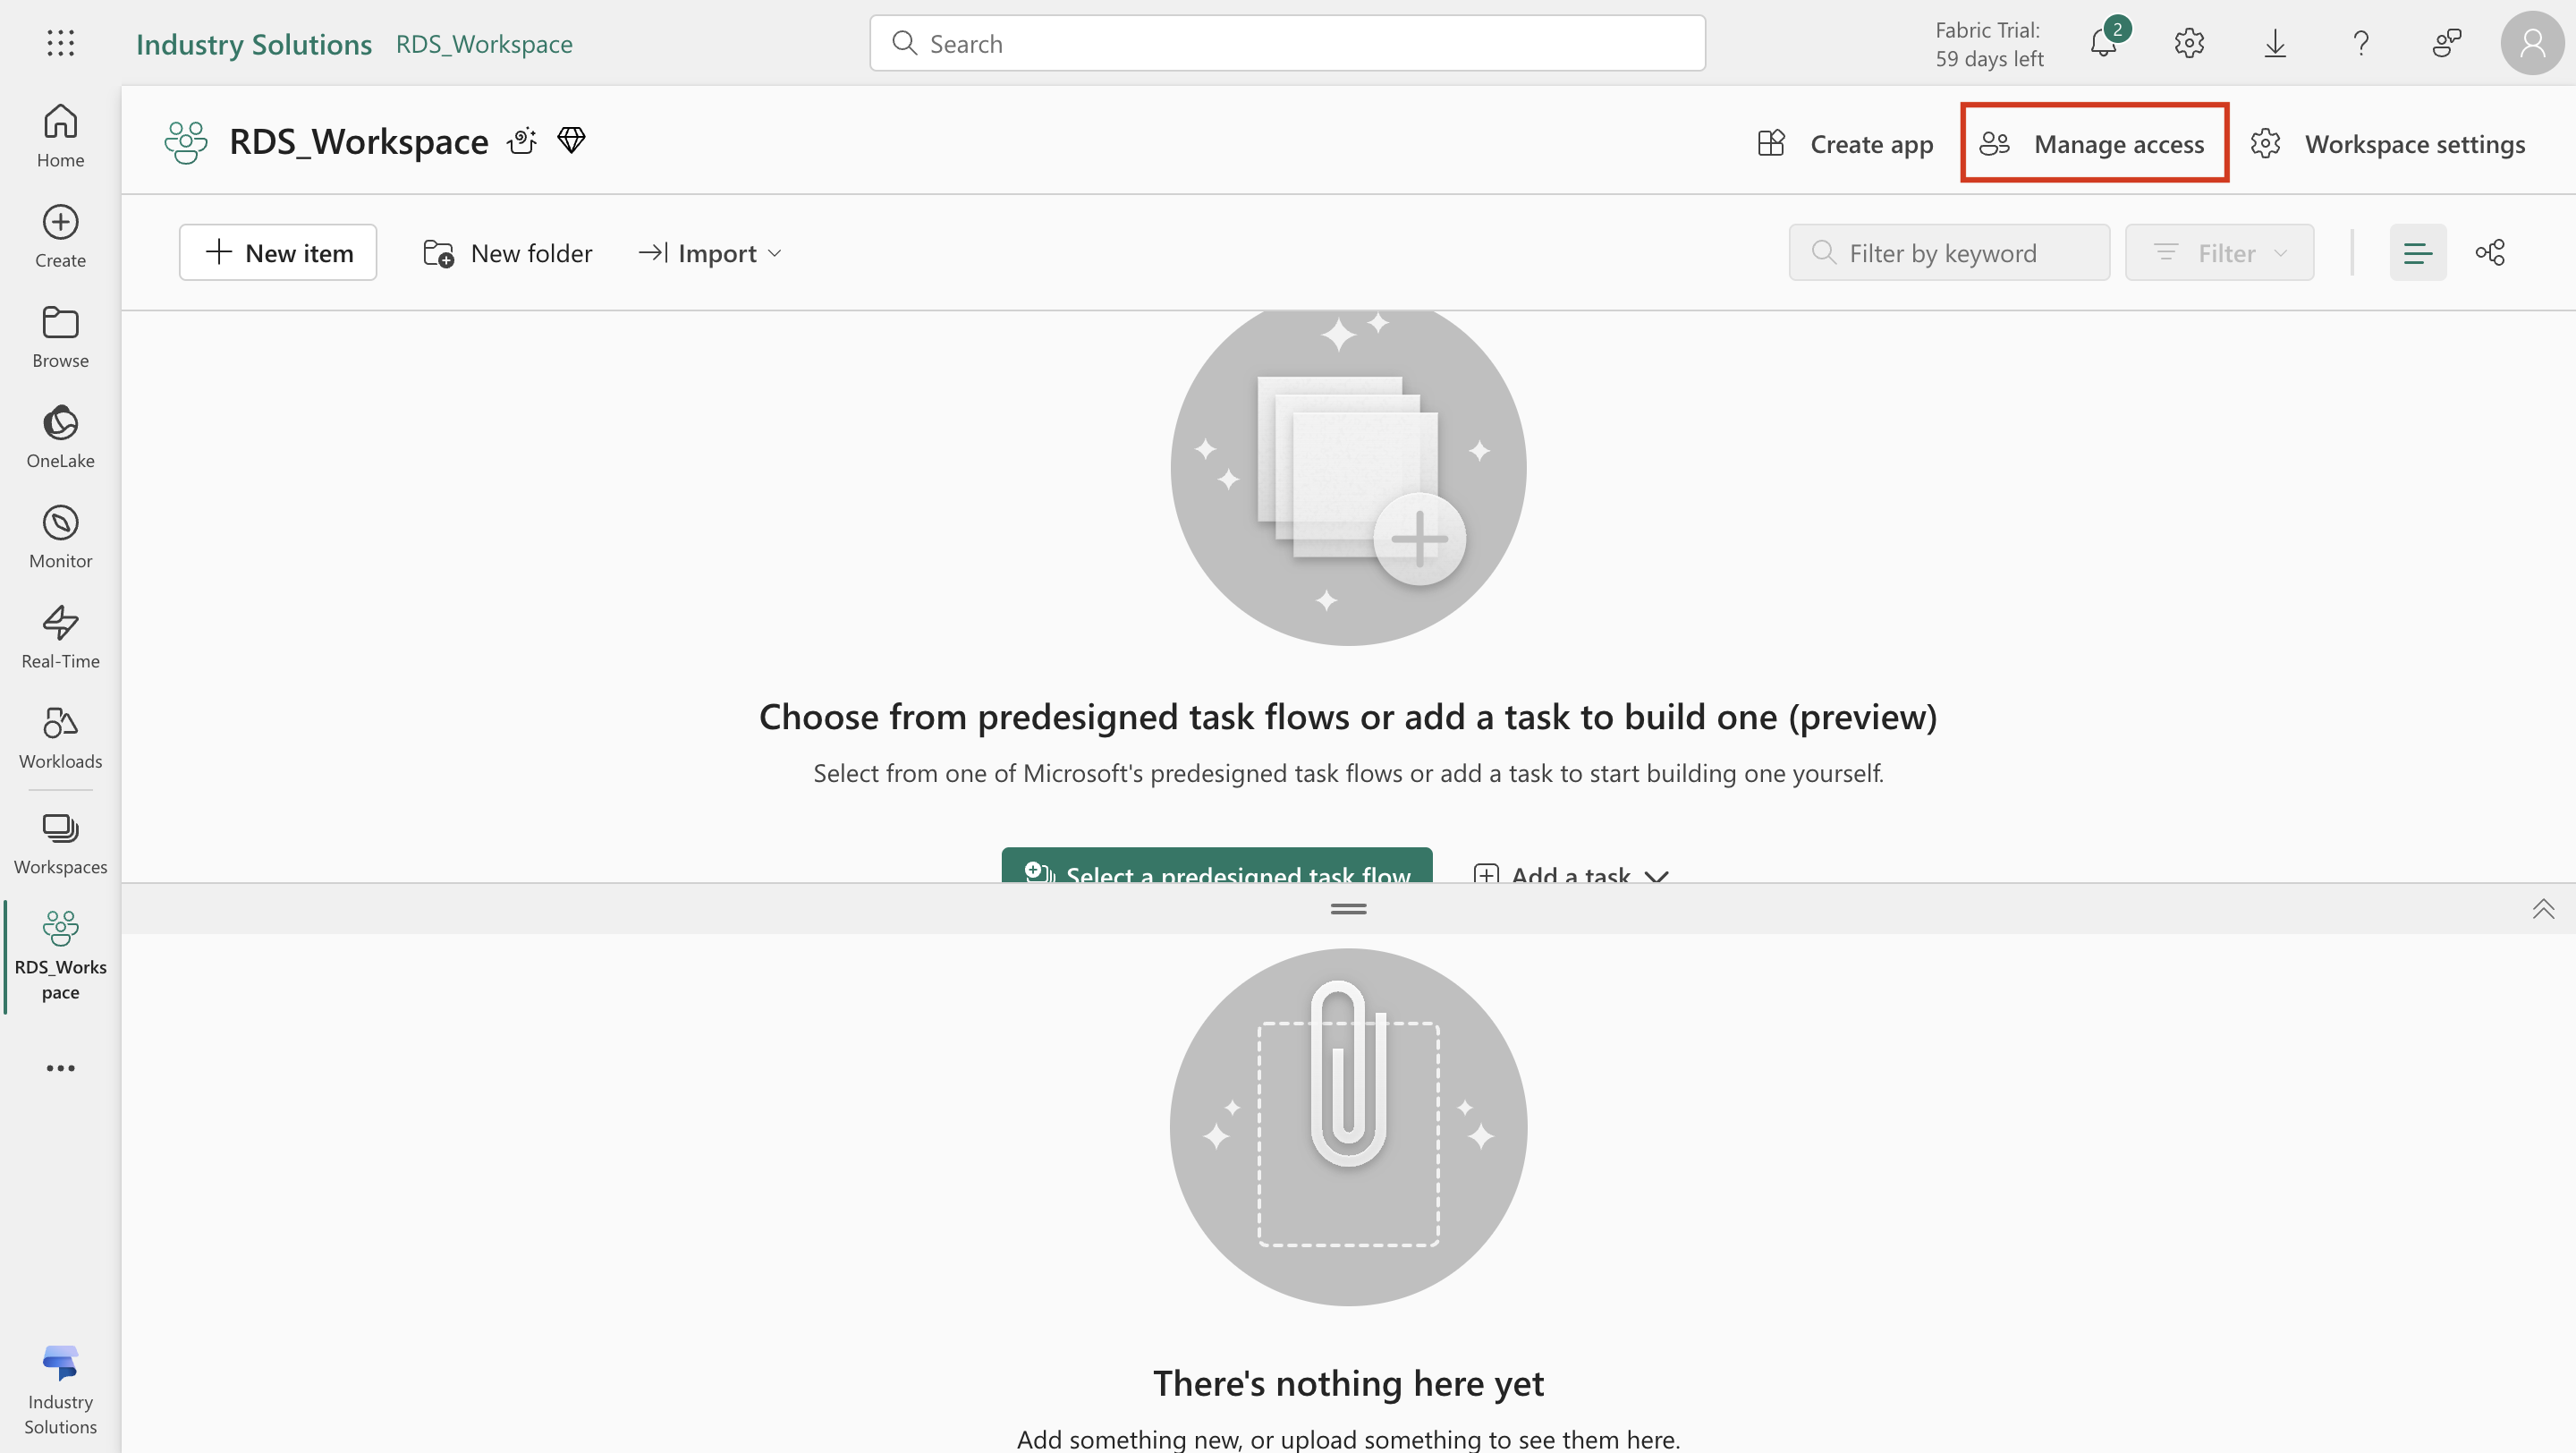
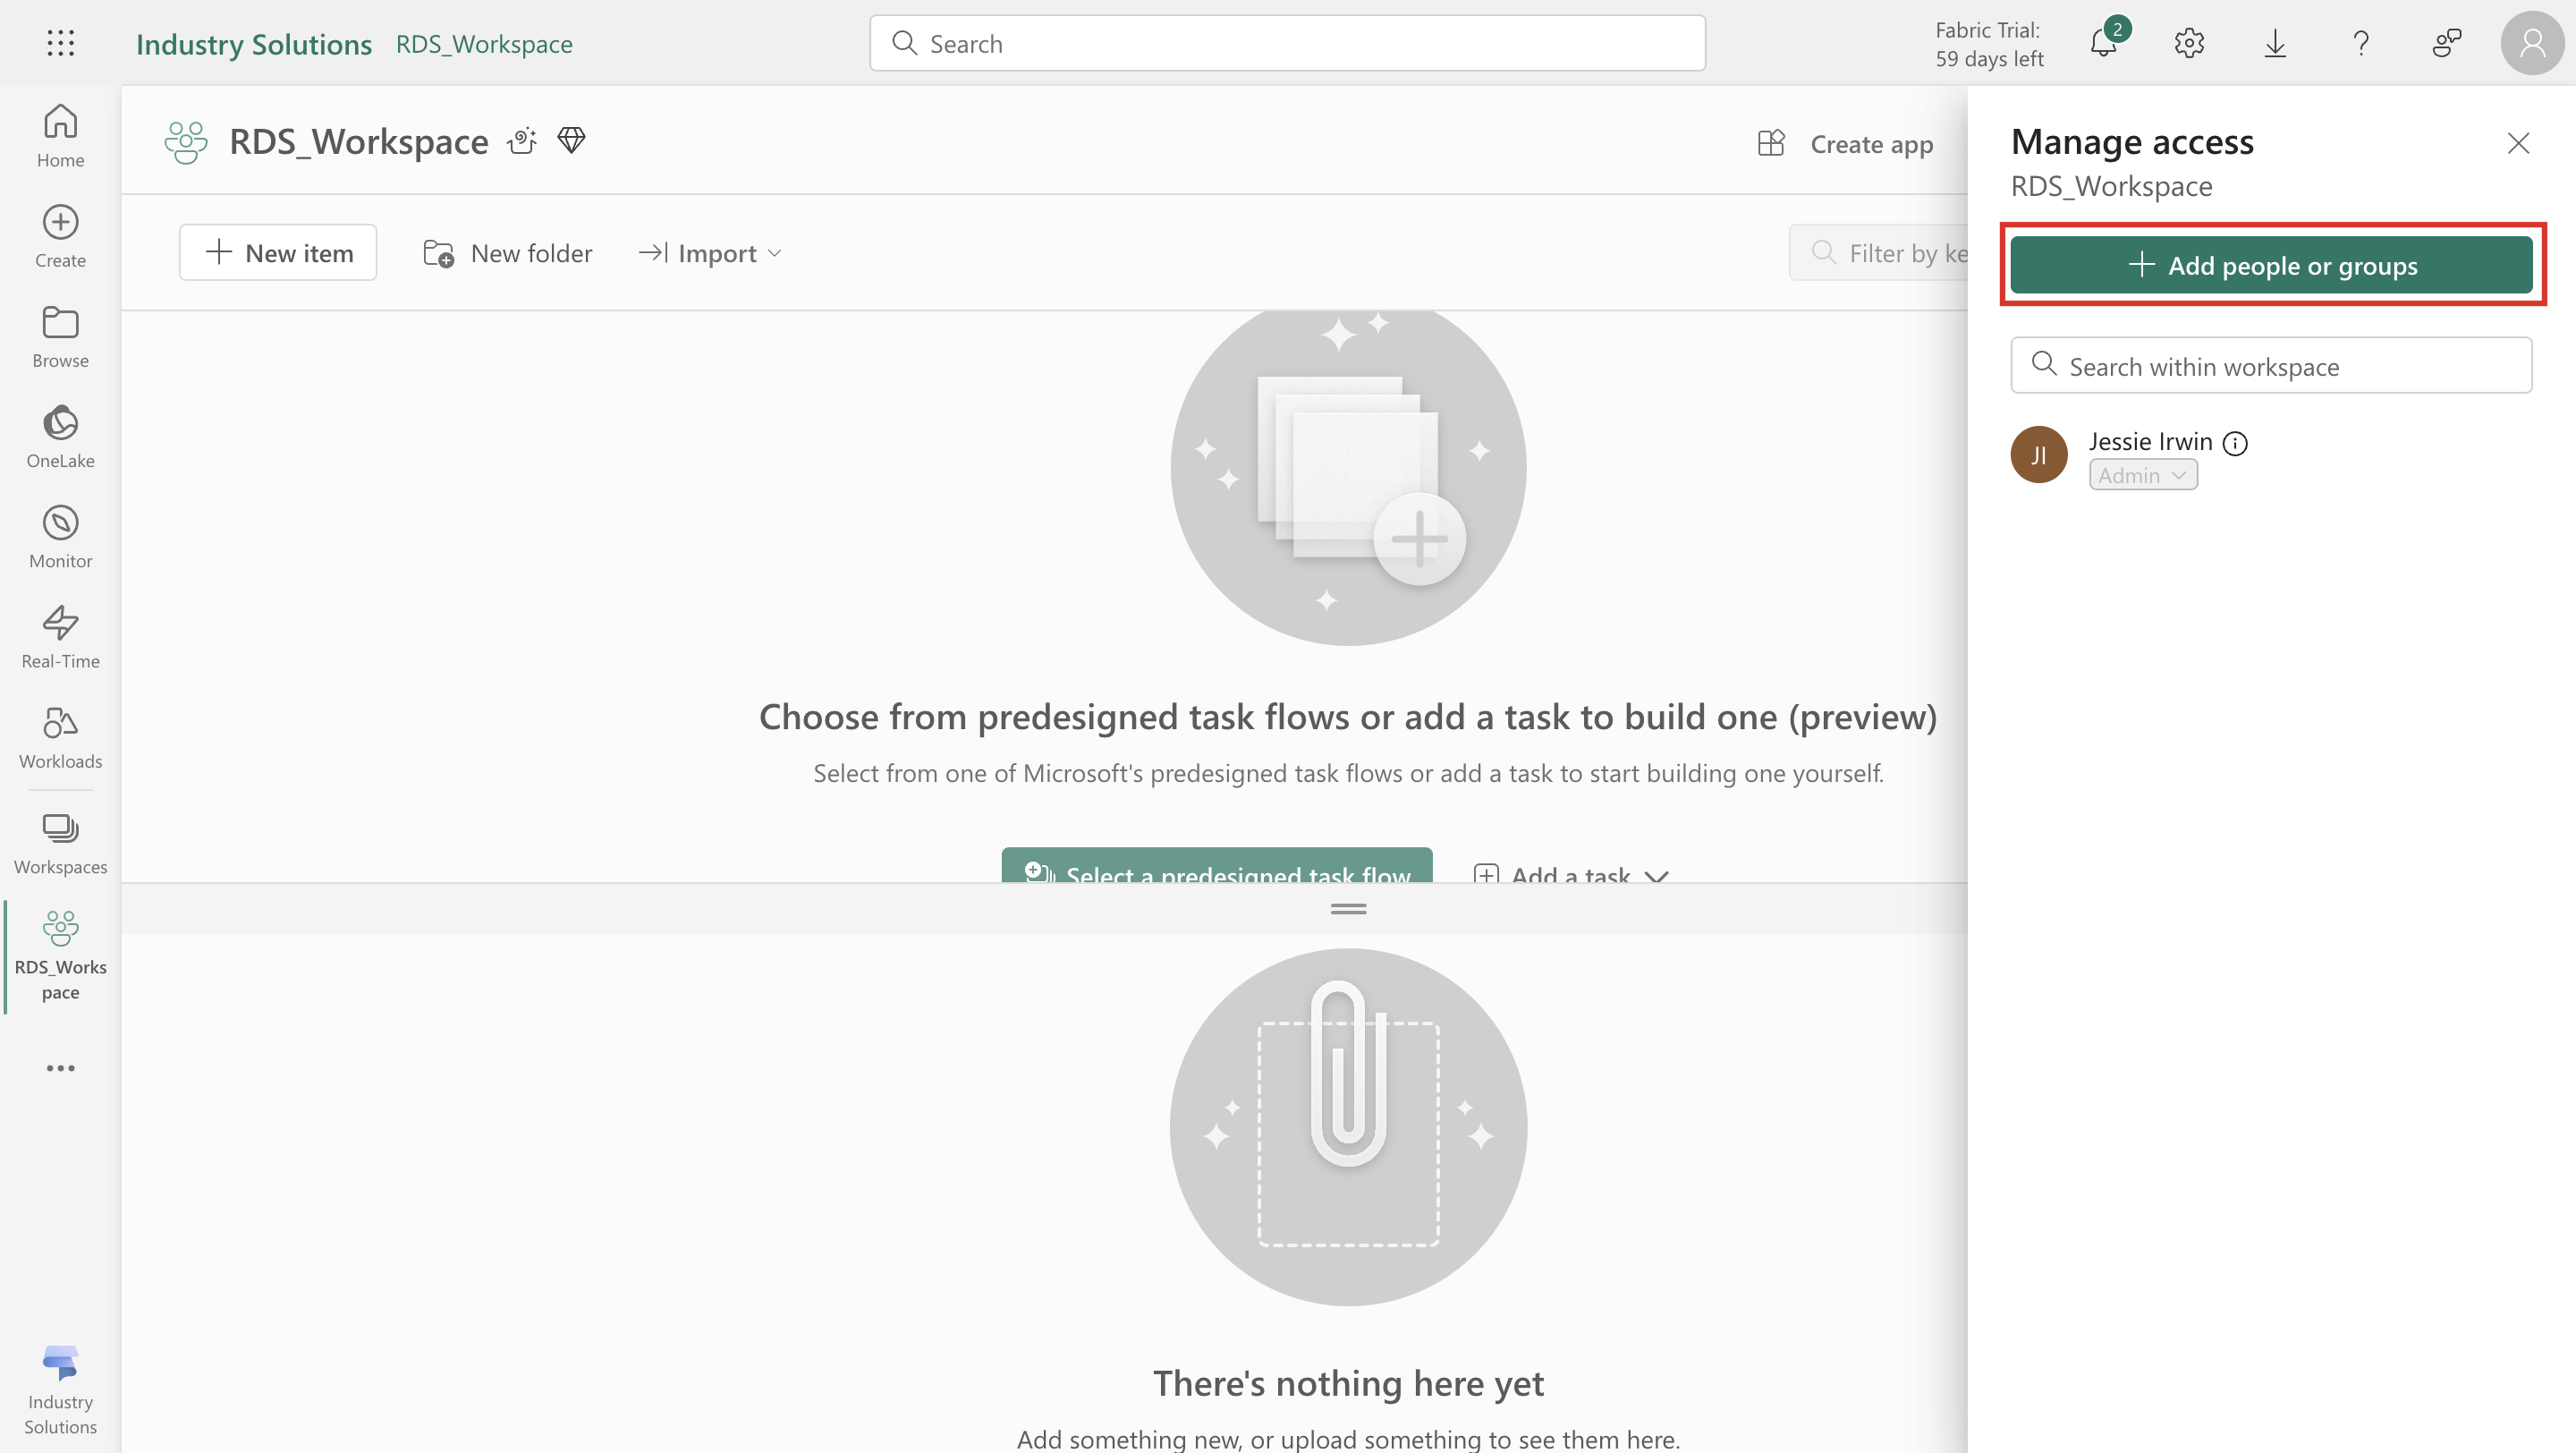
After the system creates your workspace, select Manage access from the upper bar.
Select Add people or groups.
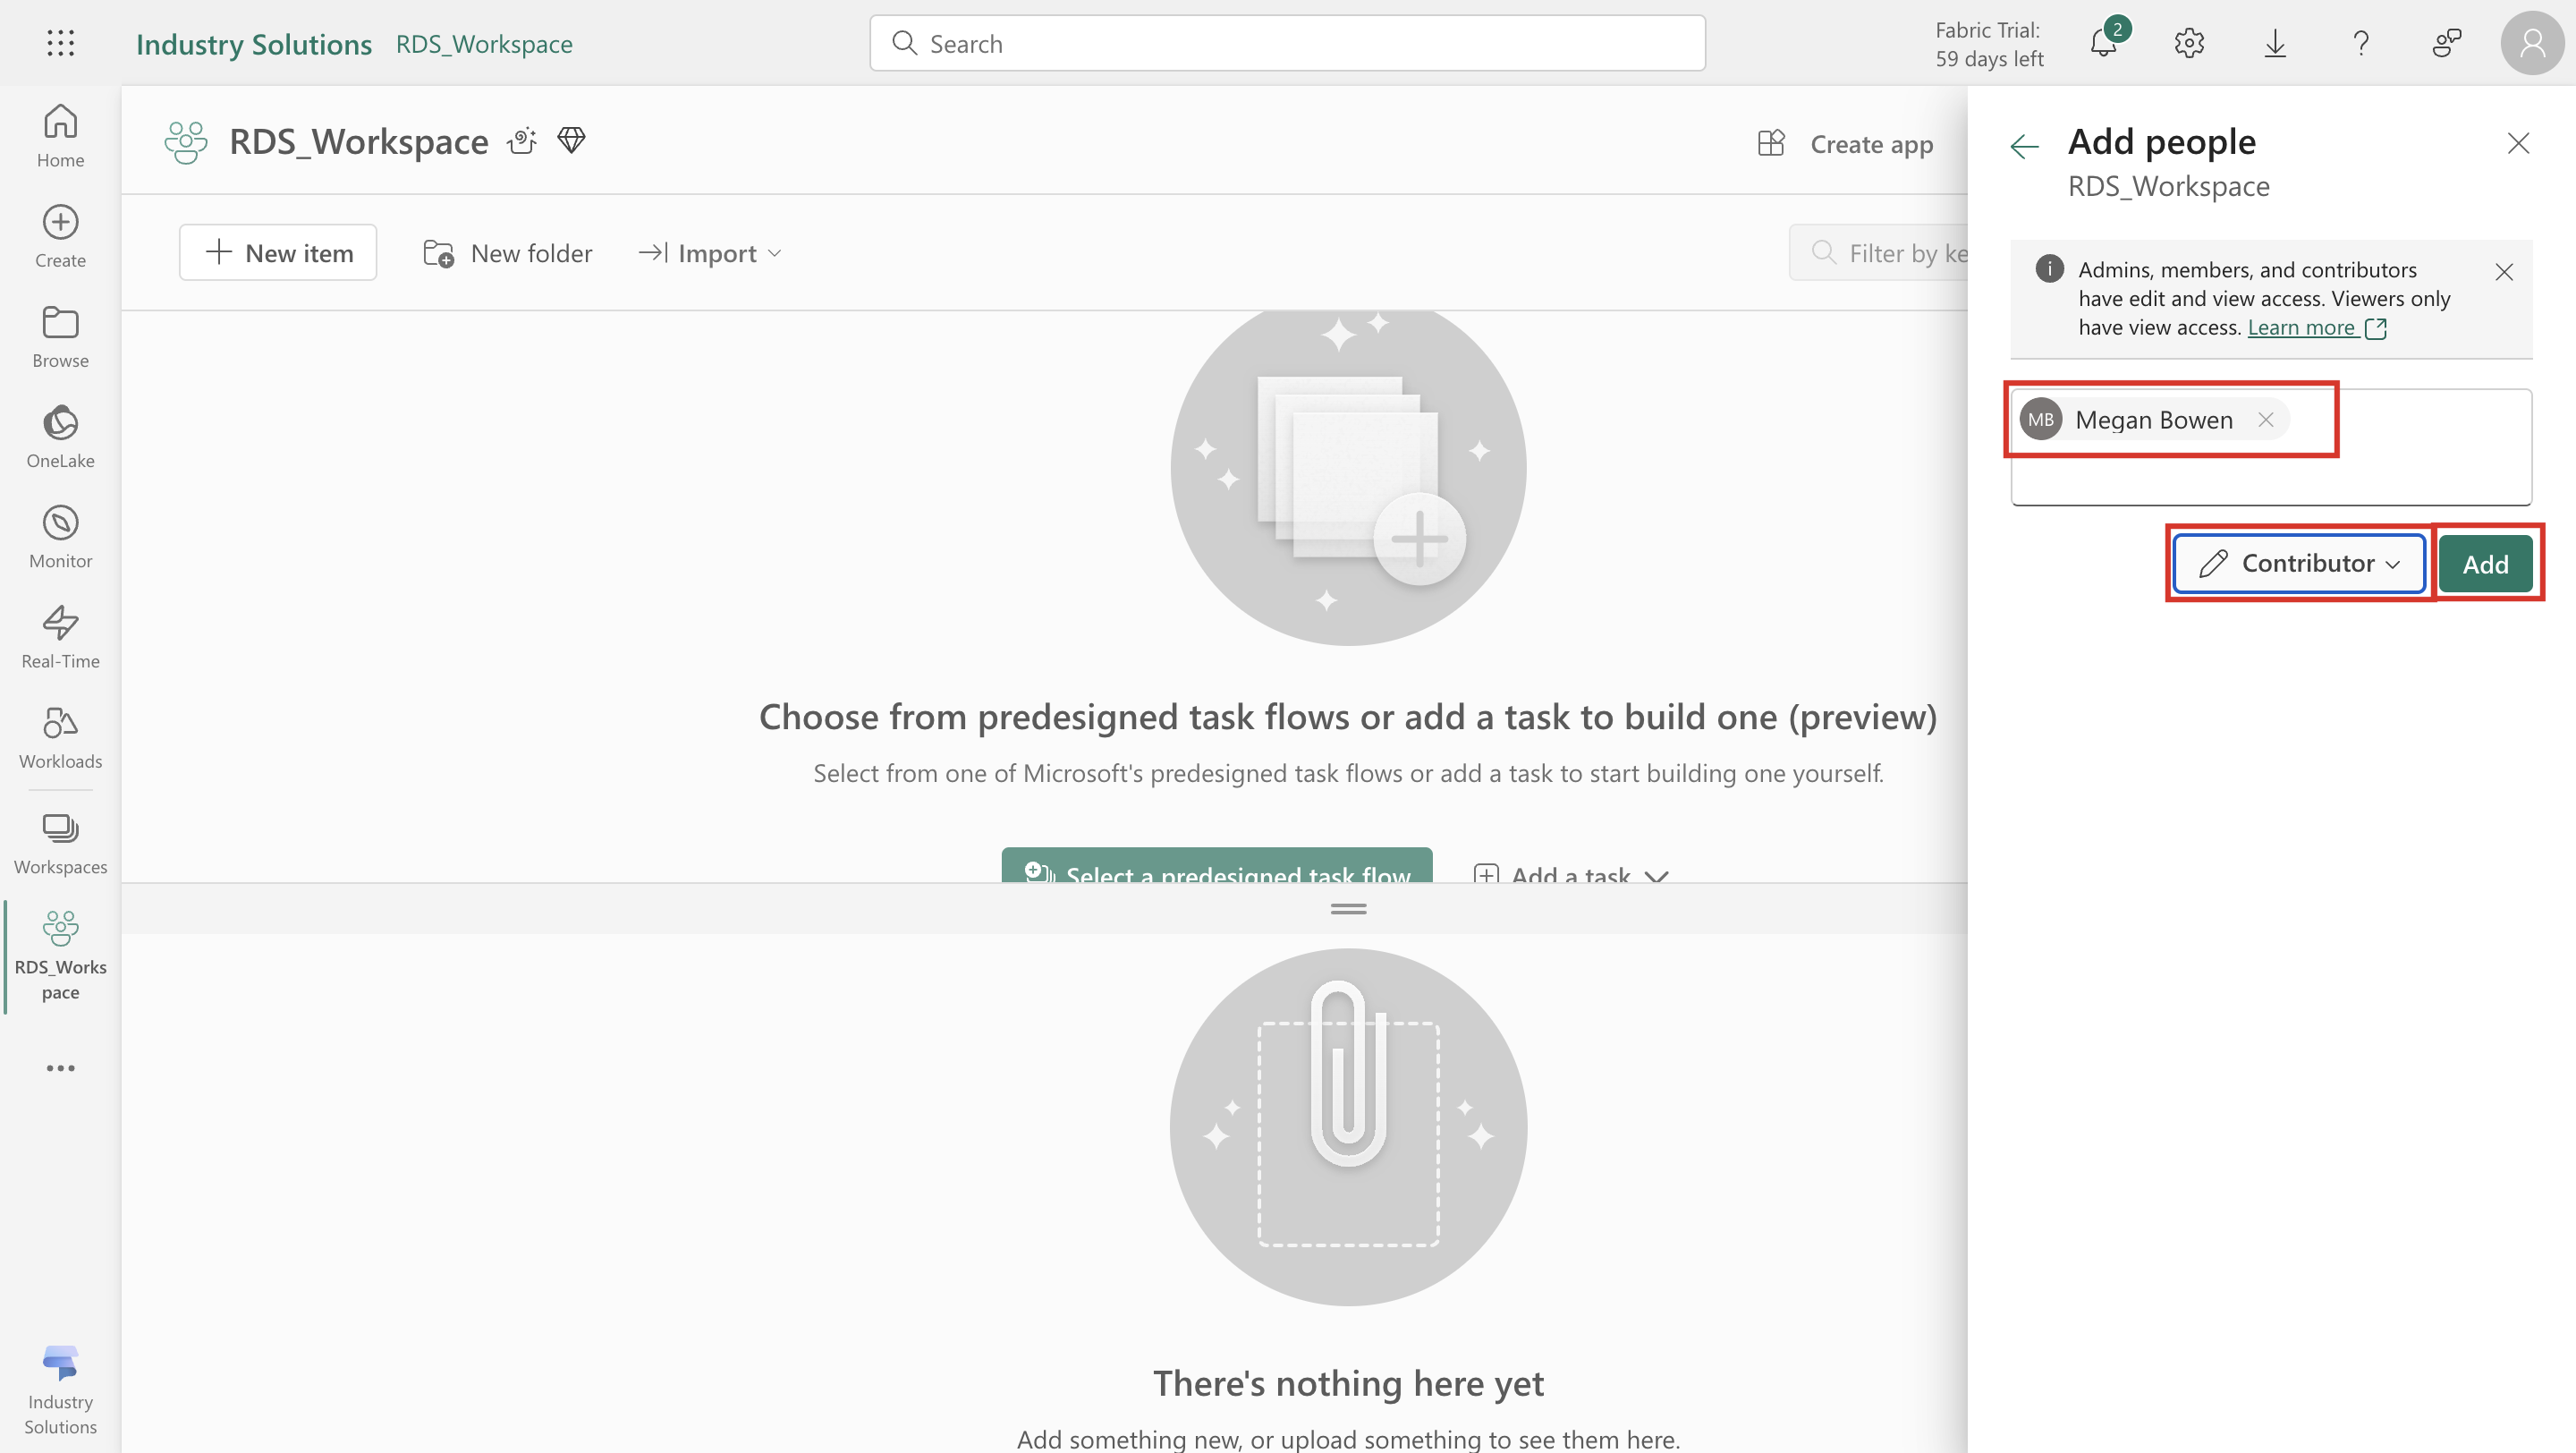
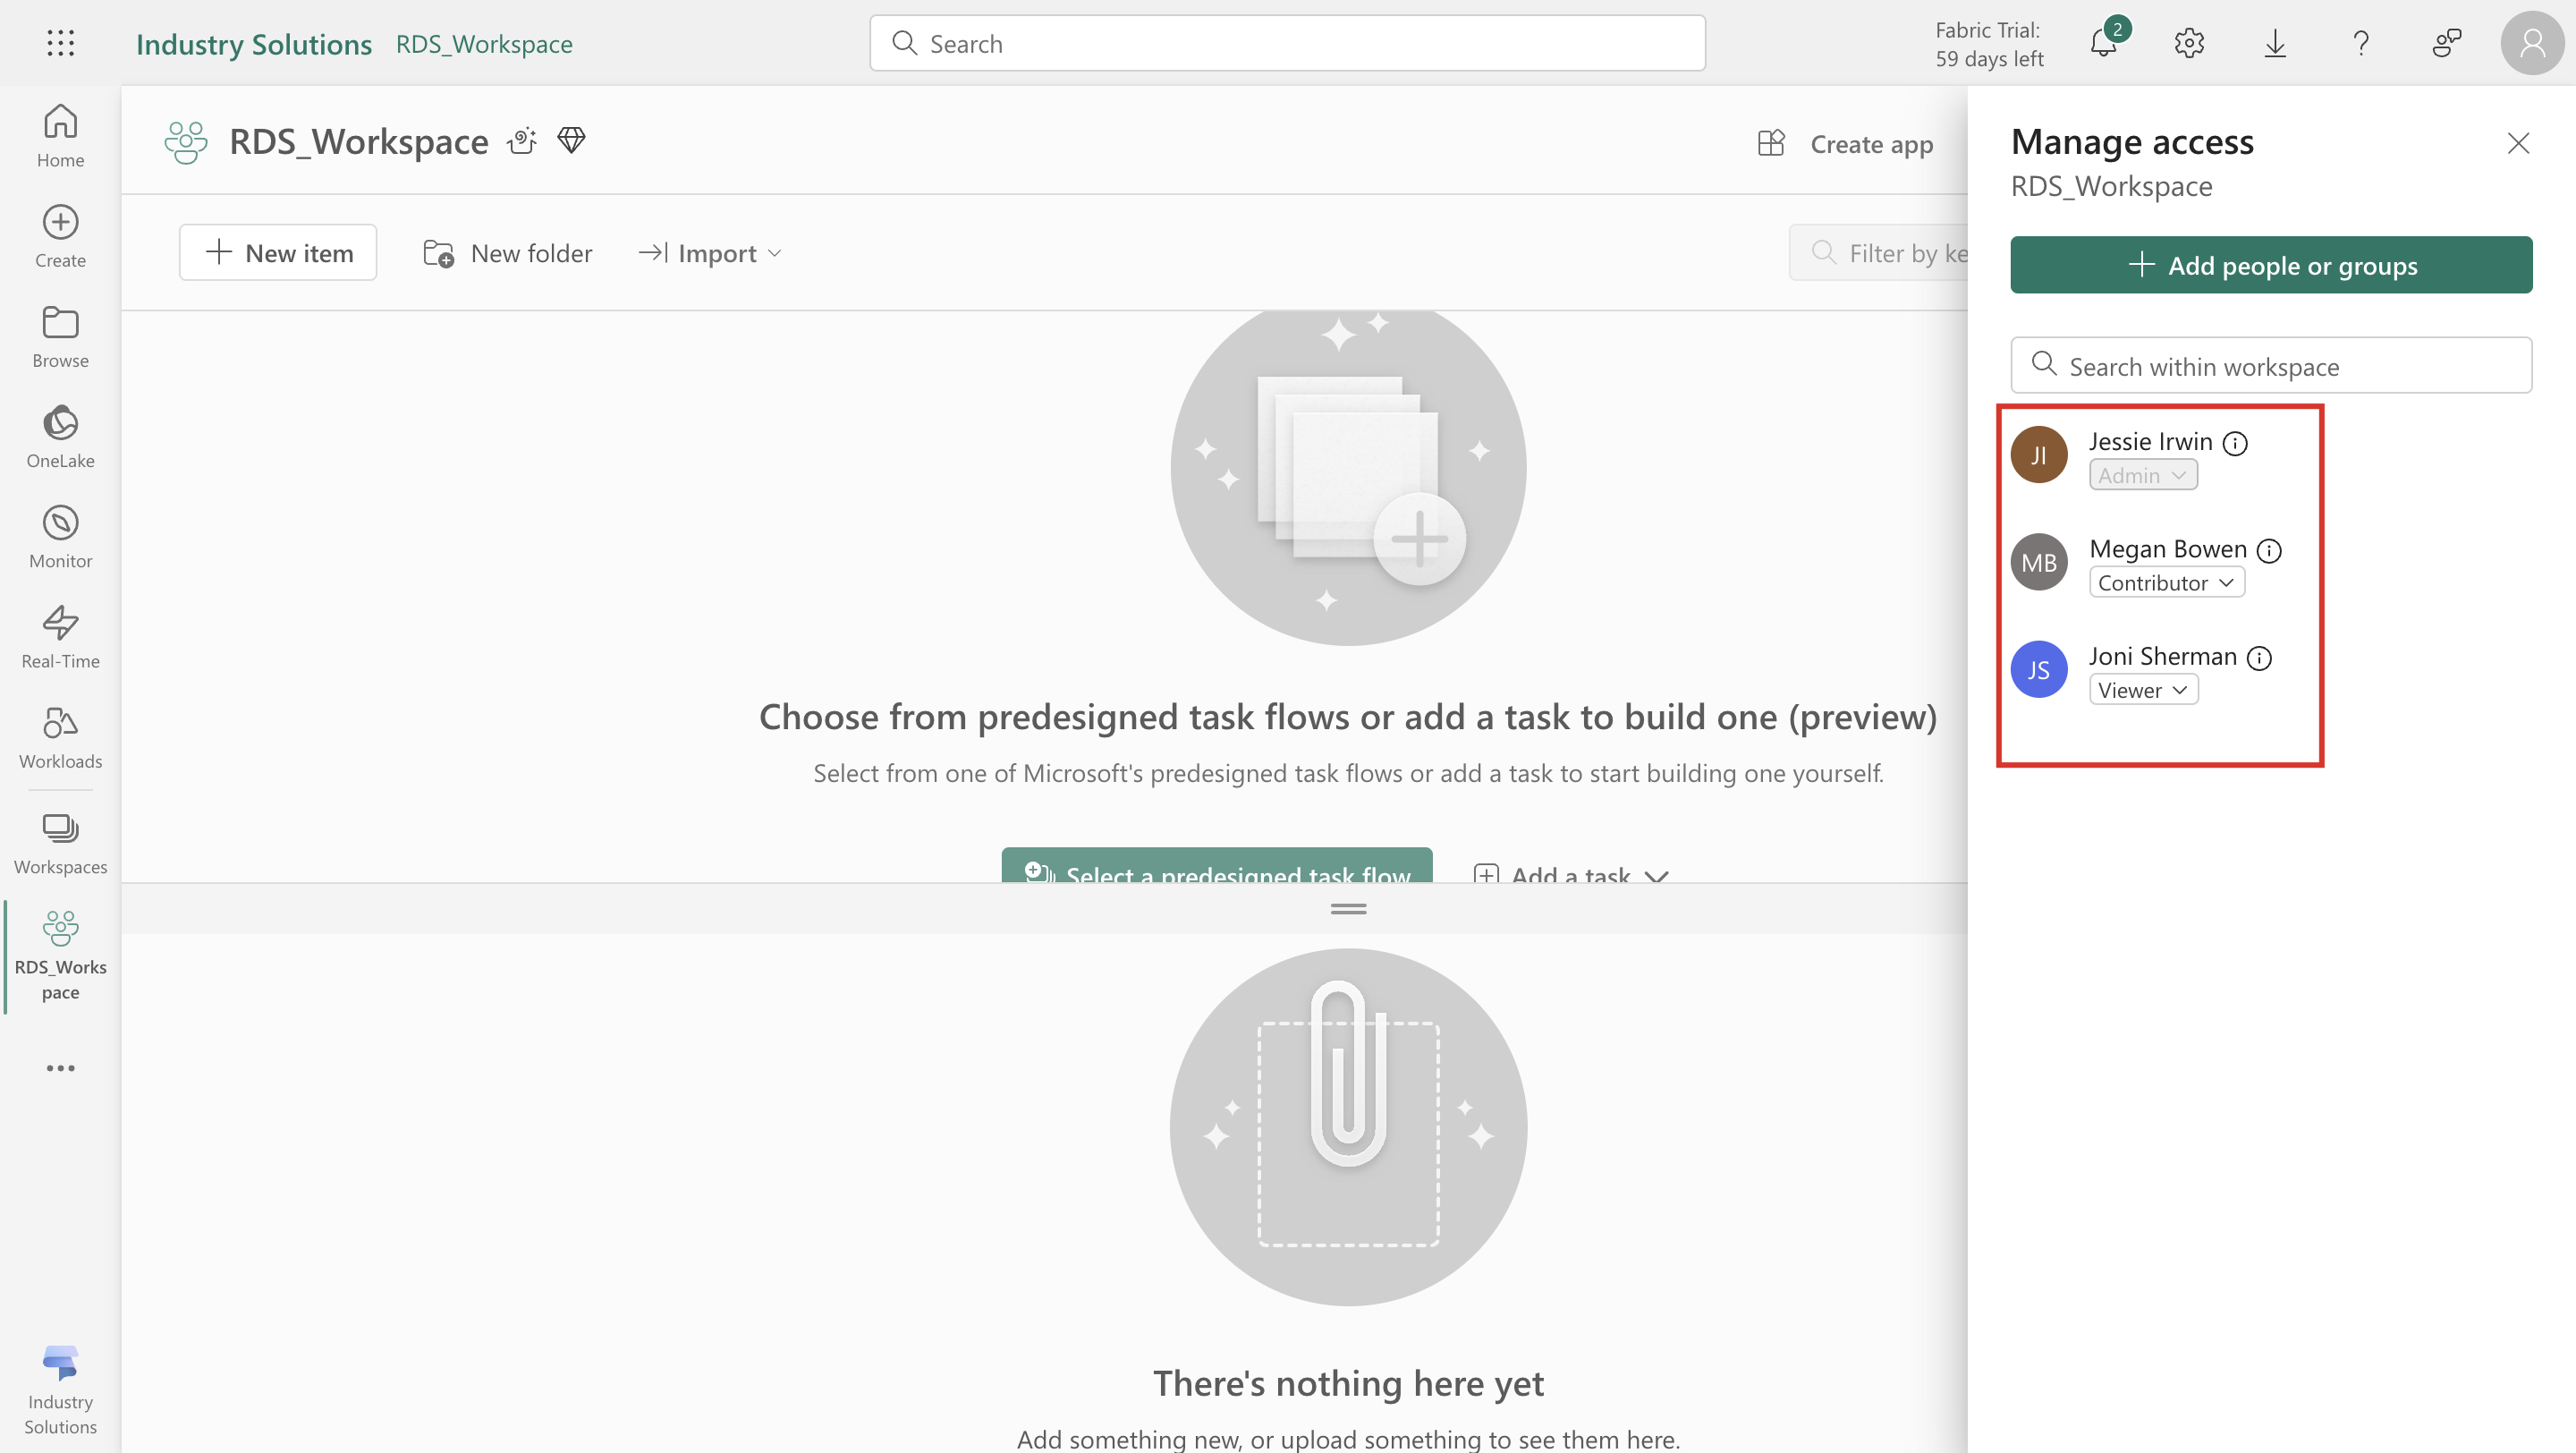
Search for and select Megan Bowen. Change the role to Contributor and then select Add.
Add Joni Sherman as the Viewer and then close the pane.
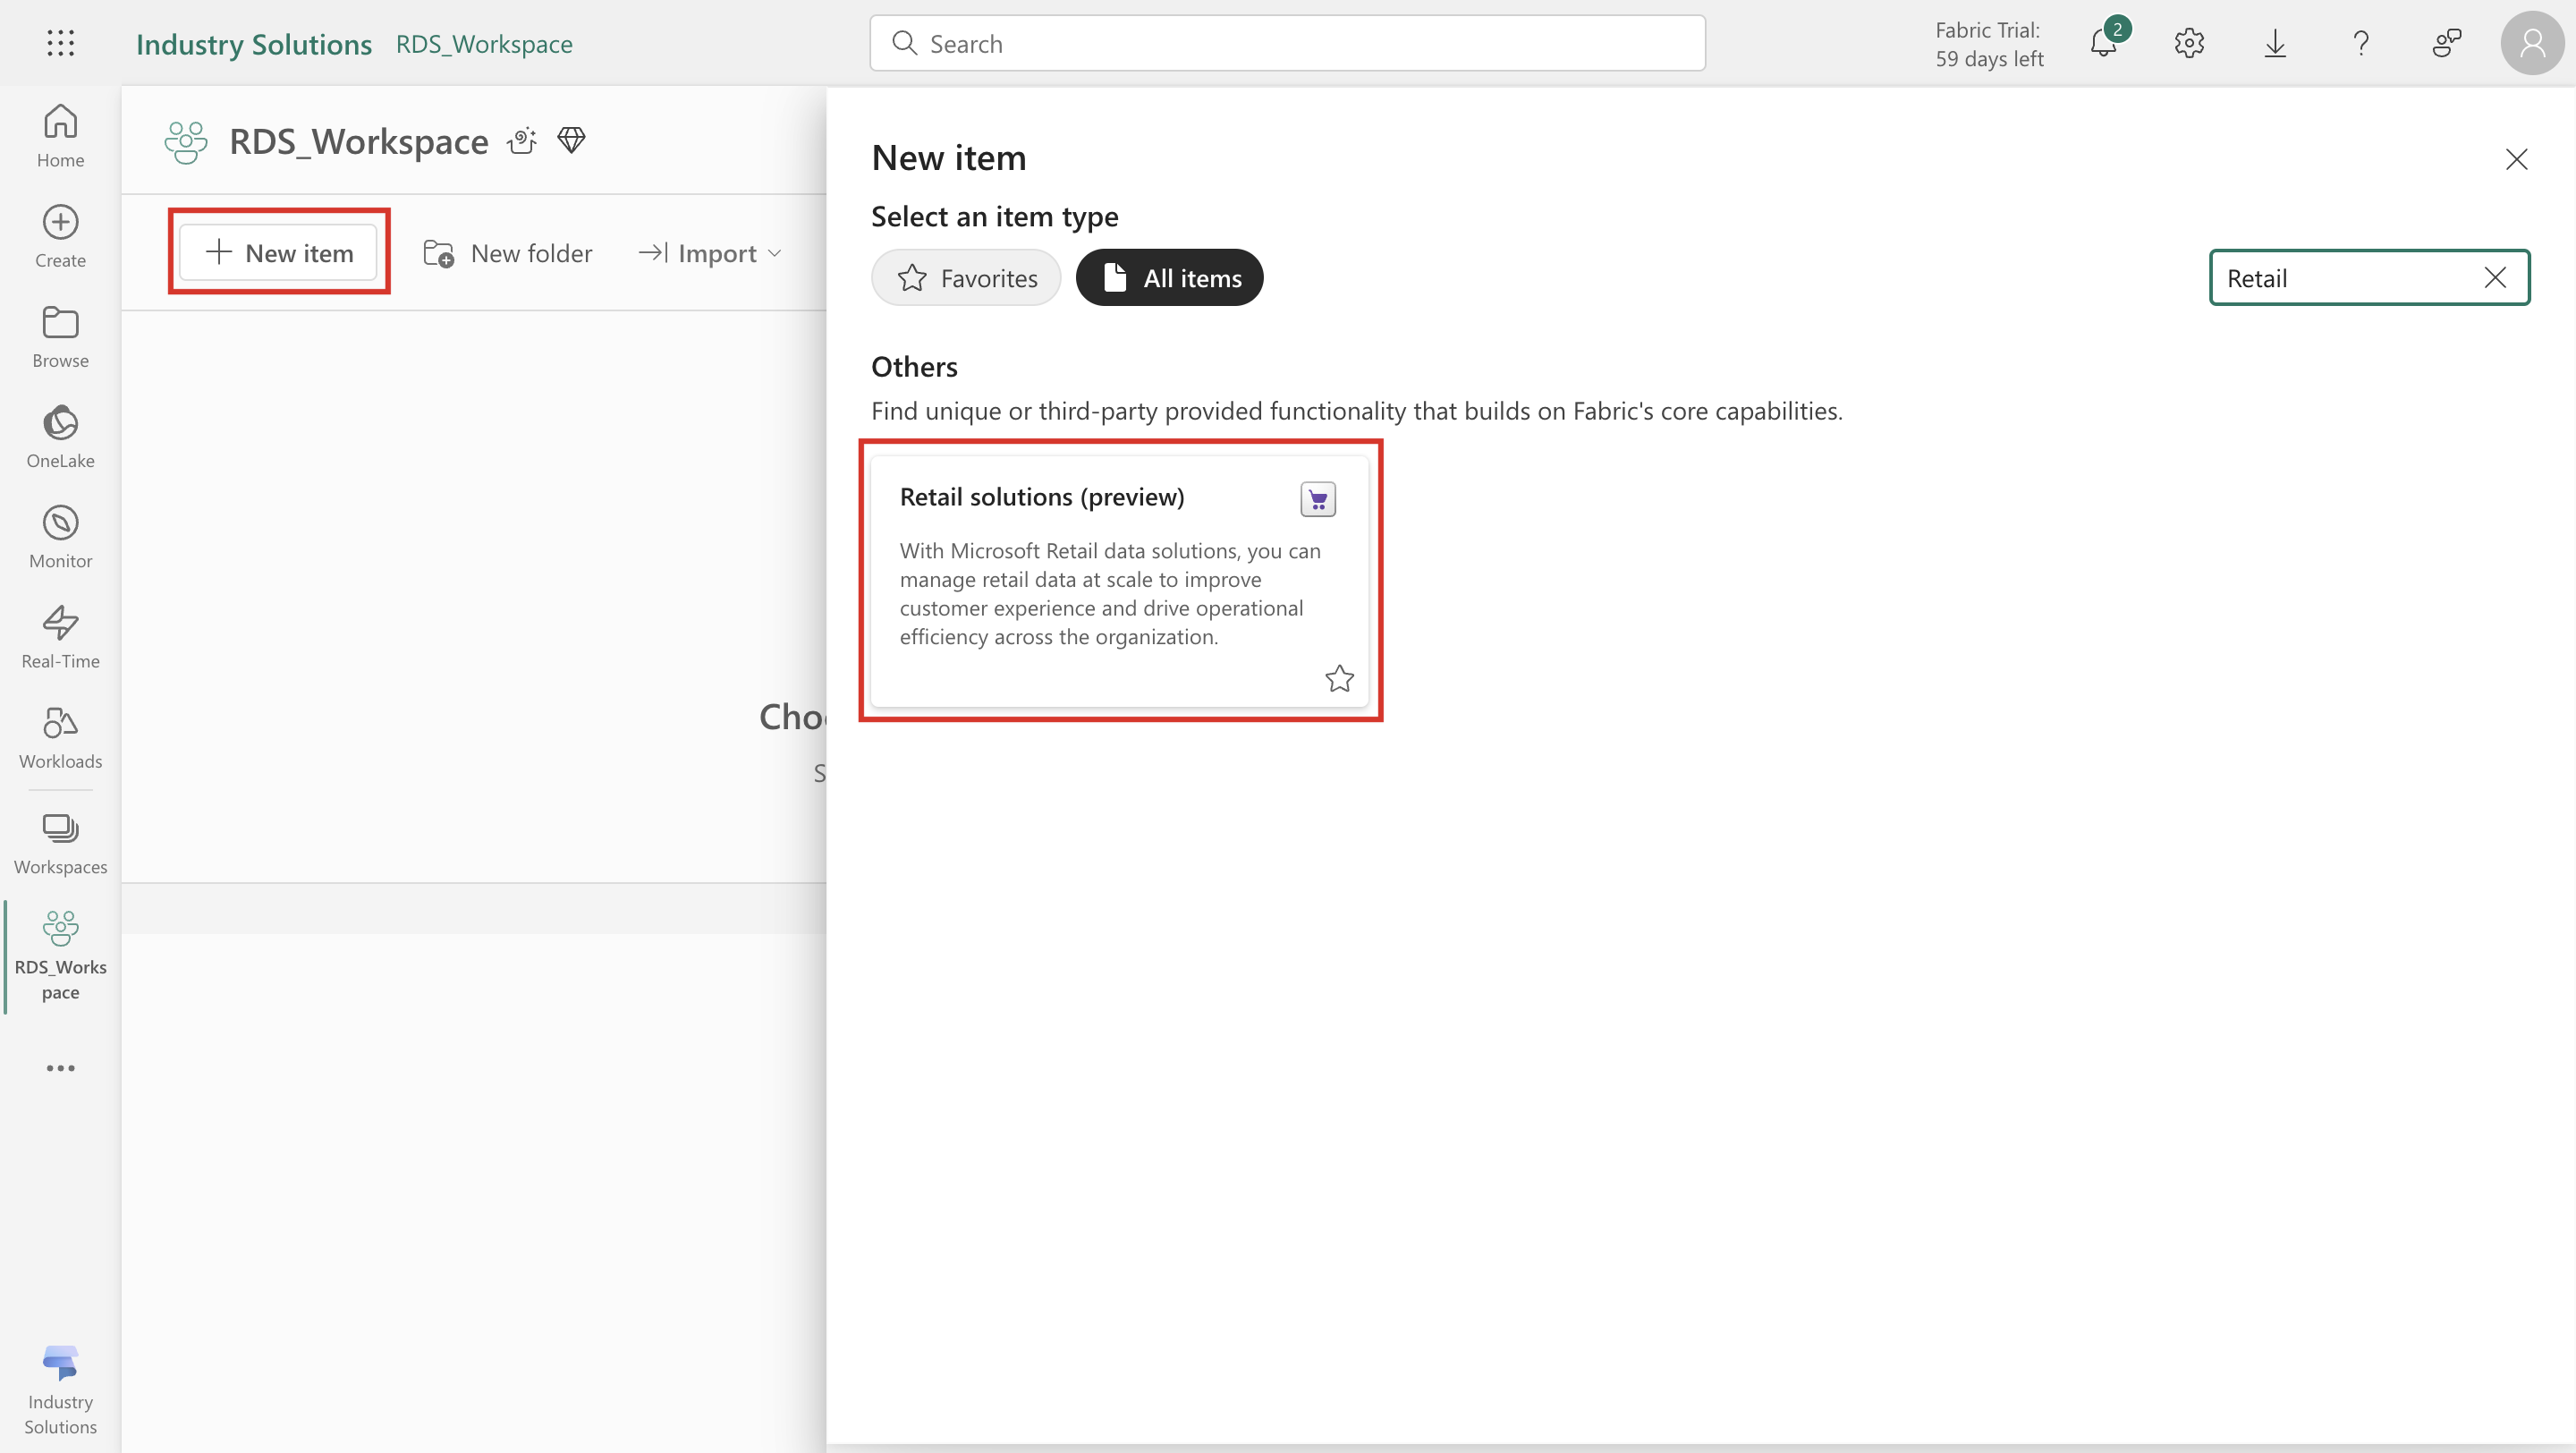
Select the New Item button and from the pane search for and select Retail solutions (preview).
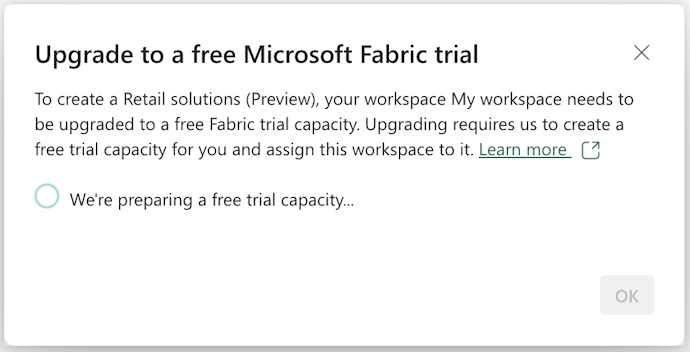
A pop-up window appears, notifying you that your workspace will upgrade to the free Fabric trial capacity.
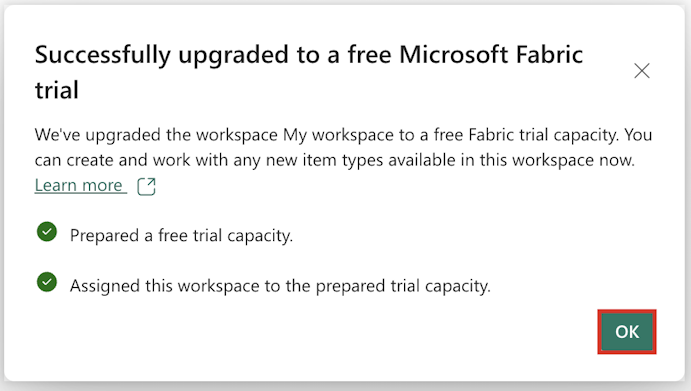
After the upgrade, the pop-up window reflects that your workspace is Successfully upgraded to a free Microsoft Fabric trial.
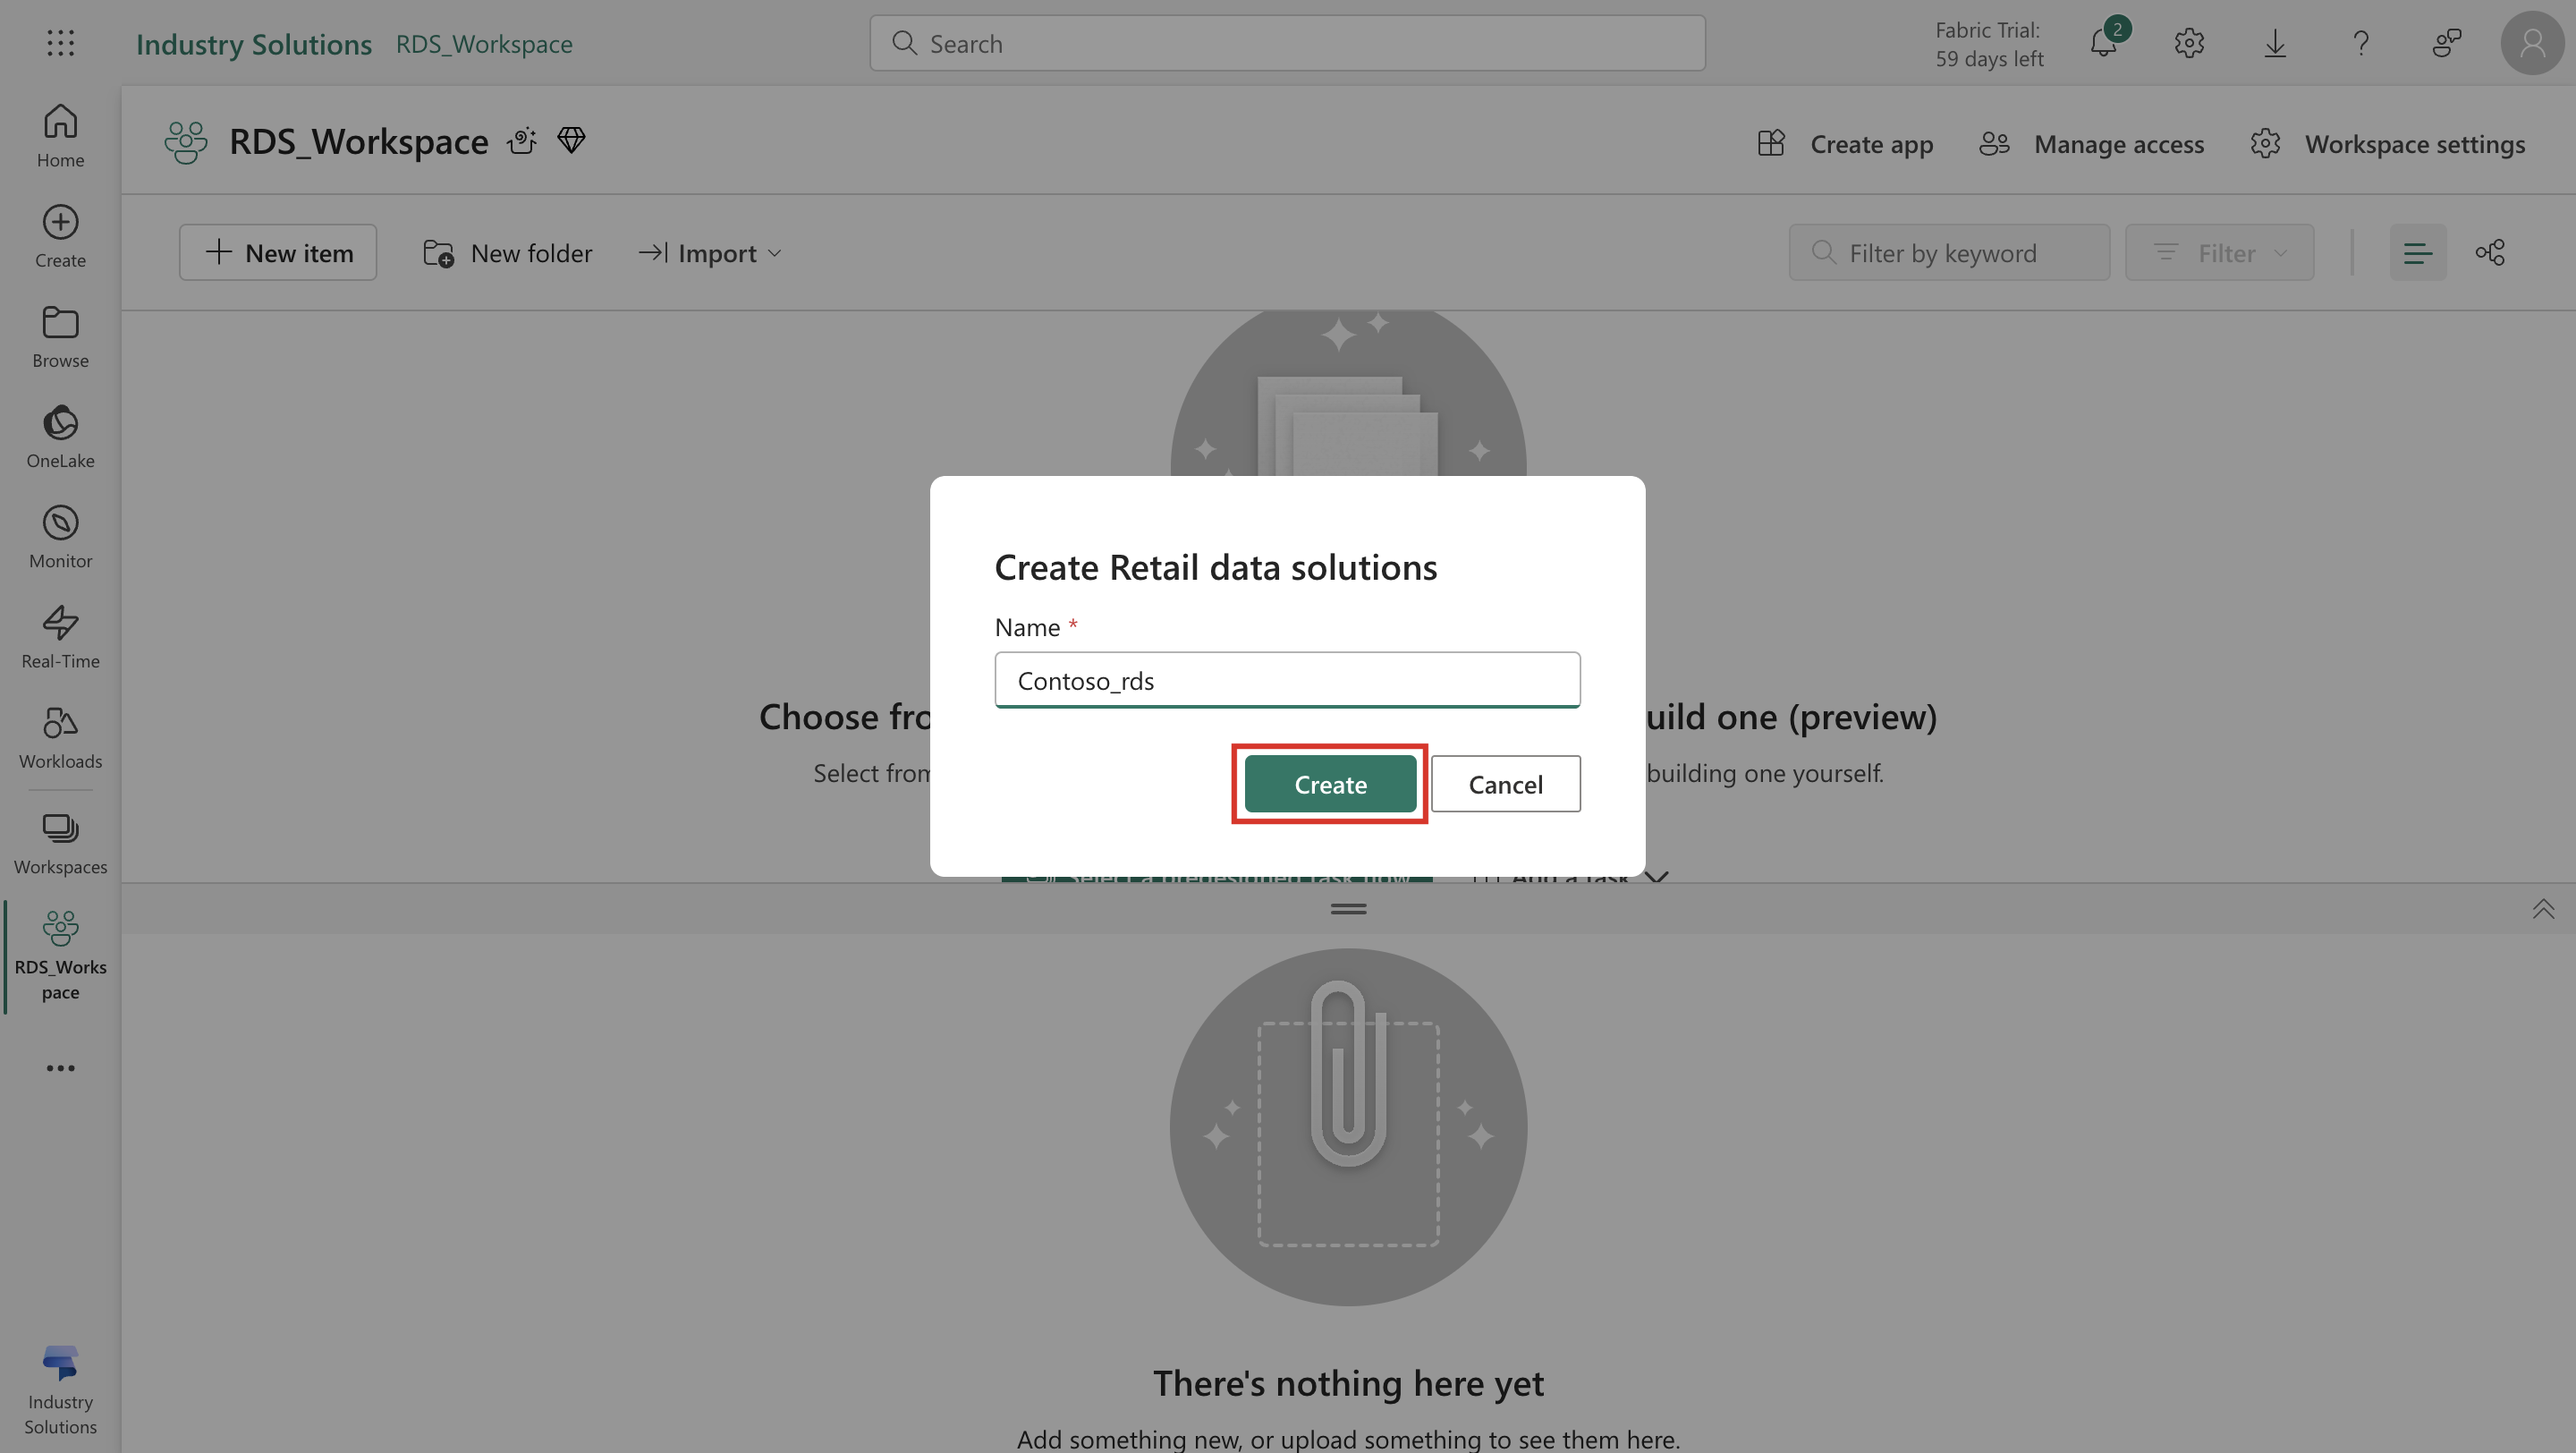
In the Create Retail data solutions pop-up window, enter Contoso_rds as the Name. Select Create.
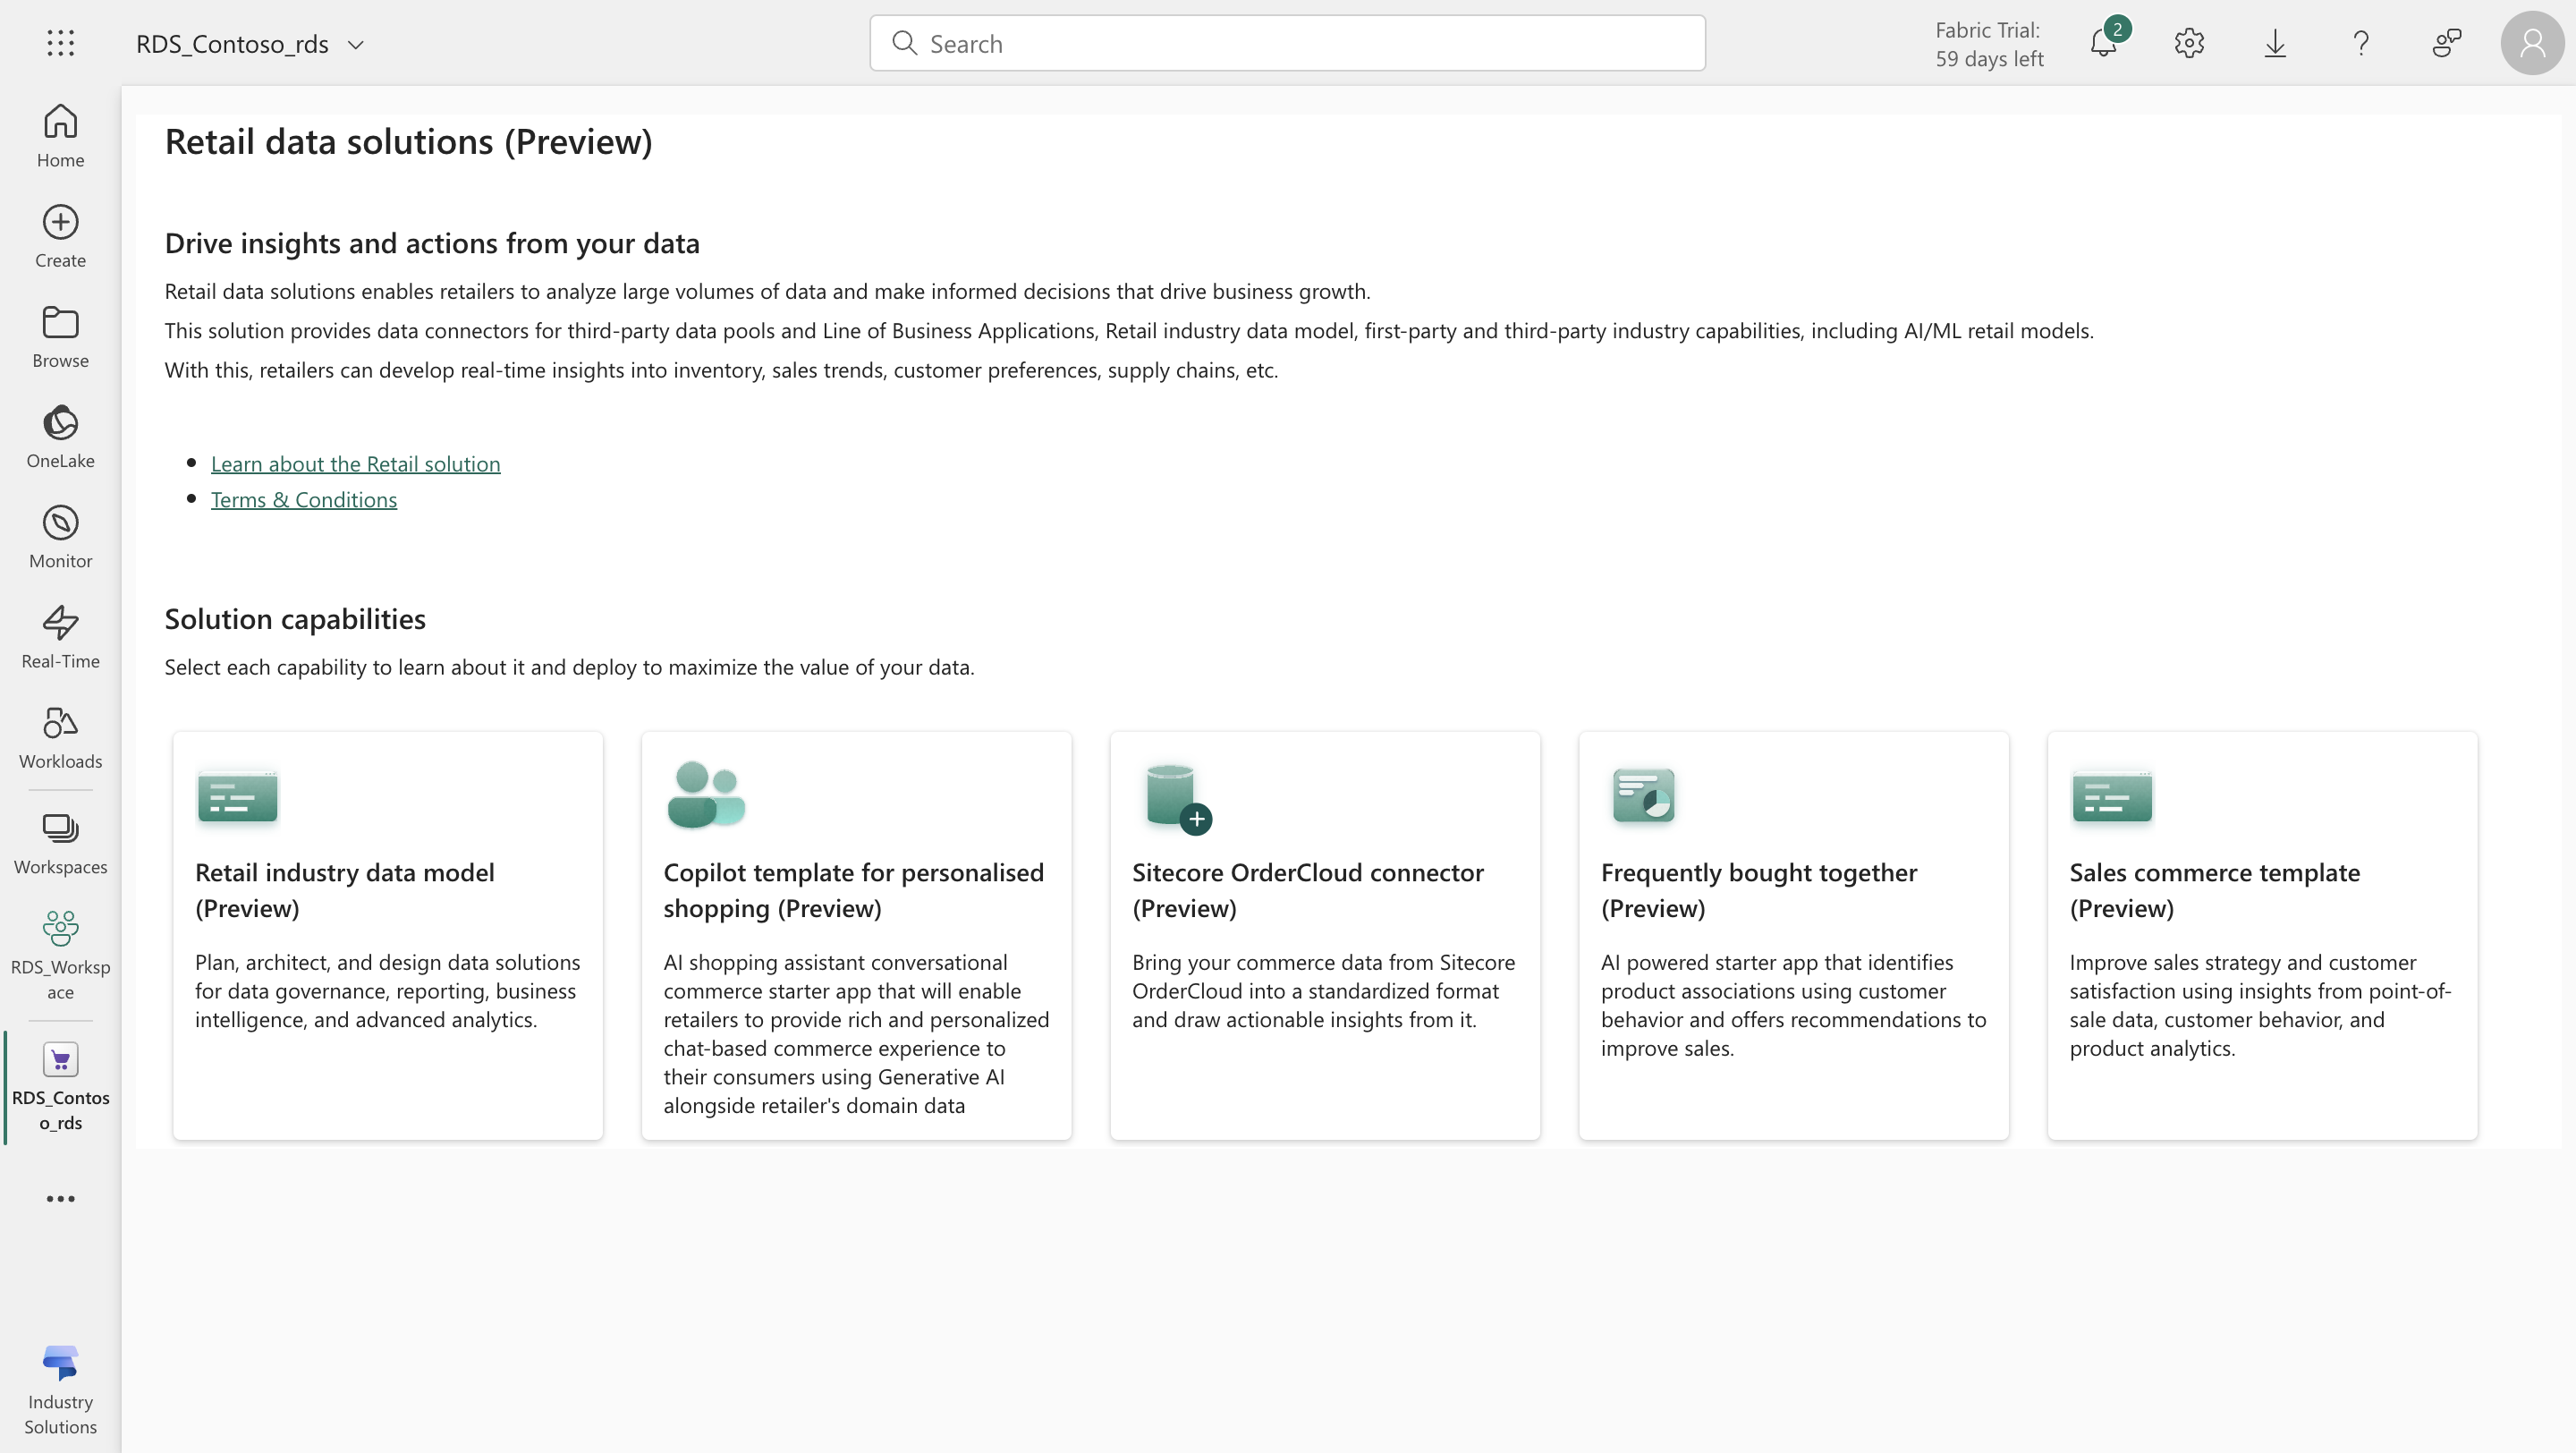
The system redirects you to the Retail Data Manager screen, or RDS_Contoso_rds, where you can view the data solution capabilities that you can deploy.
Congratulations, you successfully deployed Retail data solutions. Now, you can explore the capabilities that are available on top of Retail data solutions.
For more information, see Enable Retail data solutions on your tenant and Deploy Retail data solutions (preview).
