Exercise - Create an Azure Remote Rendering account
You need an Azure Remote Rendering account to access the Remote Rendering service. In this exercise, you use the Azure portal to create a Remote Rendering account. You copy the account ID, account domain, and primary access key to use in the next unit to remotely render a model.
Create the Remote Rendering account
After the sandbox activates, open the Azure portal and select Create a resource.
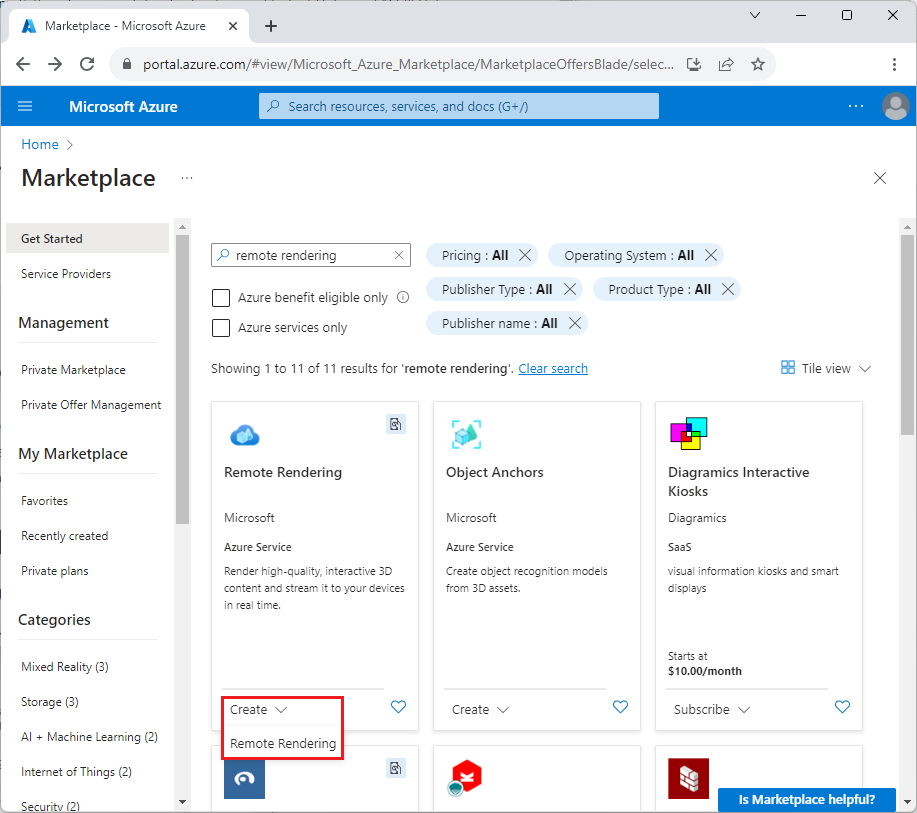
On the Create a resource page, enter remote rendering in the Search box.
On the Marketplace page, at the bottom of the Remote Rendering tile, select Create > Remote Rendering.
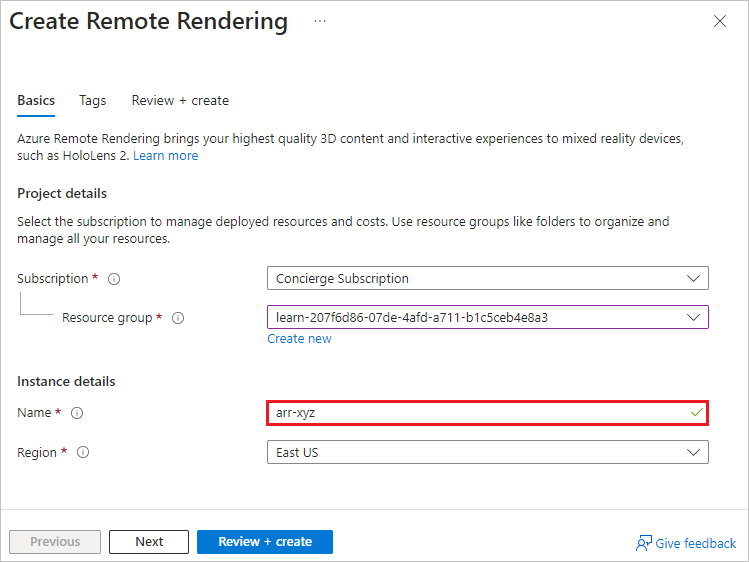
On the Create Remote Rendering page, leave the Subscription field populated with the sandbox subscription name. Drop down the arrow next to Resource group and select the prepopulated sandbox resource group, which is learn- followed by a GUID.
For Name, enter a globally unique name with valid characters a-z, 0-9, and -. Leave Region at the prepopulated value.
Select Review + create at the bottom of the page, and then select Create.
It takes a few seconds for the Remote Rendering account to be created. A notification appears after deployment is complete.
View the subscription keys and endpoint
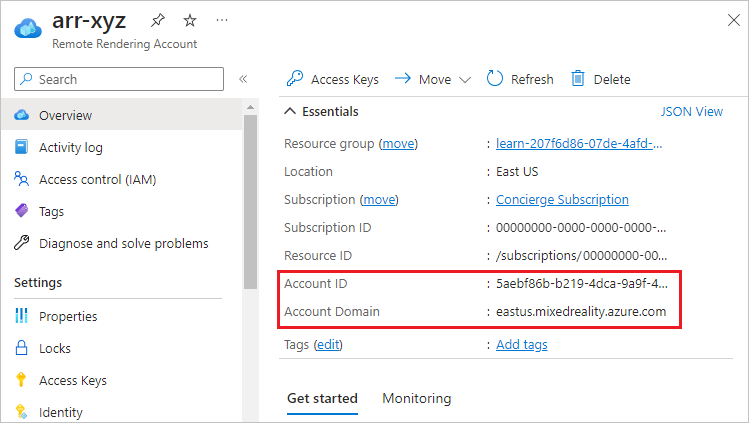
When you see the notification that deployment is complete, select Go to resource.
The Remote Rendering Overview page shows the Account Domain and Account ID. Copy these values to use later in this module.
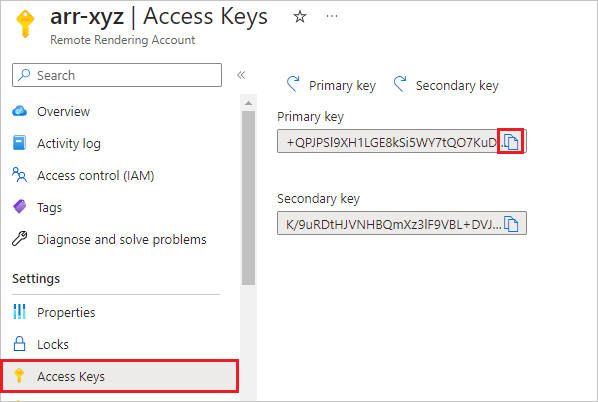
In the left navigation, select Access Keys under Settings.
On the Access Keys page, copy the Primary key value to use later in the module.


