Exercise - Create your Azure SQL database
Here, you set up your database, which includes creating your Azure SQL Database logical server, for your transportation logistics application. In practice, you choose settings that support the kind of app you're building.
Over time, if you realize you need more compute power to keep up with demand, you can adjust performance options or even switch between the DTU (Database Transaction Unit) and vCore (Virtual core) performance models, with little or no interruption.
Note
This exercise requires you to use your own Azure subscription. To make sure you don't incur extra charges, clean up any resources you create after you finish this module.
Sign in to the Azure portal.
From Home, under Azure services, select Create a resource.
In the Create a resource pane, Under Categories, select Databases and in the results, select SQL Database.
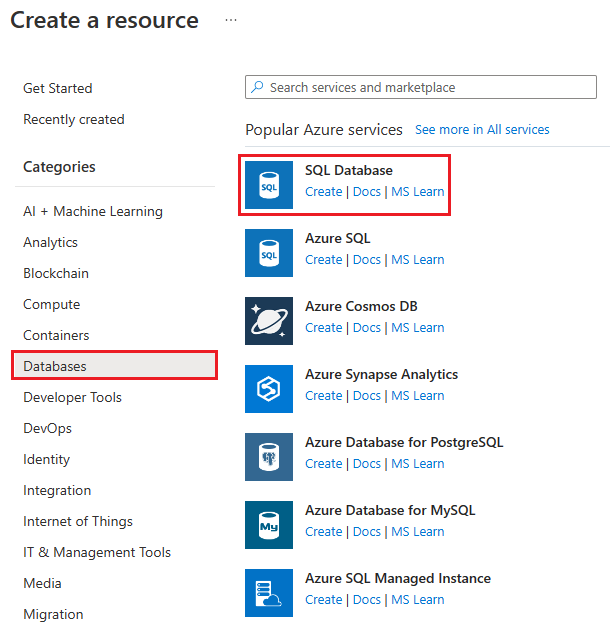
The Create SQL Database pane appears.
Note
You might see the Want to try Azure SQL Database for free? banner at the top of the page if your subscription is eligible. The free offer provides 100,000 vCore seconds of compute in the vCore General Purpose purchasing model for the lifetime of your subscription. Select Apply offer to take advantage of this offer. You can use this Azure SQL Database offer as part of this exercise. For more information, see Try Azure SQL Database free of charge.
On the Basics tab, enter the following values for each setting.
Setting Value Project details Subscription Select your subscription. Resource group Select an existing resource group or select Create new. For this training exercise, create a new resource group to make cleanup easy. Database details Database name LogisticsServer [See step 5] Want to use SQL elastic pool? No Workload environment For this training exercise, select Development. Compute + storage [See step 6] Backup storage redundancy Backup storage redundancy To minimize costs in this training exercise, select Locally-redundant backup storage, which wouldn't be appropriate for your production app database. Under Server, select Create new. The Create SQL Database Server pane appears. Enter the following values for each setting:
Setting Value Server name Enter a globally unique server name. Location Select a region near you. Authentication Method For this training exercise, choose Use SQL Authentication. For a production application, Microsoft Entra is a more robust and secure method. Server admin login Choose a unique admin login that serves as your primary administrator login ID. Password Provide a strong password. Select OK.
In the Database details section, for Compute + storage, select Configure database. The Configure pane appears. Enter the following values for each setting:
Setting Value Service and compute tier Service tier If you used the free Azure SQL Database offer, leave the default settings.
If not, in the Service tier dropdown list, under DTU-based purchasing model, select Basic.
You can scale up or down the service and compute tier of your database at any time in the future.Behavior when free limit reached If you used the free Azure SQL Database offer, leave this set to Auto-pause the database until next month for now. You can configure this setting later. Remaining settings Accept defaults Select Apply.
Select the Additional settings tab at the top of the screen, and enter or confirm the following values for each setting.
Setting Value Data source Use existing data For this training exercise, select None. Optionally, to start with the AdventureWorksLTsample dataset, choose Sample.Database Collation Collation SQL_Latin1_General_CP1_CI_AS Maintenance window Maintenance window System default (5pm to 8am) In the Tags tab, consider assigning Azure tags to all your Azure assets. For example, create the "Owner" or "CreatedBy" tag to identify who created the resource. Also, create the "Environment" tag to identify whether this resource is in production or development, etc. For more information, see Develop your naming and tagging strategy for Azure resources.
Select the Review + create tab to validate your entries and review the cost.
Select Create to create your Azure SQL database.
Important
Remember your server name, admin login, and password for the next exercise.
While deployment is in progress, Deployment details displays the resources that are created. When deployment completes, optionally, select Pin to dashboard, then select Go to resource. The Overview pane for your SQL database server appears. Your Azure SQL database is now up and running!
Set the server firewall
There are many options that you can use to configure, secure, monitor, and troubleshoot your database. You can specify which systems are allowed to access your database through the firewall.
Important
Initially, the firewall prevents all access to your database server from outside of Azure.
For this training exercise, you only need access to the database from your local computer. Later, you can add more systems, such as your mobile app.
For now, let's enable your computer to access the database through the firewall.
On the Overview page for your SQL database, select Set server firewall. The Networking pane appears.
Tip
The Set server firewall option appears on the database Overview page. From the logical Azure SQL server, select Networking under Security from the service menu.

Under Public network access, choose Selected networks.
Under Firewall rules, select Add your client IP4 address. This action automatically adds the IP address for your computer.
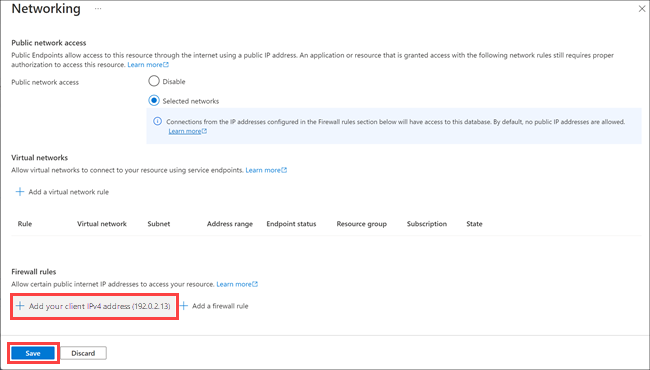
Select Save.
Now you can get some hands-on practice with your new database and with Azure Cloud Shell. In the next unit, you connect to the database, create a table, add some sample data, and execute a few SQL statements.