Exercise - Deploy Azure Firewall
In this unit, you'll create the firewall in its own virtual network. Then, you'll peer that virtual network with the virtual network used by your Azure Virtual Desktop.
Create a virtual network and subnet for Azure Firewall
Create a virtual network that acts as the central connectivity point or hub for Azure Firewall.
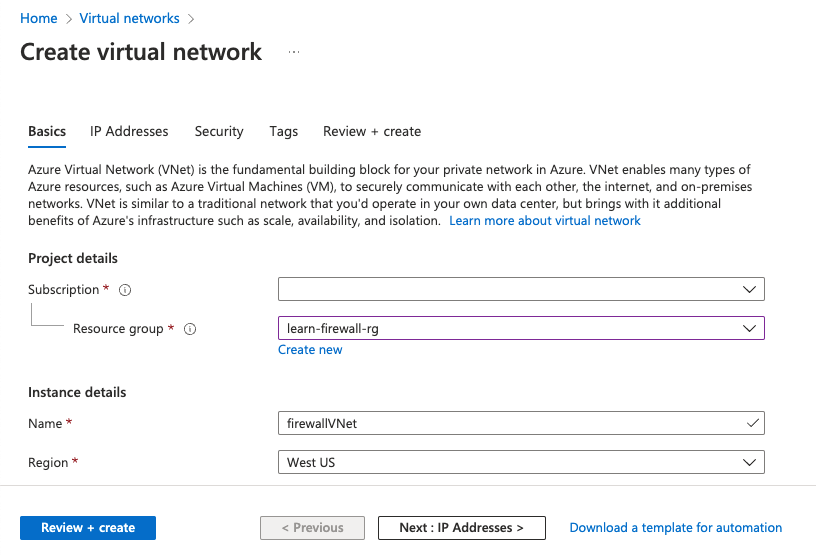
In the Azure portal, search for and select Virtual networks.
Select + Create.
Enter the following information:
Field Value Subscription Your subscription Resource group learn-firewall-rg Name firewallVNet Region Same region as your resource group 
Select the IP Addresses tab at the top of the screen.
Change the address from 10.0.0.0 to 10.1.0.0.
Under Subnets, select the Default link.
Select Azure Firewall in the Subnet purpose drop-down.
Change the Starting address to 10.1.0.0.
Leave the rest of the values as the defaults.
Select Save.
Select Review + create and wait for validation to pass.
Select Create.
After the deployment is complete, select Go to resource.
Peer virtual networks
Connect the hub virtual network with the virtual network used by the host pool by peering them.
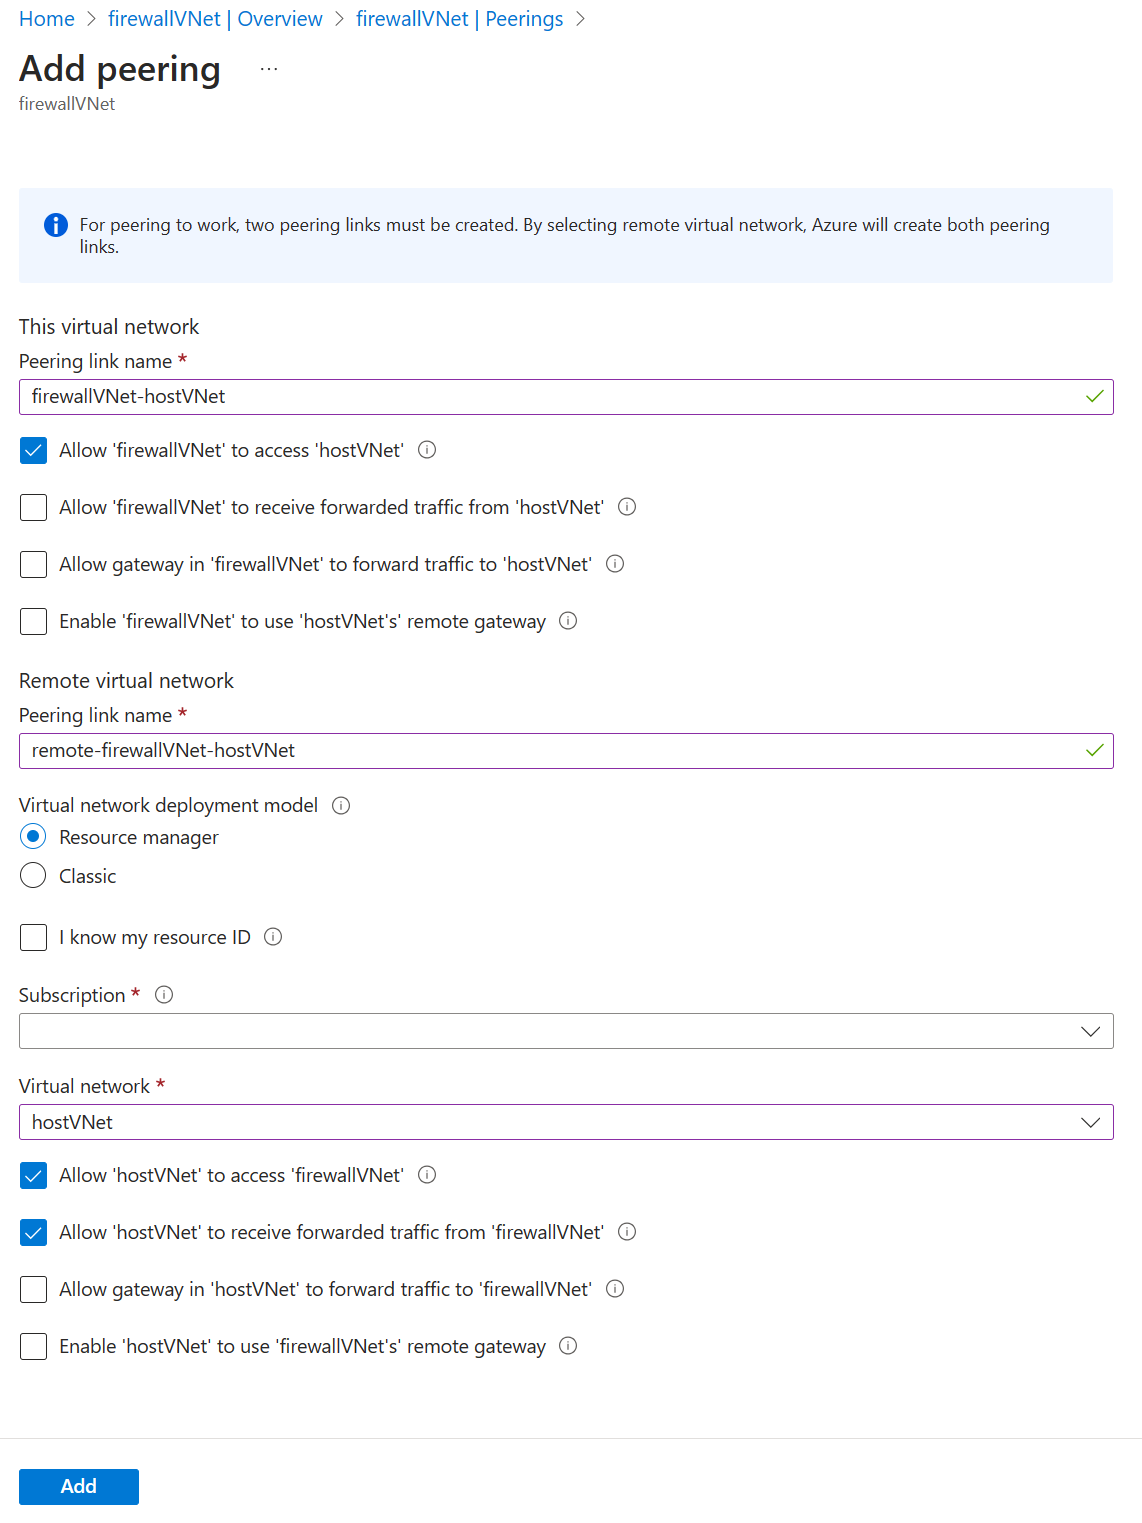
In firewallVNet, under Settings, select Peerings.
Select + Add.
Enter the following information:
Field Value This virtual network: Peering link name firewallVNet-hostVNet Remote virtual network: Peering link name remote-firewallVNet-hostVNet Subscription Your subscription Virtual network hostVNet Select Allow 'hostVNet' to receive forwarded traffic from 'firewallVNet'.

Use the default values for the rest of the fields.
Select Add.
Deploy Azure Firewall
Now that you have the virtual networks created and peered, deploy Azure Firewall.
In the Azure portal, search for and select Firewalls.
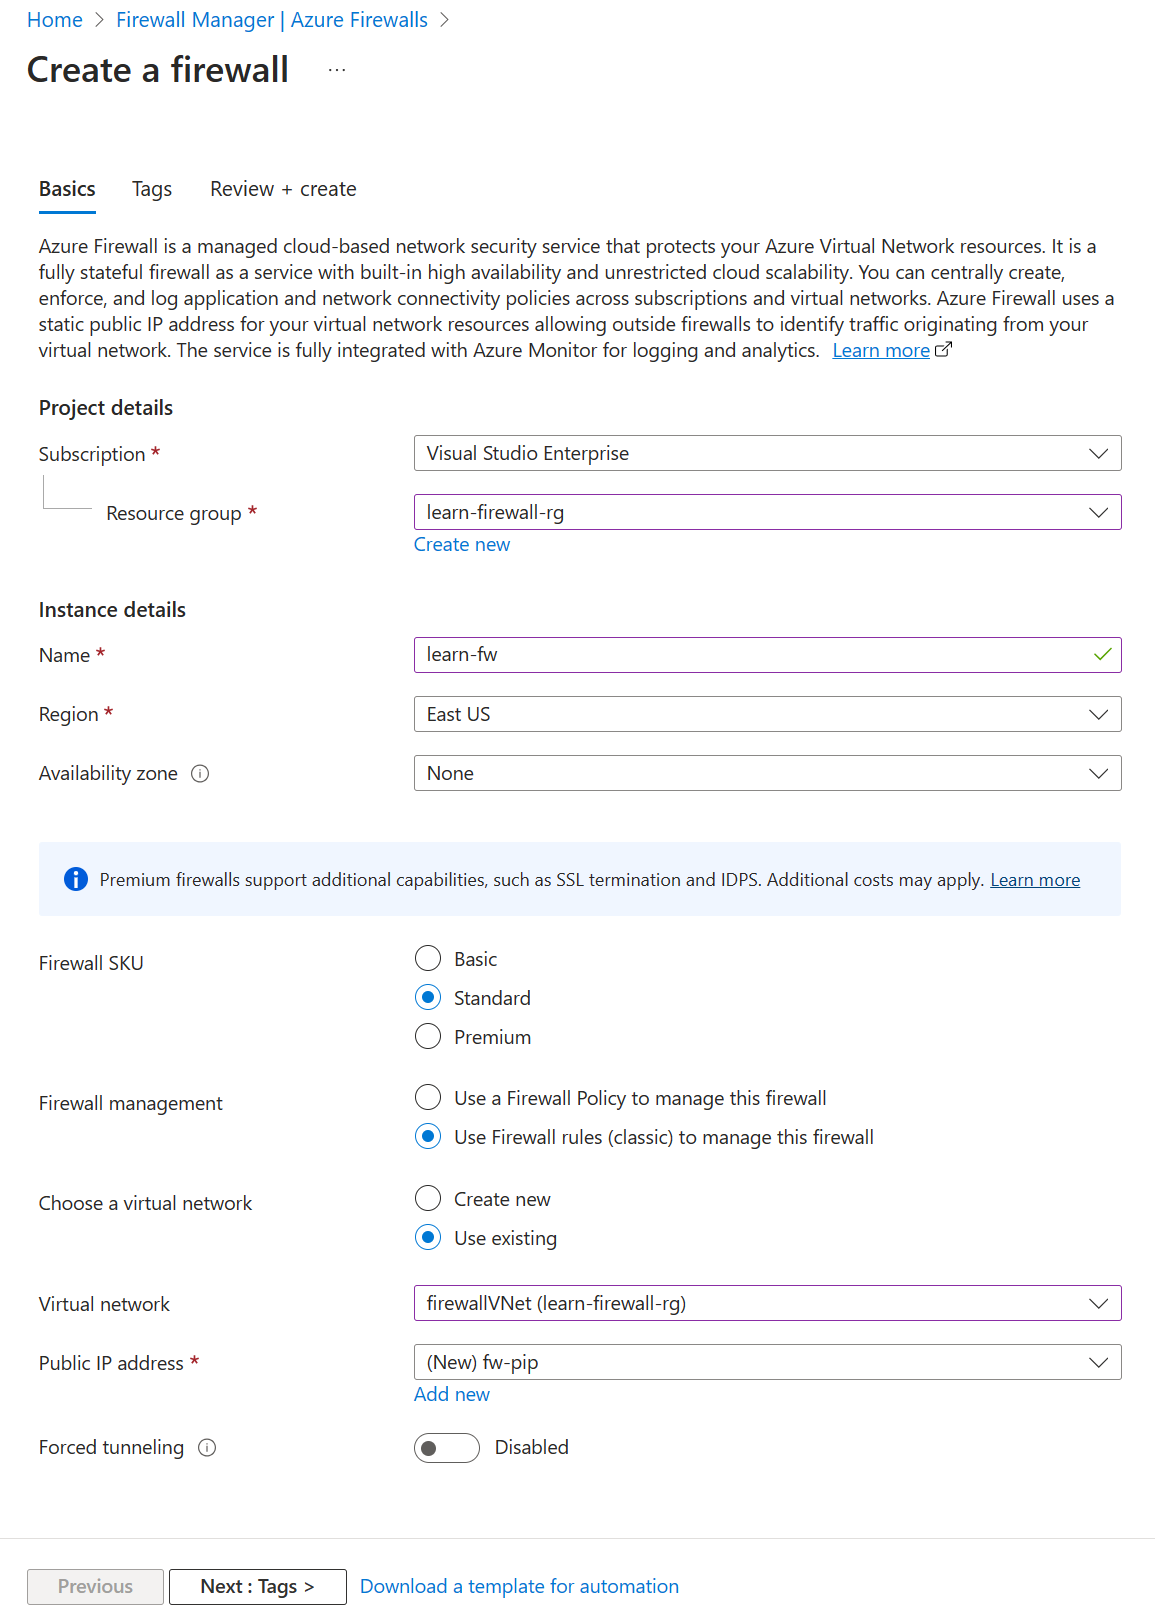
Select + Create to create a firewall.
Enter the following information to configure the firewall:
Field Value Subscription Select your subscription Resource group learn-firewall-rg Name learn-fw Region Select the same location that you used previously Firewall SKU Standard Firewall management Use Firewall rules (classic) to manage this firewall Choose a virtual network Use existing: firewallVNet Public IP address Add new
Name: fw-pipUse the default values for the rest of the fields.

Select Review + create.
Select Create.
Wait a few minutes for the firewall to deploy.
Check your work
At this point, you have a firewall deployed within its own virtual network, and you've peered that virtual network with the host pool virtual network. Let's take a look at the firewall to copy the private and public IP addresses. You need those IP addresses in the next exercise unit.
