Configure a server with answer files
You decide to automate the post-installation configuration for Windows Server servers being deployed in Contoso. You can use Windows SIM to create answer files that contain the settings you need to complete the configuration of Contoso's Windows Server servers.
What are answer files?
Answer files are .xml text files that contain settings that enable you to customize and automate the deployment process of Windows. Although you can use a text editor to create and edit your .xml files, this can be challenging. So, it's usually easier to download and install the Windows Assessment and Deployment Kit, and then use the Windows SIM tool to create and edit your unattend answer files.
Answer files are organized into two sections, as described in the following table.
| Section | Description |
|---|---|
| Components | Contains all the component settings that your answer file applies during setup. This section is further divided into configuration passes, each of which represents a different setup phase. These phases are: windowsPE, offlineServicing, generalize, specialize, auditSystem, auditUser, and oobeSystem. |
| Packages | Defines the packages that are used to distribute updates and language packs. You use this section to enable or disable selected Windows features. |
Tip
When you create your answer file, you can specify to which setup phase to add your settings.
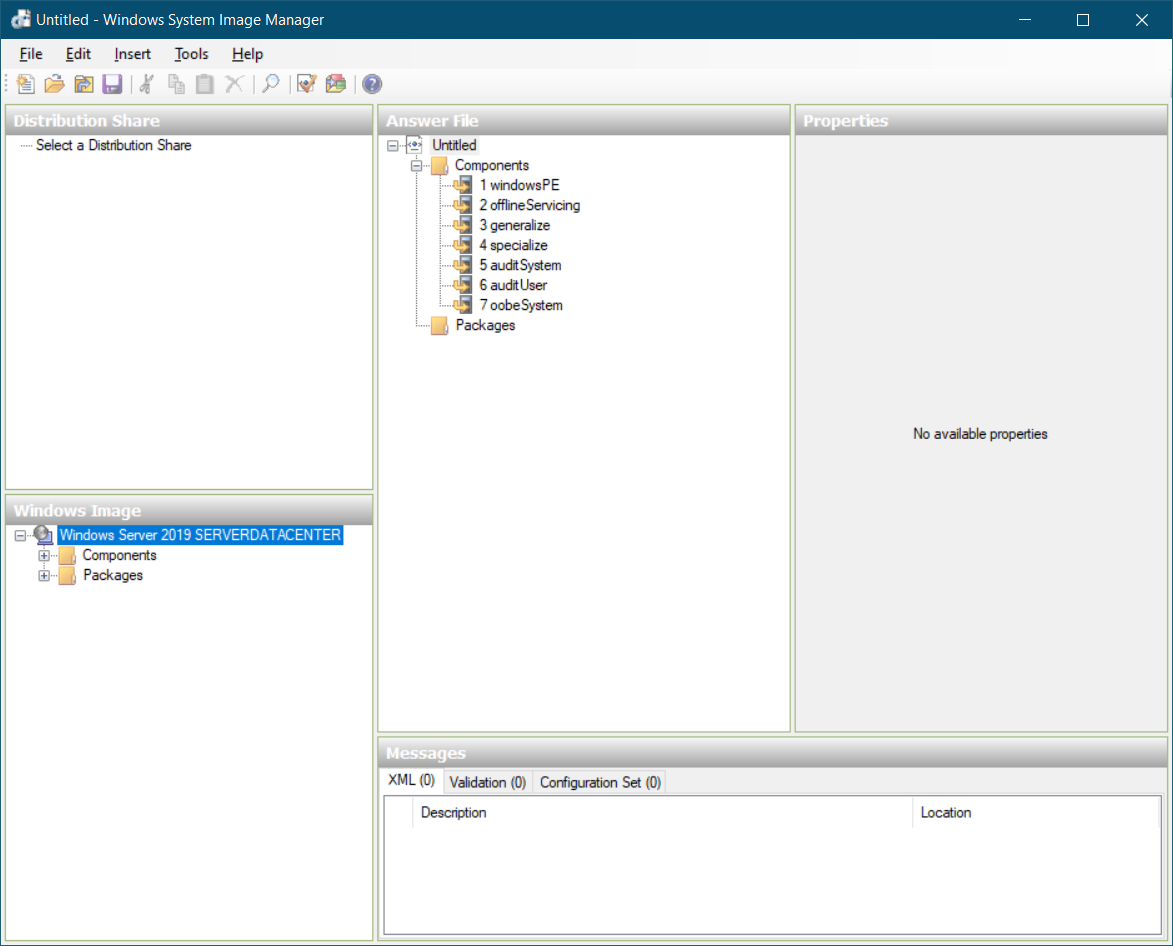
The following graphic displays the default console for an untitled answer file project in Windows SIM.
Important
Most settings that are relevant to post-installation configuration reside in the specialize installation phase.
Create and distribute answer files
The first step in creating answer files is to download the Windows ADK and perform a custom installation. When prompted, choose the Deployment Tools option (which includes Deployment Image Servicing and Management (DISM) tools, Windows SIM, and related components).
Then, use the following procedure:
Open Windows SIM. From the menu, select File and then select New Answer File.
In the Windows System Image Manager dialog box, select Yes when prompted to open a new Windows image now.
Browse and locate an image file.
Tip
You can use the install.wim image file from the Windows Server product DVD (located in the \sources folder). Alternatively, you can use a custom image which you have previously created and generalized.
Next, if prompted in the Select an Image dialog box, choose the image you want to install and select OK.
In the Windows System Image Manager dialog box, select Yes to create a catalog file. This file is required.
Note
It takes around five minutes to create the catalog file.
After the catalog file is created, you can begin to configure the answer file. The basic process is as follows:
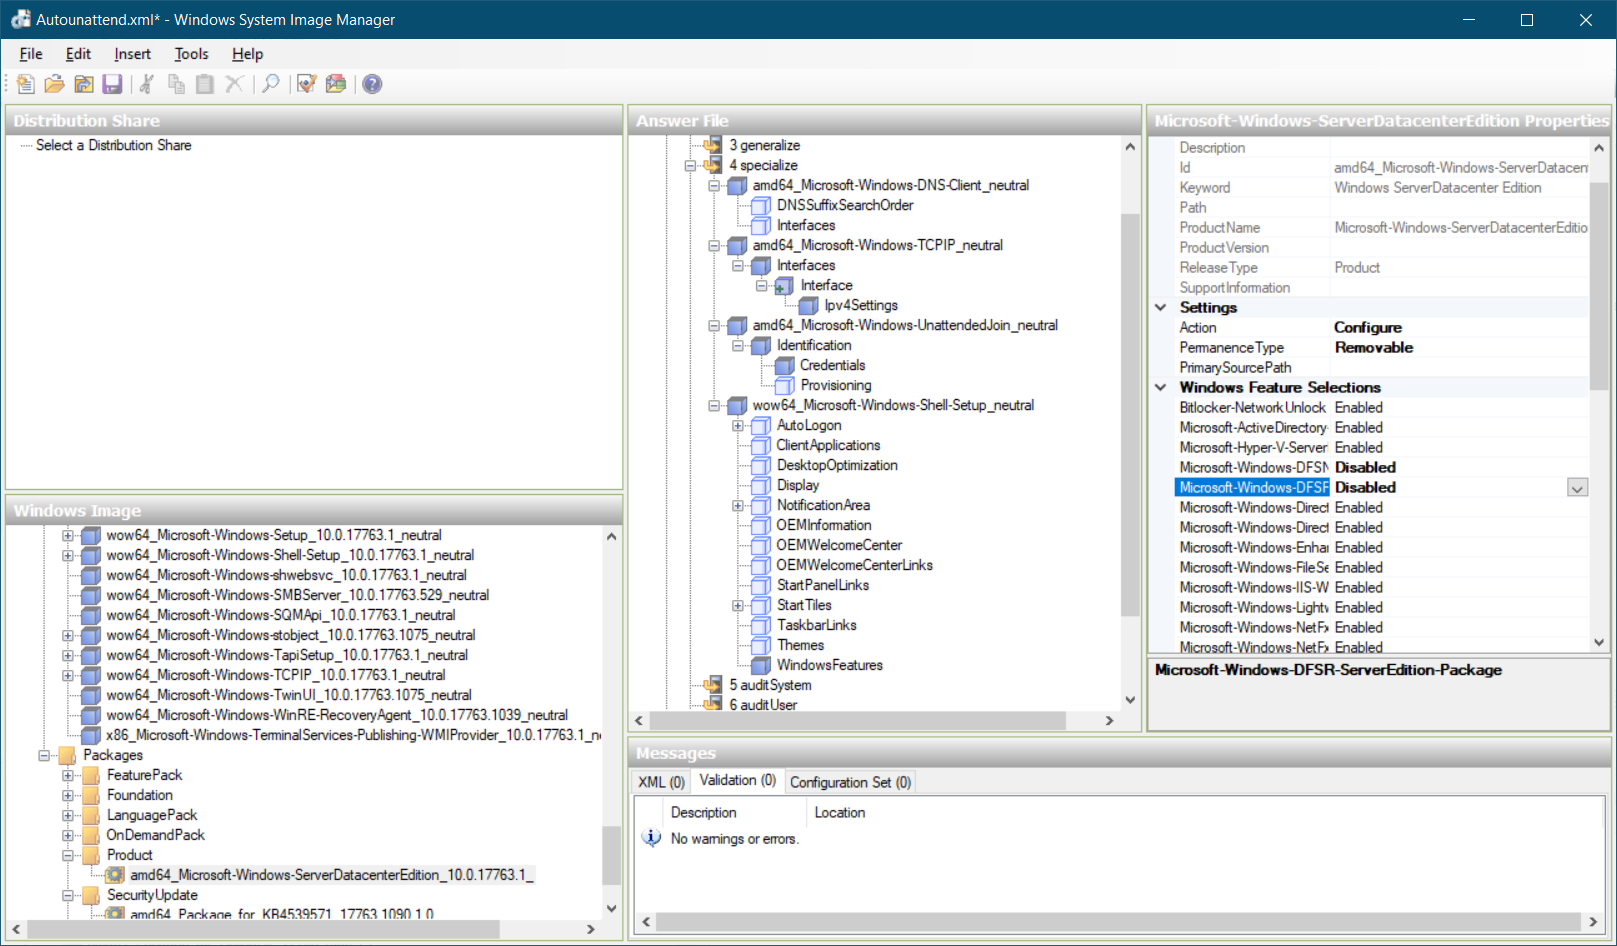
For each element you want to include in the answer file, in the Windows Image pane, locate the element (either in Components or Packages), right-click or activate the context menu for the element, and then select Add to Answer File. This procedure adds the required setting(s) to the answer file pane, from where you can configure that setting to the required value using the Properties pane.
When all required items are added to the answer file, you should use the Properties pane to configure the desired values.
Next, you should verify the answer file. On the menu, select Tools, and then select Validate Answer File. Any problems are displayed in the Messages pane.
Then save the file. Select File, and then select Save Answer File.
Select an appropriate location, and then select Save.
Tip
You can save the file with any name, and you can place it in a number of locations. However, if you save the file as Autounattend.xml in the root of a removable storage device, setup can find the file without further configuration.
Typical settings to include
Although there are many settings you can configure in an answer file, only a subset of these deal with post-installation configuration.
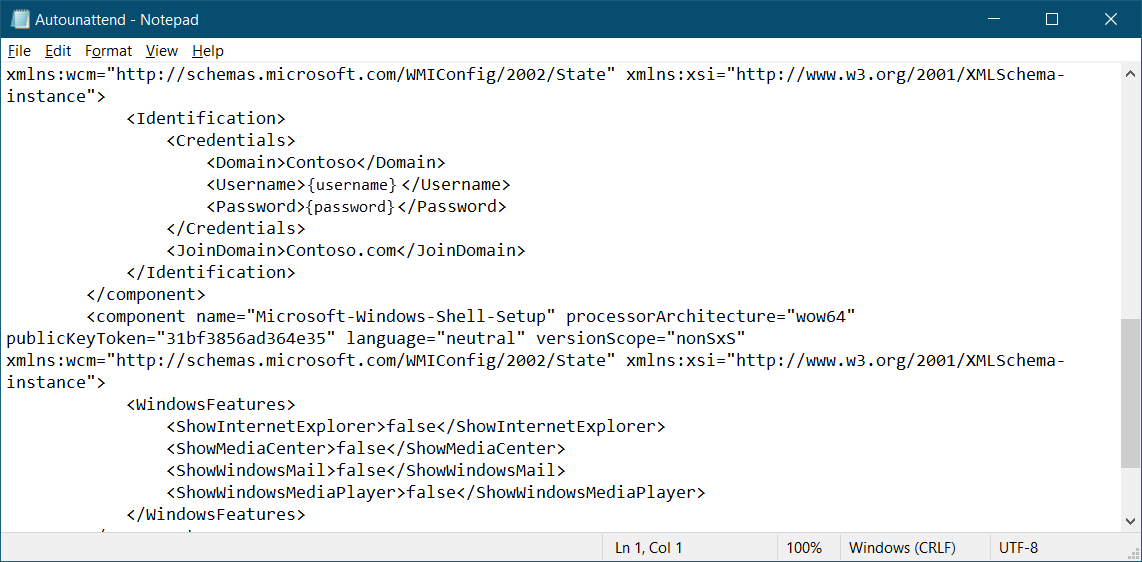
In the Components node, some of the more common settings are:
- Microsoft-Windows-TCPIP. Configures the TCP/IP networking settings.
- Microsoft-Windows-DNS-Client. Contains settings for name resolution using DNS.
- Microsoft-Windows-UnattendedJoin. Enables you to add a computer to an AD DS domain.
- Microsoft-Windows-Shell-Setup. Provides access to a number of settings, including computer name.
In the Packages node, add the Product settings to the answer file.
The end result is a simple text file that contains the XML syntax required to customize your Windows Server installation.