Migrate virtual machine workloads into Azure VMware Solution
After you install VMware HCX and you connect your on-premises VMware vSphere environment to Azure VMware Solution, you work on migrating virtual machines (VMs) running Windows Server and Linux operating systems. You migrate VMs running Windows Server and Linux from on-premises through the VMware HCX Connector migration web interface.
Migrate virtual machines
VMware HCX provides several ways of migrating VMs running Windows Server and Linux into Azure VMware Solution: cold, live, Replication Assisted vMotion (RAV), and bulk migration. You configure migrations by using the VMware HCX Connector on-premises that initiated site pairing into Azure VMware Solution. The VMware HCX migration interface also provides a set of options for VMs. These options control behaviors and conditions on the VM. These behaviors and conditions can happen either before or after the migration operation.
One last thing to note is that taking snapshots of a VM during migration, either manually or via a third-party backup solution, can disrupt the migration process. To prevent any disruption, disable backups until the VM completely migrates into Azure VMware Solution.
Important
Try our HCX migration click-through demo. This demo shows how an organization can confidently migrate workloads from an on-premises VMware deployment to a private cloud in Microsoft Azure. Try now
Steps to migrate virtual machines into Azure VMware Solution using Bulk Migration
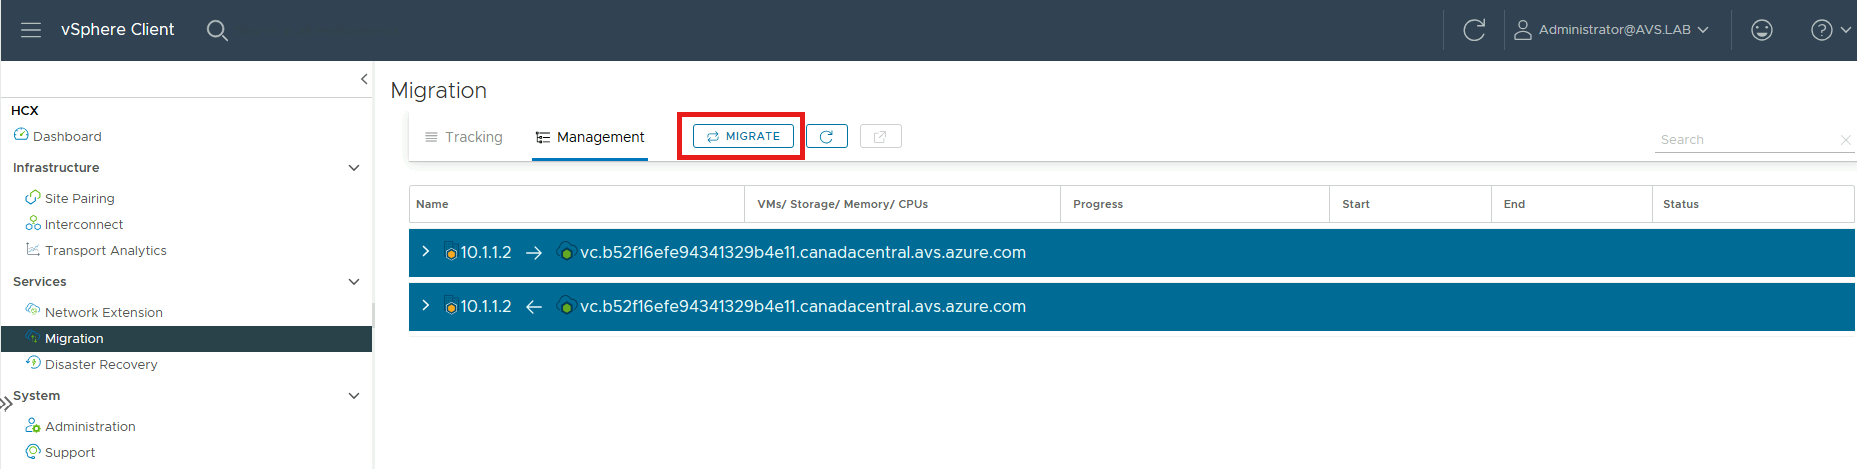
From within the HCX dashboard on-premises, select Services > Migration.
The Migration Tracking page displays a summary of virtual machine migrations. Since this is your first migration, no VMs are shown.
Select Migrate.

The list of virtual machines available for migration appears on the display. Check the Name(s) you want, then select Add.

Set the Transfer and Placement, Switchover, and Extended Options needed for the VM being migrated.
To set machine-specific Transfer and Placement and Switchover options, under VM for Migration, select a specific virtual machine and expand the entry.

Select the destination network for each virtual machine to be migrated.
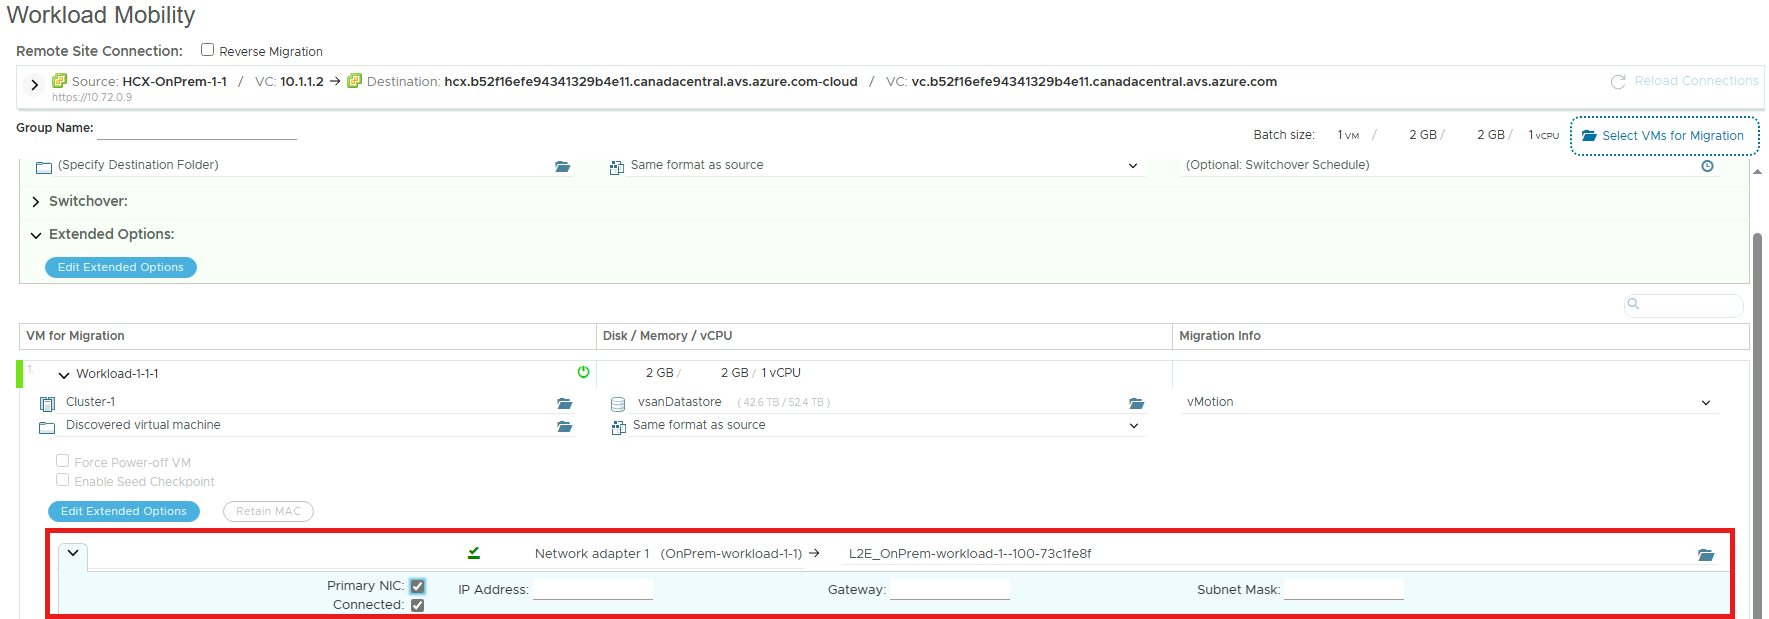
After the network configuration finishes, select Validate or Go. Validate ensures the settings are configured correctly. Go starts the migration.
HCX Manager then migrates all VMs selected. If you see a warning or error when you validate, fix the configuration and select Go to start the migration again.


Steps to migrate virtual machines into Azure VMware Solution using Replication Assisted vMotion
From the HCX dashboard on-premises, select Services > migration.
Under the Select VMs for Migration tab, add the desired virtual machines, then select Add.

Configure the required fields then choose Replicaton-Assisted vMotion.
For each VM you're migrating, select the Destination Network, then select the GO button.

Verify migration has started.


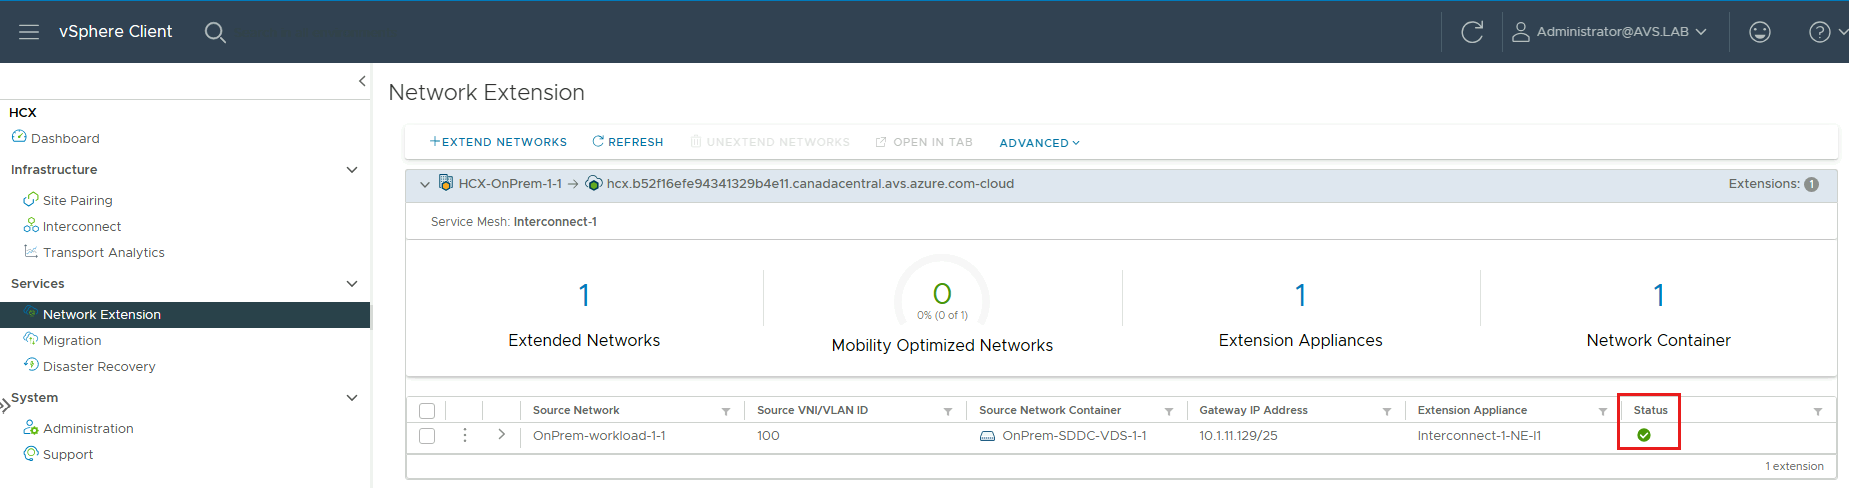
Configure Network Extension
Extend a network when you plan to vMotion virtual machines keeping the same IP addresses as the source vSphere environment.
Use the following steps to extend a Network:
From the HCX dashboard, to go Services > Network Extension > Create a Network Extension.

Select the network you want to extend, then select Next.
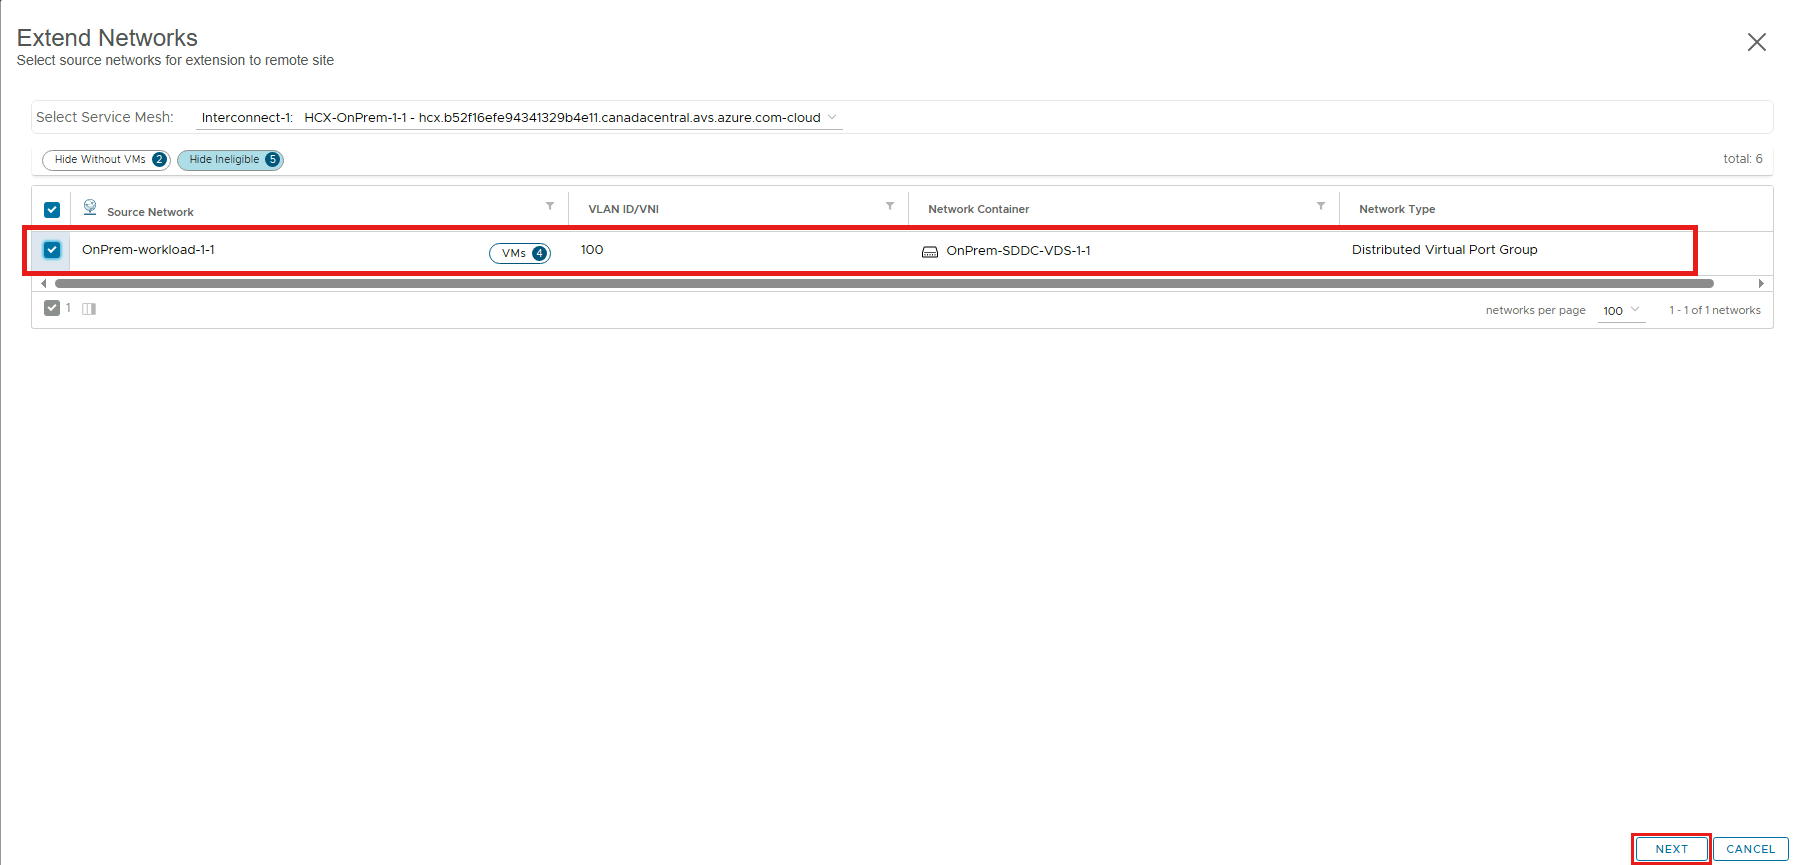
Under Source Network to Extend, select the required mandatory fields, then select Submit.

Verify a green check under Status indicating the Network Extension is completed.