Case creation and life cycle
In Microsoft Dynamics 365, you can create cases in multiple ways to accommodate the different scenarios that your organization might receive cases from. For example, you can have cases created automatically, based on a social media interaction, or representatives can create them manually as they take a call from someone. You can also create cases through a self-service portal. When you implement a case management strategy, you'll need to consider the scenarios that your organization might support.
In Dynamics 365, you can capture and enter cases into the system in several ways, depending on your organization's specific needs (for example, through a self-service portal). Most often, you'll create cases manually or convert an activity to a case.
Create cases manually
Support representatives can enter cases manually as needed. As the representative enters the case, they can capture relevant information, such as the customer, point of contact, issue, and so on. Two primary ways to manually create cases are by using the Case page or using the Quick Create: Case form.
Case page
The Case page is the most used method for entering cases into Dynamics 365. You can create a case on the Case page by using the site map to go to the case table and selecting the New case button on the Command bar. As a representative enters a case, they'll specify details about the case, such as the case title, customer, case origin, and so on.
The Case page has all fields that are available for the case, and it provides quick access to related records, such as knowledge articles. Additionally, the Productivity pane provides tools that the representative can use in resolving the issue. In the preceding image, the Productivity pane is displaying an agent script that assists the representative as they work through resolving the case.
Note
The Case Title and Customer fields are required and must be filled in before you can save a case record.
Quick Create: Case form
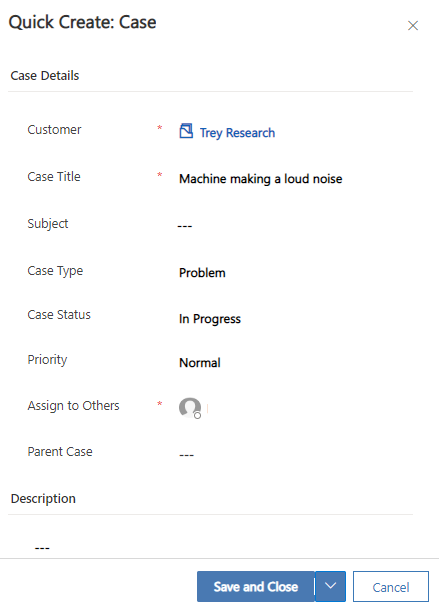
The Quick Create: Case dialog is a trimmed-down version of the Case page. It only has the most important fields for the case entity. You would use this dialog as a time-saver to quickly enter case information. Additionally, you can use this dialog when you're creating a case in the context of another record. For example, if you add a case directly from an account in Dynamics 365, you'll use the Quick Create: Case dialog.
You can find the Quick Create dialogs in the upper navigation bar in the application, from the related panel, or from an attached sub grid on a parent record. Though a Quick Create dialog isn't available by default for every entity, it's available for the case entity. Therefore, when you add a case from a related record, you'll use the Quick Create: Case dialog.
Convert activity records to a case
Occasionally, a case might be the result of an activity, such as an email, phone call, or task. For example, a support representative might receive an email request for service directly from a customer. In these situations, you can convert activities directly to Dynamics 365 case records. Then, the system will use the record creation and update rules to automatically convert specific activities to Dynamics 365 records. You can also complete this conversion manually on an individual record.
Note
The next unit covers automatic creation of cases from activity records.
You can convert the following types of Dynamics 365 activities out of the box:
Appointments
Campaign responses
Emails
Faxes
Letters
Phone calls
Service activities
Tasks
Social activities
Additionally, you can convert custom activities that have been created for an organization to cases. For example, an organization might create a custom activity named SMS messages that's used to work with text messages. You can also convert these activities to cases.
From within a specific activity, select the Convert To dropdown menu on the command bar. Then, you can select whether to convert the activity to an opportunity or a case.
When you select To Case, the Convert to Case screen will display, providing more information such as the ability to close the activity as completed.
Channel considerations
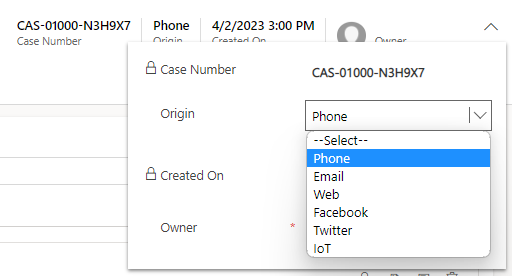
Because so many avenues are available for customer interaction, organizations are providing more channels that customers can submit support cases from. The channel that a case is submitted from can influence how the case is routed or which customer support contract the case is applied to. Because this information can be critical, Dynamics 365 lets you select, directly on the case record, the specific channel that a case was received from.
Note
Out of the box, Dynamics 365 includes the channels that are shown in the preceding image. However, because most organizations have different channel needs, the ability to add more channels is provided.


