How to get started
To use GitHub Copilot for your enterprise organization, you must have a GitHub Enterprise Cloud account and an existing Copilot for Business subscription. Here are the general steps:
- Set up a Copilot business account.
- Set up an Enterprise account: You need a GitHub Enterprise Cloud account. If you don't have one, you can start a free trial.
- Once an admin enables GitHub Copilot Enterprise at the enterprise level, you can configure GitHub Copilot settings for each organization in your enterprise.
Enable GitHub Copilot Enterprise for your enterprise
Your enterprise owner can enable GitHub Copilot Enterprise for the organizations in the enterprise by first establishing the policy and then assigning users.
Enforce a policy
Follow these steps to enforce a policy to manage the use of GitHub Copilot Enterprise:
- In the enterprise sidebar, select Policies.
- Under Policies, select Copilot.
- Under Manage organization access to GitHub Copilot, configure the access for your GitHub Copilot subscription.
Enable access to GitHub Copilot for all current and future users in your organization
- Select your profile photo, then select Your organizations.
- Next to the organization, select Settings.
- In the Code planning and automation section of the sidebar, select Copilot, then select Access.
- To enable GitHub Copilot for all users in your organization, select Allow for all members under User permissions.
- In the Confirm seat assignment dialog, confirm that you want to enable GitHub Copilot for all current and future users in your organization, then select Confirm.
- To save your changes, select Save.
Enable access to GitHub Copilot for selected users in your organization
First, complete steps 1-2 in the preceding “Enforce a policy” steps. Then follow steps 1-3 below.
- To enable GitHub Copilot for select users in your organization, select Selected teams/users under User permissions.
- In the Confirm seat assignment dialog, confirm that you want to enable GitHub Copilot for selected teams/users in your organization, then select Confirm.
- To save your changes, select Save.
Disable access to GitHub Copilot for your whole organization
First, complete steps 1-2 in the preceding enabling steps. Then follow steps 1-3 below.
- To disable GitHub Copilot for all users in your organization, select Disabled under the User permissions section.
- In the Confirm seat assignment dialog, confirm that you want to disable GitHub Copilot for selected teams/users in your organization, then select Confirm.
- To save your changes, select Save.
Use Copilot chat in Copilot Enterprise
To start collaborating and using Copilot within pull requests, follow these steps:
Create Copilot pull request summaries in Copilot Enterprise
Copilot's pull request summaries automatically generate concise overviews of pull requests based on the code changes. Here's how to use them:
While viewing a pull request on GitHub.com, navigate to the description field.
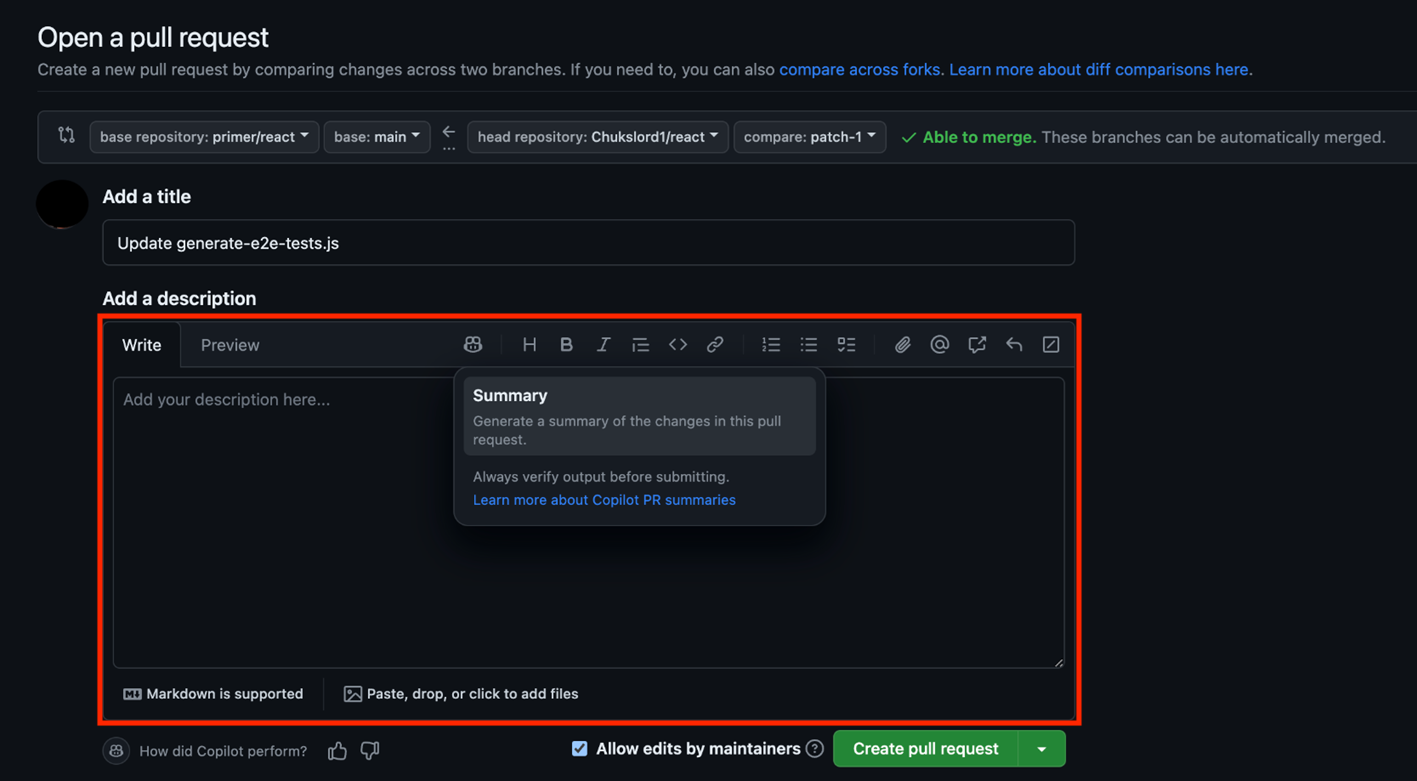
Select the Copilot icon above the description field, then select Summary.
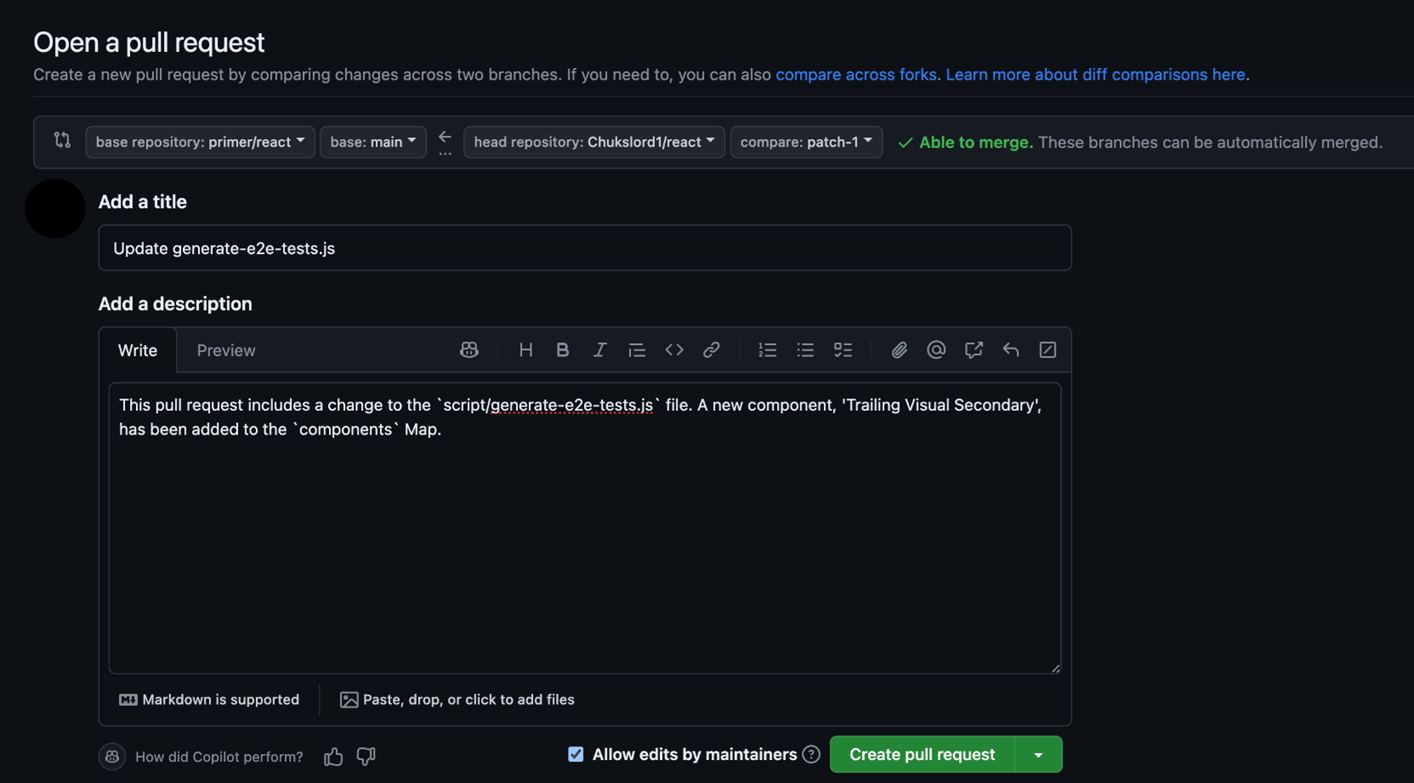
- Copilot goes through the file changes in your pull request and generate a summary for you.
Review the generated text and ensure it accurately reflects the main changes and impacts of the pull request. You can manually edit the summary to add more details or clarify specific points.
Next up, we'll test your knowledge on the content we just learned.