Design and plan with Copilot
Copilot can be a powerful way to accelerate your solution building. However, it's the maker's responsibility to know how to interact with it. That interaction includes writing prompts to get the desired results and evaluating the results that Copilot provides.
Consider the design first
While asking copilot to "Help me automate my company to run more efficiently" seems ideal, that prompt is unlikely to produce useful results from Microsoft Power Platform copilots.
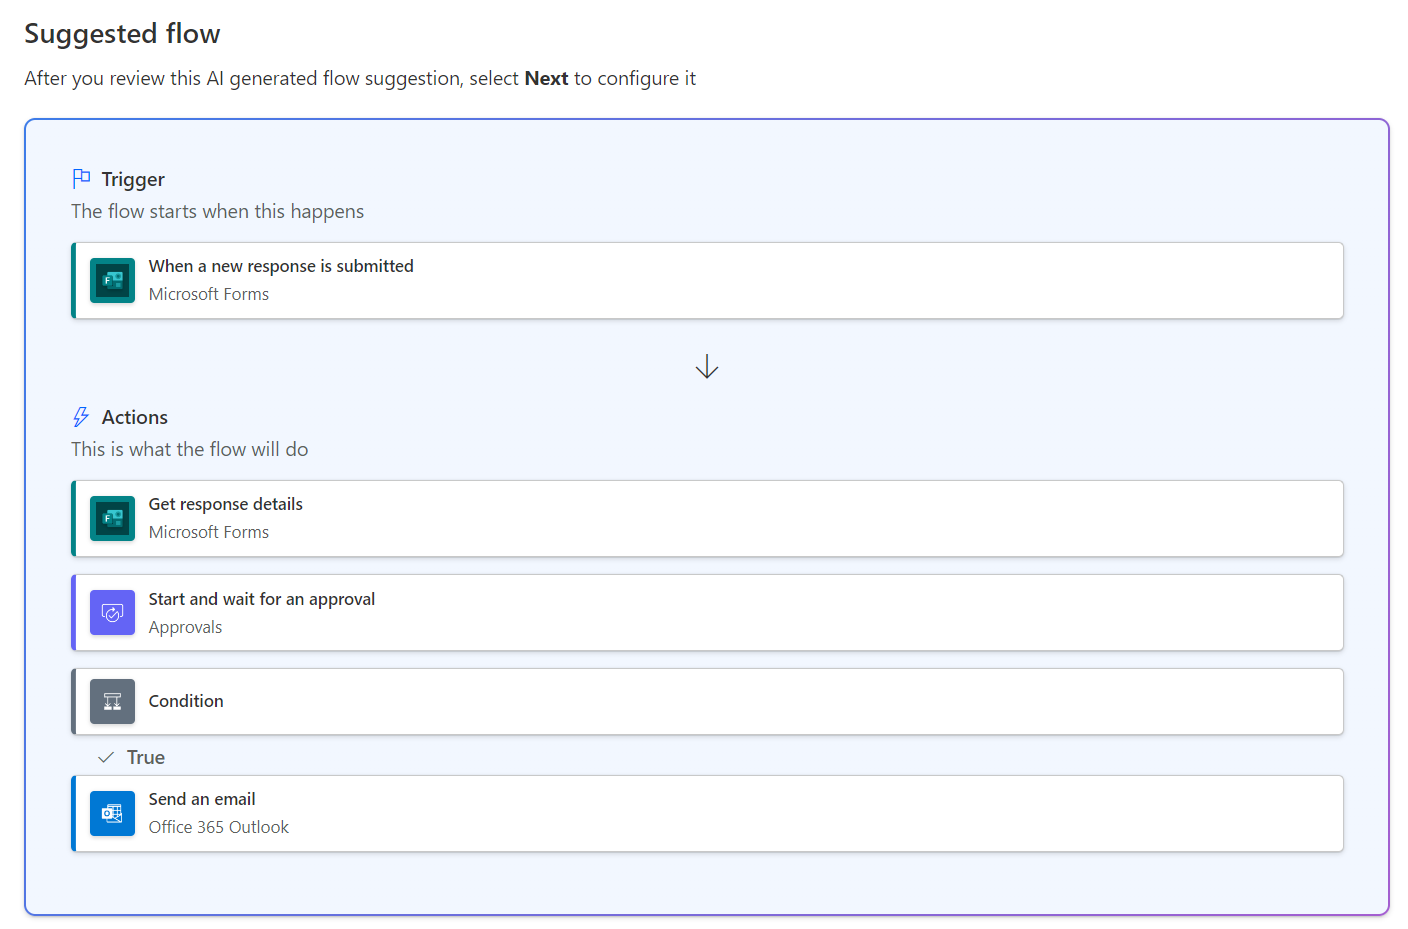
Consider the following example, where you want to automate approval of intake requests. Without significant design thinking, you might use the following prompt with Copilot for Power Automate.
"Create an approval flow for intake requests and notify the requestor of the result."
This prompt produces the following suggested cloud flow.
While the prompt is an acceptable start, you should consider more details that can help you create a prompt that might get you closer to the desired flow.
A good way to improve your success is to spend a few minutes on a whiteboard, or other visual design tool, drawing out the business process.
Include the correct ingredients in the prompt
A prompt should include as much relevant information as possible. Each prompt should include your intended goal, context, source, and outcome.
When you're starting to build something with Microsoft Power Platform copilots, the first prompt that you use sets up the initial resource. For Power Apps, this first prompt is to build a table and an app. For Power Automate, this first prompt is to set up the trigger and the initial steps. For Power Pages, this first prompt sets up the website.
Consider the previous example and the sequence of steps in the sample drawing. You might modify your initial prompt to be similar to the following example.
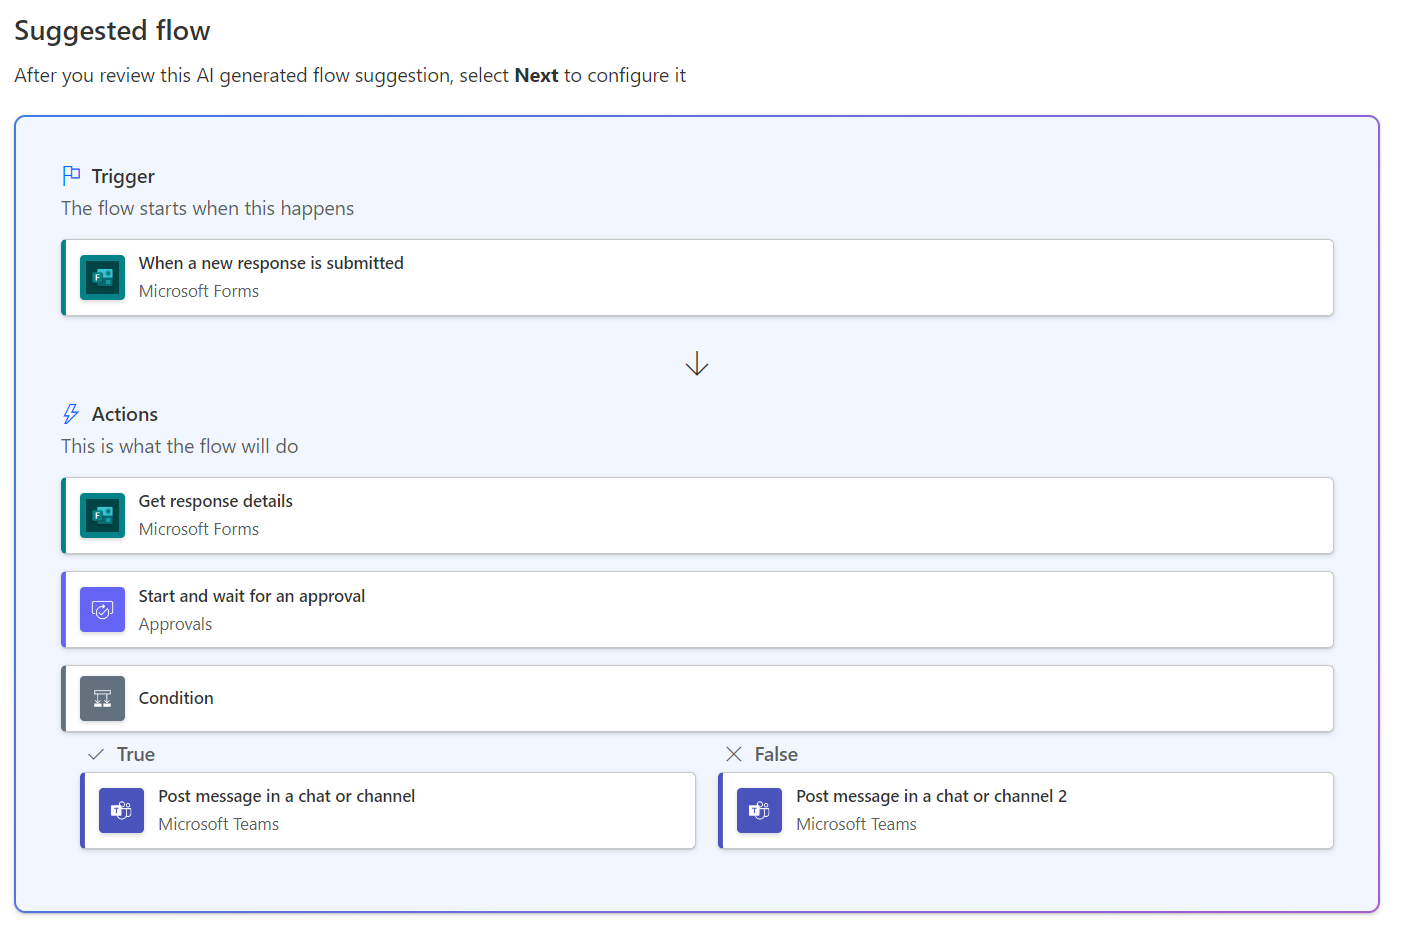
"When I receive a response to my Intake Request form, start and wait for a new approval. If approved, notify the requestor saying so and also notify them if the approval is denied."
This prompt would produce the following suggested flow.
You might notice that Copilot understood your desire to notify the requestor if the approval is denied and that it modified the original flow to include that request.
Copilots work best when they don't need to guess which tools you want to use. For example, your prompt included the word "notify," and it's fortunate that Copilot suggested email for notifications. However, Copilot could have used another notification technology. In fact, using that prompt multiple times causes Copilot to propose the use of different notification technologies. Therefore, in your prompt, you could be more specific by writing "email" instead of the generic "notify" term.
The following example shows a detailed prompt.
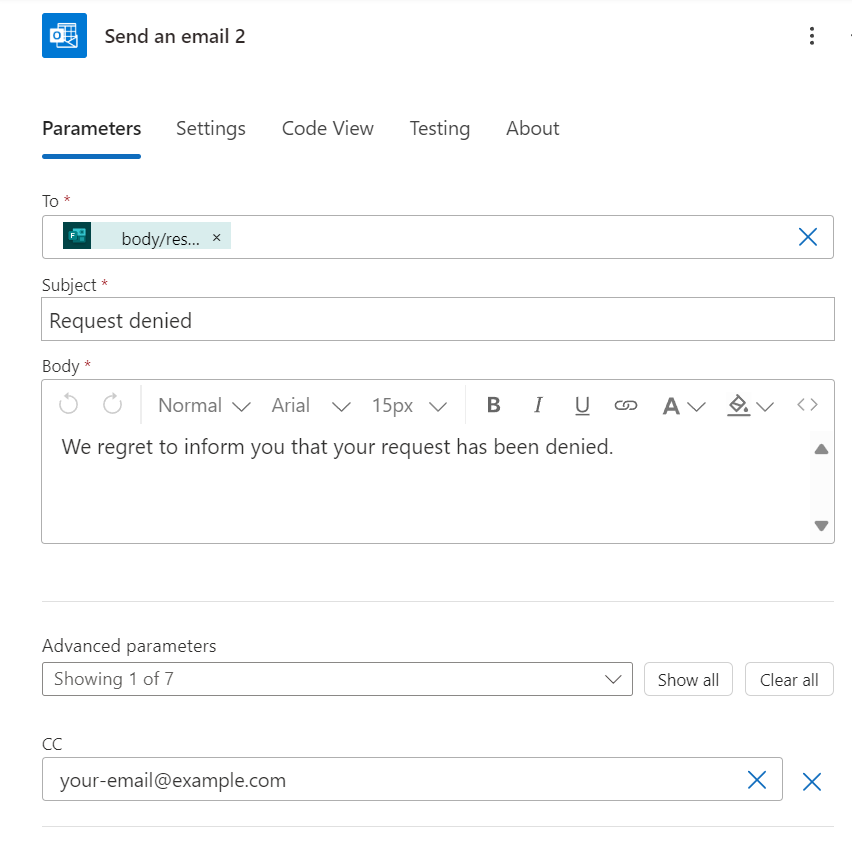
When I receive a response to my form that's called Intake Request, start and wait for a new approval. The approval should be sent to me and contain the content of Request Details question of the form. If the approval is approved, send an email to the person who submitted the response and copy me on it. The subject of the email should say "Request approved," and the body should explain that the request has been approved and we'll schedule a follow-up soon. If the approval isn't approved, send an email to the person who submitted the response and copy me on it. The subject of the email should say "Request denied" and the body should politely explain that the request has been denied.
While the proposed steps of the flow are similar at a high level, the individual steps have more details. For example, the email that's sent to the requestor when the approval is denied now has a message already set up.
Regardless of the level of detail that you provide, Copilot offers solutions or requests more information.
Continue the conversation
You can iterate with your copilot. After you establish the context, Copilot remembers it.
The key in starting to build an idea with Copilot is to consider how much to include with the first prompt and how much to refine and add after you set up the resource. Knowing this key consideration is helpful because you don't need to get a perfect first prompt, only one that builds the idea. Then, you can refine the idea interactively with Copilot.
Make small incremental changes and verify
When you refine and finish building the resource, making small changes to the first prompt and subsequent prompts can be a valuable approach. With the first prompt, you might find that, as you enter more details, you include something in your prompt that causes Copilot to react unexpectedly. For example, in your flow, you add more detail, but Copilot removed the proposed steps. In this case, your information likely confused Copilot, so you need to return and restate your change differently.
When refining your resource with Copilot after the initial build, you need to use small steps to verify that the change that Copilot made is correct. Different copilots allow the Undo function but only for the last modification that they performed.


