Exercise - Create a VM using the Azure portal
You've planned out the network infrastructure and identified a few VMs to migrate to the cloud. You have several choices for creating your VMs. The choice you make depends on the environment you're comfortable with. Azure supports a web-based portal for creating and administering resources. You can also choose to use command-line tools that run on Linux, macOS, and Windows.
Options to create and manage VMs
Let's explore the Azure portal first - it's the easiest way to start with Azure.
Azure portal
The Azure portal provides an easy-to-use browser-based user interface that enables you to create and manage all your Azure resources. For example, you can set up a new database, increase the compute power of your virtual machines, and monitor your monthly costs. It's also a great learning tool, because you can survey all available resources and use guided wizards to create the ones you need.
Create an Azure VM with the Azure portal
Let's assume you want to create a VM running a web server on Ubuntu. Setting up a site isn't difficult, but there are a couple of things to keep in mind. You need to install and configure an operating system, configure a website, install a database, and worry about things like firewalls. We're going to cover creating VMs in the next few modules, but let's create one here to see how easy it is. We don't go through all the options - check out one of the Create a VM modules to get complete details on each option.
Sign in to the Azure portal using the same account you used to activate the sandbox.
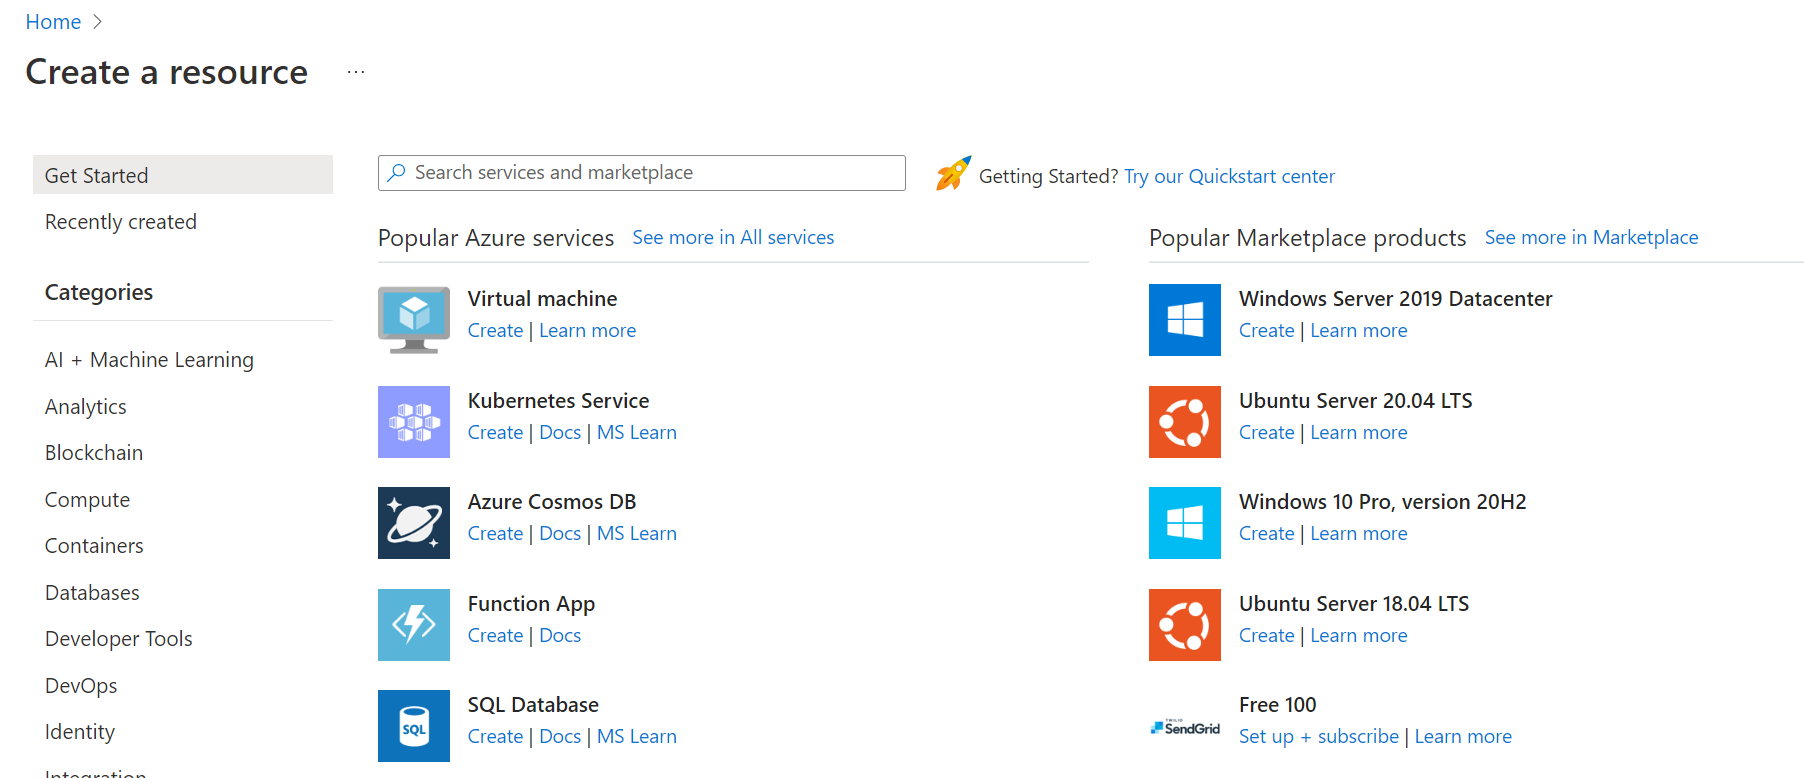
On the Azure home page, under Azure services, select Create a resource. The Create a resource pane appears, displaying popular products for Azure services.

We want to create a VM, so select Virtual machine.
The Create virtual machine pane appears.
Configure the VM
You need to configure the basic parameters of your virtual machine. If some of the options at this point are unfamiliar to you, that's OK. We're going to describe all of these options in a future module. You're welcome to copy the values used here.
On the Basics tab, enter the following values for each setting.
Setting Value Project details Subscription Concierge Subscription Resource group Select [sandbox resource group name] from the drop-downInstance details Virtual machine name Enter test-ubuntu-cus-vm Region From the dropdown list, select a geographical location close to you. Availability options No infrastructure redundancy required Security type Standard Image Ubuntu Server 24.04 LTS - Gen2 VM architecture x64 Run with Azure Spot discount Unchecked Size Standard D2s V3 Administrator account Authentication type SSH public key Username Enter a username SSH public key source Generate a new key pair Key pair name test-ubuntu-cus-vm_key Inbound port rules Public inbound ports Allow selected ports Select inbound ports SSH (22) There are several other tabs you can explore to see the settings you can influence during the VM creation. After you're finished exploring, select Review + create to review and validate the settings.
Azure validates your configuration settings for a resource before it creates it. You might need to supply some additional information based on the requirements of the image creator built into Azure. It's simple; just open the tab that has an error. Verify all the settings are set the way you want, and then select Create to deploy and create the VM.
The Generate new key pair window opens. Select Download private key and create resource.
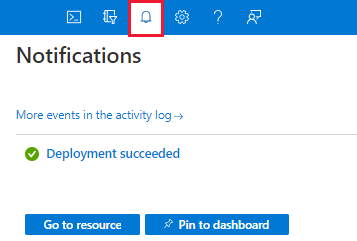
You can monitor the deployment in the Deployment details on the Overview pane or through the Notifications pane. Select the notifications icon in the top right toolbar to show or hide the Notifications pane.

The VM deployment process takes a few minutes to complete. You receive a notification informing you that the deployment succeeded.
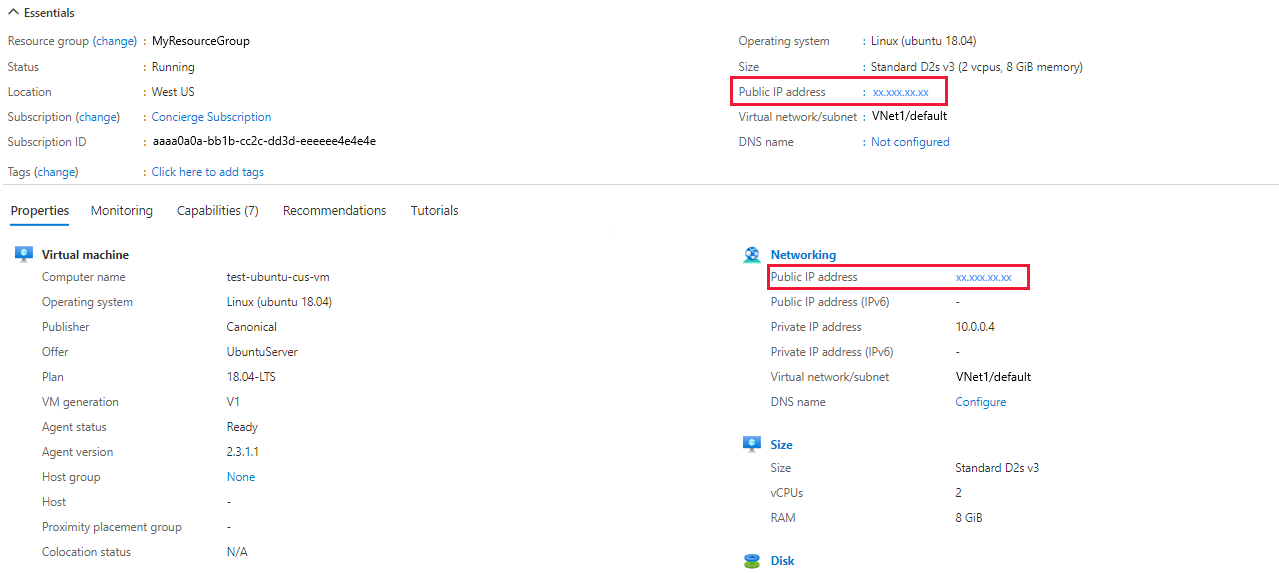
Select Go to resource. The Overview page of your VM appears.
Here, you can see all the information and configuration options for your newly created Ubuntu VM. One of the pieces of information is the Public IP address.

When you enabled SSH public key authentication in an earlier step, the user interface also gave an option to enable SSH. SSH allows you to connect to your VM via the public IP using any SSH client.
Congratulations! With a few steps, you deployed a VM that runs Linux. Let's explore some other ways we could have created a VM.