Exercise - Create a Data Science Virtual Machine
Referring to our scenario, let's say that you decided to work on an Ubuntu Data Science Virtual Machine (DSVM). You first specify its configuration, and then create a resource in your resource group.
Create a DSVM by using the Azure portal
Sign in to the Azure portal with the same account that you used to activate the sandbox.
Select the Create a resource option in the upper-left corner of the portal page. The Azure Marketplace pane opens.
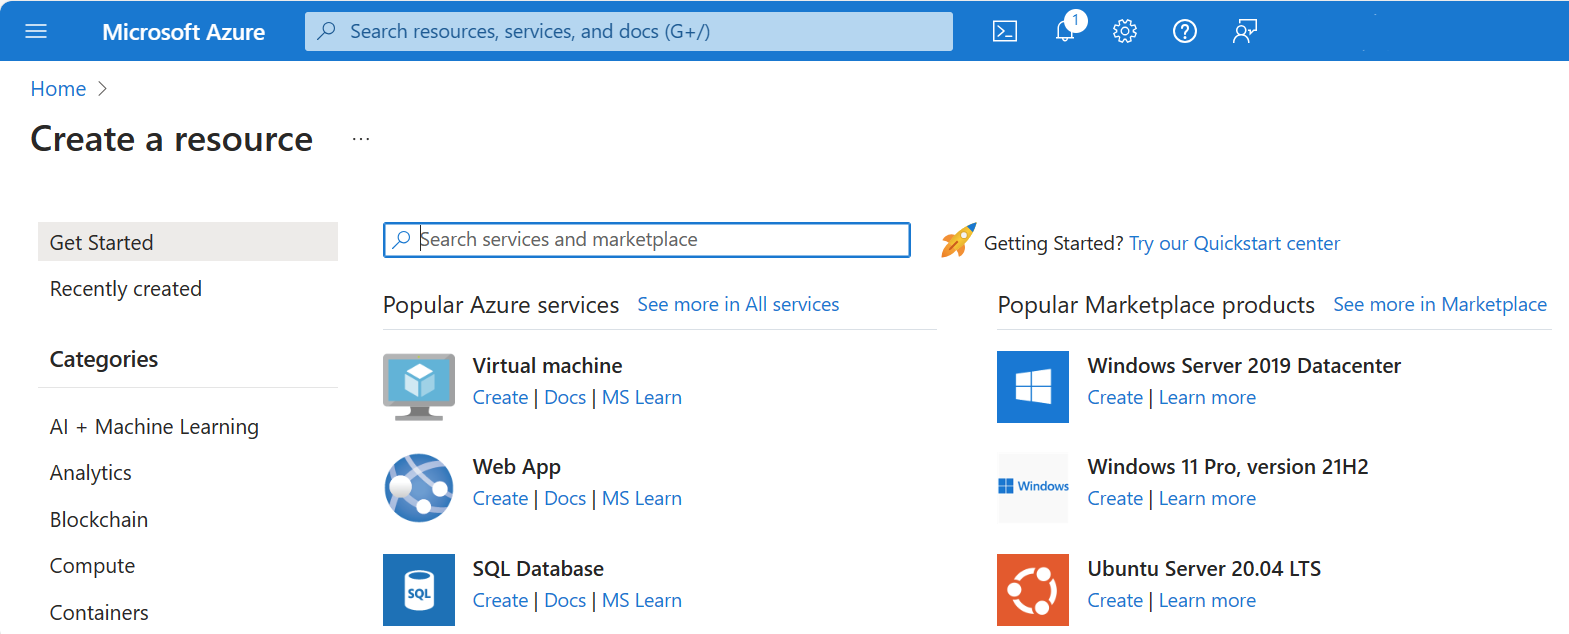
We have many options available. We want to create a DSVM running on Ubuntu.
In the Search services and marketplace search bar, enter Data Science. Select the Data Science Virtual Machine - Ubuntu 20.04 option. The Data Science Virtual Machine - Ubuntu 20.04 pane appears.
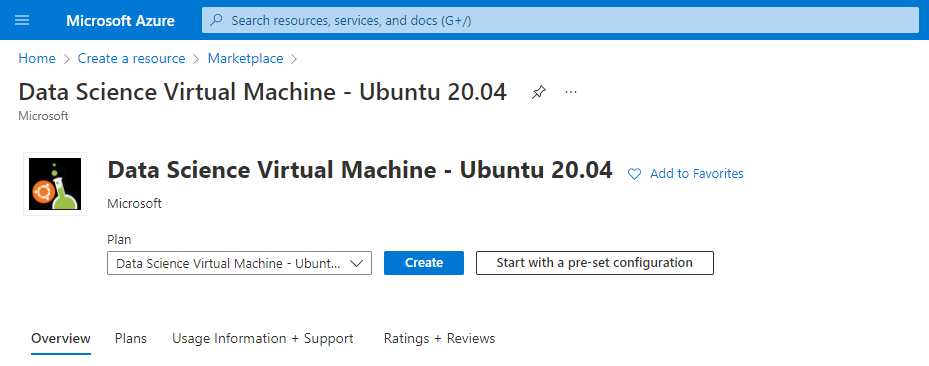
Select Create. The Create a virtual machine pane appears. We can use the wizard-based technique to configure the Virtual Machine (VM).
Configure the VM
To configure the basic parameters of our Ubuntu virtual machine, enter these values for each setting in the Basics tab:
Setting Value Project details Subscription Concierge Subscription Resource group Select [sandbox resource group name] as the sandbox resource groupInstance details Virtual machine name Enter test-ubuntu-dsvm Region Select a region near you. It should match the resource group. Availability options No infrastructure redundancy required Image Data Science Virtual Machine - Ubuntu 20.04 - X64 Gen2 VM architecture x64 Security type Standard Size Standard_DS1_v2. If that's not the selected value:
- Select See all sizes link.
- Enter DS1_ in the search box.
- Select the DS1_v2 row.
- Select that size and return to the configuration screen.Administrator account Authentication type Password Username Enter a string from 1 to 64 characters long Password Enter a strong password 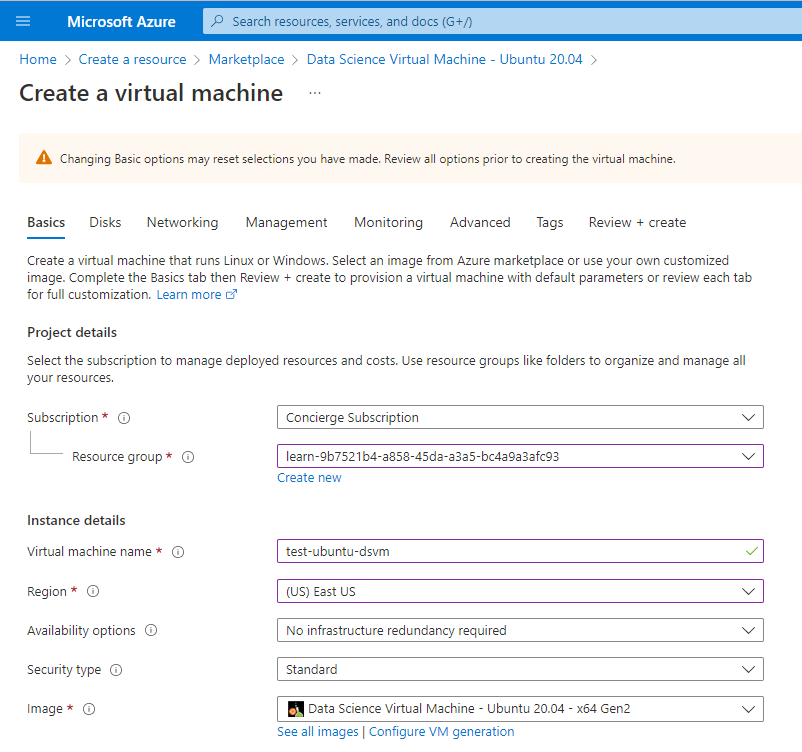
You can explore the other tabs, to see the settings that you can configure during the VM creation. For example, you can specify your data disks on the Disks tab. After you finish your exploration, select Review + create to review and validate the settings.
On the review screen, verify that you configured all the settings the way you want. Select Create.
You can monitor the deployment through the Notifications panel. Select the icon on the top toolbar to show or hide the panel.
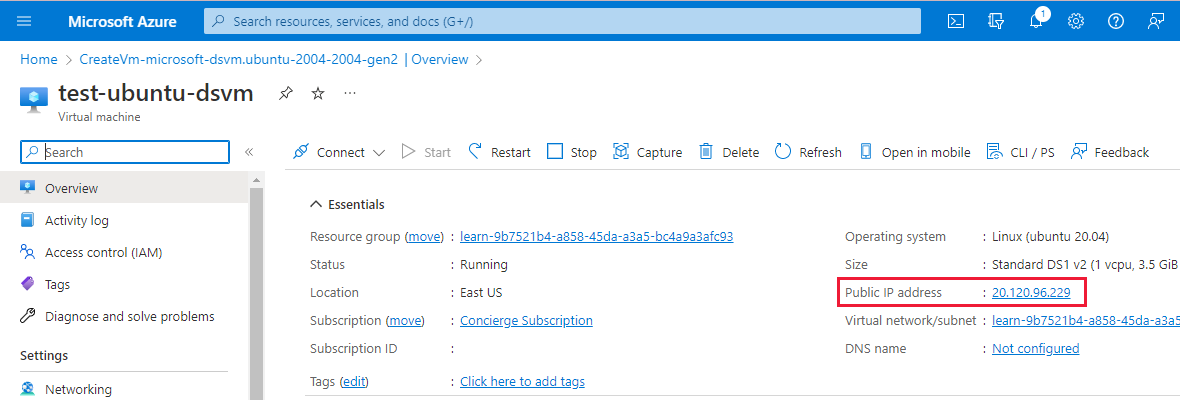
The VM deployment process takes a few minutes to finish. A notification informs you that the deployment succeeded. Select Go to resource to go to the VM overview page.
You can see all the information and configuration options for your newly created DSVM. The Public IP address value is an important part of this information. Make note of this IP address value, because you need it to connect.
Congratulations! You deployed a DSVM running on Linux with a few steps. Now let's connect to it.