Exercise -Use an activity log alert and an action group to notify users about events in your Azure infrastructure
The shipping company for which you work wants to avoid any future issues with updates to its applications on the Azure platform. To improve the alerting capabilities within Azure, you can create activity log alerts.
Your goal is to set up a Linux virtual machine (VM) and create an activity log monitoring rule to detect when a VM is deleted. Then, delete the VM to trigger this alert.
Create the Azure activity log monitor
Sign in to the Azure portal with the same account you used to activate the sandbox.
On the Azure portal resource menu or under Azure services, select Monitor. The Overview pane for Monitor appears.
In the Monitor menu, select Alerts. The Monitor | Alerts pane appears.
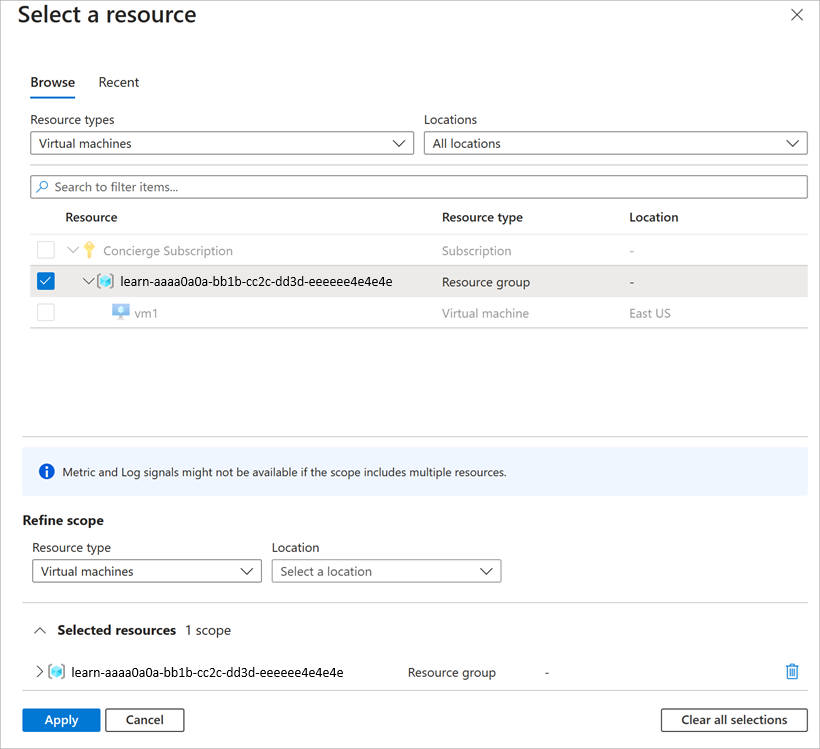
On the command bar, select Create + and select Alert rule. The Create an alert rule pane appears with the Scope section open and the Select a resource pane open on the right-hand side of your screen.
In the Resource type dropdown list, search for and select Virtual machines.
You want an alert when any virtual machine in your resource group is deleted. Select the box for the
[sandbox resource group name] resource group, then select Apply.
The Create an alert rule pane reappears with the Scope target resource showing All Virtual machines. Select the Condition tab. The Select a signal pane appears.
Select the See all signals link, then search for and select Delete Virtual Machine (Virtual Machines). Select Apply
The Create an alert rule pane reappears. You want to receive alerts of all types, so leave Alert logic settings at their default of All selected. Leave the Create an alert rule pane open for the next section.
Add an email alert action
For the previous Azure Monitor alert, you didn't add any actions. You just viewed triggered alerts in the Azure portal. Actions let you send an email for notifications, to trigger an Azure function, or to call a webhook. In this exercise, we're adding an email alert when VMs are deleted.
On the Create an alert rule pane, select the Next: Actions button, and select Use action groups.
Select Create action group in the Select action group pane. The Create an action group pane appears.
On the Basics tab, enter the following values for each setting.
Setting Value Project details Subscription Concierge Subscription Resource group From the dropdown list, select your sandbox resource group Region Global (default) Instance details Action group name Alert the operations team Display name AlertOps Select Next: Notifications, and enter the following values for each setting.
Setting Value Notification type Select Email/SMS message/Push/Voice Name VM was deleted The Email/SMS message/Push/Voice pane appears automatically. If it didn't, select the Edit pencil icon.
Select Email, and in the Email box, enter your email address, and then select OK.
Select Review + create to validate your input.
Select Create.
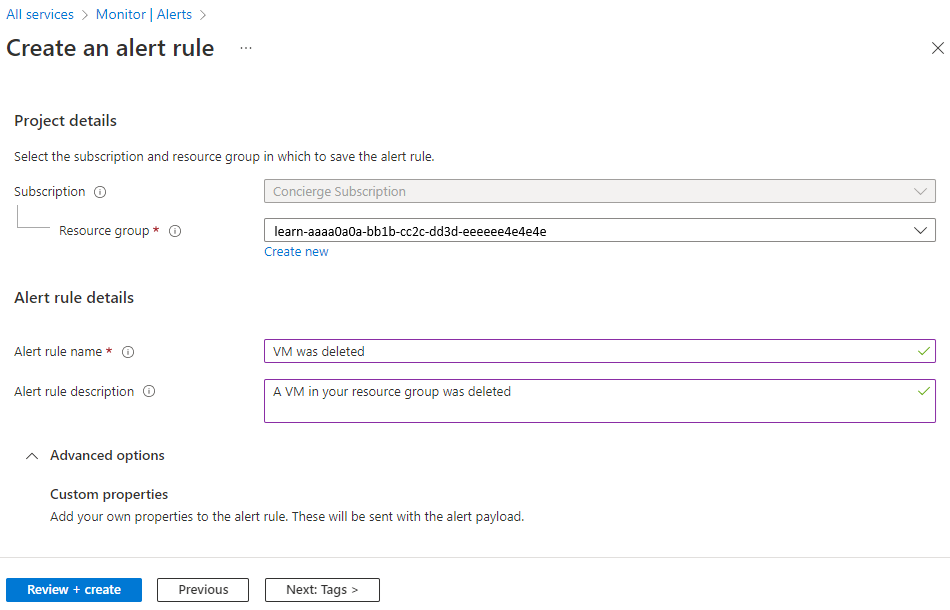
The Create an alert rule pane reappears. Select Next: Details and enter the following values for each setting.
Setting Value Alert rule name VM was deleted Description A VM in your resource group was deleted Expand the Advanced options section and confirm that Enable alert rule upon creation is selected.

Select Review + create to validate your input, then select Create.
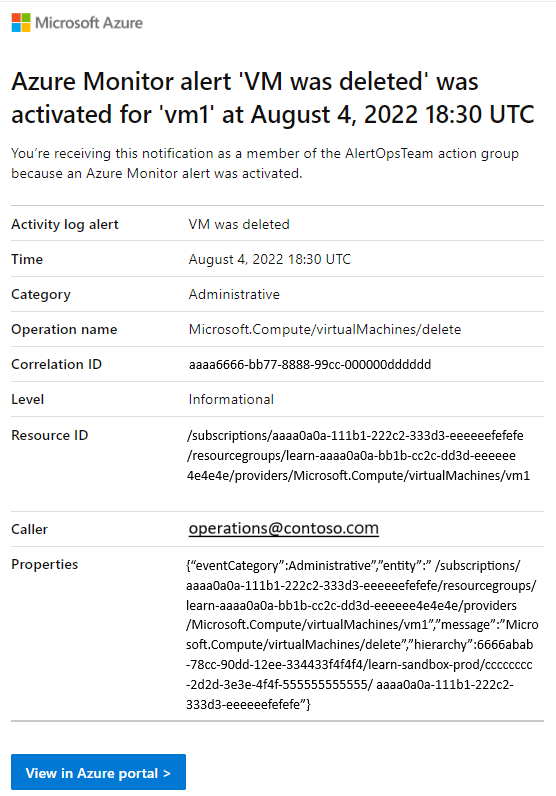
Recipients added to the configured action group (operations team) receive a notification:
- When they're added to the action group
- When the alert is activated
- When the alert is triggered
It can take up to five minutes for an activity log alert rule to become active. In this exercise, if you delete the virtual machine before the rule deploys, the alert rule might not be triggered. Because of this delay, you might not see the same results in the following steps after you delete the VM.
Delete your virtual machine
To trigger an alert, you need to delete the Linux VM that you created in the previous exercise.
On the Azure portal menu or from the Home page, select Virtual machines.
Check the box for the vm1 virtual machine.
Select Delete from the menu bar.
Enter delete to confirm deletion and select Delete.
In the title bar, select the Notifications icon and wait until vm1 is successfully deleted.
View your activity log alerts in Azure Monitor
In the exercise, you set up an Ubuntu VM and created an activity log rule to detect when the VM was deleted. You then deleted a VM from your resource group. Let's check whether an alert was triggered.
You should receive a notification email that reads, Important notice: Azure Monitor alert VM was deleted was activated... If not, open your email program and look for an email from azure-noreply@microsoft.com.

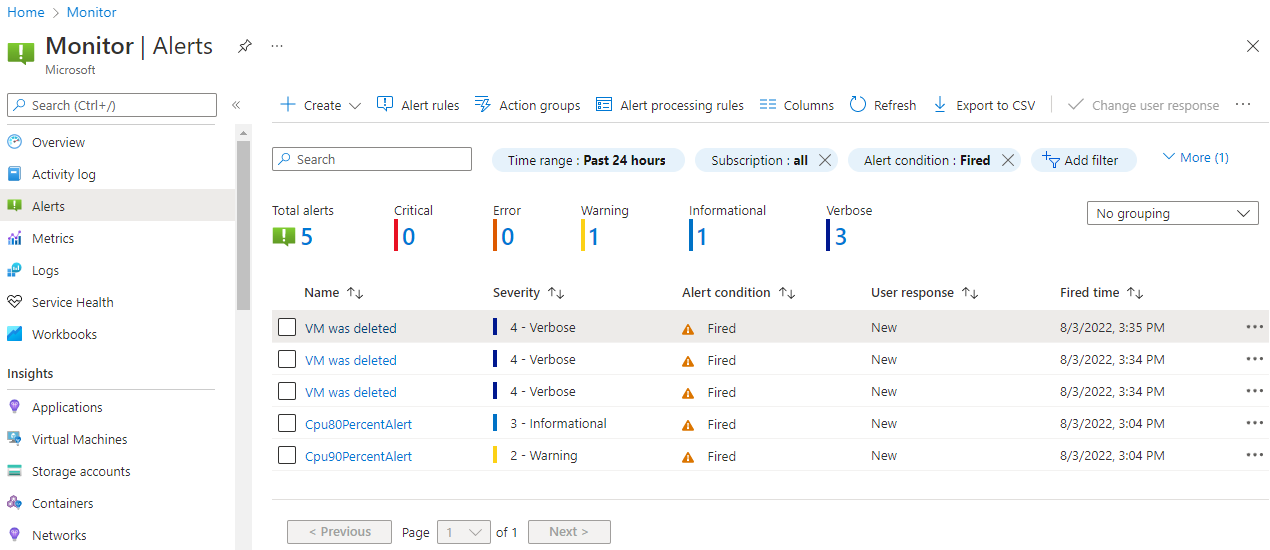
On the Azure portal resource menu, select Monitor, and then select Alerts in the menu on the left.
You should have three verbose alerts that were generated by deleting vm1.

Select the name of one of the alerts (For example, VM was deleted). An Alert details pane appears that shows more details about the event.
Add an alert processing rule to the alert
We're going to schedule a one-time, overnight, planned maintenance. It starts in the evening and continues until the next morning.
In the Azure portal resource menu, select Monitor, select Alerts in the menu on the left, and select Alert processing rules in the menu bar.
Select + Create.
Check the box for your sandbox resource group as the scope of the alert processing rule, then select Apply.
Select Next: Rule settings, then select Suppress notifications.
Select Next: Scheduling.
By default, the rule works all the time, unless you disable it. We're going to define the rule to suppress notifications for a one-time overnight planned maintenance. Enter these settings for the scheduling of the alert processing rule:
Setting Value Apply the rule At a specific time Start Enter today's date at 10pm. End Enter tomorrow's date at 7am. Time zone Select the local timezone. Select Next: Details and enter these settings:
Setting Value Resource group Select your sandbox resource group. Rule name Planned Maintenance Description Suppress notifications during planned maintenance. Select Review + create to validate your input, then select Create.
