Incident tracking
Incidents have a lifecycle. To respond most effectively, you need to be able to track the evolution of the incident itself, and the evolution of your response to it, from the very beginning of that lifecycle.
Assess what you know
A good way to evaluate your incident-tracking procedure using a specific incident is to ask yourself a series of questions:
- When did you first know about the problem? If your goal is to reduce the time it takes to recover from incidents, you need to begin capturing information from the moment you become aware of the issues.
- How did you find out about the problem? Did your monitoring system alert you about the incident? Did you first hear about it from your customers complaining, either directly or on social media?
- If you're just finding out about the problem, are you the first one to know? If so, who do you need to notify? If not, who else is aware of the issue?
- If others are aware, what (if anything) is being done about it? Is everyone assuming that someone else is looking into it, or has someone started taking action to address it?
- How bad is it? We might not have any notion of severity or impact, and there’s no place for us to find out how bad the problem really is and who's affected.
These can be difficult questions to answer if nothing is being tracked.
Standardize where incident information will be tracked
There are many possible places you could keep and share your list of incidents (active or otherwise) and all of the current information about those incidents. These can be as simple as a shared file area with Word documents and as complex as highly specialized incident-tracking software and services. In between these two extremes are ticketing and work tracking systems that you can press into service for this task. Which system you choose is actually less important than how you use it. No matter which system you use, everyone who might have any connection at all to incidents (engineers, customer support, management, public relations, legal, and so on) needs to know where to go to find the system, how to raise an incident, and how to access the data when appropriate. One sure way to fail with incident tracking is to have the people who it will support not know how to get to the system ("what was the URL for our system again?") when they need it.
In this module, we'll use the work-item functionality of Azure DevOps for our example tracking system.
Create a conversation bridge
To answer some of the questions in the preceding Assess what you know section and to begin the incident-response process, you must have a way to communicate with others about the incident. Ideally, this will be some sort of "team collaboration" electronic medium for conversation, though telephone bridges do work as well. Conference calls/telephone bridges are less preferred, because it's harder to retroactively review the incident communication (hence the "Scribe" role mentioned earlier).
Whatever medium you choose, you should be sure to carve out a unique channel that's strictly limited to discussion about this incident and nothing else. It's important to keep irrelevant discussion out of this channel, because you need to be able to take the data and analyze it later in your post-incident review.
In this module, we'll use Microsoft Teams as our incident-communication method.
Automate the incident tracking launch
So, let's review the pieces we've put together so far. We have a:
- Roster of the people on call (and a rotation defined for them).
- Role we can assign to the people working on an incident.
- Specific place we are going to declare the incident and track it.
- Unique channel for the people working on that incident to communicate about it.
You can and should automate creating and managing all of these things to the fullest extent possible. When an urgent problem arises, you don't want to have to recall all of the steps necessary to raise an incident, bring the right people in, and track it. All you really want to do is to be able to push the "go" button so work can immediately start to deal with the problem.
Use Logic Apps for codeless automation
One way to automate your initial response is by using Logic Apps, which can simplify the job of scheduling, automating, and orchestrating tasks, business processes, and workflows.
Logic Apps is an Azure cloud service for building integration solutions. It uses connectors to create automated workflows. Triggers start the Logic App when a specific event occurs or when data meets specified criteria. Actions are the operations that are then performed in the Logic App workflow.
For our example, we'll use the following Logic App connectors for incident tracking:
- Azure Boards (a part of Azure DevOps), which you can use to create and track issues/incidents.
- Azure Storage, where you can store and retrieve information about who's on call so you can assign the proper people to respond to the incident. In our example, we'll be using Azure Table Storage because it offers a very simple "key-value" store that makes it easy to store a list of engineers and their on-call status.
- Microsoft Teams, which you can use to create a new, unique incident channel to track your engineering teams' conversations in real time as they communicate about specific incidents. This allows you to preserve the interactions in relation to the timeline of events later when performing a post-incident review.
Now let's tie this all together with a Logic App. First, take a look at the complete app as shown in the Logic Apps Designer, then we'll walk through it step by step.
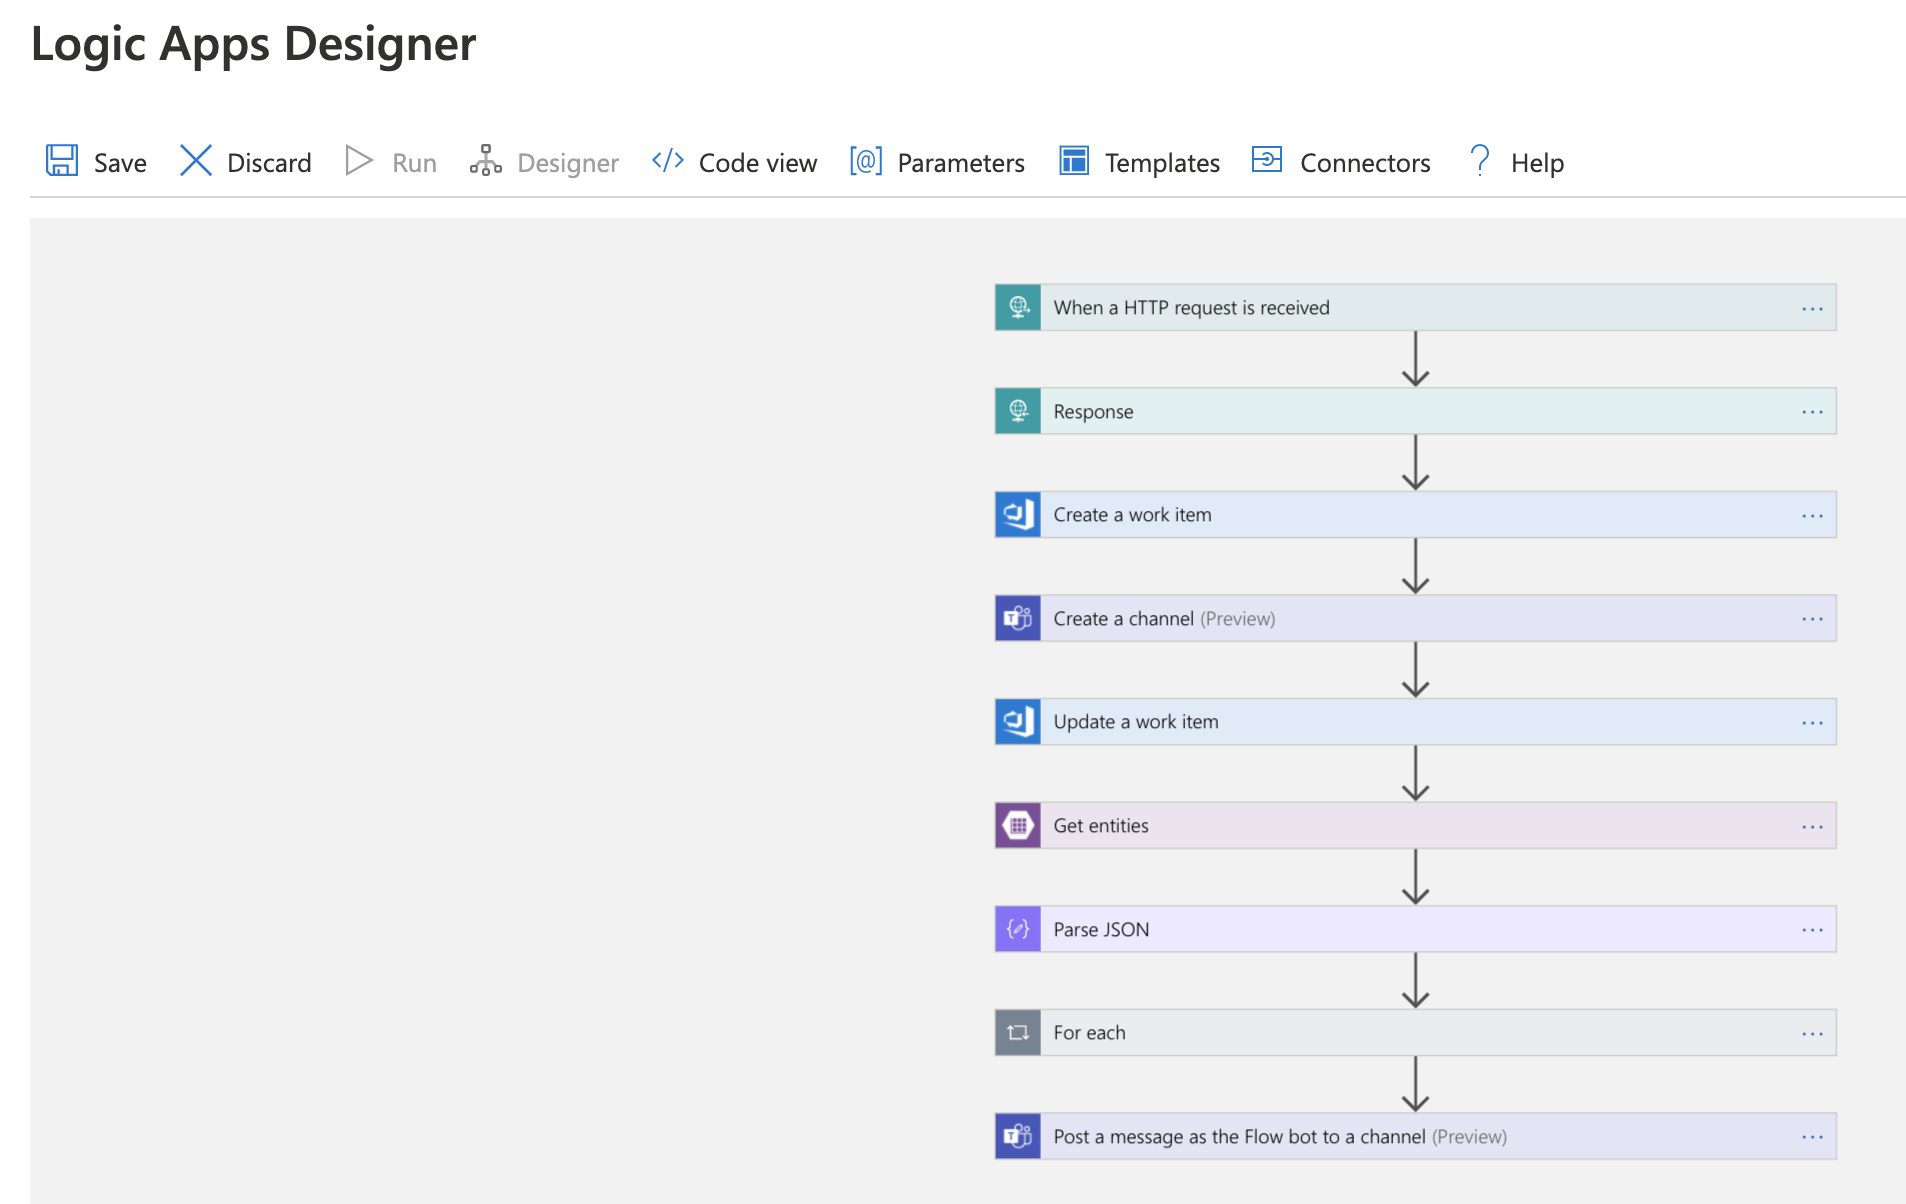
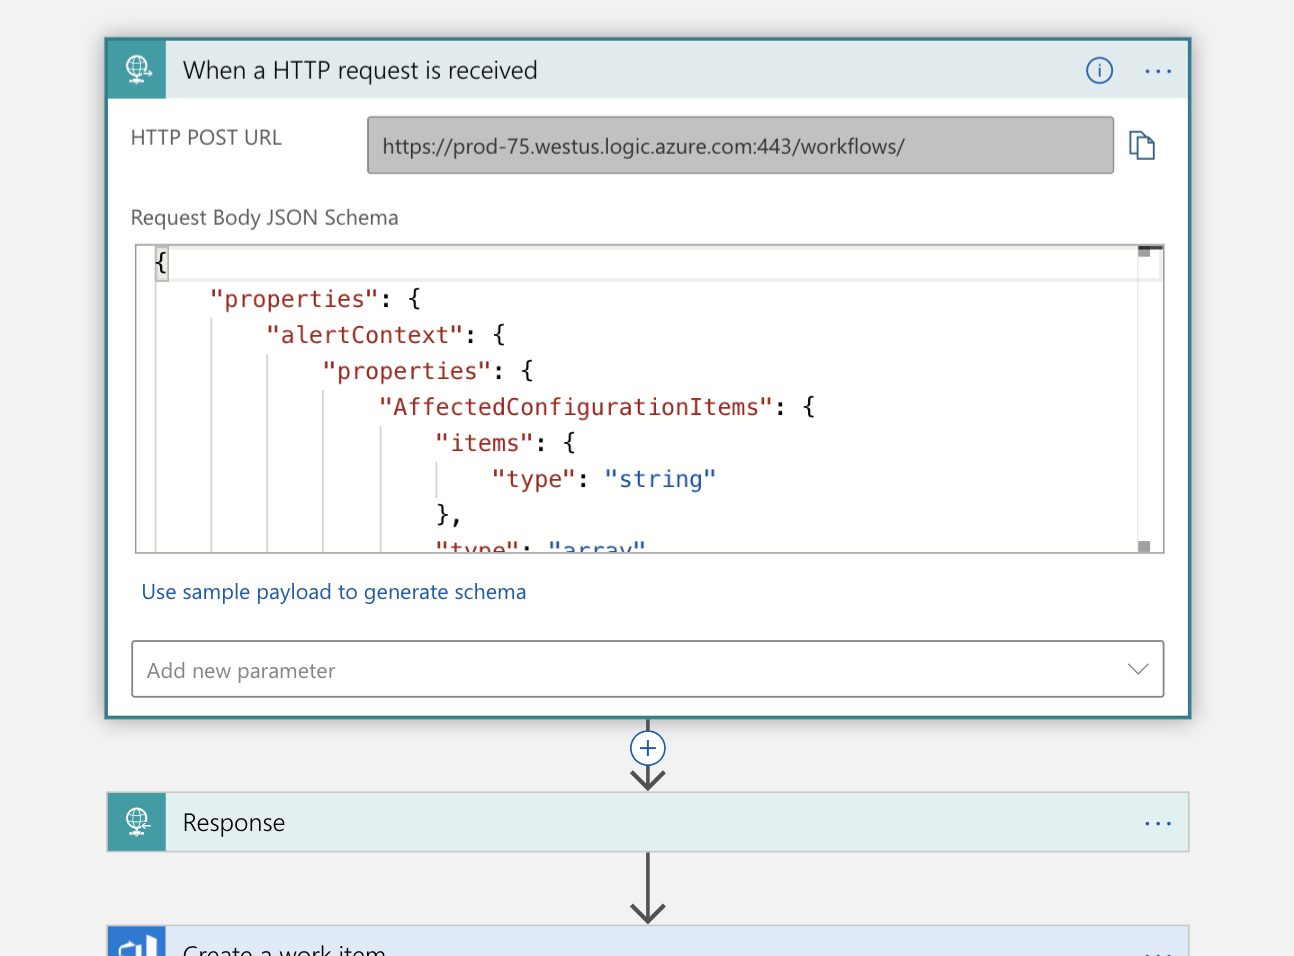
The first step is handling a trigger, that HTTP request we mentioned. An HTTP POST request is made to our logic app that contains a JSON payload with information about the incident we wish to declare. We parse that payload and send back an acknowledgment we received it:
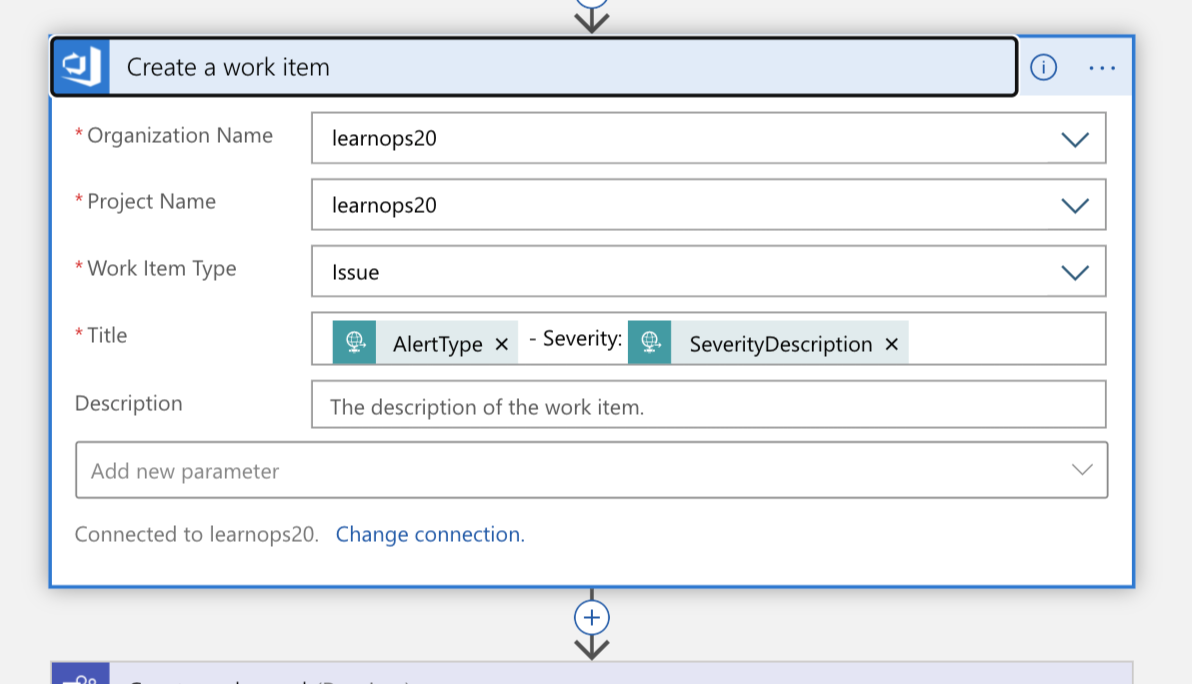
Using this information, we create a new work item in our Azure DevOps organization representing this incident.
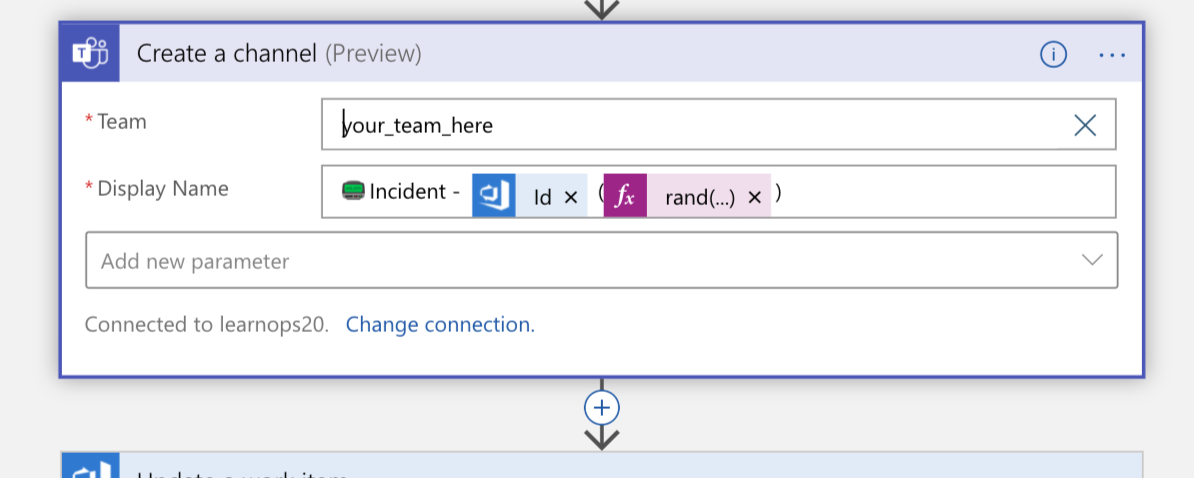
It will then create a new Teams channel for the incident:
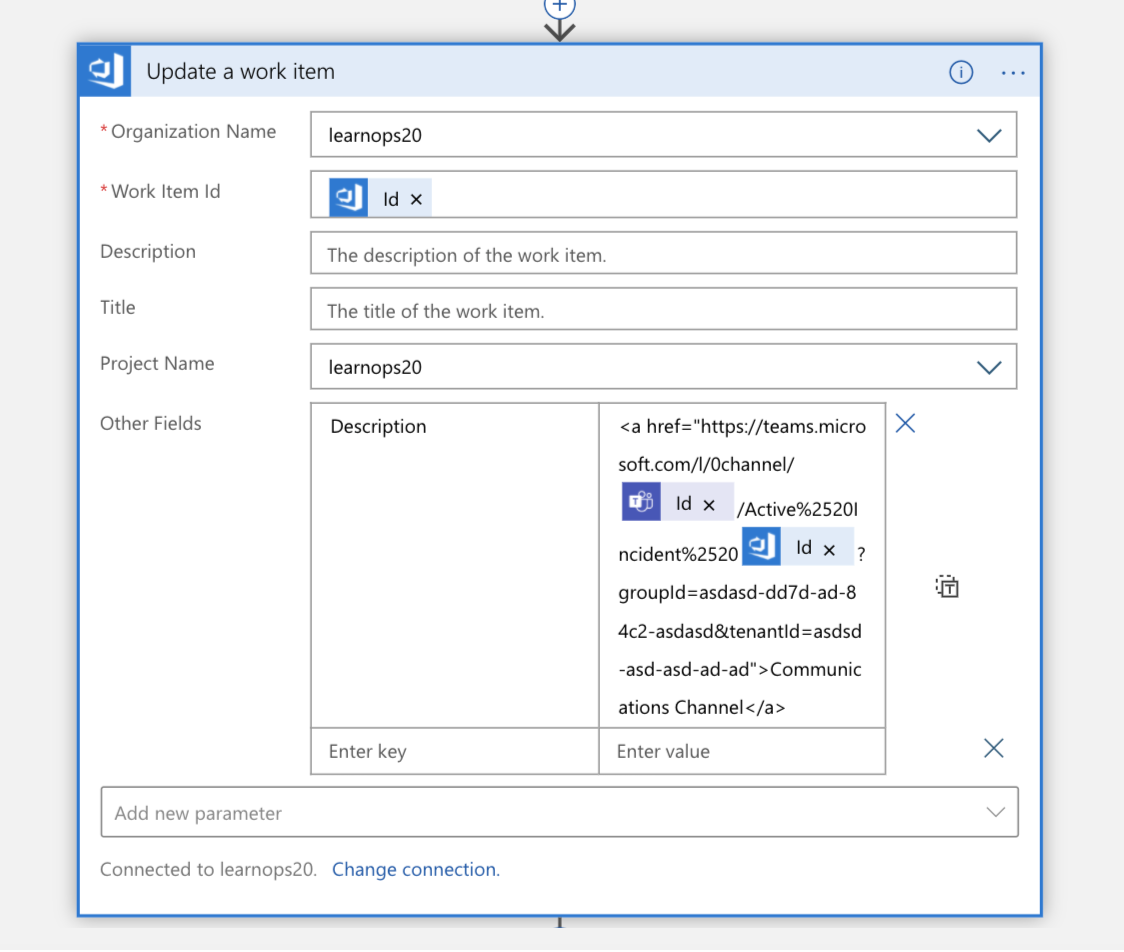
Once the channel is created, the work item we created a moment ago gets updated with a link to the new channel. This keeps all of the information in the same place (the work item) and allows people looking at it later to know where to go if they want to join that channel.
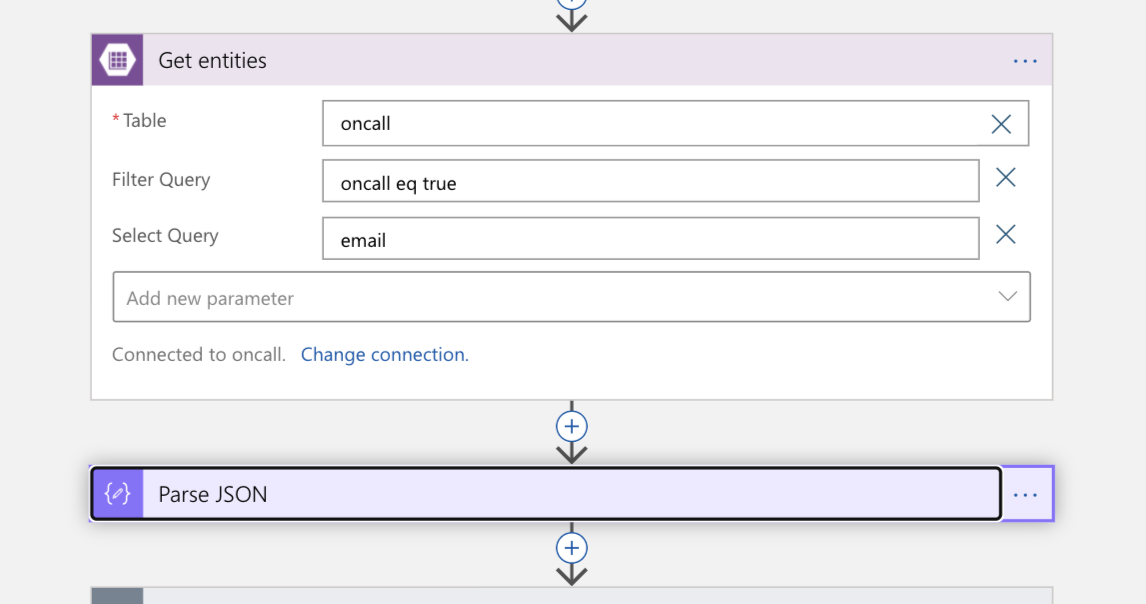
Now, it's time to bring the on-call person into the picture. We perform a lookup in Azure Table Storage for the email address of the engineer listed as being on-call. This returns a JSON response, which we then parse.
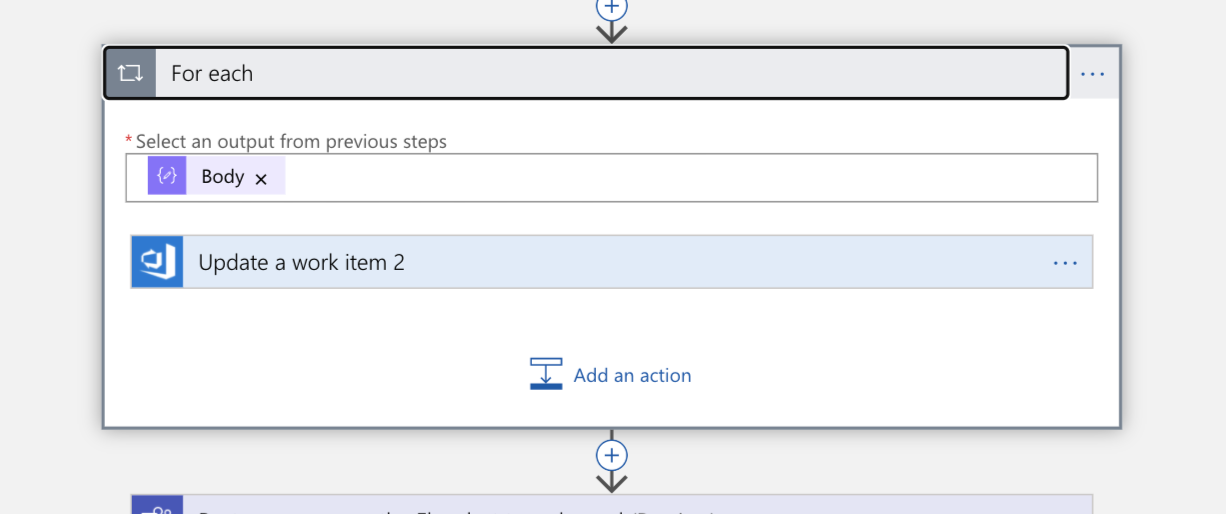
Because our query will return a list, we need to iterate over each item in that list as the next step. We assign the work item to each person (they are now "owners" of the incident).
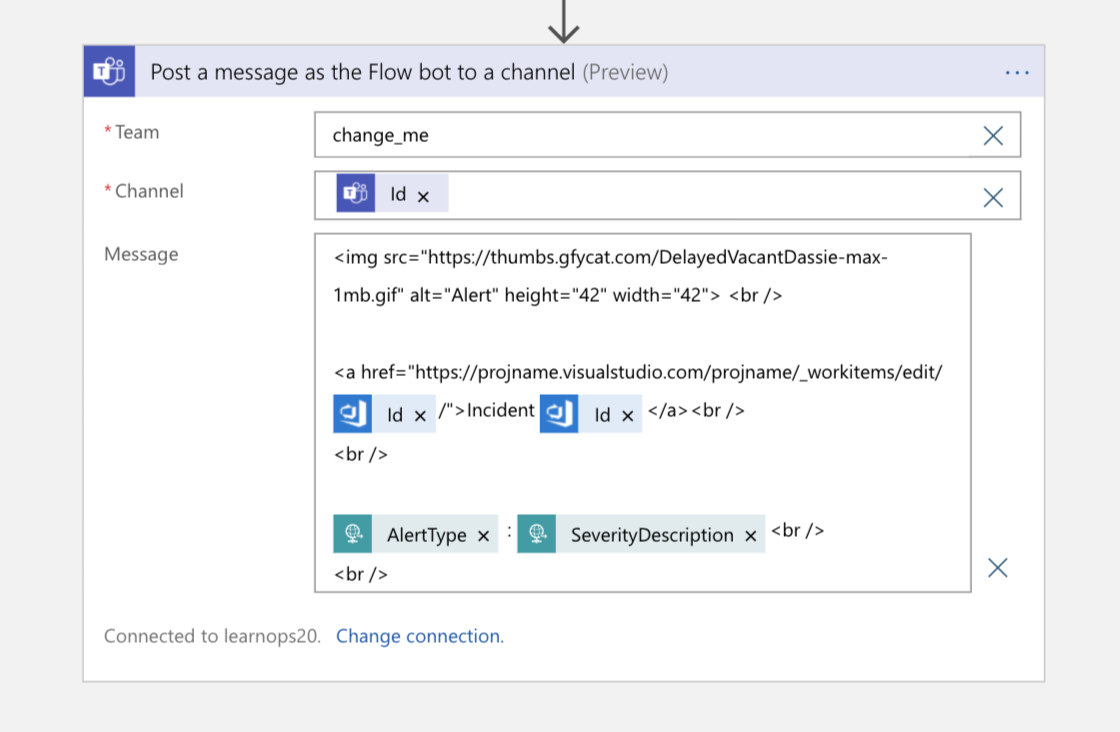
Then, as a final step, we send a message to the Teams channel with a pointer back to the work item for people who join the channel and want to know where the authoritative information for that incident is stored.
That's just one example of how we can automate setting up the mechanisms for incident tracking and communication. In the next unit, we'll dive a little deeper into aspects of communication around an incident.