Exercise - Deploy your code to App Service
In this unit, you deploy your web application to App Service.
Deploy with az webapp deploy
Let's deploy the .NET application with ZIP deploy.
First, use dotnet publish to build the final app files and zip to package them into a zip file:
cd ~/BestBikeApp
dotnet publish -o pub
cd pub
zip -r site.zip *
Finally, perform the deployment with az webapp deploy. Replace <your-app-name> in the following command with the name of your Azure web app and run it:
az webapp deploy \
    --src-path site.zip \
    --resource-group <rgn>[sandbox resource group name]</rgn> \
    --name <your-app-name>
The deployment takes a few minutes, during which time you get status output. When the command finishes running, you see an output message like this:
Deployment has completed successfully
You can visit your app at: http://<app-name>-<hash>.<region>.azurewebsites.net
Verify the deployment
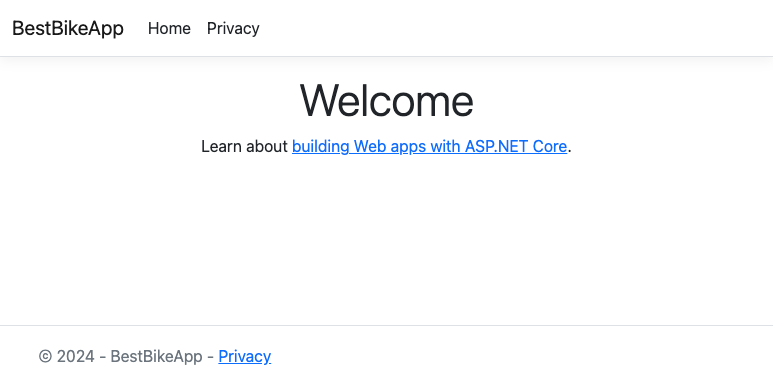
In a new tab, navigate to the URL shown in the output. You get the splash page for a new ASP.NET Core web app.

Congratulations, you successfully hosted your new ASP.NET Core application, on App Service!
Deploy with az webapp deploy
Run the following commands to deploy your Java web app. Replace <your-app-name> with the name of the web app you created in the Azure portal.
cd ~/helloworld/target
az webapp deploy \
    --src-path helloworld.war \
    --resource-group <rgn>[sandbox resource group name]</rgn> \
    --name <your-app-name>
When the command finishes running, you see an output message like this:
Deployment has completed successfully
You can visit your app at: http://<app-name>-<hash>.<region>.azurewebsites.net
In a new tab, navigate to the URL in the output. You get the greeting message from your app. You deployed successfully!
Deploy with az webapp up
Let's deploy our Node.js application with az webapp up. This command packages up our application and sends it to our App Service instance, where the app is built and deployed.
First, we need to gather some information about our web app resource. Run the following commands to set shell variables that contain our app name, resource group name, plan name, SKU, runtime, and location. Each of these variables uses a different az command to request the information from Azure; az webapp up needs these values to target our existing web app.
export APPNAME=$(az webapp list --query [0].name --output tsv)
export APPRG=$(az webapp list --query [0].resourceGroup --output tsv)
export APPPLAN=$(az appservice plan list --query [0].name --output tsv)
export APPSKU=$(az appservice plan list --query [0].sku.name --output tsv)
export APPRUNTIME="node|20-LTS"
export APPLOCATION=$(az appservice plan list --query [0].location --output tsv)
Now, run az webapp up with the appropriate values. Make sure you're in the helloworld directory before running this command.
az webapp up --name $APPNAME --resource-group $APPRG --plan $APPPLAN --sku $APPSKU --runtime $APPRUNTIME --location "$APPLOCATION"
The deployment takes a few minutes to propagate. You're able to view the progress in the status output. A 202 status code means your deployment was successful.
Verify the deployment
Let's browse to our application. In the JSON output, find the URL. Select it to navigate there in a new browser tab. The page takes a moment to load, as App Service is initializing your app for the first time.
Once it loads, you get the greeting message from your app. You deployed successfully!
Deploy with az webapp up
Let's deploy our Python application with az webapp up. This command packages up our application and sends it to our App Service instance, where the app is built and deployed.
First, we need to gather some information about our web app resource. Run these commands to set shell variables that contain our app's name, resource group name, plan name, SKU, and location. These use different az commands to request the information from Azure; az webapp up needs these values to target our existing web app.
export APPNAME=$(az webapp list --query [0].name --output tsv)
export APPRG=$(az webapp list --query [0].resourceGroup --output tsv)
export APPPLAN=$(az appservice plan list --query [0].name --output tsv)
export APPSKU=$(az appservice plan list --query [0].sku.name --output tsv)
export APPLOCATION=$(az appservice plan list --query [0].location --output tsv)
Now, run az webapp up with the appropriate values. Make sure you're in the BestBikeApp directory before running this command.
cd ~/BestBikeApp
az webapp up --name $APPNAME --resource-group $APPRG --plan $APPPLAN --sku $APPSKU --location "$APPLOCATION"
The deployment takes a few minutes, during which time you get status output. A 202 status code means your deployment was successful.
Verify the deployment
Let's browse to your application. In the JSON output, find the URL. Select that link to open your app in a new browser tab. The page might take a moment to load because the App Service is initializing your app for the first time.
Once your program loads, you get the greeting message from your app. You deployed successfully!
