Exercise – Create remote encounters and observations for the patient
Your patient record is saved in Dataverse and connected to a record in the Azure Health Data Services FHIR service. Connecting your record demonstrates how you can use your new application to manage persisted data in Dataverse and remote FHIR services.
In this exercise, you post FHIR data for encounters and observations that's related to your patient directly to the FHIR services. As a result, you can demonstrate that the data is accessible through Dataverse in your new model-driven application. After the data is linked to the patient, you also demonstrate how to modify remote FHIR services data from within your Dataverse model-driven application.
Prerequisites
To complete the steps in this exercise, you need to meet the following prerequisites:
Microsoft Cloud for Healthcare Trial with Data integration toolkit installed.
For more information, see Microsoft Cloud for Healthcare training environment preparation.
System Administrator rights are granted for the user on a Microsoft Power Platform environment.
Azure Health Data Services FHIR service is set up and accessible.
Azure Logic Apps is set up with the corresponding Microsoft Azure Blob Storage account container.
The following FHIR bundle samples are downloaded:
Post new encounter and observation records to the FHIR server
To demonstrate that data isn't being persisted in Dataverse and only on the FHIR server, you can send FHIR bundles directly to the FHIR server.
Validate only patient data in Dataverse
After you post a new patient, validate that no related records are added to Dataverse.
Go to your model-driven app and open the patient record for Patient One.
Change the form to the new form that you created in the previous exercise: Contact - VHDT. Complete this task by using the selector beneath the name in the header.
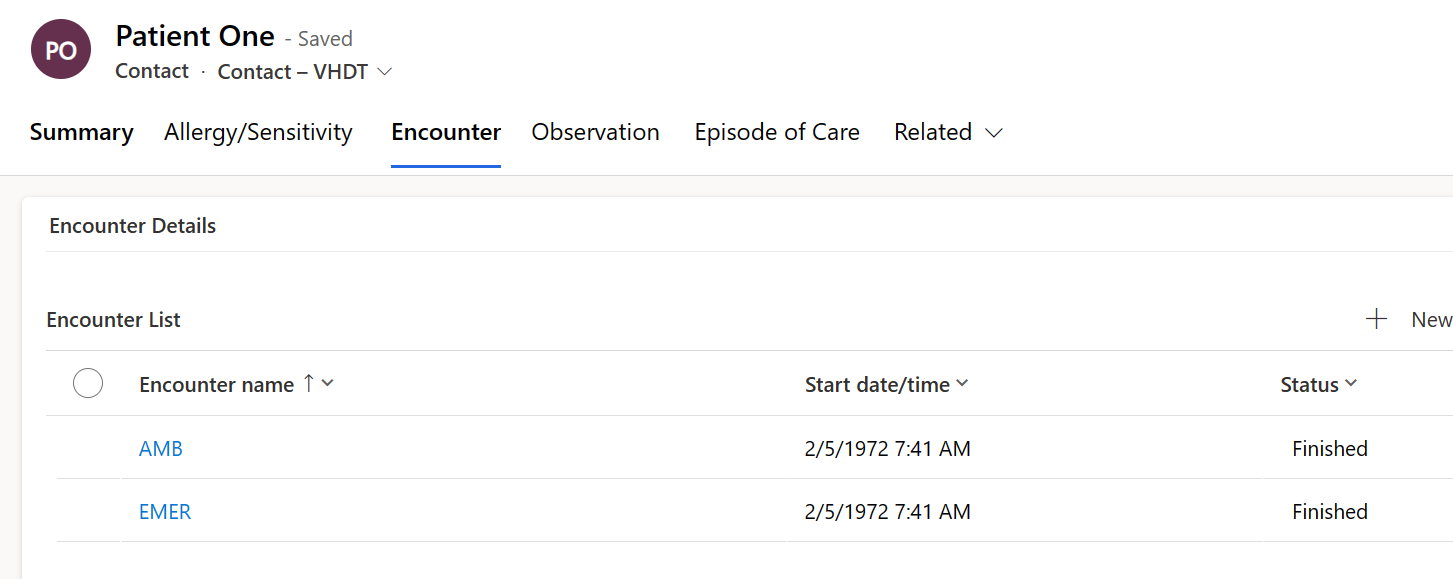
Switch tabs to Encounter in the upper part of the form. Because the patient has no related Encounters, your subgrid should be empty.
Switch to the Observation tab. Notice that the same result shows.
Post new encounter and observation FHIR data
The patient record that you posted to Dataverse includes the related FHIR identifier. You can post the Observation and Encounter records that are related to the Patient One FHIR resource.
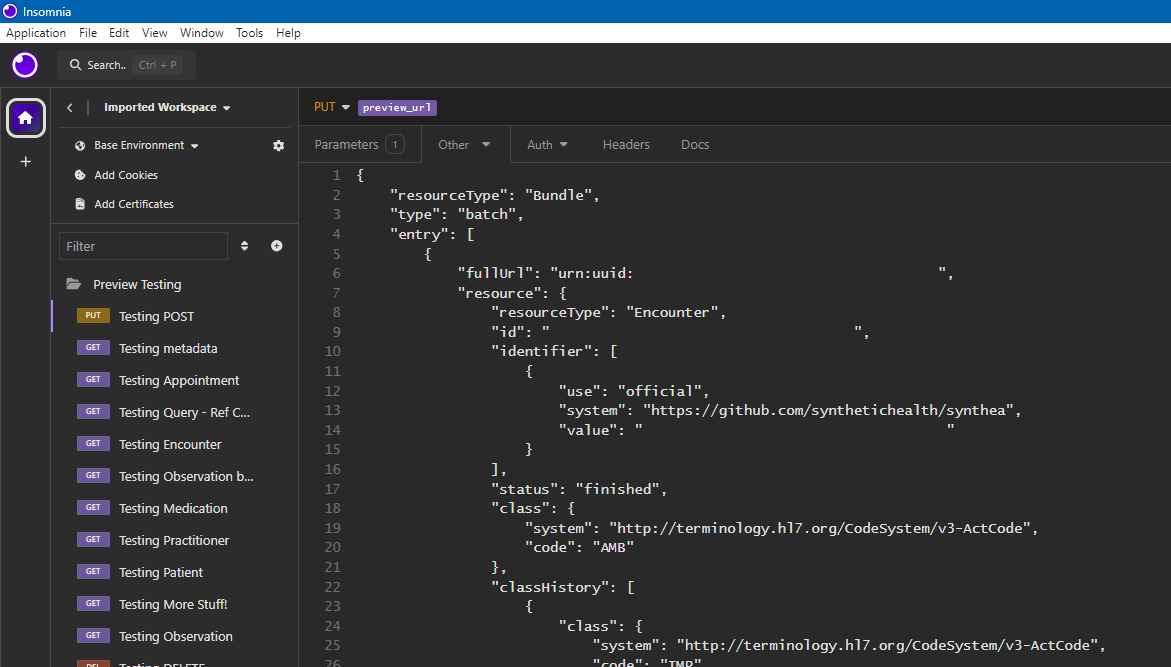
Use Insomnia to post a new FHIR bundle that contains Encounter and Observation.
Note
This step assumes that you've already completed the setup of Insomnia and have validated connectivity by following the steps in the previous exercise.
Open a new request in the workspace that you created in the previous exercise.
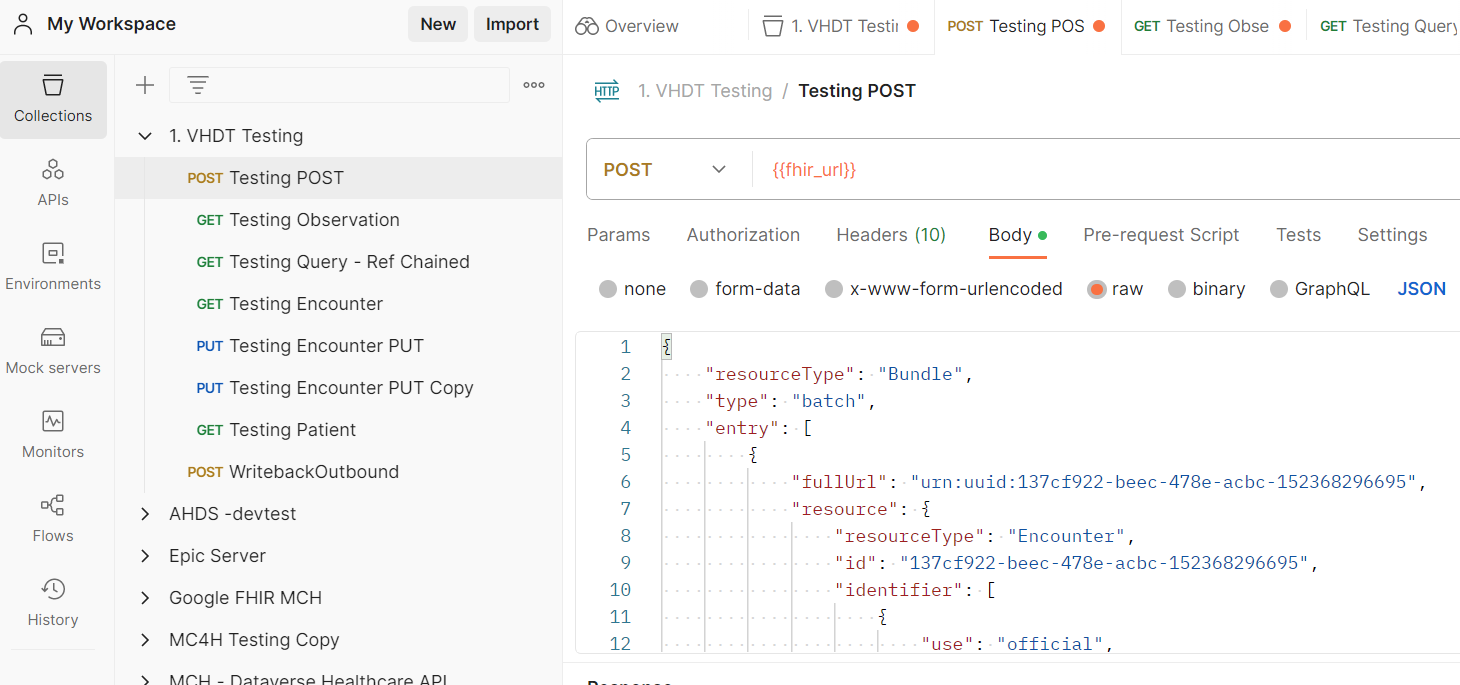
Set the request type to POST, and then set the URL to the base URL of your FHIR service.
Note
Don't include other parameters to ensure that the Bundle resource is processed.
In the Body section, set the type to raw and set JSON as the format.
In the text box, add the JSON of the bundle from the Exercise-8-Enc-Obs-FHIRServerOnly.json sample.
Acquire a new token and then select it. Select Send.
Go to your model-driven app and open the new patient record for Patient One.
In the Encounters tab, select Refresh from the Encounters subgrid. A message displays stating that No Encounter data for the Patient One record is available.
Switch to the Observation tab, which shows the same message, that no Observation records are available for Patient One.
Edit the encounter and observation data routes
Now, you can change the data route records to route the data for virtual tables to source data from the FHIR server.
Go to the Data Integration Toolkit application.
Select the Data Routes section from the left navigation pane.
Open the Data Route for Encounter, whose Routing Entity is listed as msemr_ve_encounter.
Update the Data Provider to Use value as Virtual.
At the Data Provider Change Confirmation, select Confirm Change.
Note
The Data Provider Change Confirmation message informs the administrator user that the movement of data between the FHIR service and/or Dataverse is left to the customer. Microsoft Cloud for Healthcare doesn't automatically update or delete data in either system.
For the Entity Map to Use field, select the Entity Map for Encounter, named msemr_encounter <-> Encounter.
Select Save & Close.
Complete the previous steps for the Data Route for Observation. For the Entity Map to Use field value, select msemr_observation <-> Observation.
Select Save & Close.
Complete the same steps for the Data Route for Allergy Intolerance. For the Entity Map to Use field value, select msemr_allergyintolerance <-> AllergyIntolerance.
Select Save & Close.
View the encounter and observation records
The Data Route records are changed to pull data from the FHIR service. Now, you can view the data from within your new Patient form.
Go to your model-driven app and open the new patient record for Patient One.
View the Encounters tab and then select Refresh from the Encounters subgrid.
Refresh the Encounter subgrid. The Encounter data that's sent by Insomnia for the Patient One record is now available.
Open the Observations tab and refresh the grid. The Observation data that's sent by Insomnia for the Patient One record is now available.
Perform create and update operations for allergy/sensitivity
Virtual health data tables support create, update, and delete operations. As a result, you can perform operations from within Dataverse that are posted directly to the FHIR service.
Create a new allergy/sensitivity record
To create a new allergy/sensitivity record, follow these steps:
Go to your model-driven app and select Allergy/Sensitivities in the left navigation pane.
From the available tools in the Allergy/Sensitivities grid, select New.
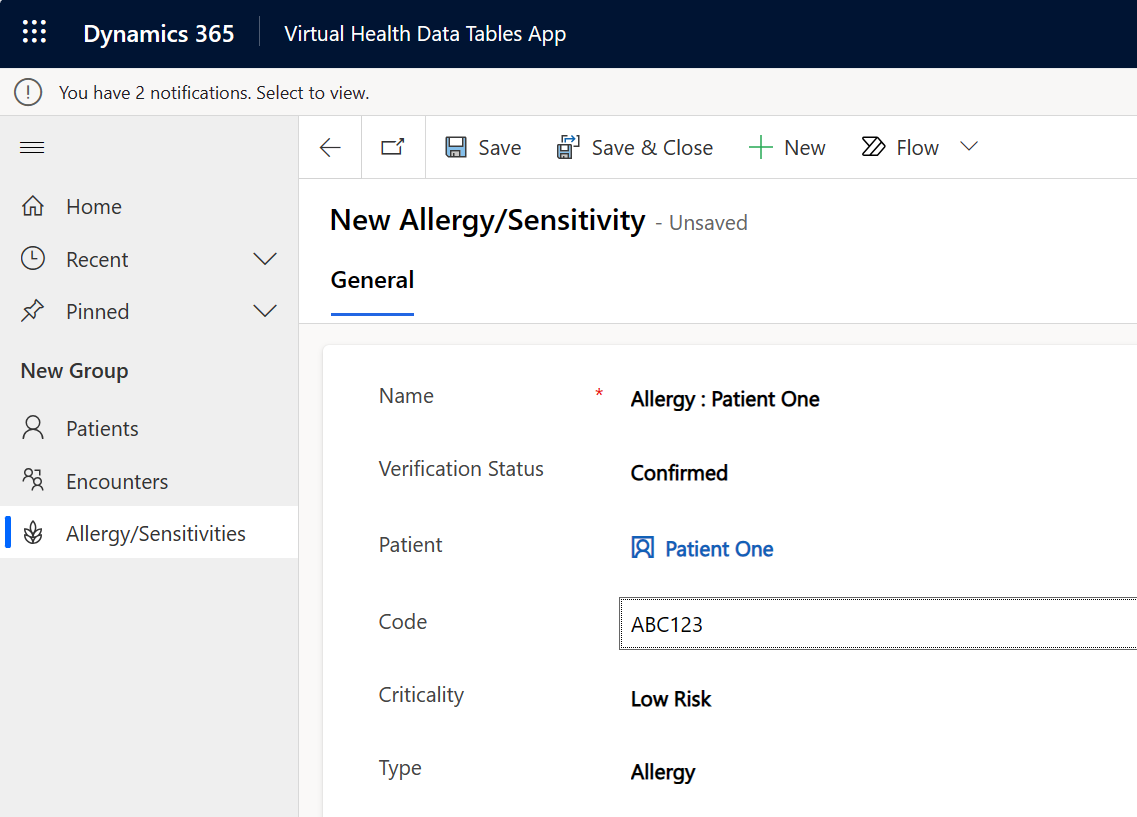
In the new Allergy/Sensitivities form, enter values from the following table.
Field Value Name Allergy: Patient One Verification Status Confirmed Patient Patient One Code ABC123 Criticality Low Risk Type Allergy Select Save.
After the record saves, copy the new record ID from the browser URL.
From the address bar, copy the GUID value following the ID parameter in the URL, for example, the trailing portion of the URL: *&etn=msemr_ve_allergyintolerance&ID=c14ab13e-6714-4512-94a6-8e5e5ce9b773
Use Insomnia to view the new record on the FHIR server
In this task, you use Insomnia to view the new record on the FHIR server by following these steps:
While using Insomnia, retrieve the new Allergy/Sensitivity record on the FHIR service.
Open a new request in the workspace that you created in the previous exercise.
Set the request type to GET, and then set the URL to the base URL of your FHIR service.
After the base FHIR URL, include the name of the FHIR resource and the new ID, for example AllergyIntolerance/3cd38aa5-52a9-445c-9d11-690d0e4762be.
Acquire a new token and then select it. Select Send.
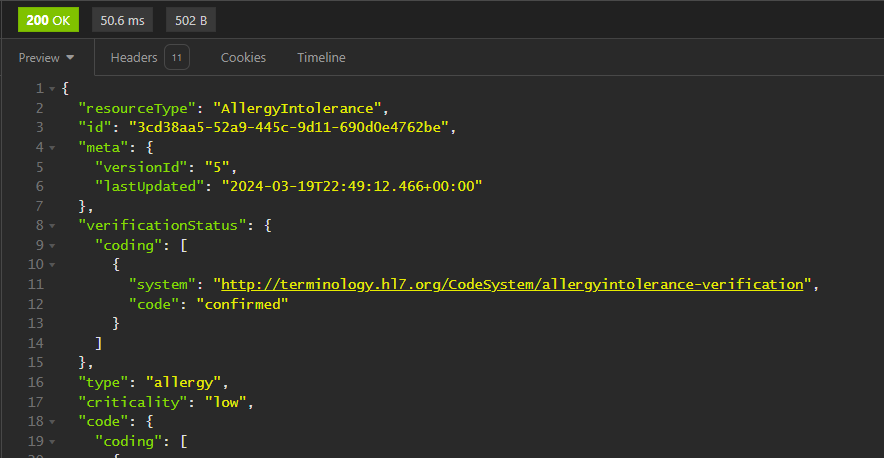
The results pane should show the FHIR resource that represents the new Allergy/Sensitivity record that you created in the Dataverse form.
The FHIR ID value should be the same as the ID that you copied from the Dataverse URL.
The meta field for versionId should be 1, and the lastUpdated value should be the date and time that you created the Allergy/Sensitivity record in Dataverse in UTC time.
Update or delete the Allergy/Sensitivity record in Dataverse and then validate in Insomnia
In this task, you'll update or delete the Allergy/Sensitivity record in Dataverse, and then you validate in Insomnia.
Go to your model-driven app to the new Allergy/Sensitivity record that you created.
Update the Code field value to XYZ456, and then change Criticality to High Risk.
Select Save.
In the previous Insomnia request, select Send again.
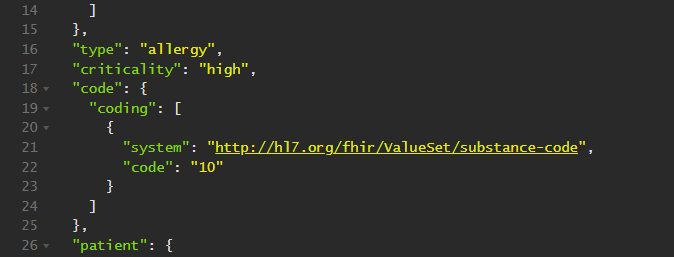
In the results pane, the updated FHIR resource displays.
The meta fields for versionId and lastUpdated should also show as updated.
The Allergy/Sensitivity field values for code and criticality should also be updated to reflect the new values that you entered in Dataverse.
In the model-driven app, go to the new Allergy/Sensitivity record that you updated.
Select Delete.
In the previous Insomnia request, select Send again.
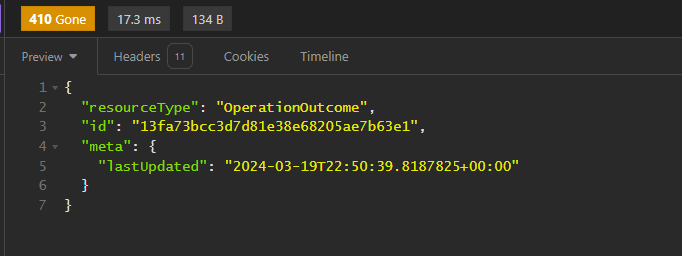
The results pane should show only an OpertionOutcome resource and no Allergy/Sensitivity record.
You can repeat these steps and use your own bundles of FHIR data for the available virtual tables, as listed in the Data Routes feature.
In this exercise, you observed the virtual health data tables in action in your new model-driven application. You created a new patient record in the FHIR server and Dataverse, and you also displayed related records that are only persisted on the FHIR service. Additionally, with virtual health data tables, you updated the record to remote data from within the Dataverse application.
