Exercise - Deploy healthcare data solutions in Microsoft Fabric with sample data
In this exercise, you deploy healthcare data solutions in Microsoft Fabric and ingest sample data by configuring and running the data pipelines.
Prerequisites
To complete this exercise, you need to have the ability to create Microsoft Fabric workspaces with capacity or trial capacity.
Create a workspace
To create a workspace, follow these steps:
Go to Power BI and sign in.
On the left navigation pane, select Workspaces > + New workspace.
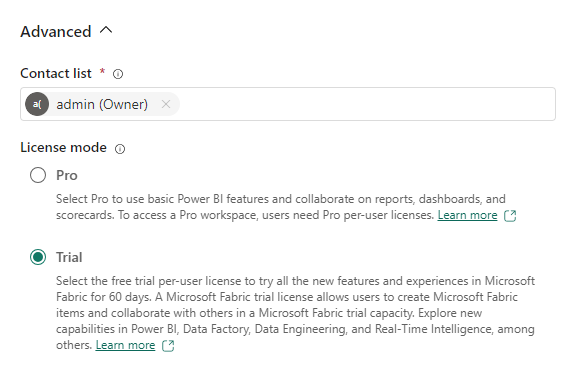
Enter FL HC Cloud for Name, where FL is your initials, and then expand the Advanced section.
For License mode, select Trial and then select Apply.
Install healthcare data solutions
To install healthcare data solutions, follow these steps:
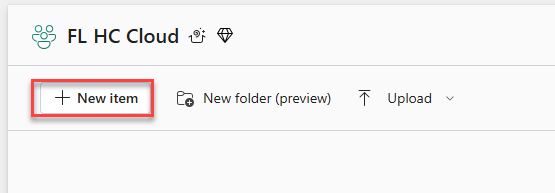
Select the workspace that you created and then select + New item.
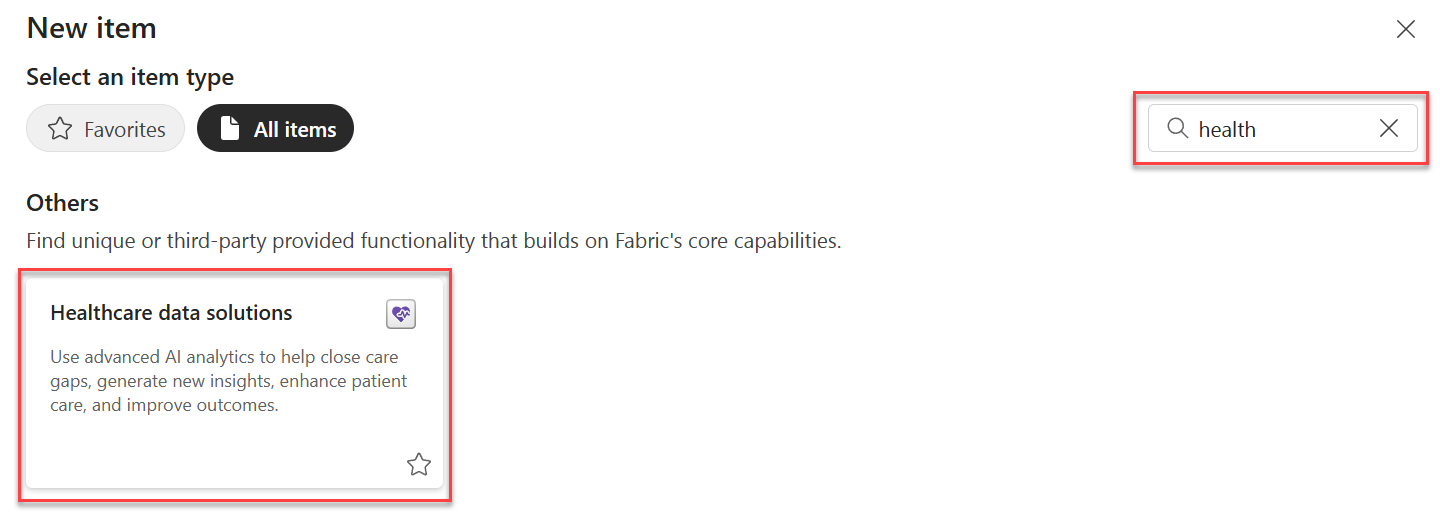
Search for health and then select Healthcare data solutions.
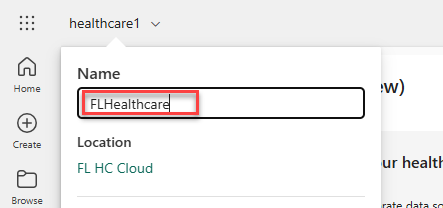
After the solution deploys, select healthcare1 in the upper-left corner and rename it as FLHealthcare (replace FL with your initials). This change isn't required for deployments, but the system uses the name to prefix the assets that the solution creates.
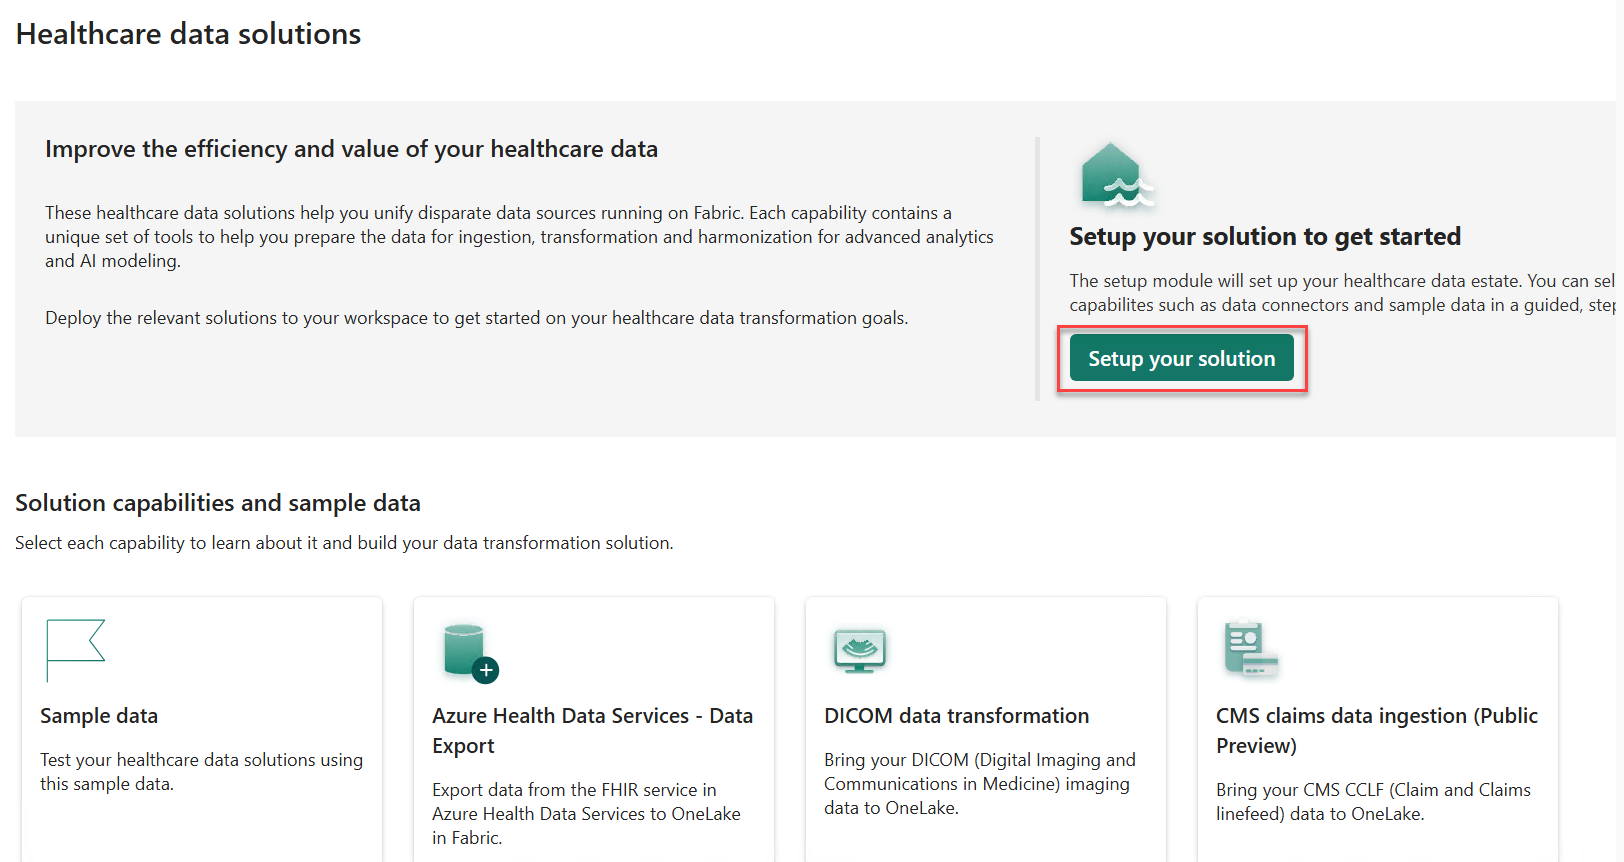
Select Setup your solution.
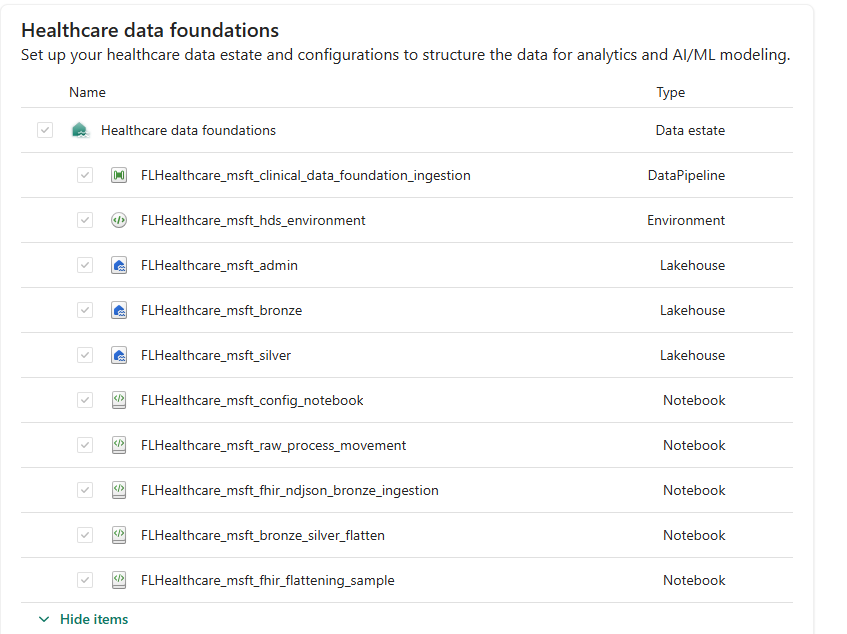
Select Show items to expand and view the components that deployed to your workspace.
Review the items to be deployed and then select Next. The following image shows the items that are part of healthcare data foundations.
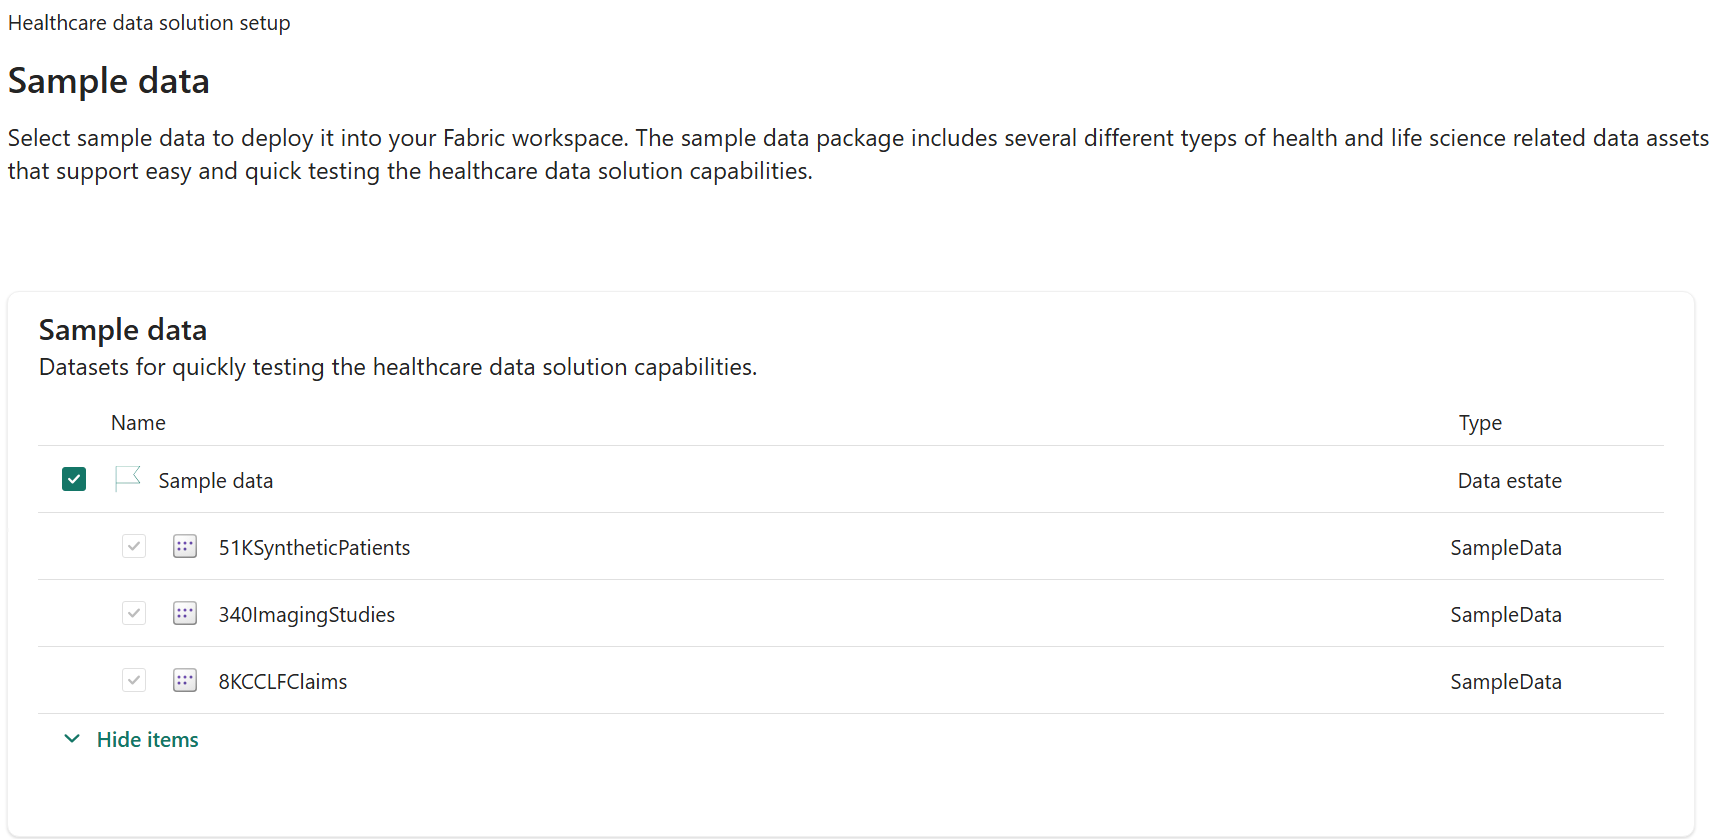
Select Sample data and then select Show items to view the three types of available sample data.
Note
If you installed the data in a production environment, you can skip this step. In this exercise, you test the ingestion processes, so you must select the Sample data option.
Select Next.
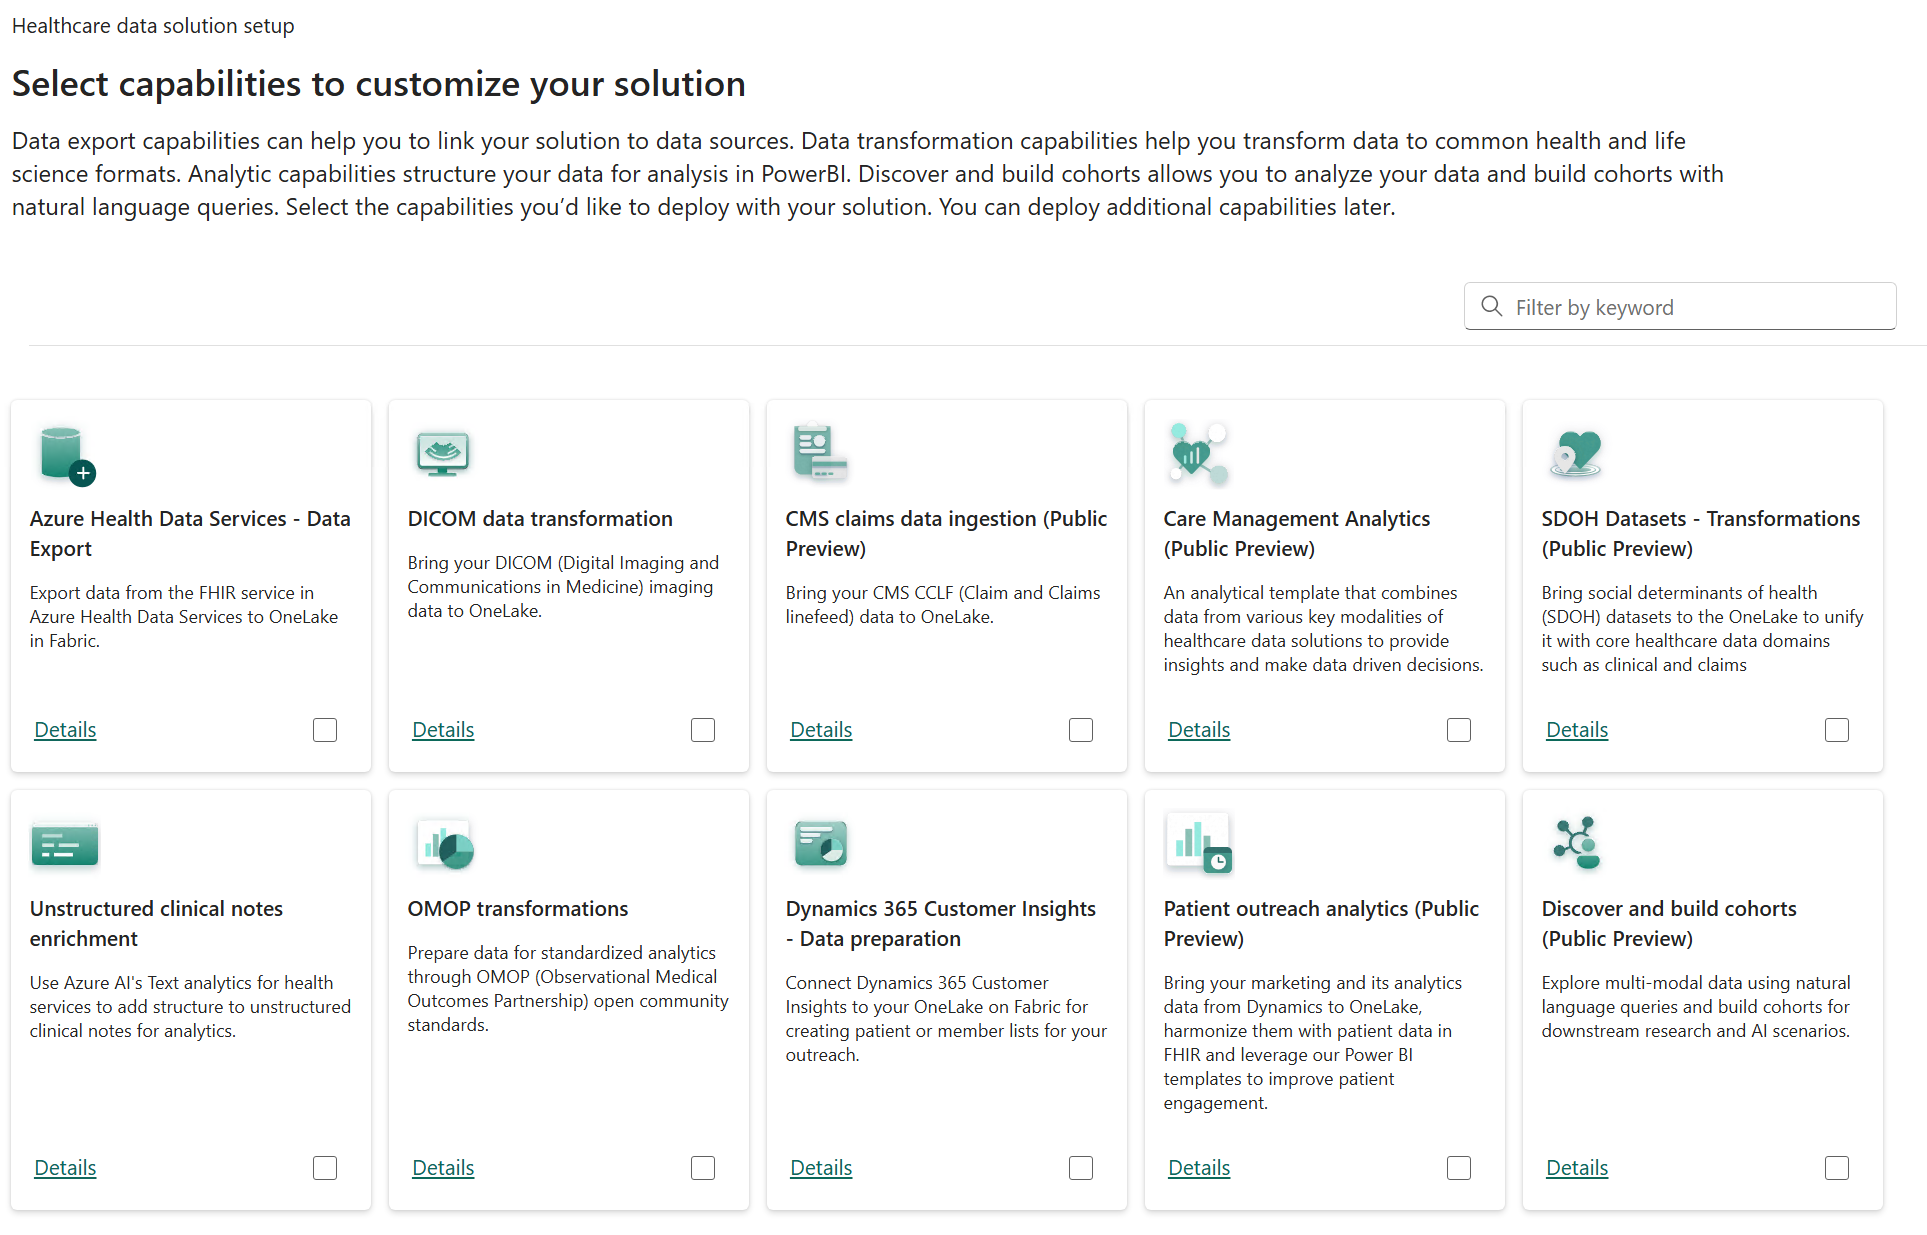
Review the capabilities. This step provides you with the option to deploy each capability that you need, all at once. For this exercise, you incrementally add the other components as you progress through the module.
Select Next.
In the Settings configuration, don't make any changes. The page displays contents based on your selection and the capabilities that you want to install.
Select Next.
Review and accept the Terms of service, and then select Deploy.
When the deployment is in progress, you can view the indicators on each item.
After the deployment completes, proceed to the next task. The deployment is complete except for publishing an environment change of the runtime.
Copy sample data for ingestion
In this task, you copy data into the Ingest folder for processing. You do so by using Python code to copy data from the sample folder into the ingestion folder. You can also perform this task by installing and using Azure Storage Explorer; however, it requires you to install it on your local device. You can also use Fabric data pipelines with the Copy Data activity to copy files into the ingestion folder.
Select the FL HC Cloud workspace that you created and then select the FLHealthcare_msft_bronze lakehouse.
In the Explorer panel, select Files, select the ellipsis (...) button, and then select Properties.
Copy the ABFS path. Save this value because you need it when you configure where to copy data to or from.
Close the Properties pane.
Select your FL HC Healthcare workspace.
Select New item. You create your own custom notebook to hold your logic to copy the files.
Search for notebook, and in the Get data section, select Notebook.
In the Explorer pane, select Lakehouses.
Select the Existing Lakehouse option and then select Add.
Select FLHealthcare_msft_bronze and then select Add.
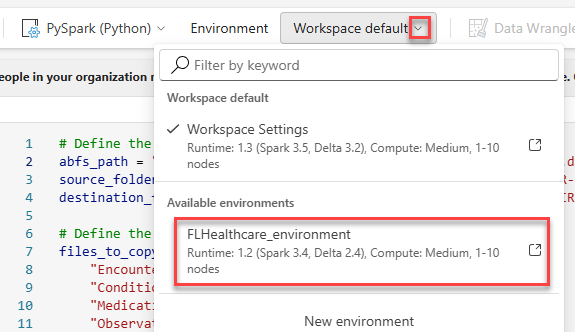
Switch to FLHealthcare_environment.
Copy the following code and then add it to the notebook that you created. Replace [ABFS path] with the ABFS path that you copied. This logic copies the provided list of files in the bronze lakehouse sample folder into the ingestion folder for processing.
# Define the source and destination folders
source_folder = "[ABFS path]/SampleData/Clinical/FHIR-NDJSON/FHIR-HDS/51KSyntheticPatients"
destination_folder = "[ABFS path]/Ingest/Clinical/FHIR-NDJSON/FHIR-HDS/"
# Define the files to be copied
files_to_copy = [
    "Encounter.ndjson",
    "Condition.ndjson",
    "MedicationRequest.ndjson",
    "Observation.ndjson",
    "Patient.ndjson",
    "Practitioner.ndjson",
    "PractitionerRole.ndjson",
    "Procedure.ndjson",
    "CarePlan.ndjson",
    "Goal.ndjson",
    "Location.ndjson",
    "Appointment.ndjson"
]
# List all files in the source folder
files_in_source = mssparkutils.fs.ls(source_folder)
# Copy only the specified files to the destination folder
for file in files_in_source:
    file_path = file.path  # Get the full path of the file
    file_name = file.name  # Get the file name

    # Check if the file is in the list of files to copy
    if file_name in files_to_copy:
        destination_file_path = destination_folder + file_name  # Construct destination file path

        try:
            print(f"Copying: {file_name}")
            # Copy the file to the destination folder
            mssparkutils.fs.fastcp(file_path, destination_file_path)
            print(f"Copied: {file_name}")
        except Exception as e:
            print(f"Failed to copy {file_name}: {e}")
print(f"Selected files copied successfully from {source_folder} to {destination_folder}.")
Change the environment to FLHealthcare_environment.
Select Run all.
After the run completes, select Lakehouses from the Explorer pane.
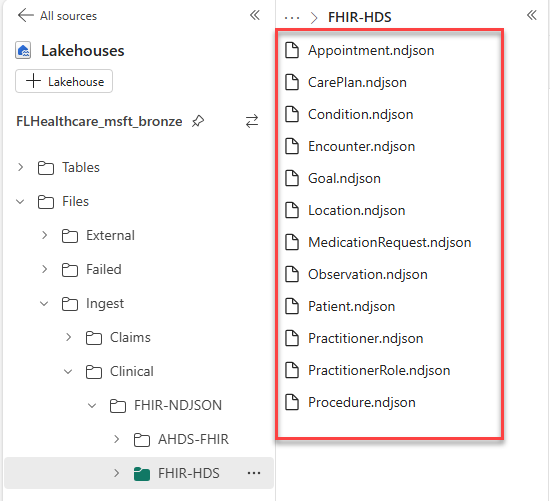
Expand Files > Ingest > Clinical > FHIR-NDJSON, and then select FHIR-HDS. The sample data should be staged.
Check environment publishing status
To check the environment publishing status, follow these steps:
Select your FL HC Cloud workspace.
Locate and select the environment. You should view the environment publishing progress. After the publishing is complete, you can proceed to the next task. This process typically takes 5-10 minutes to finish, depending on the sample data. If the message for active publishing state doesn't appear, go to the next task.
Run the data ingestion pipeline
To run the data ingestion pipeline, follow these steps:
Select the FL HC Cloud workspace that you created. Select FLHealthcare_msft_clinical_data_foundation_ingestion to open the ingestion data pipeline.
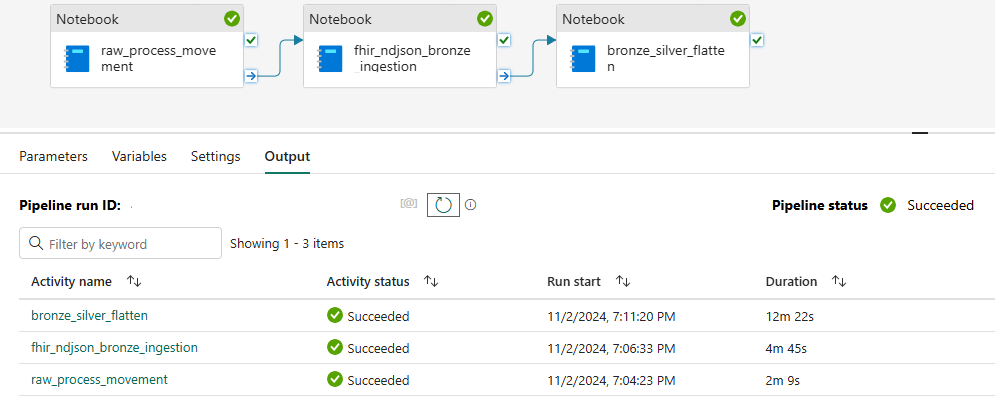
Review the pipeline. The pipeline runs the following notebooks, which move the files from the Ingest folder into the Process folder, ingest the data into the bronze lakehouse, and then flatten the data into the silver lakehouse.
Select and review the descriptions of each notebook.
Select Run from the command bar and then monitor the progress in the pipeline status in the lower part of the page.
Wait for the processing to complete. Select the Refresh icon if it doesn't update for a while.
A Succeeded activity status should show for each process. If these three activities fail, it's likely that your workspace environment is still publishing a runtime change made during deployment. You can recheck the environment or wait for a couple of minutes and then retry.
Select the FL HC Cloud workspace that you created and then open the FLHealthcare_msft_silver lakehouse.
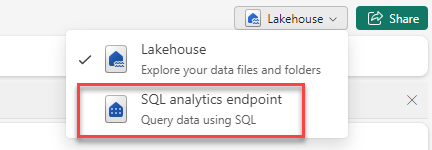
In the upper-right corner, change Lakehouse to SQL analytics endpoint.
Locate Patients in list of tables and then query for 100 patients.
Change the query as follows, replacing FL with your initials.
    Select Count(*)
FROM [FLHealthcare_msft_silver].[dbo].[Patient]
The query must return 10,364 patients.
You completed the deployment and ingested sample data. Now, you can view and explore the different tables in the silver lakehouse or proceed to the next module.
