Exercise - Use the canvas app
In this exercise, you explore and use the functionality in the canvas app that you created. You search for the patient by name and review how the system returns the data from FHIRlink and displays it in your canvas app for the Patient and related Appointment records.
Use the new canvas app functionality
In the following sections, you use the new canvas app functionality to search for patients by name and view existing appointments for the patient.
Search for patients by name
To search for patients by name, follow these steps:
Go to Power Apps.
Open the saved canvas app for editing.
Preview the application and then run the query to check the formula update.
Press the F5 key to preview the app.
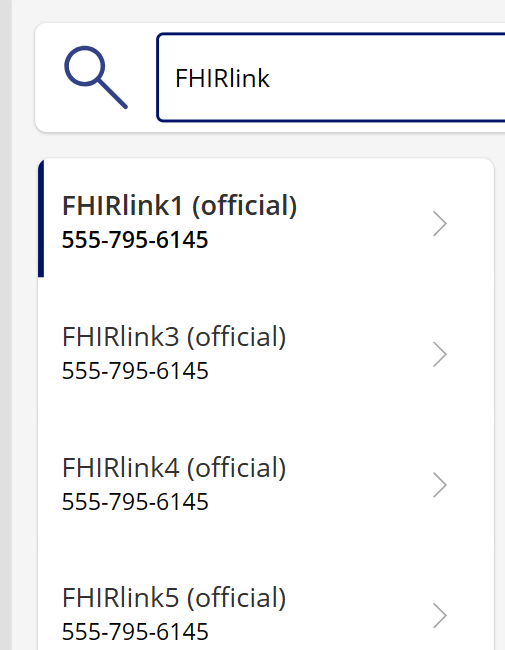
In the TextInputSearch box, enter a name, such as FHIRlink.
Select the IconSearch control.
View the updated list in the PatientListGallery.
Select a patient from the list in PatientListGallery.
The system updates the display to the right of PatientListGallery with more details from the selected patient.
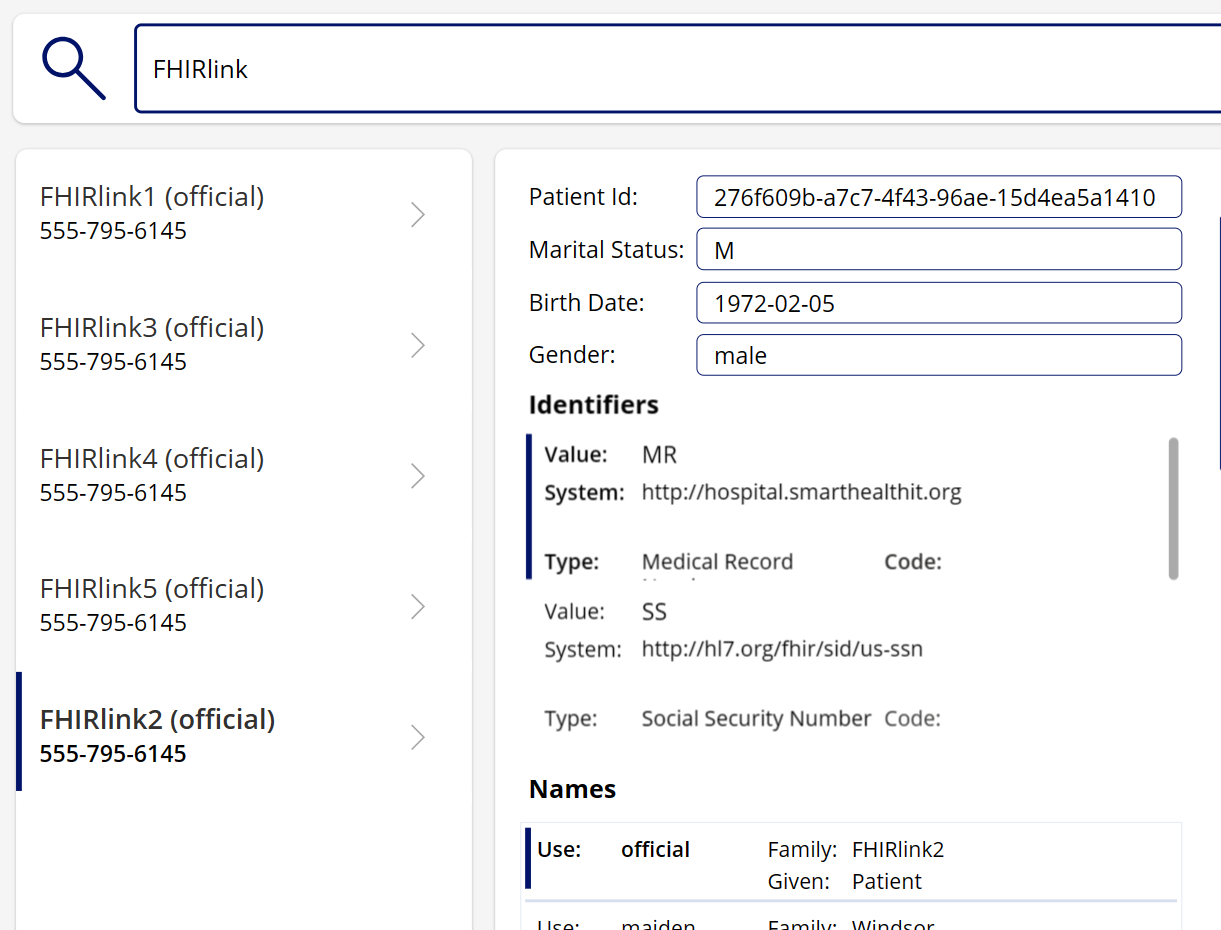


The canvas app should now display individual fields from the patient JSON and child array data.
View existing appointments for the patient
To view existing appointments for the patient, follow these steps:
Select a different patient from the list. The system updates the related controls with that patient's details.
You can view the full patient record for each selected patient along with the name and identifier child arrays. The application populates the related list of appointments.
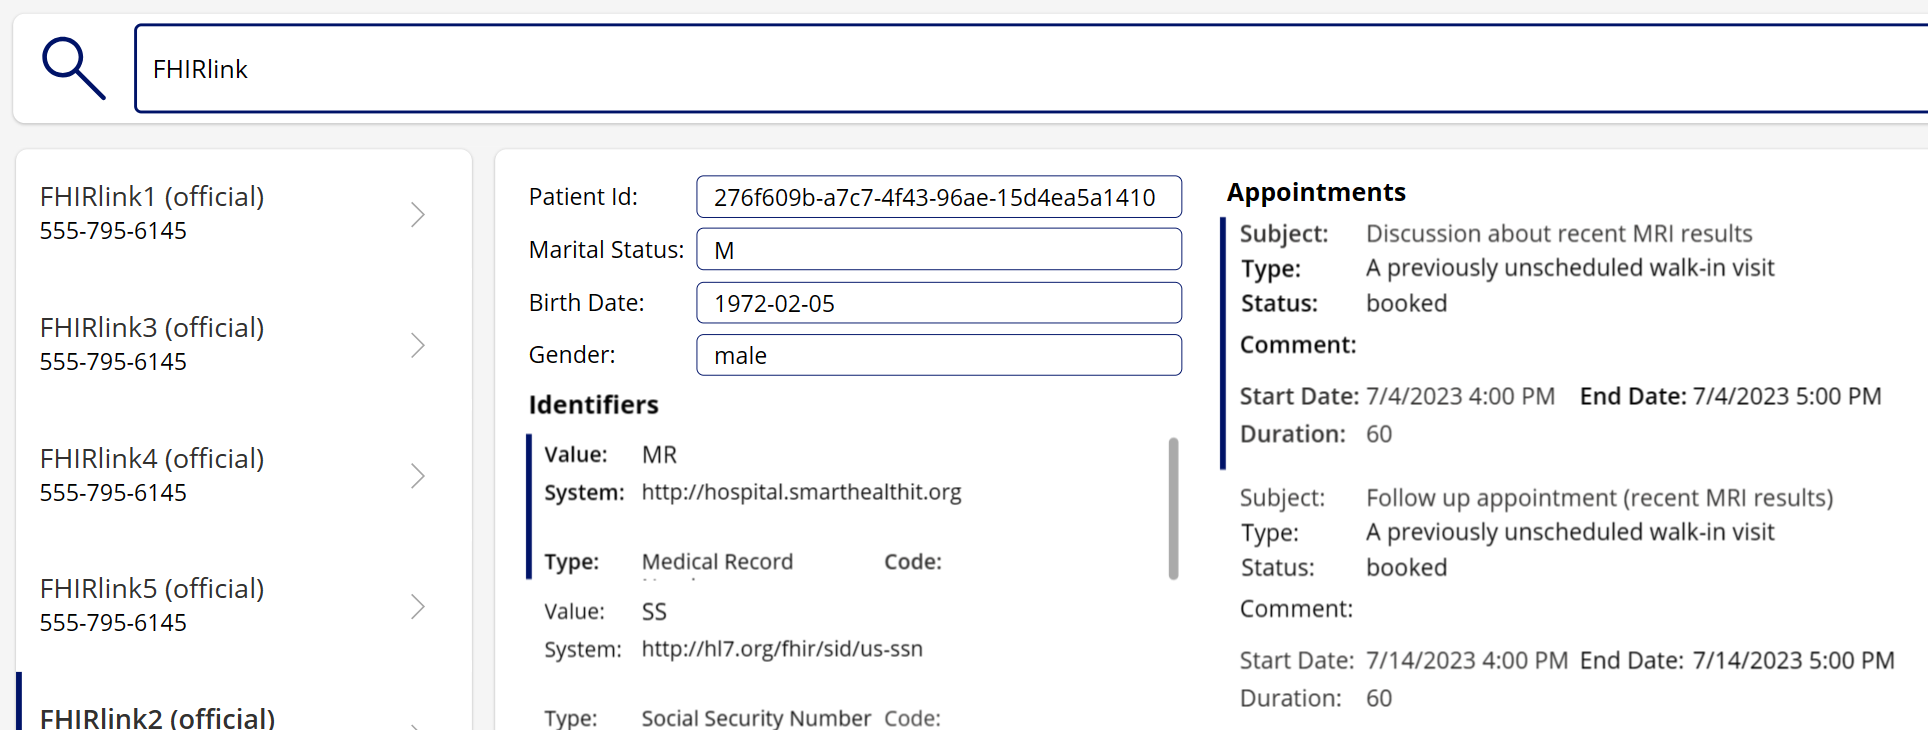
The application updates the related controls with the full patient record and the list of related appointment records.

The preceding tests validate that you successfully retrieved data from FHIRlink for both lists of data by using FHIRlink.ListResources and a single record by using FHIRlink.GetResource. You also explored how you can use the same connector for multiple calls for different FHIR resources.
Create a new appointment
When you selected a patient, you can view the list of appointments. Now, you can test how to create a new appointment for the selected patient.
Post a new appointment to your FHIR service
To post a new appointment to your FHIR service, follow these steps:
Go to Power Apps.
Open the saved canvas app for editing.
Preview the application and then run the query to check the formula update.
Press the F5 key to preview the application.
In the TextInputSearch box, enter a name, such as FHIRlink.
Select the IconSearch control.
Select a patient from the list, such as FHIRlink1.
In the Subject text box, update the text to read Follow-up appointment.
Add a new Comment, such as This is a new follow-up appointment.
Select CHECKUP as the Type.
Set the Duration as 60.
Optionally, select a new Date/Time value. The default value is the current date and time.
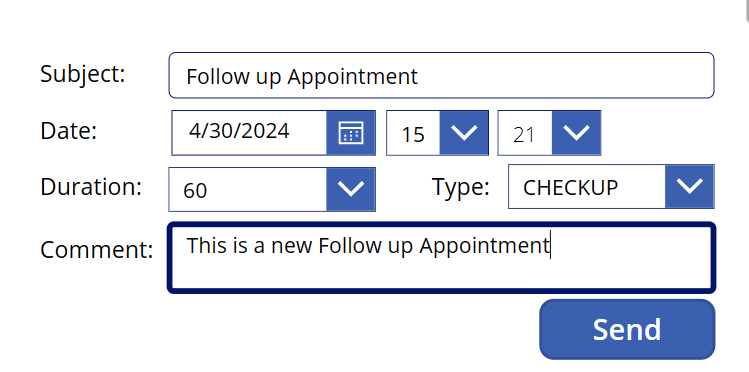
Select Send.
When the progress bar completes, select the IconSearch control and then select patient FHIRlink1 again.
In the Appointments gallery, scroll down to the newly created appointment in the list.
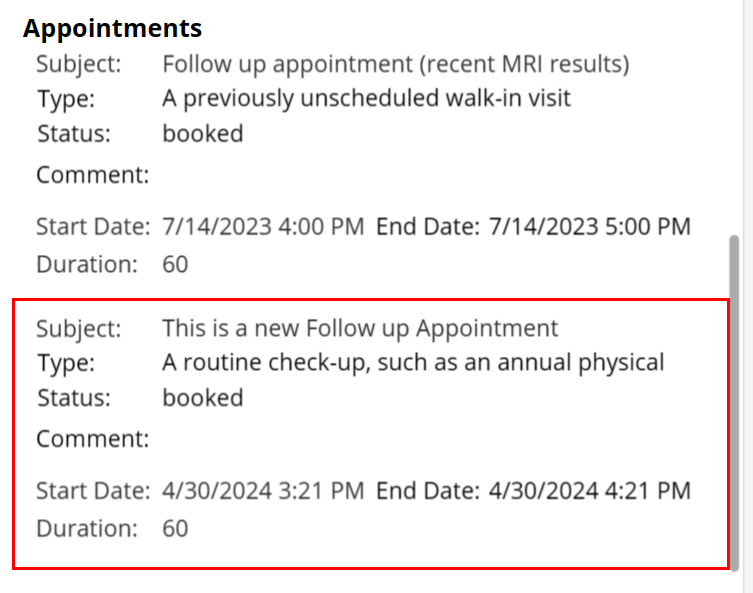


This last task demonstrates how you can post data to the FHIR service with FHIRlink through FHIRlink.CreateResource by using a Power Automate flow. This task also uses the same saved FHIRlink connection that the canvas app uses to complete its work.
Next steps
Now that you're familiar with FHIRlink and know its uses in canvas apps and Power Automate, you can update the app in multiple ways, including:
Work with FHIRlink operations:
Filter on FHIR elements other than name.
Display and capture more appointment fields.
Test updating a record by using FHIRlink.UpdateResource.
Use other Power Apps connectors:
Create a Microsoft Outlook appointment.
Post to a Microsoft Teams channel.
Use advanced Power Fx:
Add error handling to the canvas app controls and methods.
Have the system automatically reload appointments when you create them.