Exercise - Connect to Azure Health Data Services by using FHIRlink
In this exercise, you set up a new FHIRlink connection in your environment to an Azure Health Data Services FHIR service instance. This connection provides access to the FHIR services from your canvas apps, Power Automate flows, and logic apps from Azure Logic Apps.
Create an FHIRlink connection
In this task, you create a new FHIRlink connection to an Azure Health Data Services FHIR service instance and save it in your environment.
Go to Power Apps.
Select Connections on the left navigation pane.
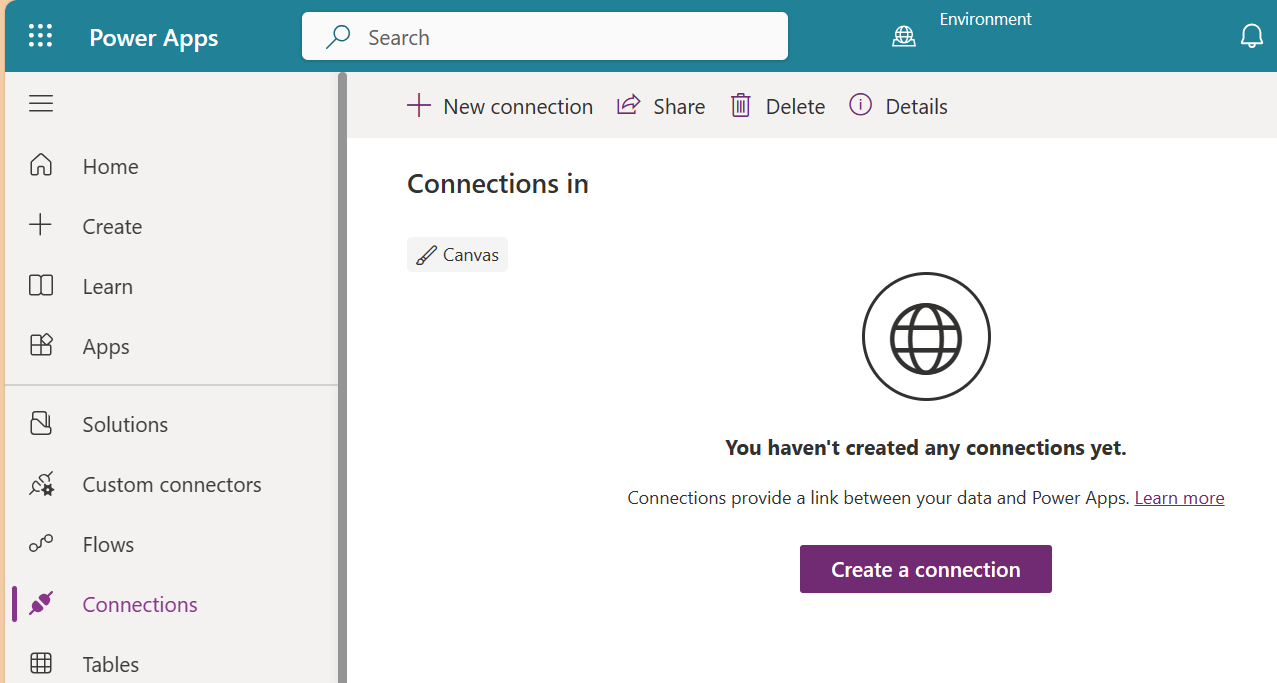
In the Search box in the upper right of the page, enter FHIRlink.
Select FHIRlink from the list.
An options dialog appears. Select the default Authentication Type and then enter the URL and URI for your Azure Health Data Services FHIR service.
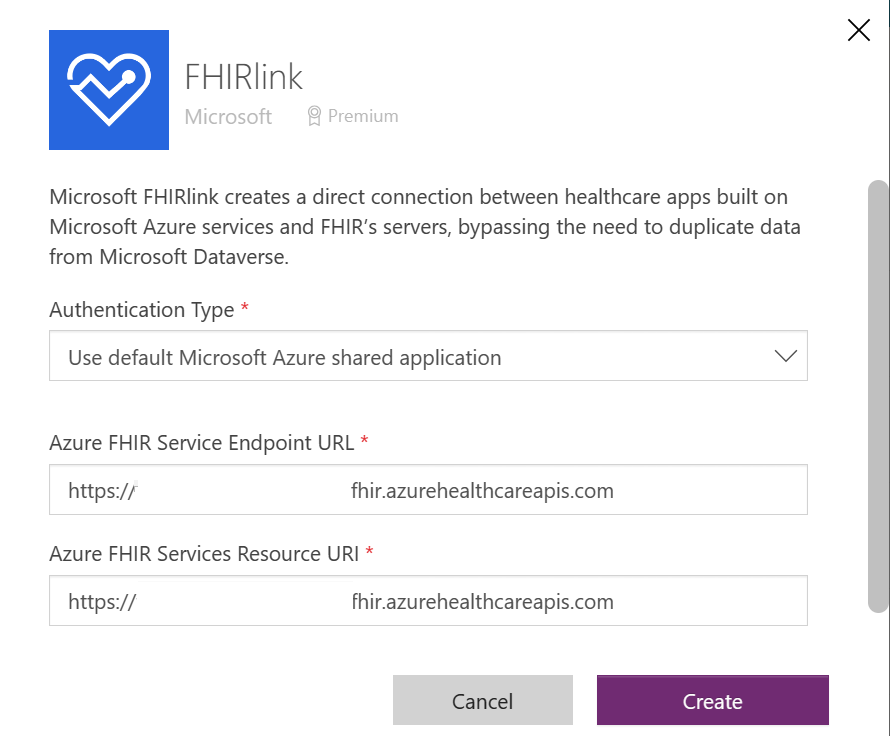
Select Create. Enter the credentials for the user that has access to the Azure Health Data Services FHIR service.
After you save, the new connection for FHIRlink shows as saved in your environment.
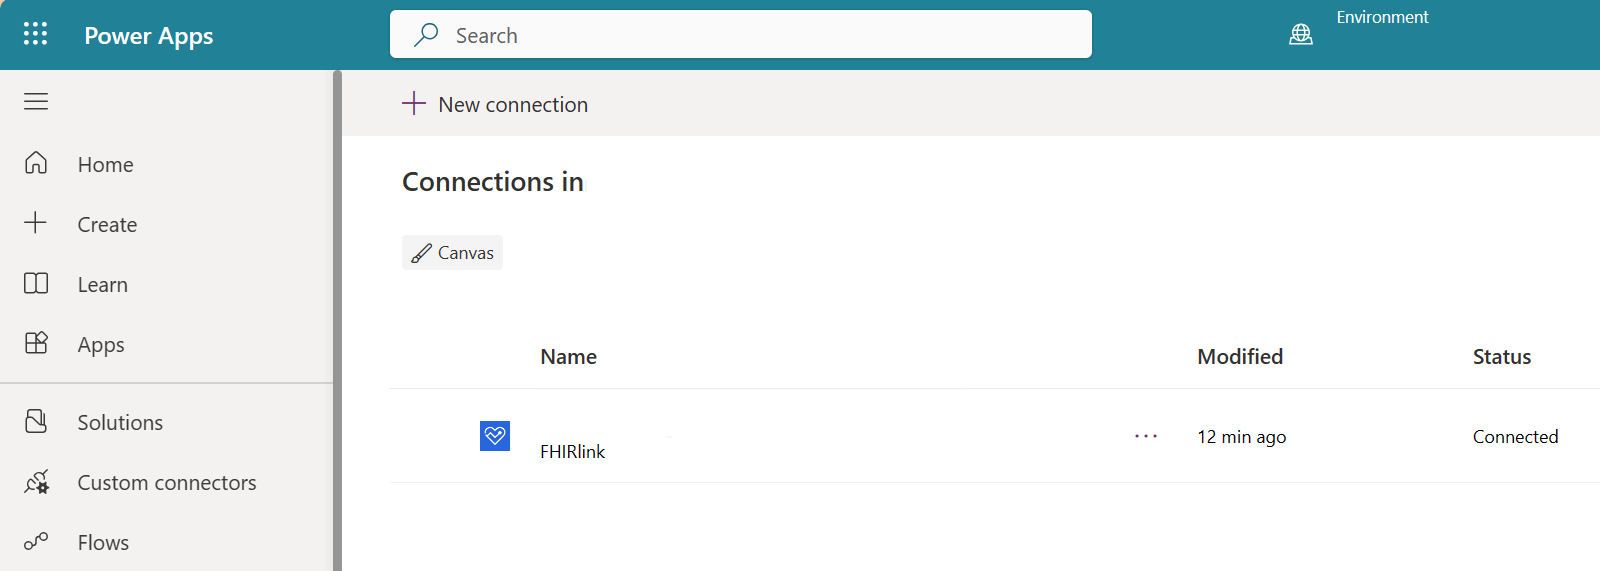


Now, you can use this connection in multiple canvas apps and Power Automate flows.
Test your connection with Power Automate
In this next task, you create a new Power Automate flow in your environment and then use the saved FHIRlink connection to query Azure Health Data Services FHIR service.
Go to Power Apps.
Select Flows on the left navigation and then select New flow from the dropdown menu.
Select Instant cloud flow from the list of available templates.
In the Build an instant cloud flow dialog, select Manually trigger a flow and then provide a Flow name, such as Test FHIRlink.
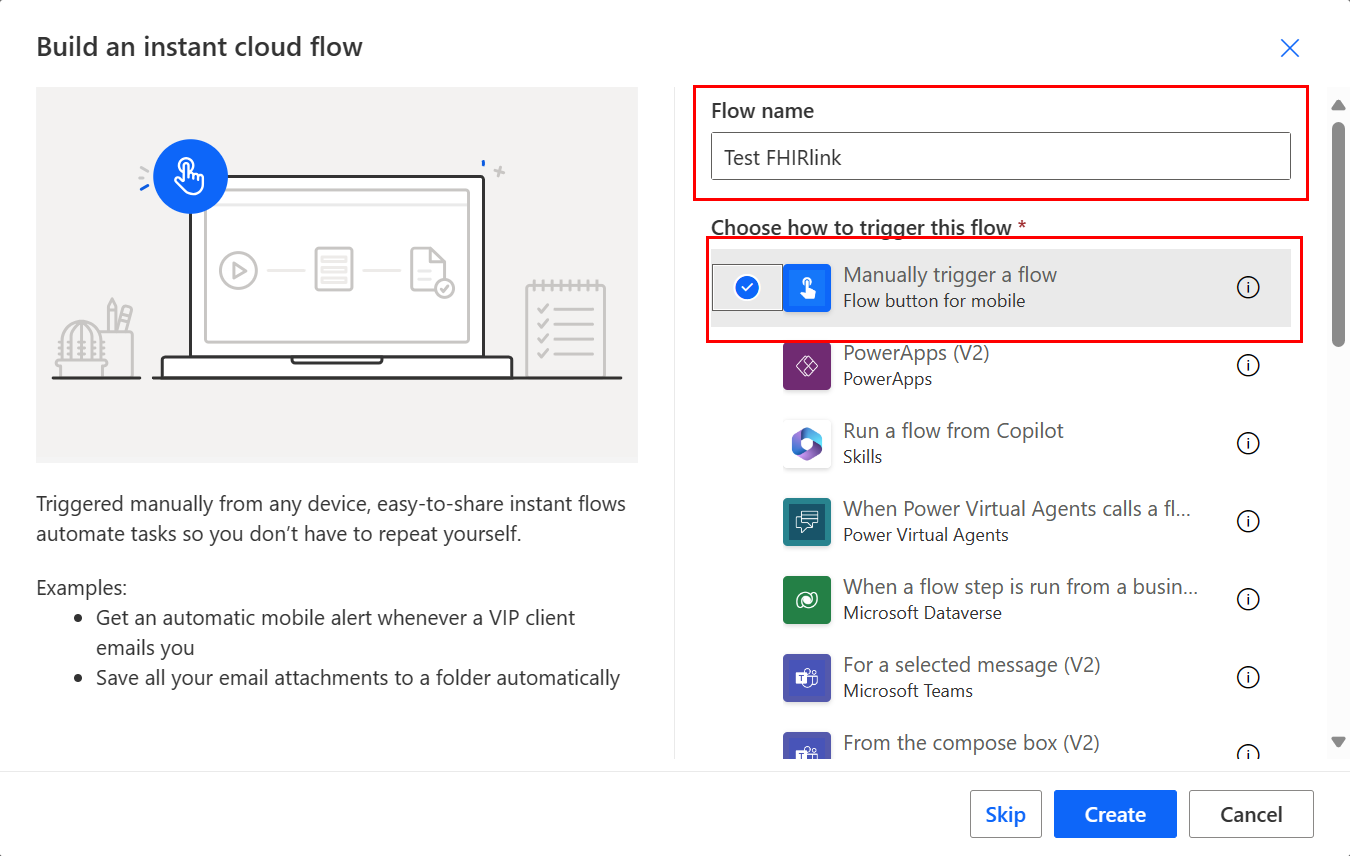
Select Create.
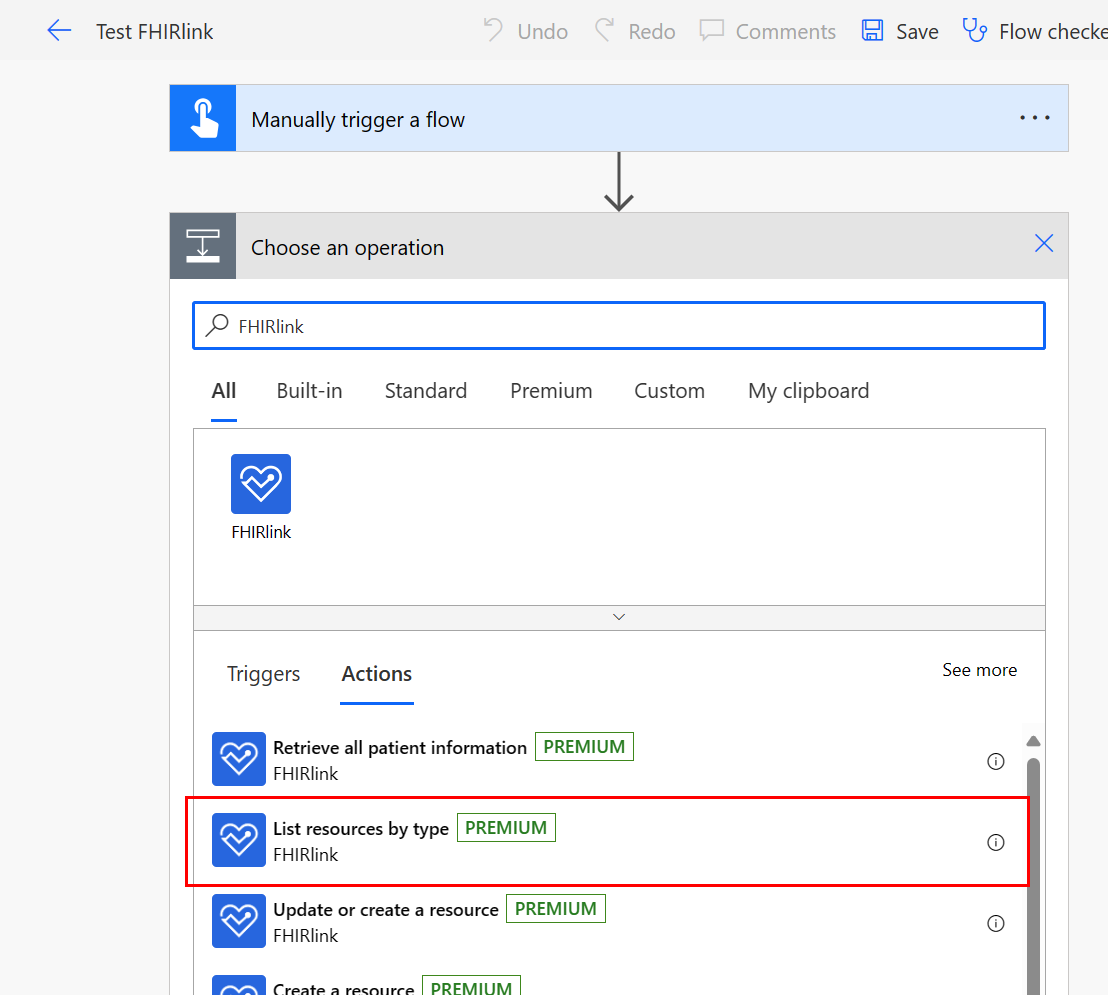
In the flow editor, select + New step. In the Search connectors and actions field, enter FHIRlink to search for the FHIRlink connector.
On the Actions tab, select the List resources by type action. This operation allows you to retrieve a bundle of FHIR resource records for a given FHIR resource type.
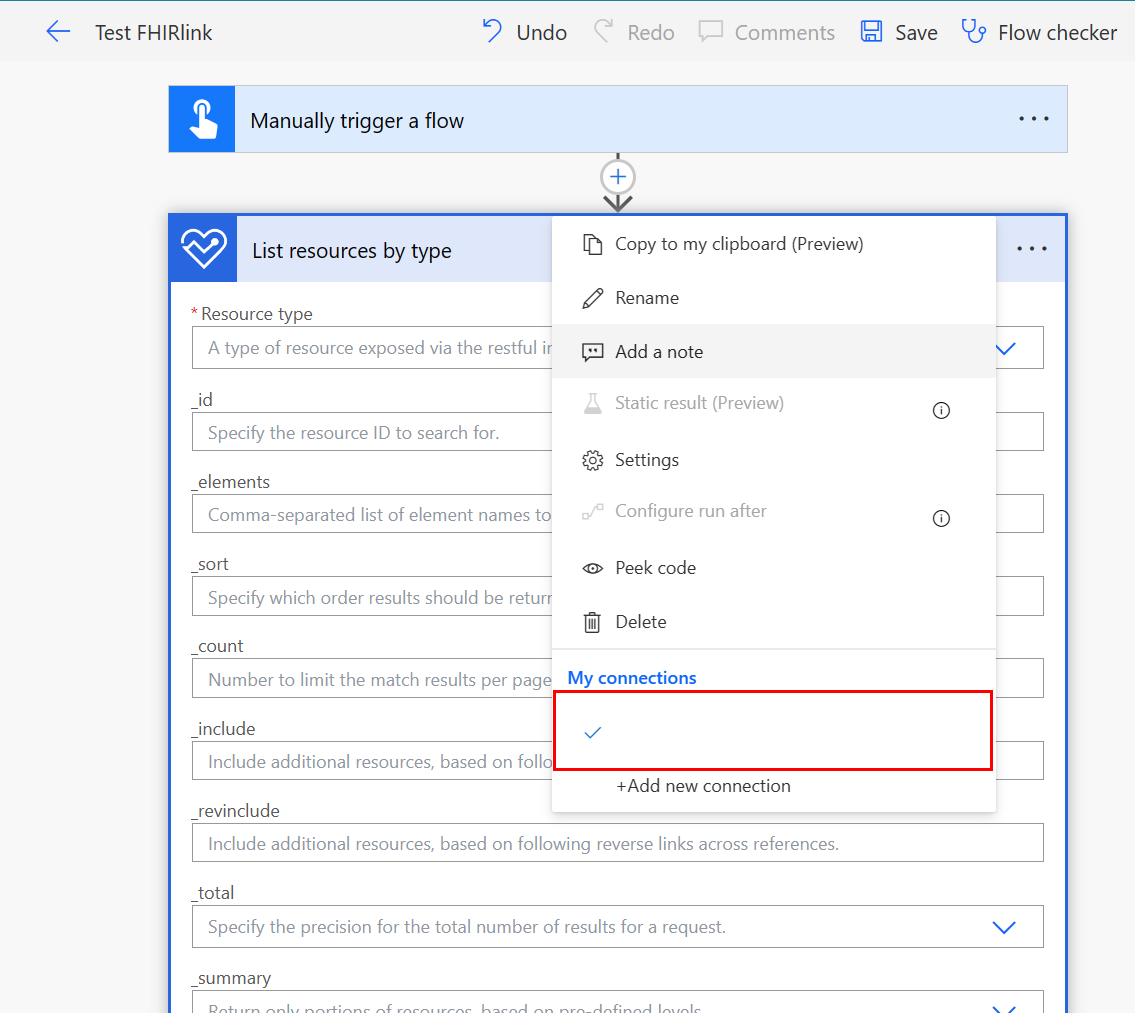
In the List resources by type action, select the ellipsis (...) in the upper right. In the lower part of the menu, the FHIRlink connection instance that you selected in the previous task should display. If you have more than one connection to FHIRlink, you can change it on this page.
In the List resources by type action, select the Resource type dropdown menu. A list of all available FHIR resources that are supported by the Azure Health Data Services FHIR service should display. FHIRlink automatically retrieves this list by querying the
$metadataendpoint.In the List resources by type action, in the Resource type field, search for and select Patient. Enter the name in the
_elementsfield. This step restricts the data elements that are returned in the FHIR resources. Additionally, this step corresponds to the_elementsparameter that you defined in the FHIR API specification.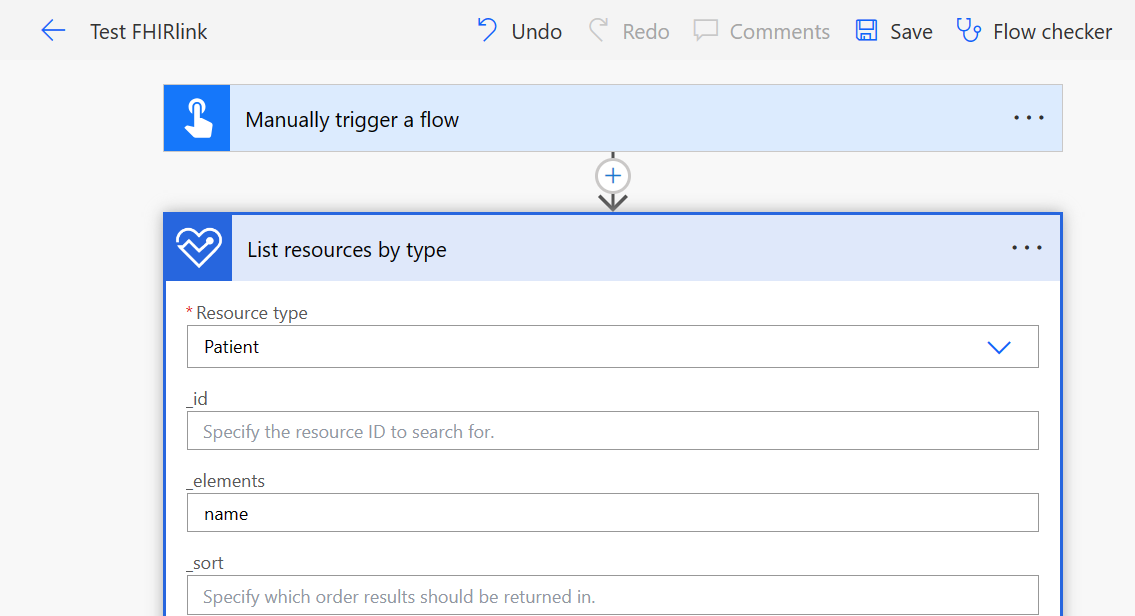
Select Save.
From the upper-right corner of the flow editor, select Test. In the dialog, select Manually and then select Test from the lower part of the pane.
Follow the steps to complete and run your flow. After the flow is complete, expand the List resources by type element. In this view, you can review the results of the flow. You can observe the inputs to the FHIRlink connector making the call to Azure Health Data Services FHIR service: the Patient resource and name element. The Outputs section displays the results of the call to retrieve Patients in the form of a FHIR JSON bundle.
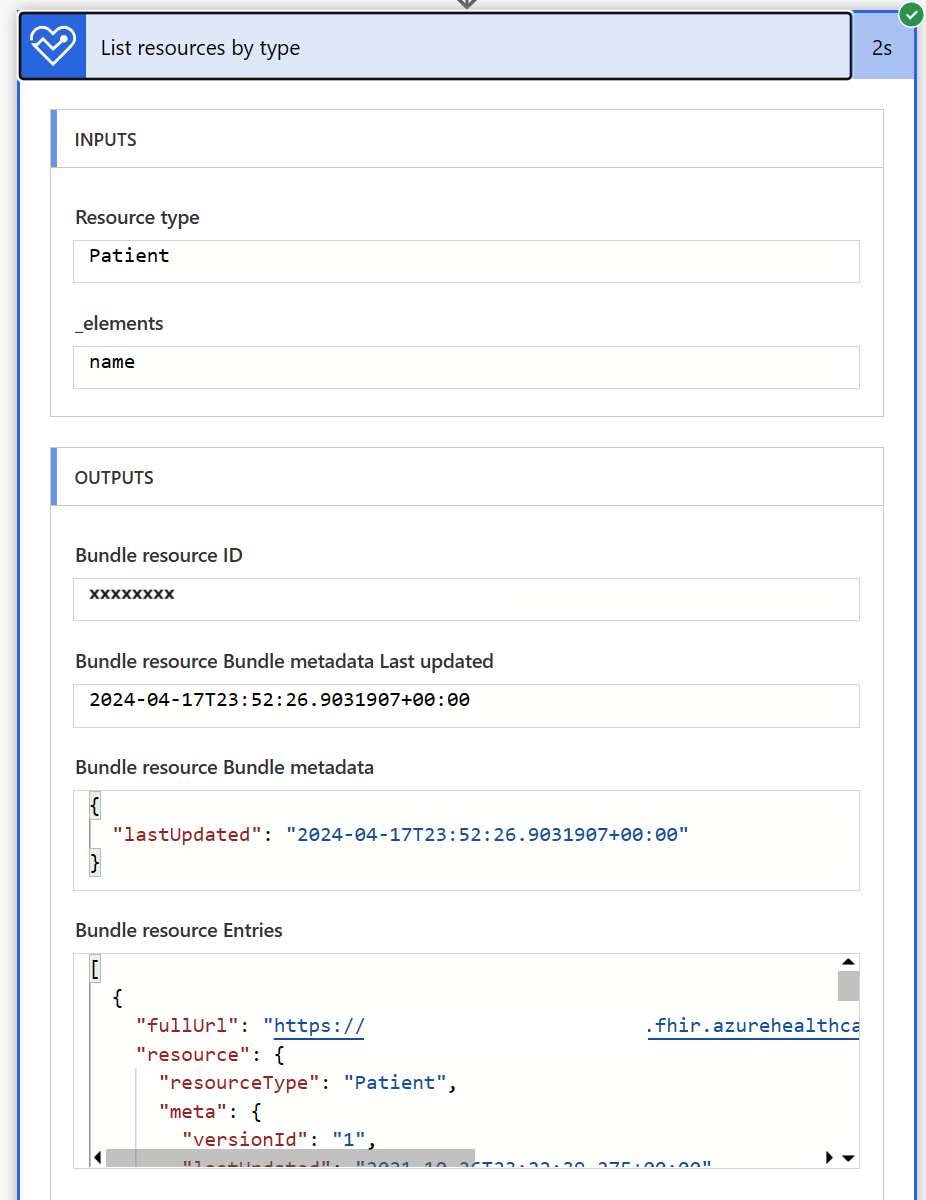


The resulting FHIR JSON bundle indicates that the connection to the Azure Health Data Services FHIR service is correct and can retrieve data.
In this exercise, you created a new FHIRlink connection. You used a Power Automate flow to test this link by retrieving a list of Patient records that are saved in your Azure Health Data Services FHIR service.
Useful links
For more information, select the following links:
FHIR®, Google, and EPIC® are registered trademarks that are owned by Health Level Seven International and Epic Systems Corporation, respectively. Use of these trademarks on this page doesn't constitute endorsement by Health Level Seven International or Epic Systems.