How do I use GitHub Actions to deploy to Azure?
This unit discusses how to use GitHub actions to deploy a container-based web app to Microsoft Azure Web Apps. It covers some options for triggering a workflow. Next, you learn how to work with conditionals in the workflow. Finally, you learn about how to create and delete Azure resources by using GitHub Actions.
Options for triggering a CD workflow
There are several options for starting a CD workflow. In the previous module on CI with GitHub Actions, you learned how to trigger a workflow from a push to the GitHub repository. However, for CD, you might want to trigger a deployment workflow on some other event.
One option is to trigger the workflow with ChatOps. ChatOps uses chat clients, chatbots, and real-time communication tools to run tasks. For example, you might leave a specific comment in a pull request that can kick off a bot. That bot might comment back with some statistics or run a workflow.
Another option, and the one we use in our example, is to use labels in your pull request. Different labels can start different workflows. For example, add a stage label to begin a deployment workflow to your staging environment, or add a spin up environment label to run the workflow that creates the Microsoft Azure resources for you to deploy to. To use labels, your workflow looks like this:
on:
  pull_request:
    types: [labeled]
Control execution with a job conditional
Often, you only want to run a workflow if a certain condition is true.
GitHub workflows provide the if conditional for this scenario. The conditional uses an expression that's evaluated at runtime. For example, you want to run this workflow if a stage label is added to the pull request.
if: contains(github.event.pull_request.labels.*.name, 'stage')
Store credentials with GitHub Secrets
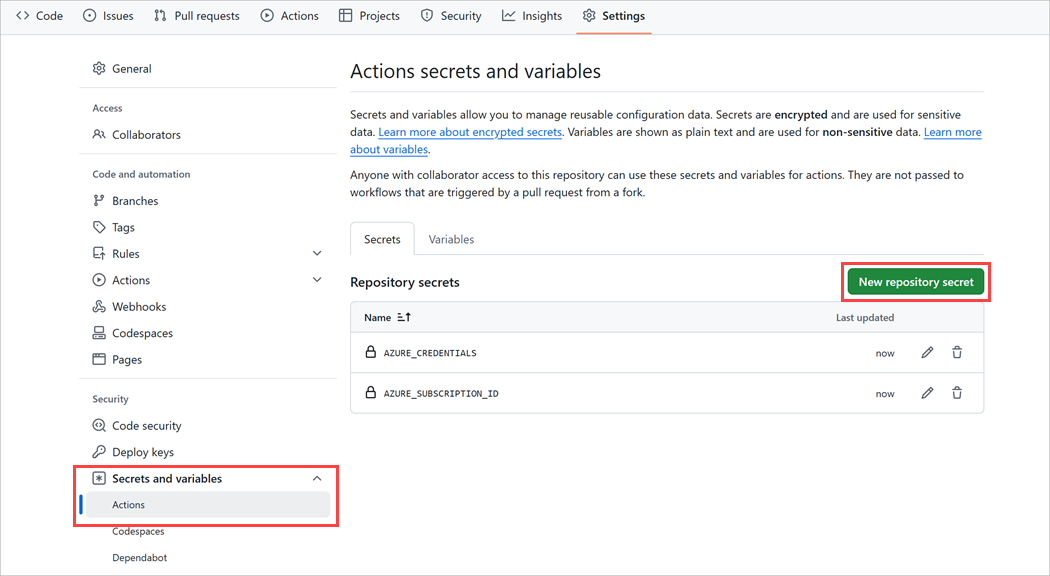
You never want to expose sensitive information in the workflow file. GitHub Secrets is a secure place to store sensitive information that your workflow needs. Here's an example:
In order to deploy to an Azure resource, the GitHub Action must have permission to access the resource. You don't want to store your Azure credentials in plain sight in the workflow file. Instead, you can store your credentials in GitHub Secrets.
To store information in GitHub Secrets, create a secret on the portal.

Then, use the name of the secret you created in your workflow wherever you need that information. For example, use the Azure credential that was stored in GitHub Secrets in the creds: attribute of an Azure login action.
steps:
      - name: "Login via Azure CLI"
        uses: azure/login@v1
        with:
          creds: ${{ secrets.AZURE_CREDENTIALS }}
Deploy to Microsoft Azure using GitHub Actions
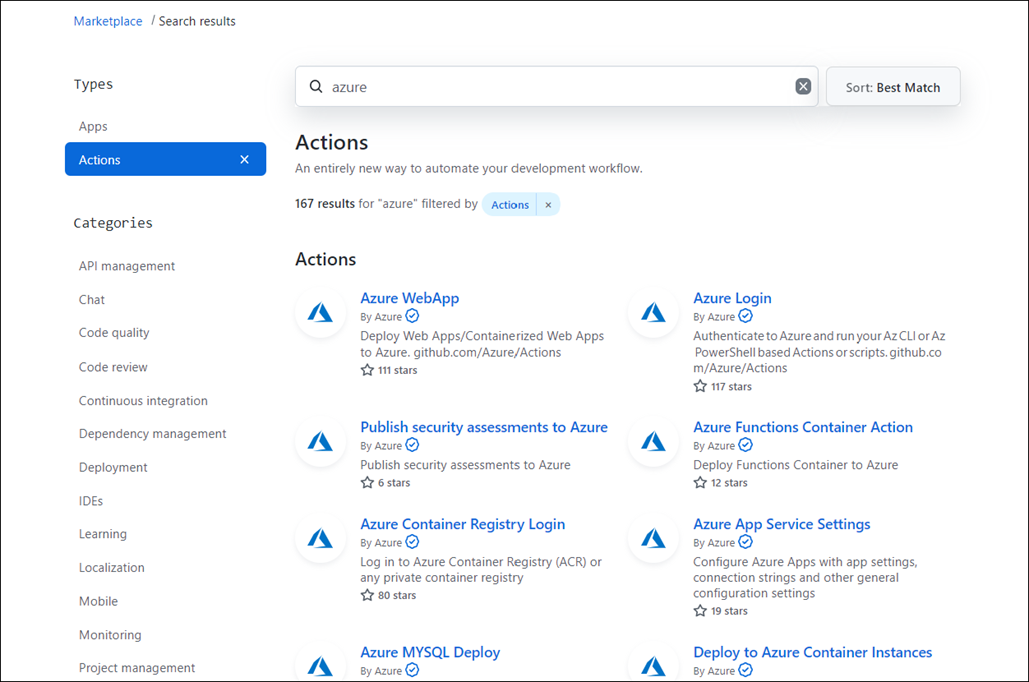
The GitHub Marketplace has several actions that help you automate Azure-related tasks.

You can also search and browse GitHub Actions directly in a repository's workflow editor. From the sidebar, you can search for a specific Action, view featured Actions, and browse featured categories.
To find an Action:
- In your repository, browse to the workflow file that you want to edit.
- Select the Edit icon in the upper-right corner of the file view.
- Use the GitHub Marketplace sidebar to the right of the editor to browse Actions.
Suppose you want to deploy a container-based web app to Azure Web Apps. If you search the GitHub Marketplace, you find these actions:
- azure/webapps-deploy@v1
- azure/login@v1 that we saw previously
- azure/docker-login@v1
If you add these actions to the Deploy-to-Azure job, your workflow looks like this:
  Deploy-to-Azure:
    runs-on: ubuntu-latest
    needs: Build-Docker-Image
    name: Deploy app container to Azure
    steps:
      - name: "Login via Azure CLI"
        uses: azure/login@v1
        with:
          creds: ${{ secrets.AZURE_CREDENTIALS }}

      - uses: azure/docker-login@v1
        with:
          login-server: ${{env.IMAGE_REGISTRY_URL}}
          username: ${{ github.actor }}
          password: ${{ secrets.GITHUB_TOKEN }}

      - name: Deploy web app container
        uses: azure/webapps-deploy@v1
        with:
          app-name: ${{env.AZURE_WEBAPP_NAME}}
          images: ${{env.IMAGE_REGISTRY_URL}}/${{ github.repository }}/${{env.DOCKER_IMAGE_NAME}}:${{ github.sha }}

      - name: Azure logout
        run: |
          az logout
Notice that this job depends on a previous job, Build-Docker-Image. The previous job creates the artifact that gets deployed.
The azure/login@v1 action needs credentials to sign in to your Azure account so that it can access the Azure resources to which you want to deploy. Here, use the credentials that we stored in GitHub Secrets.
The same is true for the azure/docker-login@v1 action. Since you're deploying a container image, you need to sign in to your private container registry.
The azure/webapps-deploy@v1 action performs the deployment. It depends on the two preceding actions.
Create and delete Azure resources by using GitHub Actions
Because CD is an automated process, you've already decided to use infrastructure as code to create and take down the environments you deploy to. GitHub Actions can automate these tasks on Azure, and you can include these actions in your workflow.
Note
Remember that it's important to tear down resources that you're no longer using as soon as possible to avoid unnecessary charges.
One option is to create a new workflow with two jobs, one that spins up resources and one that deletes them. Then, use a conditional to run only the job you want. In this example, the conditional looks for a label in the pull request and runs the set-up-azure-resources job if the label is spin up environment and the destroy-azure-resources job if the label is destroy environment.
jobs:
  set-up-azure-resources:
    runs-on: ubuntu-latest

    if: contains(github.event.pull_request.labels.*.name, 'spin up environment')

    ...

  destroy-azure-resources:
    runs-on: ubuntu-latest

    if: contains(github.event.pull_request.labels.*.name, 'destroy environment')

    ...
The jobs use the Azure CLI to create and destroy the Azure resources. For more information about Azure CLI, see Overview of Azure CLI.
Here's an example of the steps in the set-up-azure-resources job:
steps:
  - name: Checkout repository
    uses: actions/checkout@v2

  - name: Azure login
    uses: azure/login@v1
    with:
      creds: ${{ secrets.AZURE_CREDENTIALS }}

  - name: Create Azure resource group
    if: success()
    run: |
      az group create --location ${{env.AZURE_LOCATION}} --name ${{env.AZURE_RESOURCE_GROUP}} --subscription ${{secrets.AZURE_SUBSCRIPTION_ID}}
  - name: Create Azure app service plan
    if: success()
    run: |
      az appservice plan create --resource-group ${{env.AZURE_RESOURCE_GROUP}} --name ${{env.AZURE_APP_PLAN}} --is-linux --sku F1 --subscription ${{secrets.AZURE_SUBSCRIPTION_ID}}
  - name: Create webapp resource
    if: success()
    run: |
      az webapp create --resource-group ${{ env.AZURE_RESOURCE_GROUP }} --plan ${{ env.AZURE_APP_PLAN }} --name ${{ env.AZURE_WEBAPP_NAME }}  --deployment-container-image-name nginx --subscription ${{secrets.AZURE_SUBSCRIPTION_ID}}
  - name: Configure webapp to use GitHub Packages
    if: success()
    run: |
      az webapp config container set --docker-custom-image-name nginx --docker-registry-server-password ${{secrets.GITHUB_TOKEN}} --docker-registry-server-url https://docker.pkg.github.com --docker-registry-server-user ${{github.actor}} --name ${{ env.AZURE_WEBAPP_NAME }} --resource-group ${{ env.AZURE_RESOURCE_GROUP }} --subscription ${{secrets.AZURE_SUBSCRIPTION_ID}}
Notice that you use GitHub actions to check out the repository and to sign in to Azure. After that, you create the resources you need and deploy the container by using the Azure CLI.