Set up workstreams for record routing
A workstream is a container that helps enrich, route, and assign work items to the correct queues and representatives. A workstream can be one of the following types:
Messaging - To route conversations from live chat, text, and social channels.
Record - To route records, such as case, email, or activity.
Voice - To route calls that are made to the listed support numbers.
Essentially, a workstream is a collection of routing rules. Routing settings define how records should be routed to queues. Work distribution settings define how conversations should be allocated to representatives within a queue.
In Customer Service admin center, you can create workstreams by selecting Workstreams in the Customer support section. When you create a workstream, you need to define the following components:
Name - A simple name that is used to identify the workstream.
Type - Specifies the type of records that the workstream handles. It can be set to Messaging, Record, or Voice.
Based on the option that you select, more fields might display. For example, selecting the Messaging option displays a dropdown menu where you can select the type of channel that the workstream is used with.
Work distribution mode - Defines how items in the workstream are distributed to representatives. Two options are available:
Push - Conversations are sent to representatives automatically through a screen pop.
Pick - Conversations are sent to representatives when they select a conversation from the open work items in the agent dashboard.
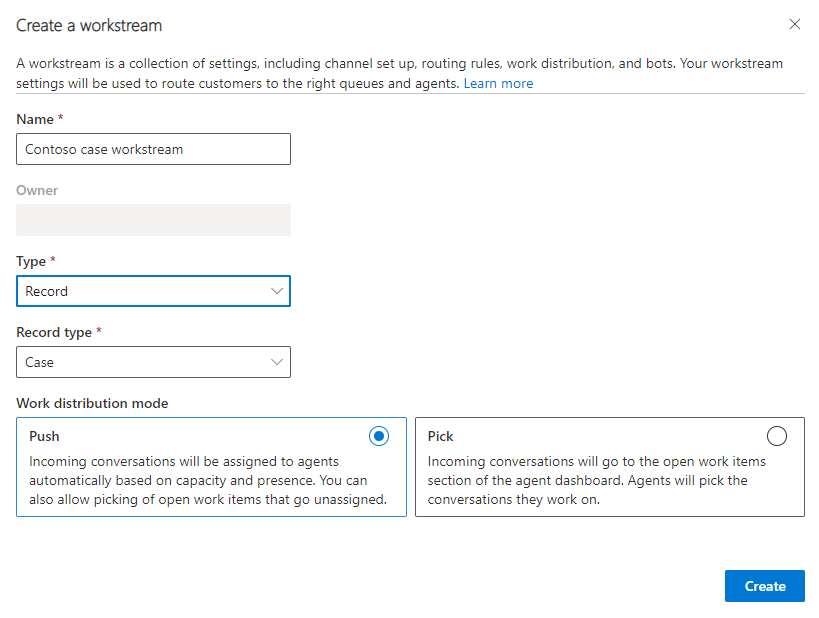
The following screenshot shows an example of a workstream that is used to automatically distribute case records to representatives. In this example, because Record was selected for the type, a record type dropdown menu displays, where you can specify the type of record that you want to work with.
Set up intake rules (record workstreams only)
Unlike workstreams for messaging or voice channels, which typically have a dedicated channel set up for them, record-based workstreams also include an intake rule option. The reason is because records can be created in multiple ways, and the system needs to know which workstream to direct the record to. Intake rules for a record help you determine which workstream to select for assigning an incoming work item. For example, cases that are created for customers with a support contract might be sent to a contract workstream, where they're routed to the correct queue before they're routed to a representative. You can create intake rules independently, and you can also map them to basic routing rule sets. However, on any workstream details page, only those intake rules that are mapped to the workstream display.
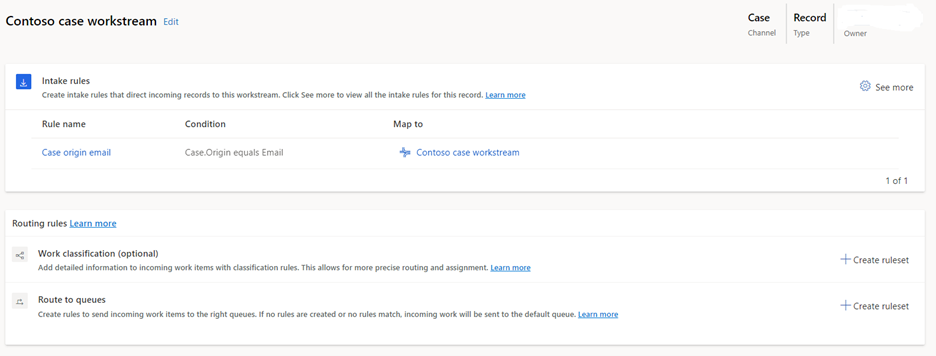
You can create intake rules by selecting the + Create rule button under the Intake rules section of the workstream.
In the Create intake rule dialog, enter the following information:
Rule Name - A simple name that is used to identify the rule.
Conditions - Define the specific conditions that are used to determine whether the intake rule applies.
Conditions can evaluate fields from the case record or from related records in many-to-one, one-to-many, and many-to-many relationships, such as the customer account.
You can use multiple AND/OR conditions in a single rule item.
Map to - Defines the workstream or basic routing rule set that you want the record to be sent to.
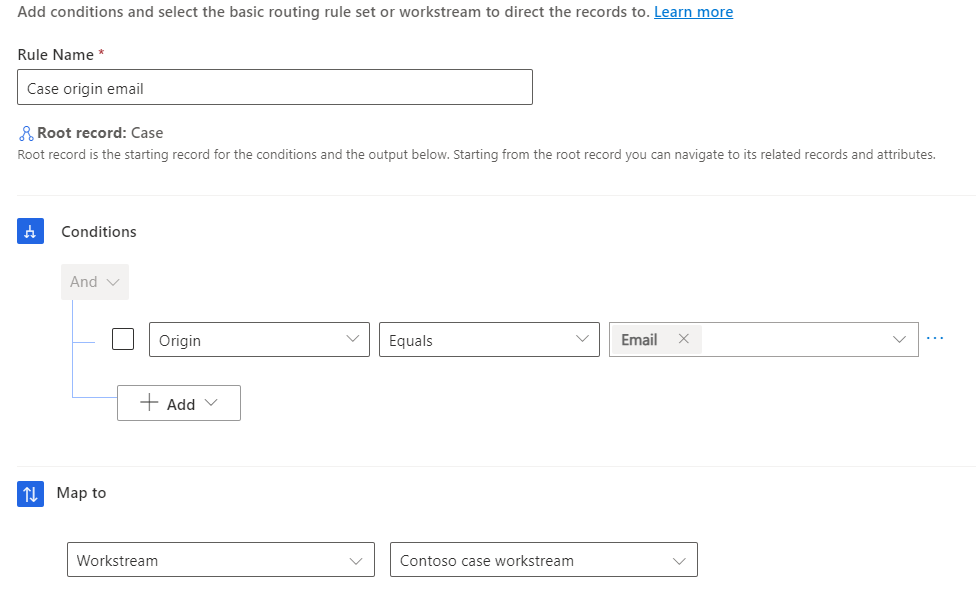
The following screenshot shows that the intake rule routes any cases where the Origin field is set to Email to the Contoso case workstream.
Set up routing rules
After a workstream processes work items, the next step is to route the incoming items to the appropriate queue so that they can be assigned to a representative. You can complete this process by creating work classification and route to queue rules.
Work classification
In unified routing, work classification lets you define rules to add detailed information to incoming work items that can be used to route and assign the work items optimally. You can create work classification rules by using the manual declarative decision list or by using machine learning models.
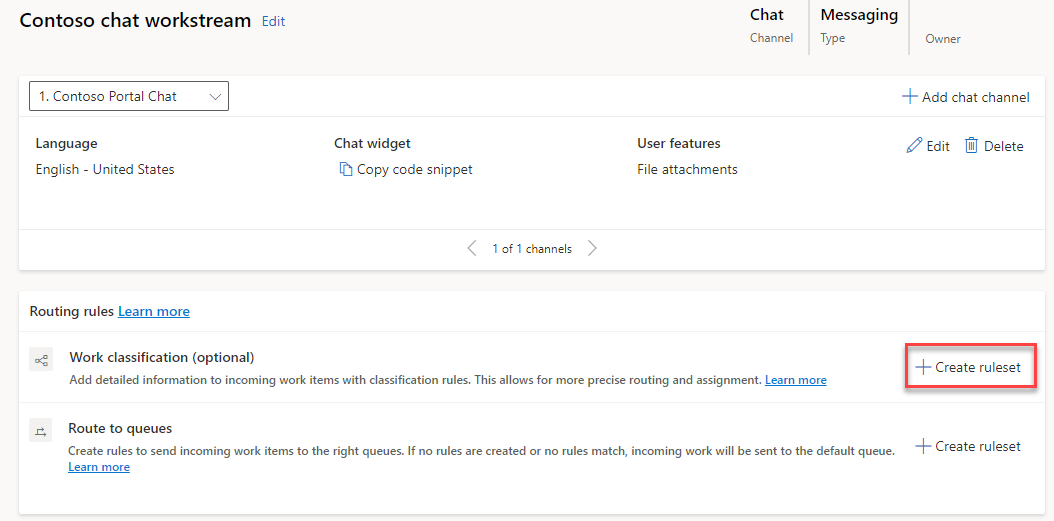
You can create a work classification rule set from within a workstream. Select + Create ruleset from a workstream to open the dialog, as shown in the following screenshot.
When creating a rule set, you can select one of the following options for the rule type:
Logical - Rules that use capacity profiles, skills, or attributes of the routed record.
Machine learning model - Use machine learning models to help classify work items. You can choose from one of the following options: Skill identification, Sentiment prediction, or Effort estimation.
For more information, see Configure work classification rulesets for unified routing.
Route to queues
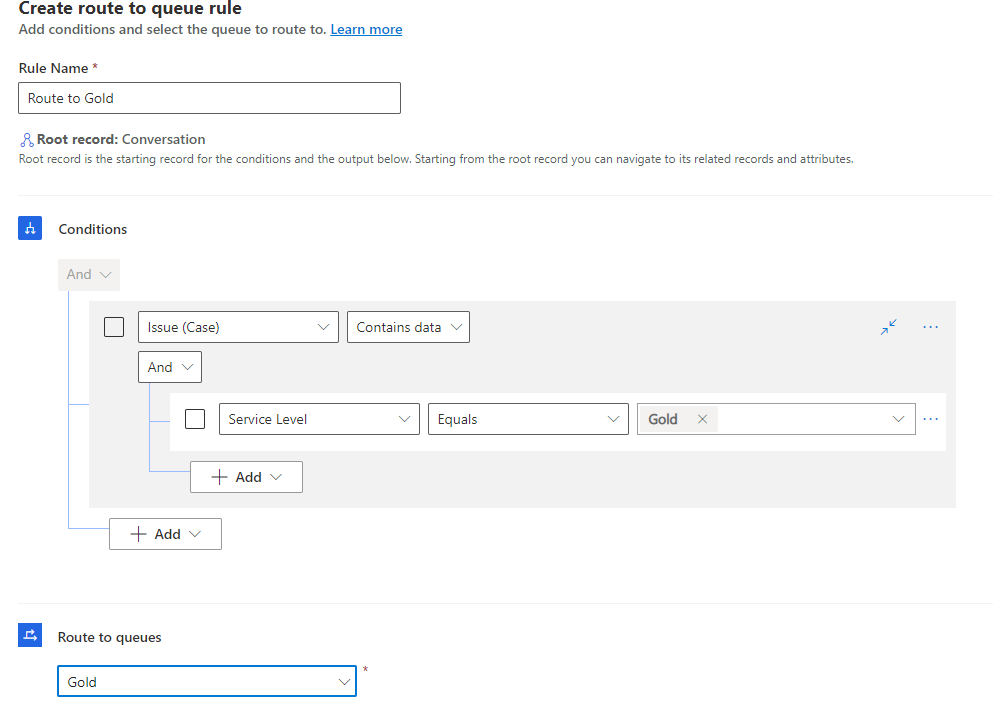
Queue routing rules send the work item to the appropriate queue. For example, you might create a routing rule that routes any case where the service level on the case is set to Gold to a Gold queue.
Important
While they're highly recommended, queue routing rules are optional. If no rules are defined, or if no rules match, then the incoming work item will be routed to the default queue of the respective channel type.
For a workstream, the route-to-queues rule set is run after all work classification rule sets are run. A workstream can have only one route-to-queues rule set.
You can create a route-to-queues rule set from within a workstream by selecting the + Create ruleset button. Setting up rule sets is similar to setting up intake rules.
The rule set contains the following items:
In the Create intake rule dialog, enter the following information:
Rule Name - A simple name that is used to identify the rule.
Conditions - Define the specific conditions that are used to determine whether the intake rule applies.
Conditions can evaluate fields from the case record or from related records in many-to-one, one-to-many, and many-to-many relationships, such as the customer account.
You can use multiple AND/OR conditions in a single rule item.
Route to queues - Defines the queue to set the item to.
The following image shows an example of a routing rule that is sending Gold cases to the Gold queue.
For more information, see Configure route-to-queues and rulesets and rules.
