Time tracking
Time entry is the process of recording the actual time that a resource consumes. Time entries in Project Operations allow cost and sales prices to be calculated as tasks progress. These entries help the project manager keep on top of projects and tasks. Time entries also notify resource managers of any potential vacation or absences that appear on the schedule board as Out. These notifications allow resource managers to plan around those events.
Time overview
When recording time in Project Operations, users can track against any level in the project, including the task, summary, or project level.
Project team members create and submit time entries for approval and the project approvers will approve the entries. The project team member can recall a time entry for corrections.
Use Copilot for time entry
Copilot for time entry, powered by generative AI, simplifies the process of logging work hours. Acting as an intelligent assistant, Copilot reduces the complexity of time entry by allowing team members to create entries without navigating through multiple forms or dropdown menus. It can generate multiple time entries using details provided by the user or existing project assignments while ensuring accuracy and compliance with validations. Additionally, Copilot can draft external comments for time entries, which can be easily modified via a sidecar feature, eliminating the need for individual forms. Users may be prompted to confirm details before finalizing entries to ensure precise tracking of their progress.
Create a new time entry
To create a new time entry, follow these steps:
In the time entry grid, select New.
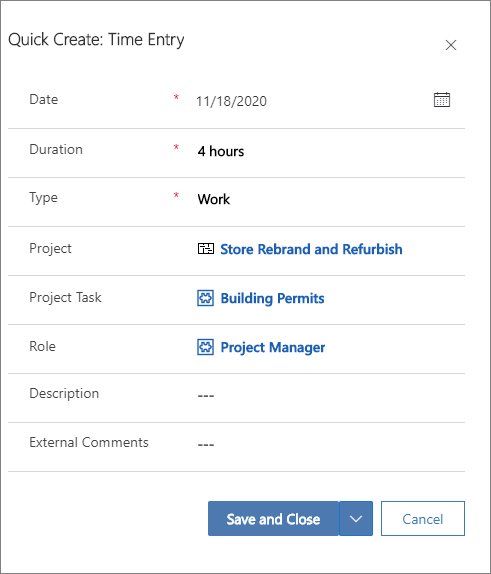
In the Quick Create: Time Entry dialog box, select the time entry date.
Enter data for the Project, Project Task, Role, and Duration dimensions. This information should be added in minutes, hours, or days by typing h, m, or d, together with the number.
Enter a description for the entry and any comments that can be shared externally regarding time entry.
Save the entry. The entered values appear in the Dimensions section. The information that was entered in the Duration field appears on the date that the time entry was created for.
