Explore alert policies in Microsoft 365
Alerts are the basis of all incidents. They can also indicate the occurrence of malicious or suspicious events in your environment. Alerts are typically part of a broader attack and provide clues about an incident.
Note
An alert policy can trigger an alert when a user takes a specific action. However, not all alerts indicate the occurrence of a malicious event. Organizations can use alerts to help monitor activities that could cause security issues if abused. For example, a company's Global Administrator wants to receive a notification when someone grants delegate access to a user's mailbox. Delegating permissions to a mailbox in and of itself isn't necessarily malicious, or even suspicious. But given the potential ramifications should a bad actor perform this type of activity, an organization might want to monitor all, or selected occurrences of this action.
In Microsoft Defender XDR, related alerts are aggregated together to form incidents. Incidents always provide the broader text of an attack. However, analyzing alerts can be valuable when an organization requires deeper analysis.
Note
Microsoft 365 Defender is now Microsoft Defender XDR (Extended Detection and Response).
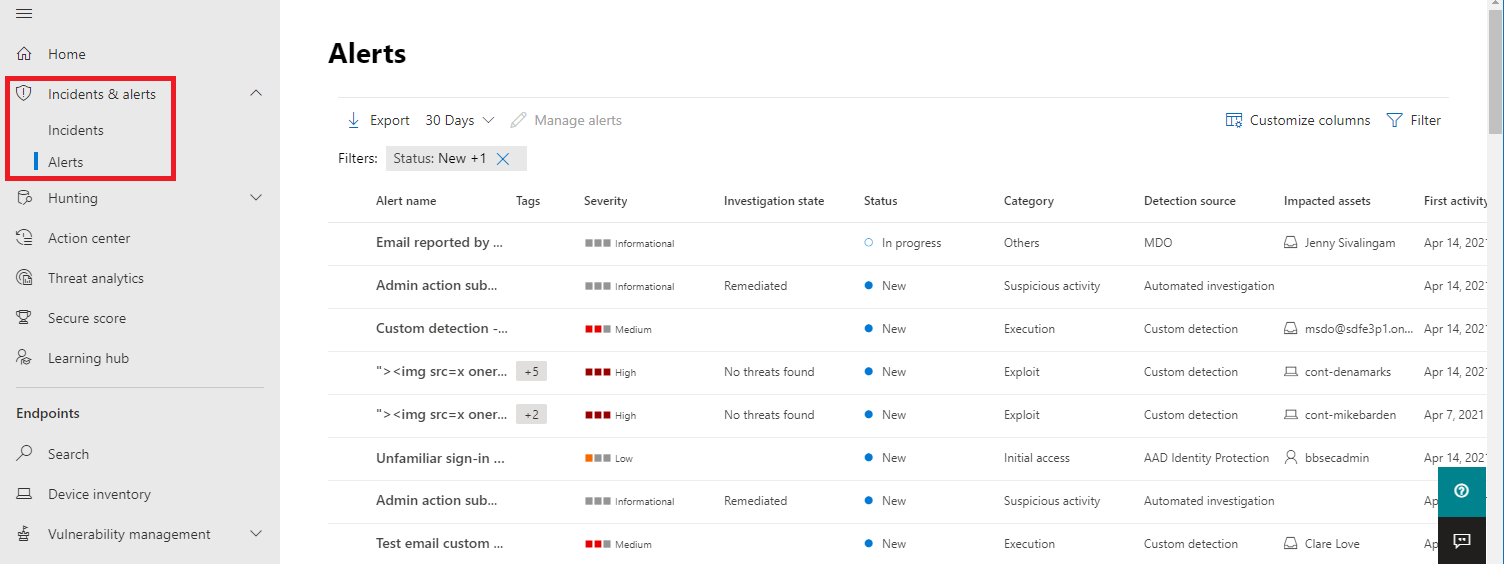
The Alerts queue shows the current set of alerts. The Microsoft Defender portal is the home of alerts. In the navigation pane, you must select the Incidents & alerts group to expand it, and then select Alerts.
Important
You can create alerts in different Microsoft security solutions, such as Microsoft Defender XDR, Microsoft Defender for Endpoint, and Microsoft Defender for Office 365. The Alerts page in the Microsoft Defender portal displays the alerts that originate from all these solutions.
By default, the Alerts page displays the new and in progress alerts from the last 30 days. The most recent alert is at the top of the list so you can see it first.
From the Alerts page, you can select Filter to see a Filter pane. From the Filter pane, you can specify a subset of the alerts. Here's an example.
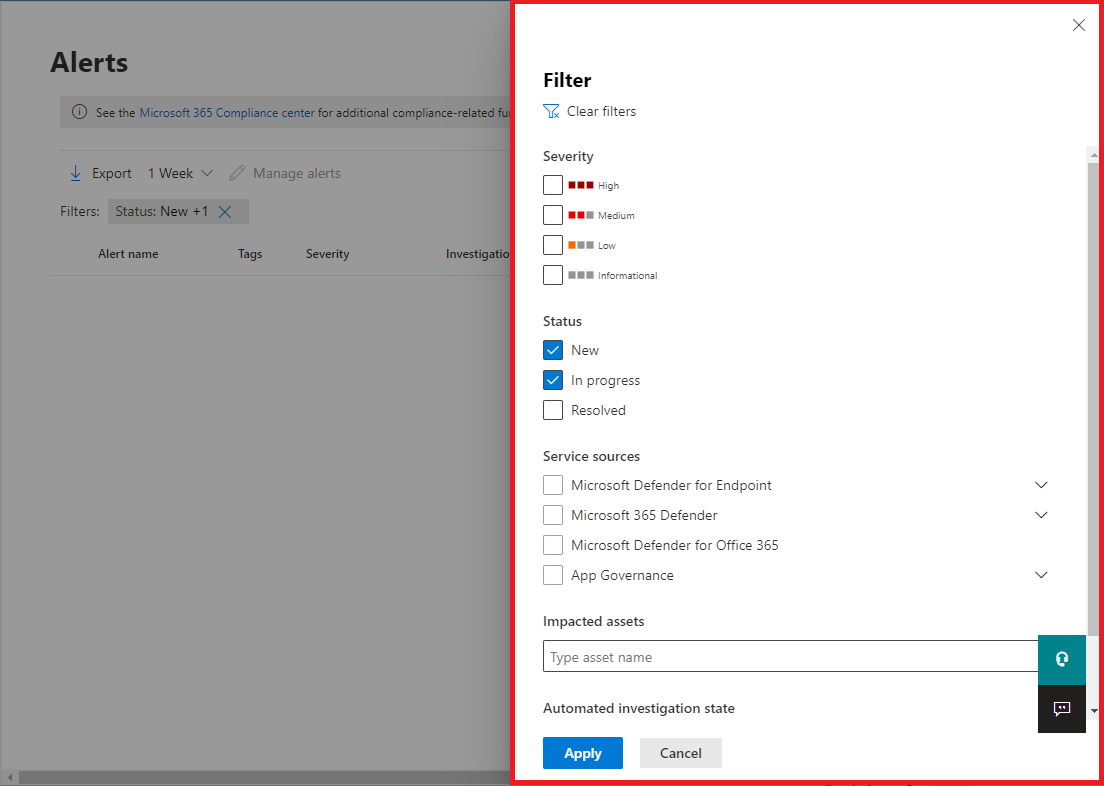
You can filter alerts according to these criteria:
- Severity
- Status
- Service sources
- Entities (the impacted assets)
- Automated investigation state
Analyze an alert
To see the main alert page, select the name of the alert. An alert page consists of the alert story and summary details. The alert story describes the chain of events and any other alerts related to this alert in chronological order.
Throughout an alert page, you can select the ellipses (...) beside any entity to see available actions. For example, linking the alert to another incident. The list of available actions depends on the type of alert.
Alert sources
Microsoft Defender XDR alerts can come from solutions like:
- Microsoft Defender for Identity
- Microsoft Defender for Endpoint
- Microsoft Defender for Office 365
- Microsoft Defender for Cloud Apps
- The app governance add-on for Microsoft Defender for Cloud Apps
You might notice alerts with prepended characters in the alert. The following table provides guidance to help you understand the mapping of alert sources based on the prepended character on the alert.
- The prepended GUIDs are specific only to unified experiences such as unified alerts queue, unified alerts page, unified investigation, and unified incident.
- The prepended character doesn't change the GUID of the alert. The only change to the GUID is the prepended component.
| Alert source | Prepended character |
|---|---|
| Microsoft Defender for Office 365 | fa{GUID}Example: fa123a456b-c789-1d2e-12f1g33h445h6i |
| Microsoft Defender for Endpoint | da or ed for custom detection alerts |
| Microsoft Defender for Identity | aa{GUID}Example: aa123a456b-c789-1d2e-12f1g33h445h6i |
| Microsoft Defender for Cloud Apps | ca{GUID}Example: ca123a456b-c789-1d2e-12f1g33h445h6i |
Analyze affected assets
The Actions taken section has a list of impacted assets, such as mailboxes, devices, and users affected by this alert. You can also select View in action center to view the History tab of the Action center in the Microsoft Defender portal.
Trace an alert's role in the alert story
The alert story displays all assets or entities related to the alert in a process tree view. The alert in the title is the one in focus when you first land on your selected alert's page. You can expand and select the assets in the alert story. They provide more information and expedite your response by allowing you to take action right in the context of the alert page.
Note
The alert story section might contain more than one alert. Other alerts related to the same execution tree might appear before or after the alert you selected.
View more alert information on the details page
The details page shows the details and actions related to the selected alert. If you select any of the affected assets or entities in the alert story, the details page changes to provide contextual information and actions for the selected object.
Once you selected an entity of interest, the details page changes to display:
- Information about the selected entity type.
- Historic information when it's available.
- Options to take action on this entity directly from the alert page.
Manage alerts
To manage an alert, select Manage alert in the summary details section of the alert page. For a single alert, here's an example of the Manage alert pane.
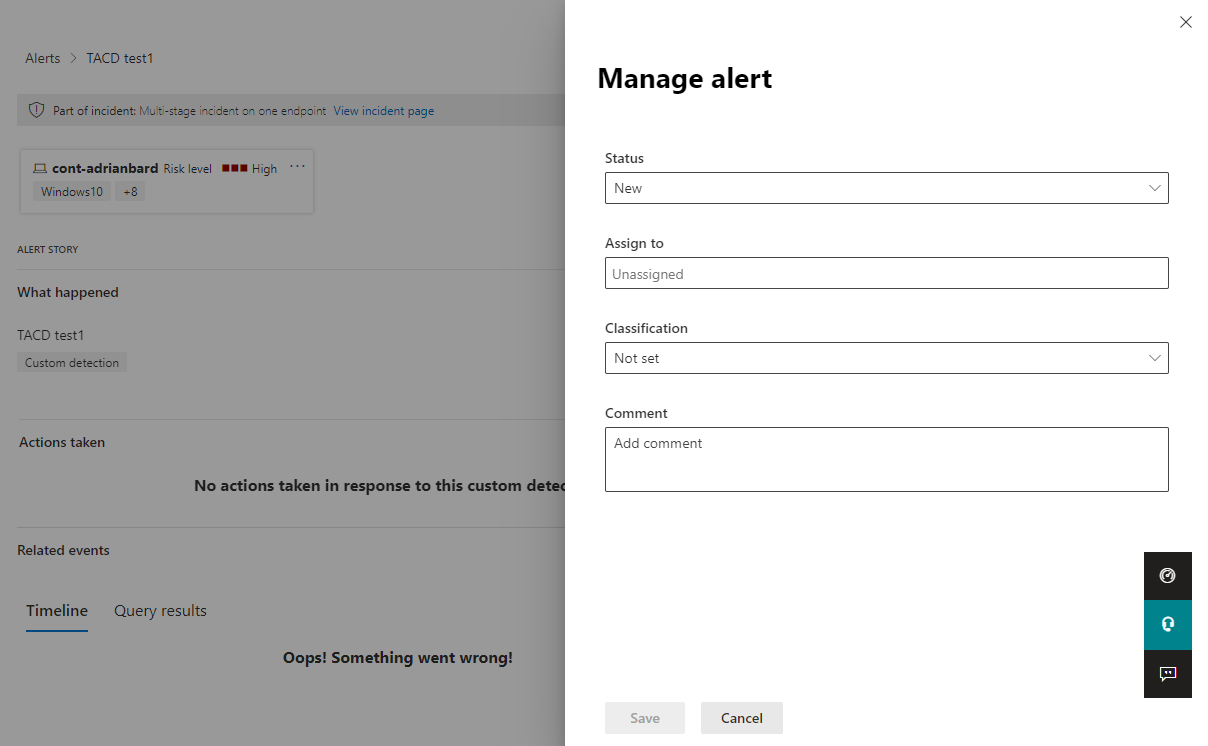
The Manage alert pane allows you to view or specify:
- The alert status (New, Resolved, In progress).
- The user account which Microsoft Defender XDR assigned to the alert.
- The alert's classification:
- Not set. This option is the default setting.
- True positive. Use this classification for alerts that accurately indicate a real threat. Specifying the threat type helps your security team see threat patterns and act to defend your organization from them.
- Informational, expected activity. Use the options in this category to classify alerts. For example, for security tests, red team activity, and expected unusual behavior from trusted apps and users.
- False positive. Use this classification for the type of alerts related to nonmalicious activity. Classifying alerts as false positive helps Microsoft Defender XDR improve its detection quality.
- A comment on the alert.
To manage a set of alerts similar to a specific alert, select View similar alerts in the INSIGHT box in the summary details section of the alert page.
From the Manage alerts pane, you can then classify all of the related alerts at the same time. Here's an example.

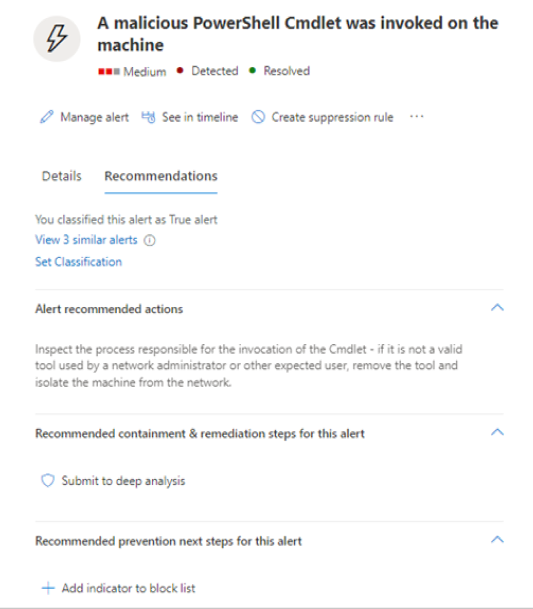
If an organization classified similar alerts in the past, it can save time by using Microsoft Defender XDR recommendations to learn how it resolved the previous alerts. From the summary details section, select Recommendations.
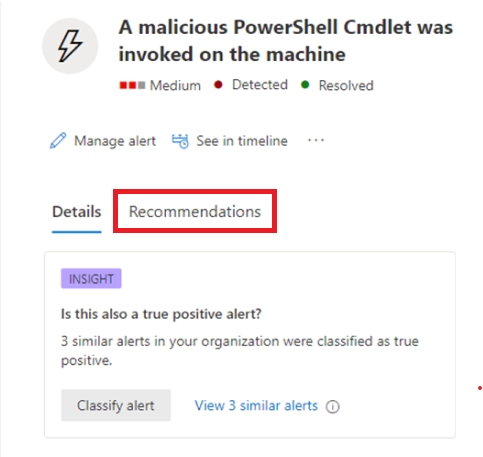
The Recommendations tab provides next-step actions and advice for investigation, remediation, and prevention. Here's an example.
Resolve an alert
Once you finished analyzing an alert, you can mark it as resolved. To do so, go to the Manage alert pane for the alert or similar alerts and mark the status as Resolved. Then classify the resolution as one of the following types:
- True positive. Also enter a type of threat.
- Informational, expected activity. Also enter a type of activity.
- False positive.
Classifying alerts helps Microsoft Defender XDR improve its detection quality.