Exercise - Dynamically search for users and their information
This exercise shows you how to set up a flow to dynamically search for users in Office 365 based on specific attributes, such as name or department. Then, you use the retrieved information to automate downstream actions.
Scenario
Your organization needs to locate employees dynamically and automate actions, such as notifying team members or saving user details in a database.
Create the flow
Your first step is to create the flow:
- Go to the Power Automate home page (https://make.powerautomate.com).
- Select Create from the left sidebar.
- Select Instant cloud flow.
- In the pop-up window, complete the following tasks:
- Enter a meaningful name, such as Search for Users Dynamically.
- For the trigger, select Manually trigger a flow and then select Create.
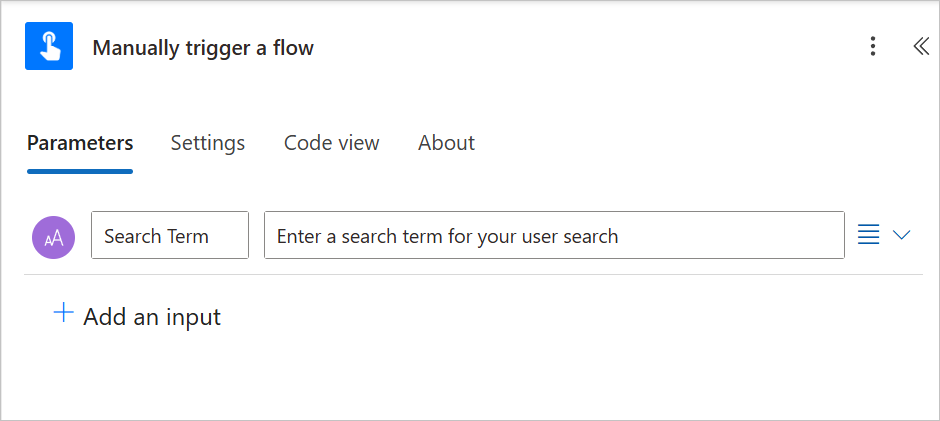
Add inputs to the trigger
To add inputs to the trigger, follow these steps:
Select the Manually trigger a flow card to configure its inputs on the left.
Select Add an input, select Text, and then rename the Input to Search Term. Add Enter a search term for your user search as the description. This action allows you to enter a name, email, or other search criteria when testing the flow.

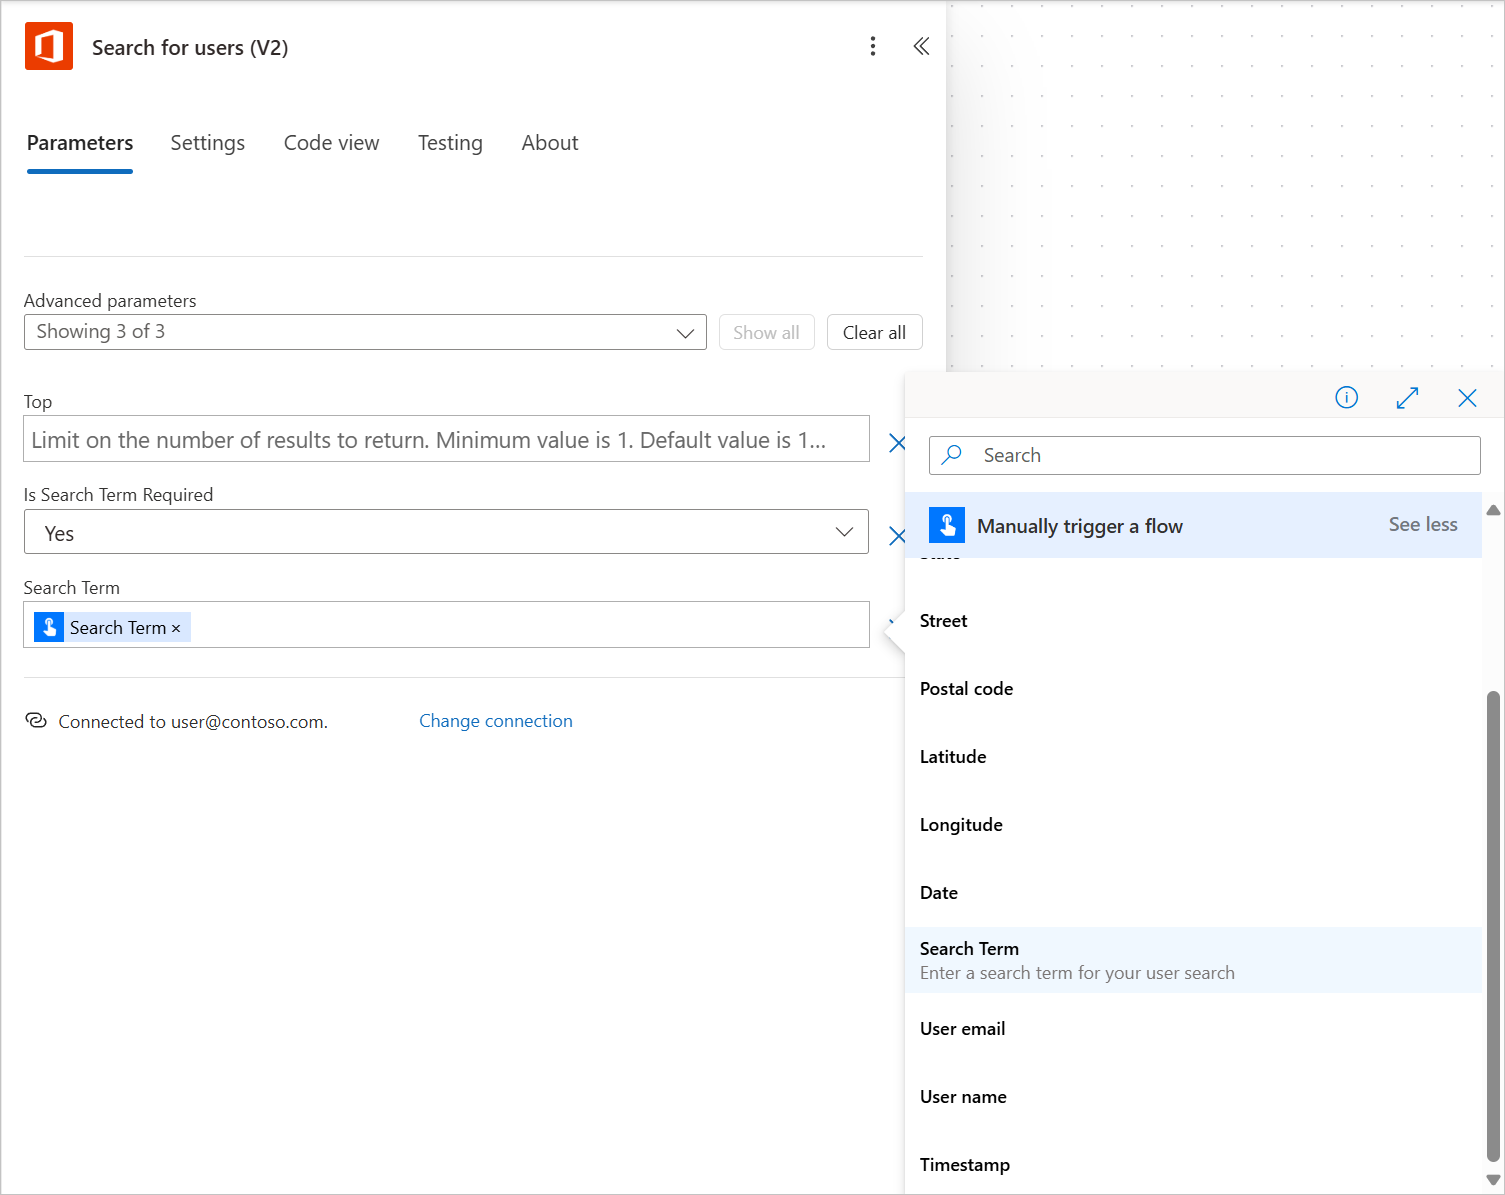
Add the Search for users (V2) action
To add the Search for users (V2) action, follow these steps:
Select the plus (+) icon under the trigger card and then select Add an action.
In the search box, enter Search for users (V2).
Select the Search for users (V2) action under the Office 365 Users connector.
Select Show all next to Advanced parameters.
In the Search Term field, select the lightning bolt icon. Next to the Manually trigger a flow heading, select See more and then select Search Term. This action allows the flow to dynamically search for users based on the input that you provide during testing.

Add an action to display the search results
To add an action to display the search results, follow these steps:
- Select the plus (+) icon under the Search for users (V2) action and then select Add an action.
- In the search box, enter Compose.
- Select the Compose action under the Data Operations connector.
- In the Inputs field, select the lightning bolt icon. From the Dynamic content panel, search for and select Display name under the Search for users (V2) heading. The system automatically creates a loop with the Compose action inside to display the names of the employees found based on the search criteria.
- Use this action to confirm that your search is correctly identifying employees as expected based on the search term that you entered during testing.
Test the flow
Your final task is to test the flow:
Select Save.
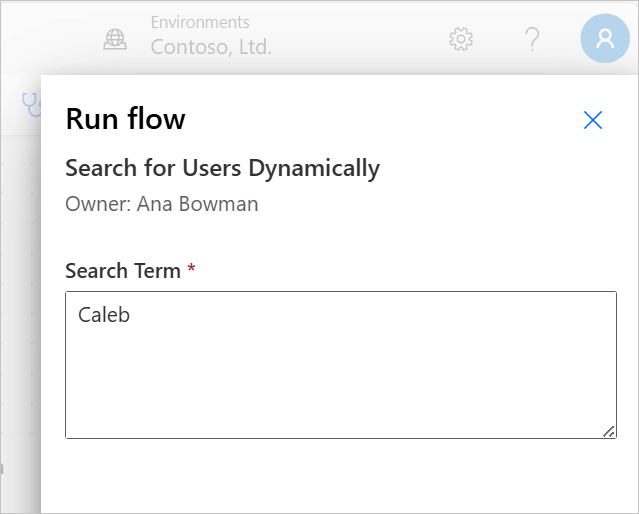
Select Test > Manually > Test.
If the system prompts you to sign in, do so and then select Continue.
In the Search Term input field, enter a name or email from your organization to search for. The Search for users (V2) action can search on display name, given name, surname, email address, email nickname, and user principal name. Enter your search criteria and then select Run flow.
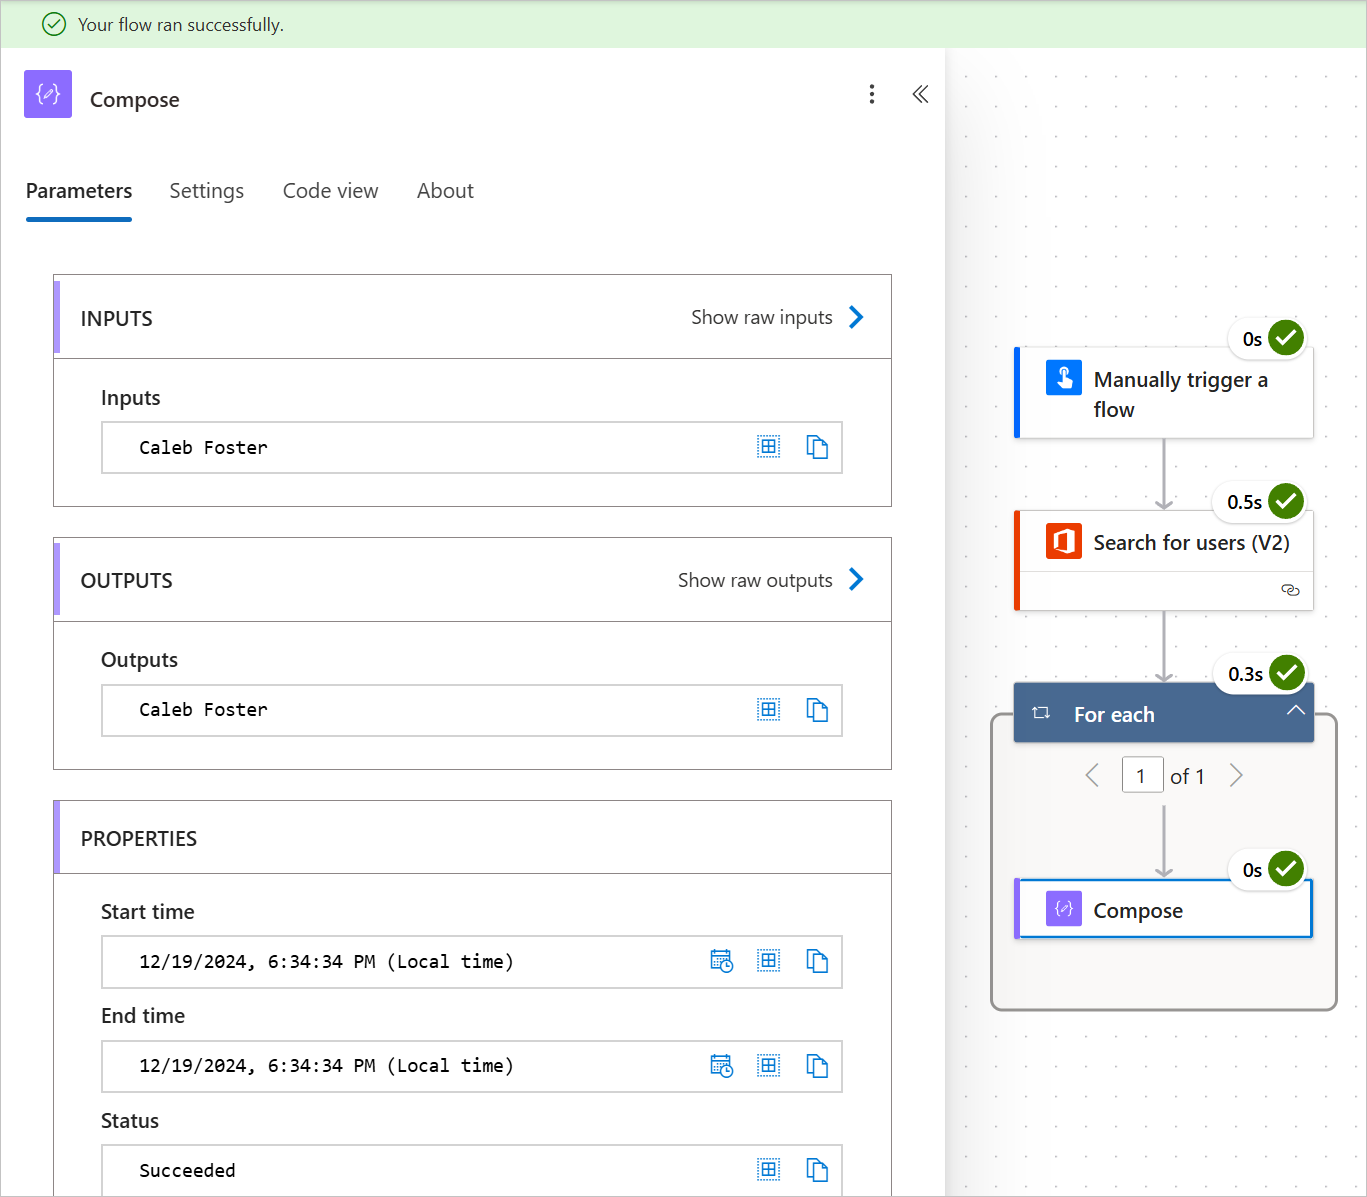
Verify that the following actions occur:
- The flow runs successfully.
- The Compose action displays the names of users who match the search term.


In this exercise, you learned how to use the Search for users (V2) action to dynamically find employees based on specific criteria, such as their name or email. This unit introduced the concept of using the user data in workflows to allow for automation, personalization, and efficient communication.