Exercise - Deploy ARM templates as part of your CI/CD efforts with GitHub Actions
Here you deploy an Azure Resource Manager (ARM) template from a GitHub Actions workflow.
Important
You perform this exercise outside the Microsoft Learn environment. This exercise requires you to have your own Azure subscription, and you might incur charges. This is required because you'll need to create a service principal, which is not supported in the sandbox subscription. If you don't already have an Azure subscription, create a free account before you begin.
Create your GitHub account and repository
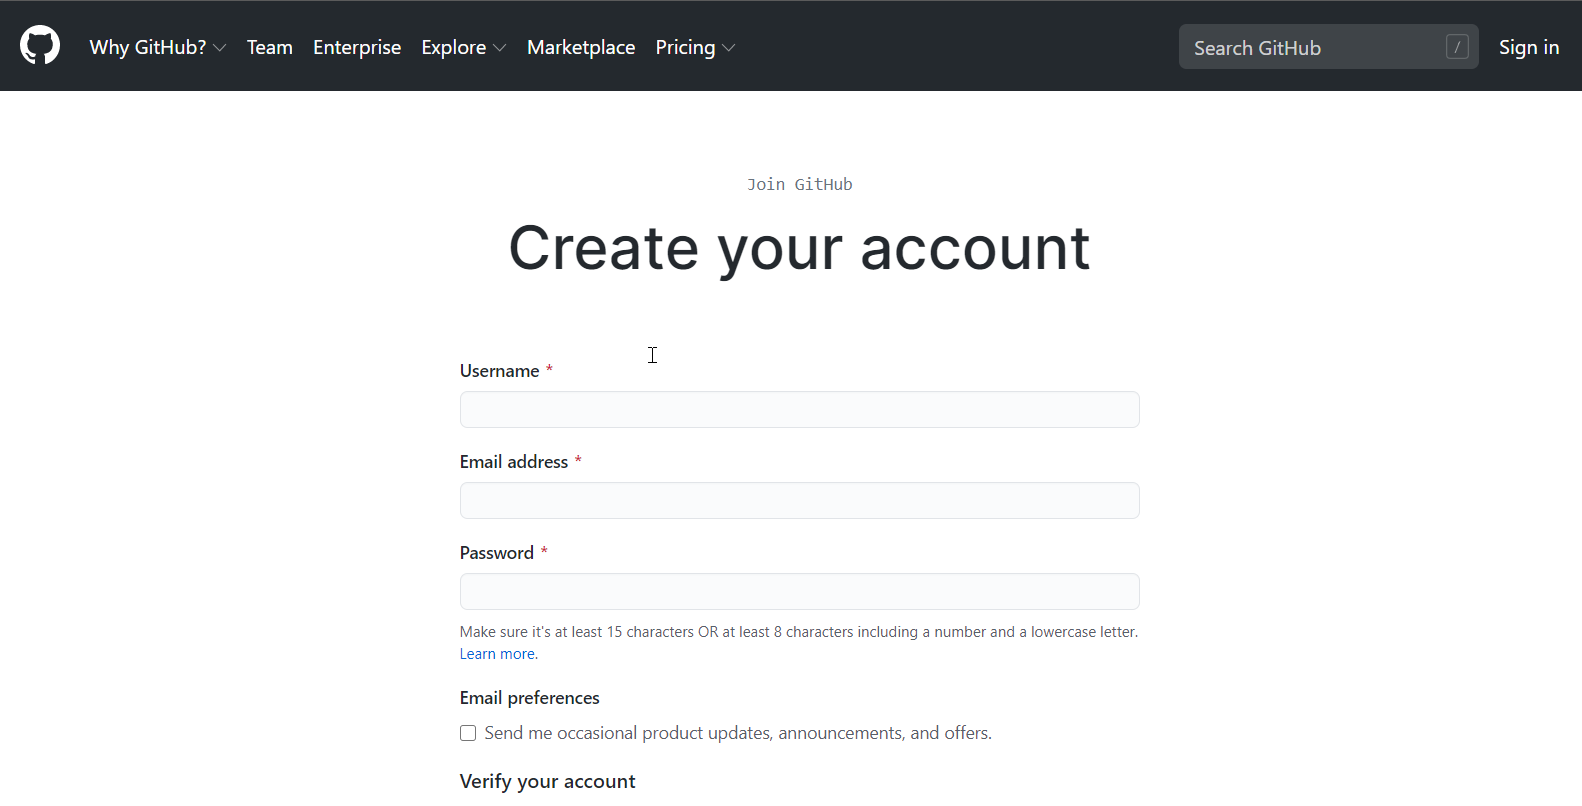
First, if you don't have a GitHub account, create one now on the GitHub account creation page. (It's free.)
After you have an account, sign in and create a new repository where you can keep your templates as part of the infrastructure as code (IaC) model. To create the repository (commonly known as a repo in the industry), follow these steps:
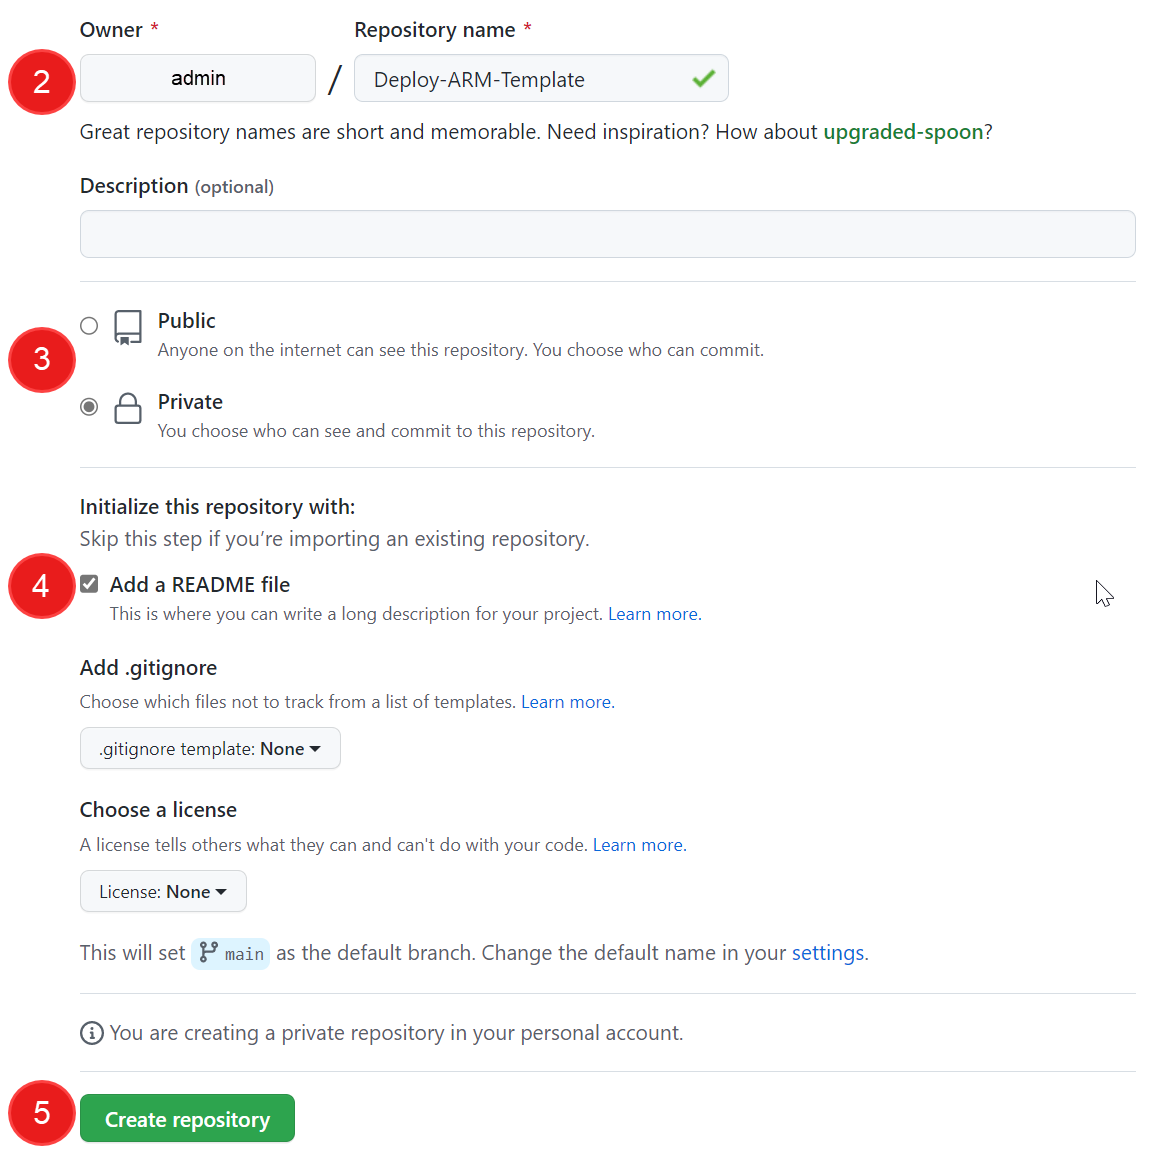
In the upper-right corner of any page on the GitHub site, use the + drop-down menu and select New repository. Or select the green Create repository button, if it's there.

Enter a short, memorable name for your repository. For example, use Deploy-ARM-Template. Optionally, add a description of your repository. For example, use Deploying my first ARM template with GitHub Actions.
Choose a repository visibility setting. Public repositories are accessible to everyone on the internet. Private repositories are accessible only to you and to people you explicitly share access with. (Either works with this exercise.)
Under Initialize this repository with:, select Add a README file.
Select Create repository.
You created your repository and initialized it with a README file. It's time to commit a template and a template parameter file to the repo.
Note
README files are a great place to describe your project in more detail, or to add some documentation such as how to install or use your project. The contents of your README file automatically appear on the front page of your repository.
Commit an ARM template file to the repo
On GitHub, go to the main page of the repository.
Above the list of files, in the Add file drop-down list, select Create new file.
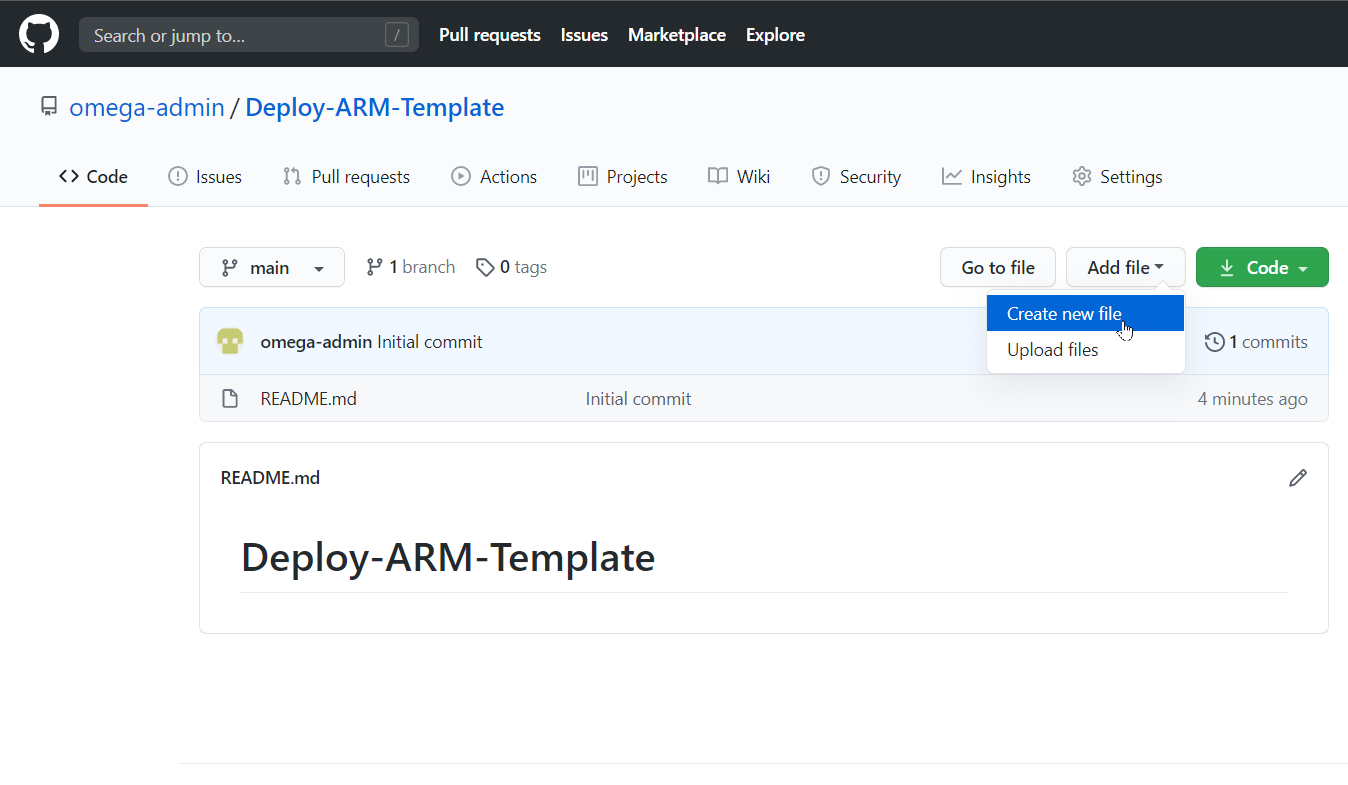
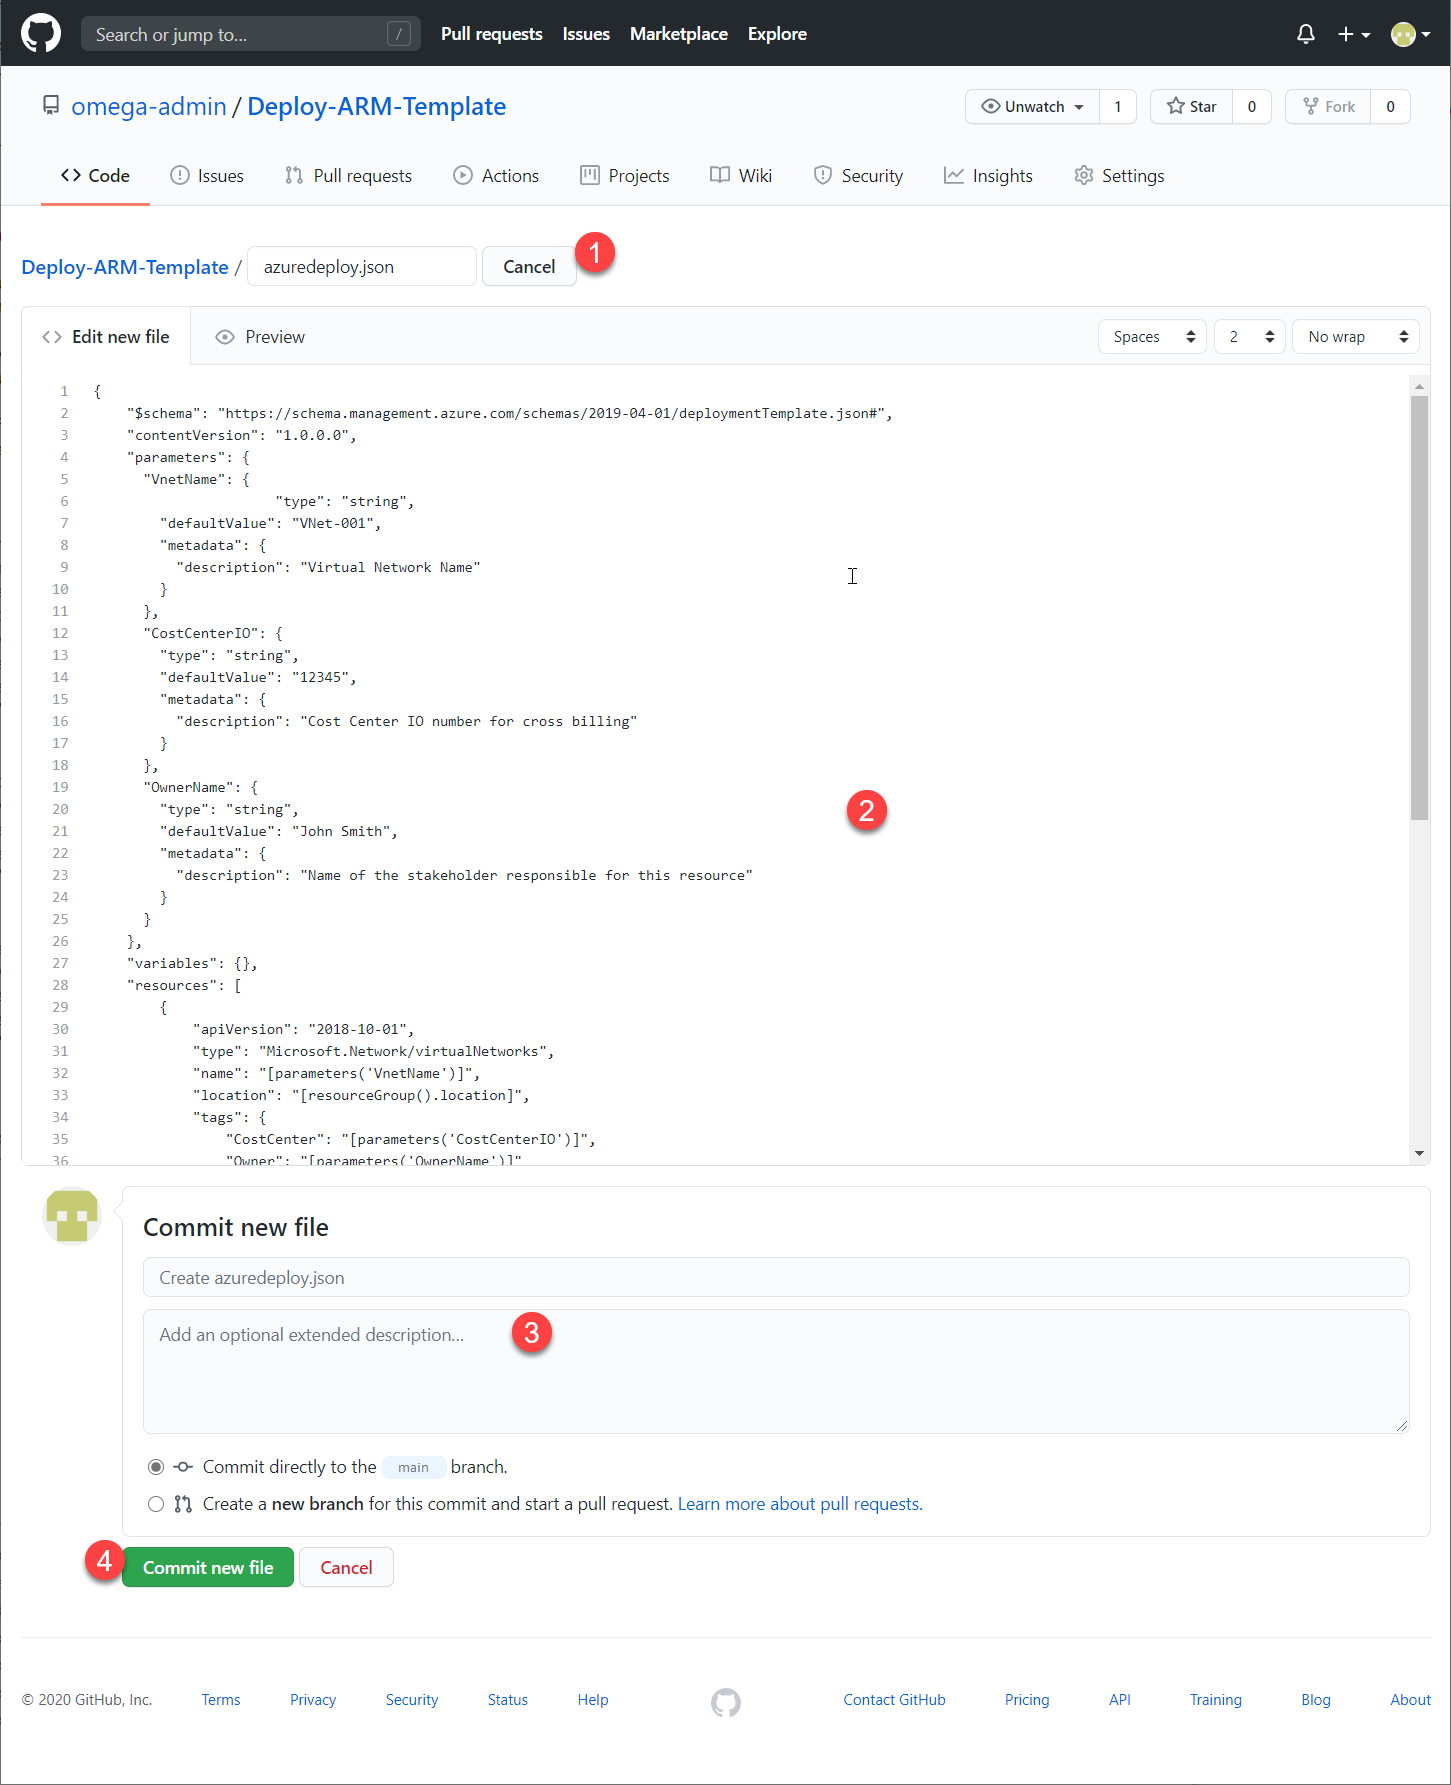
In the file name field, enter the name and extension for the template. In our exercise, use the name azuredeploy.json. Copy and paste the following template into your new GitHub file.
{
    "$schema": "https://schema.management.azure.com/schemas/2019-04-01/deploymentTemplate.json#",
    "contentVersion": "1.0.0.0",
    "parameters": {
        "VnetName": {
            "type": "string",
            "defaultValue": "VNet-001",
            "metadata": {
                "description": "Virtual Network Name"
            }
        },
        "CostCenterIO": {
            "type": "string",
            "defaultValue": "12345",
            "metadata": {
                "description": "Cost Center IO number for cross billing"
            }
        },
        "OwnerName": {
            "type": "string",
            "defaultValue": "John Smith",
            "metadata": {
                "description": "Name of the stakeholder responsible for this resource"
            }
        }
    },
    "variables": {},
    "resources": [
        {
            "apiVersion": "2018-10-01",
            "type": "Microsoft.Network/virtualNetworks",
            "name": "[parameters('VnetName')]",
            "location": "[resourceGroup().location]",
            "tags": {
                "CostCenter": "[parameters('CostCenterIO')]",
                "Owner": "[parameters('OwnerName')]"
            },
            "properties": {
                "addressSpace": {
                    "addressPrefixes": [
                        "10.0.0.0/16"
                    ]
                },
                "enableVmProtection": false,
                "enableDdosProtection": false,
                "subnets": [
                    {
                        "name": "subnet001",
                        "properties": {
                            "addressPrefix": "10.0.0.0/24"
                        }
                    },
                    {
                        "name": "subnet002",
                        "properties": {
                            "addressPrefix": "10.0.1.0/24"
                        }
                    }
                ]
            }
        }
    ]
}
Add a description in the Commit new file section and select Commit new file to save it to your repo.
Configure authentication between GitHub Actions and your Azure subscription
To deploy any resources to Azure by using GitHub Actions, you need to create an Azure service principal and give it permissions to create resources defined in your templates. You perform that step in the Azure Cloud Shell section of the Azure portal after you're signed in to your subscription.
Create the service principal
For the principal of a GitHub Actions workflow to deploy Azure resources, it needs the right built-in contributor.
The following Azure CLI script shows how you can generate an Azure service principal with contributor permissions in an Azure resource group. This resource group is where the workflow deploys the resources defined in your ARM template.
projectName="GitHubActionExercise"
location="eastus"
resourceGroupName="${projectName}-rg"
appName="http://${projectName}"

# Create the resource group
az group create --name $resourceGroupName --location $location

# Store the resource group ID in a variable
scope=$(az group list --query "[?contains(name, '$resourceGroupName')].id" -o tsv)

# Create the service principal with contributor rights to the resource group we just created
az ad sp create-for-rbac --name $appName --role Contributor --scopes $scope --sdk-auth
In the portal, while you're signed in your subscription, select the Cloud Shell icon to open the shell at the bottom of the page.
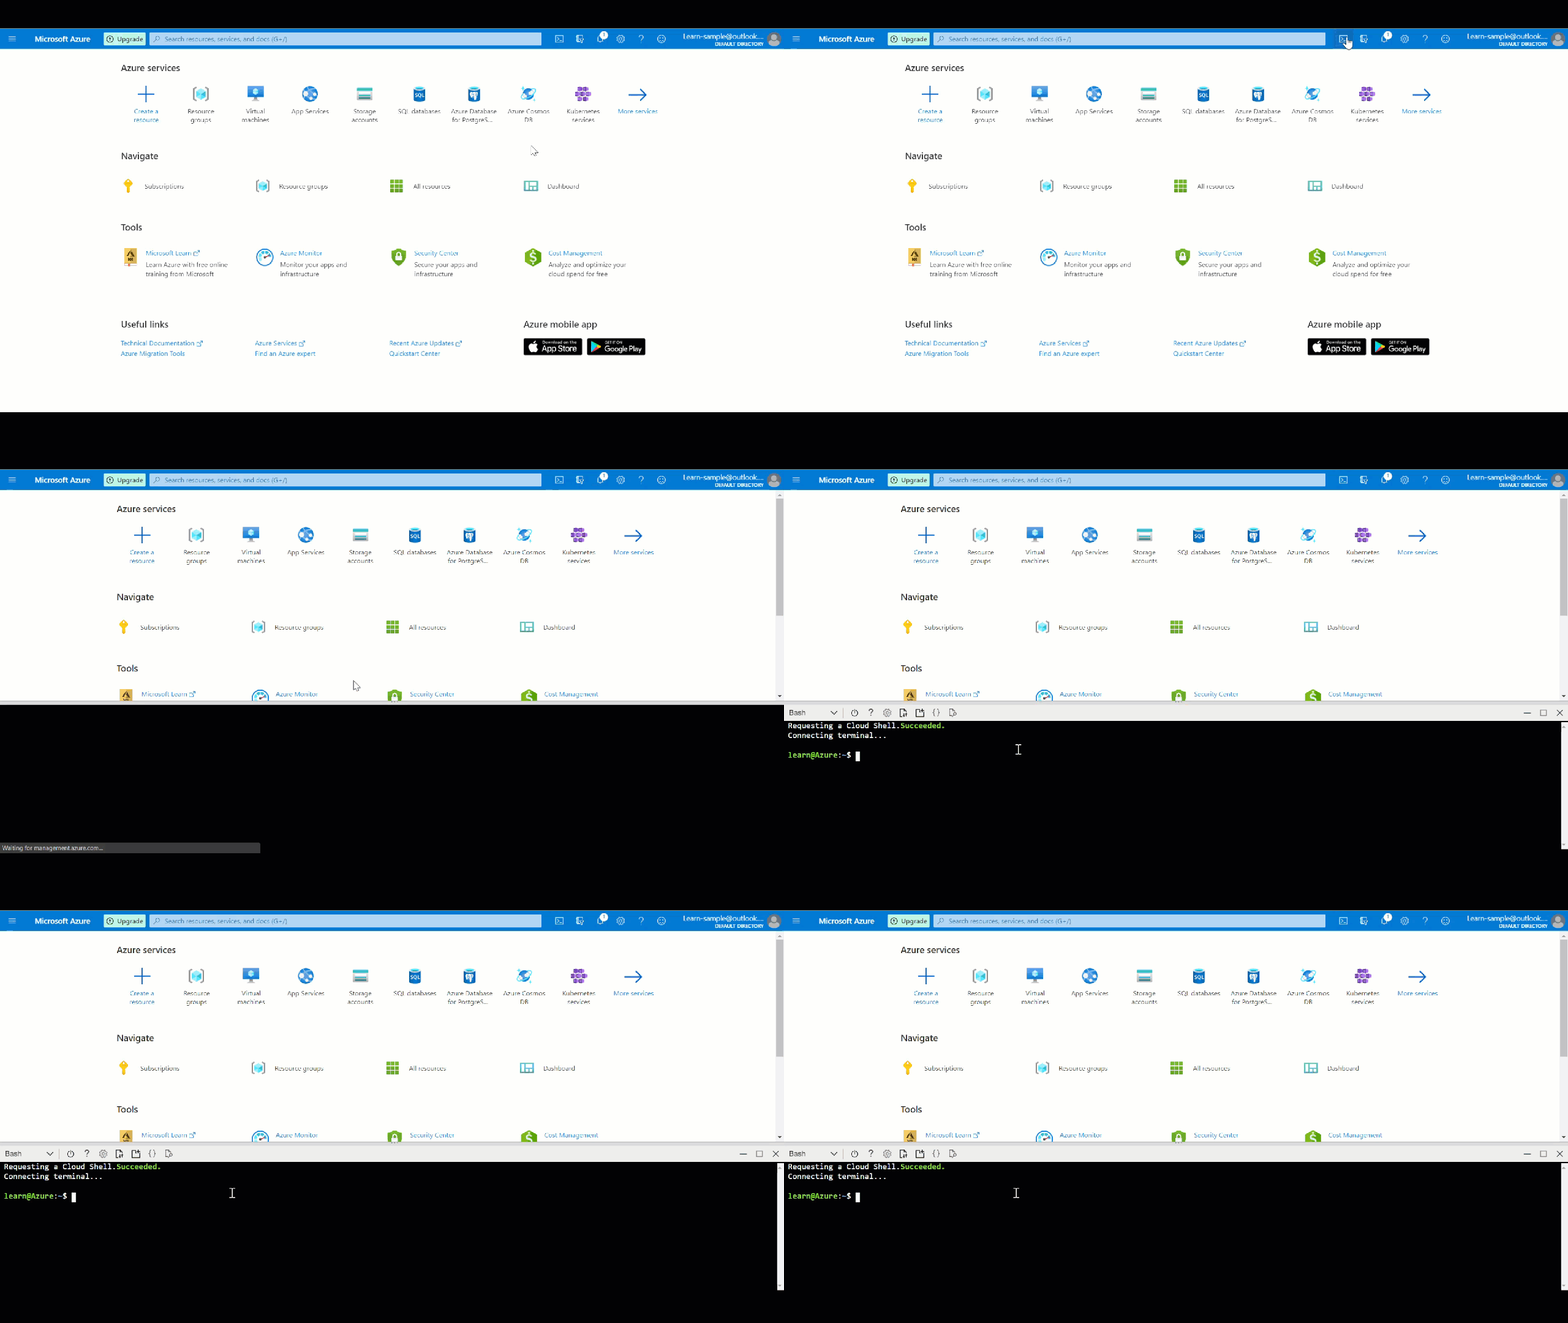
In the shell, use the preceding code to create the service principal. You get the following results. Copy the JSON part of the results (the content in the red box in the following screenshot) because you need it when configuring the secret in GitHub.
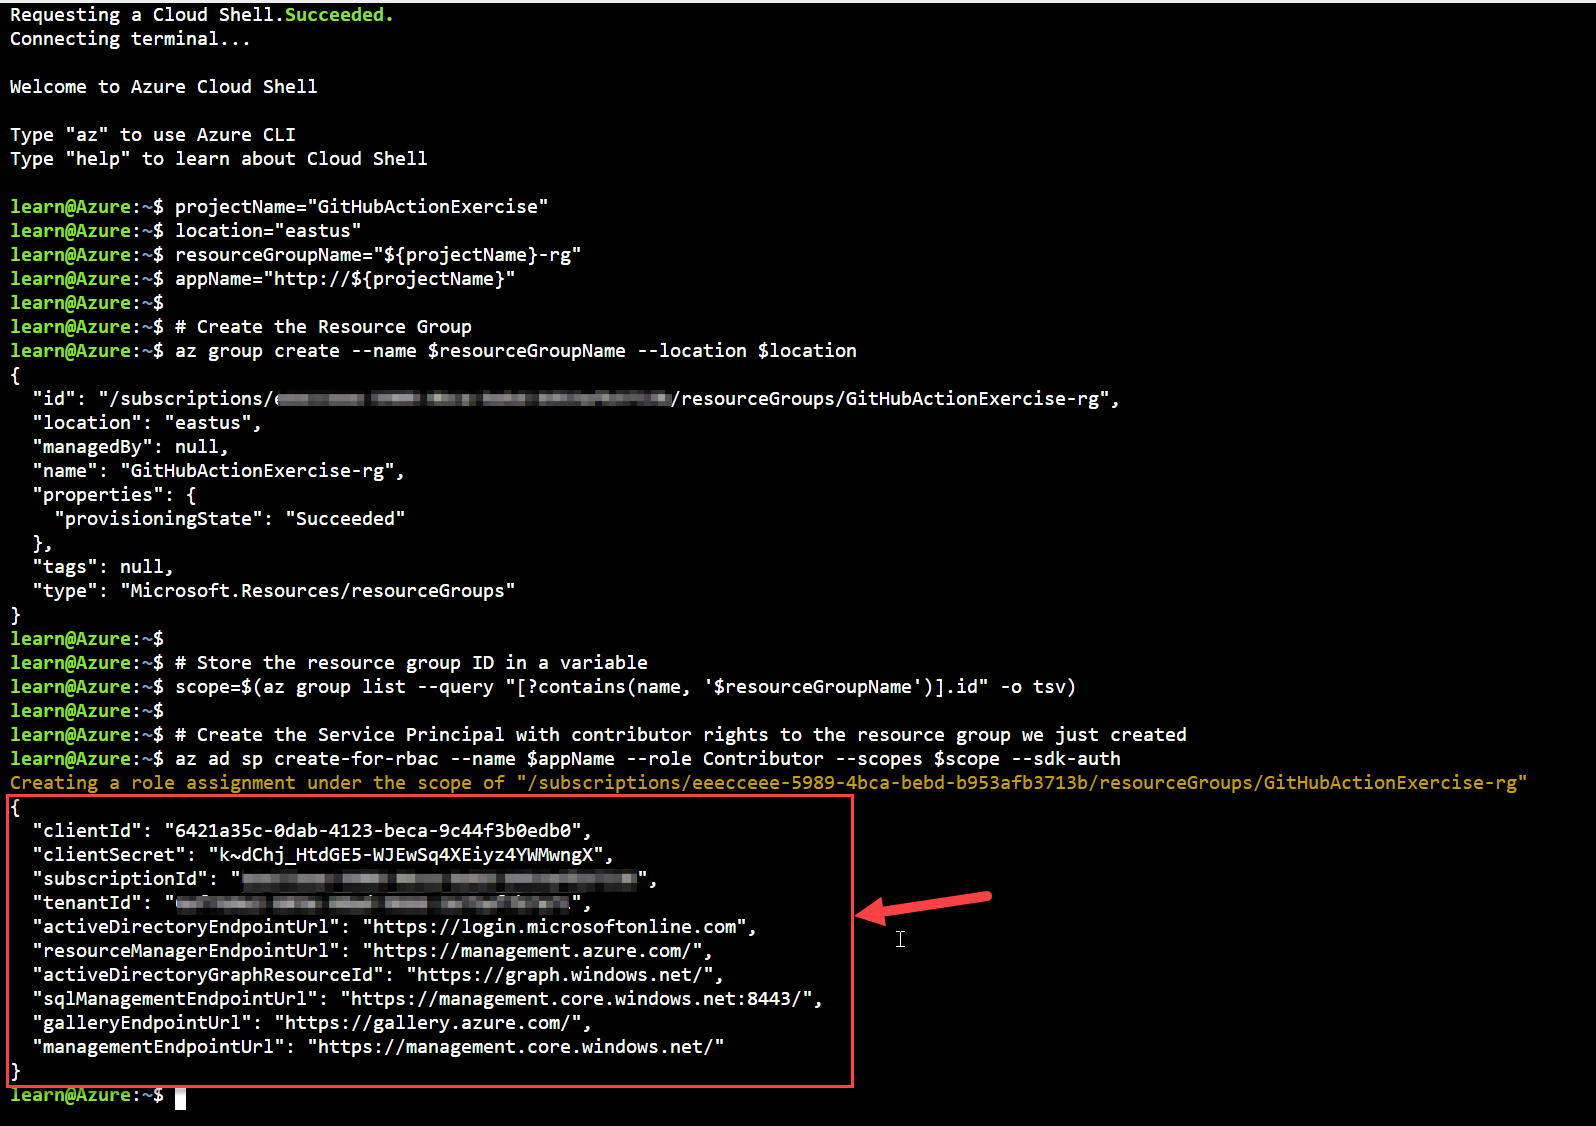
Copy the JSON output and store it as a GitHub secret within your GitHub repository by doing the following steps in GitHub: From your GitHub repository, select the Settings tab. From the left menu, select the Secrets drop-down, and then select Codespaces.
Enter the following values and then select Add secret:
- Name: Enter AZURE_CREDENTIALS.
- Secret: Paste the JSON output that you copied earlier.
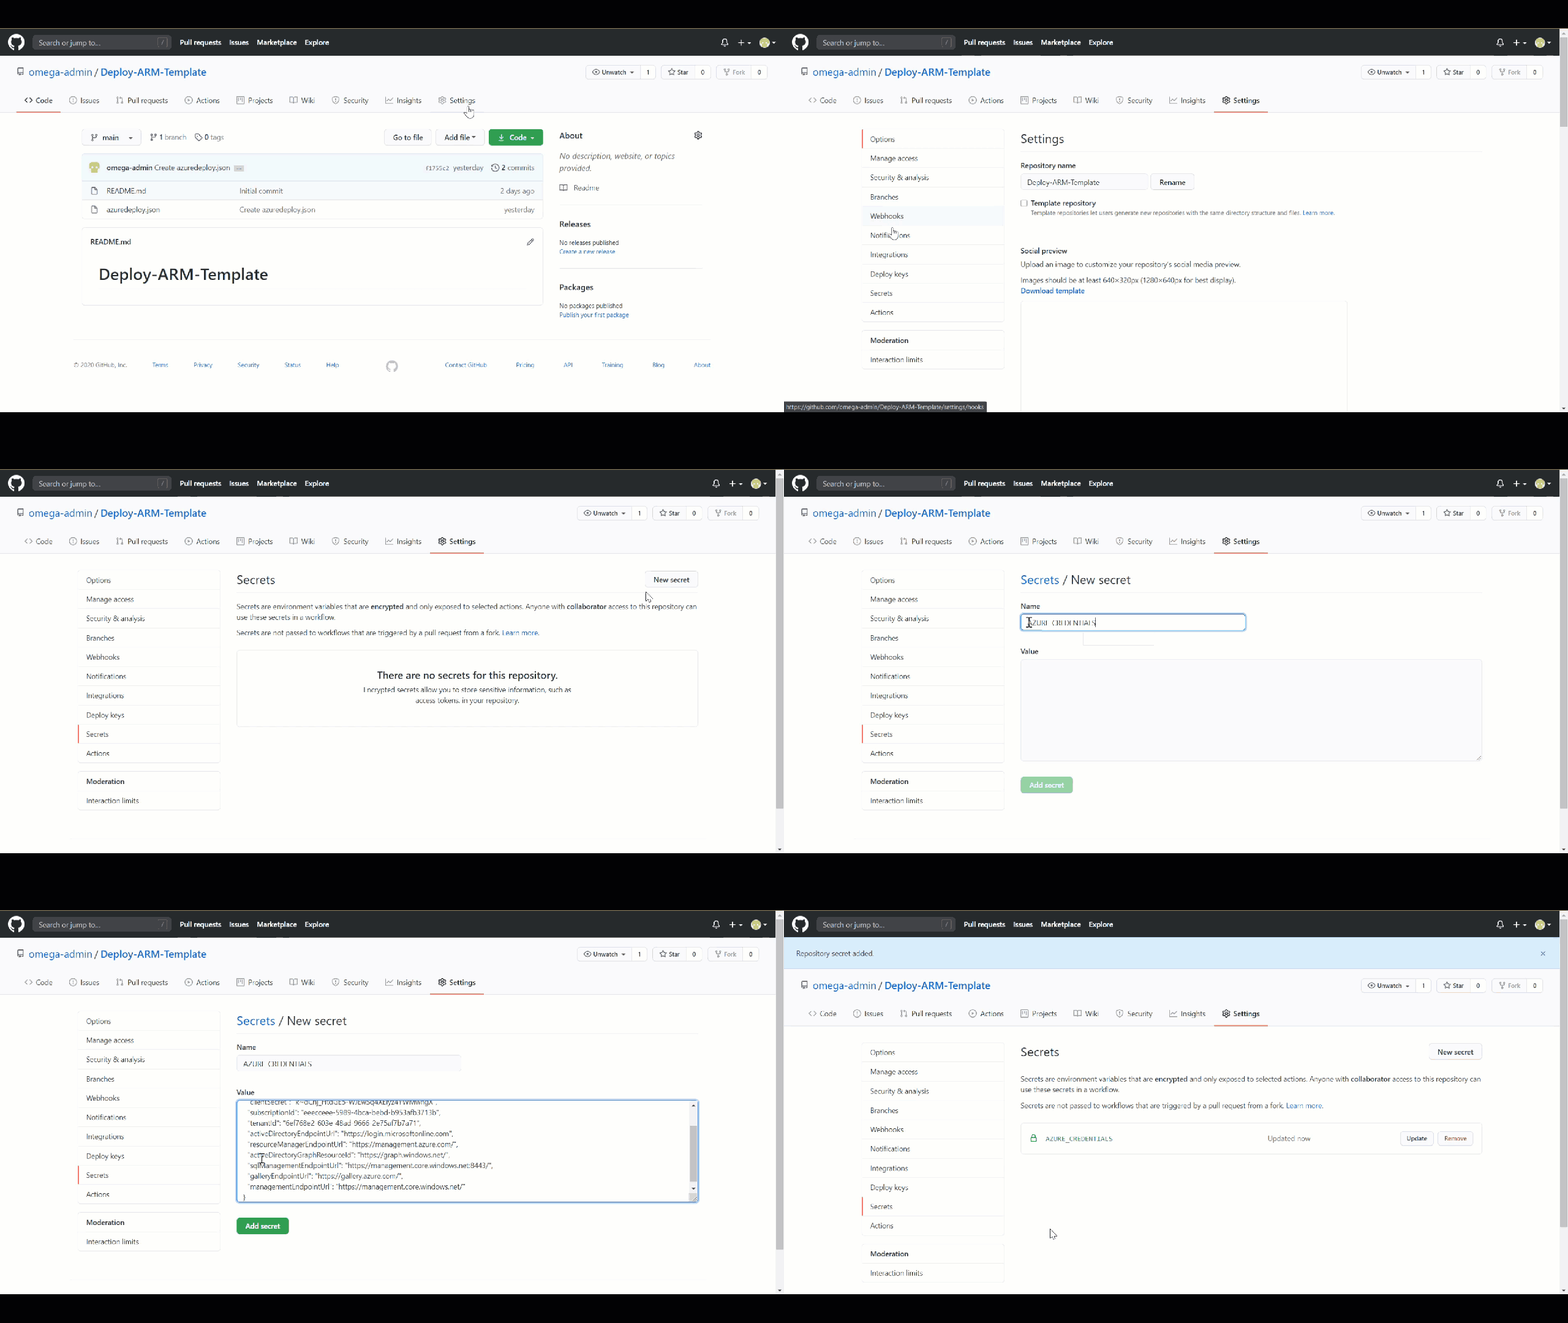
You need this information to specify the authentication in the workflow.
Create a workflow
The workflow file must be stored in the .github/workflows folder at the root of your repository. The workflow file extension can be either .yml or .yaml.
You can create a workflow file and then push/upload the file to the repository. Or you can use the following procedure to create it in the GitHub interface:
From your GitHub repository, select Actions from the top menu, and select Set up a workflow yourself.
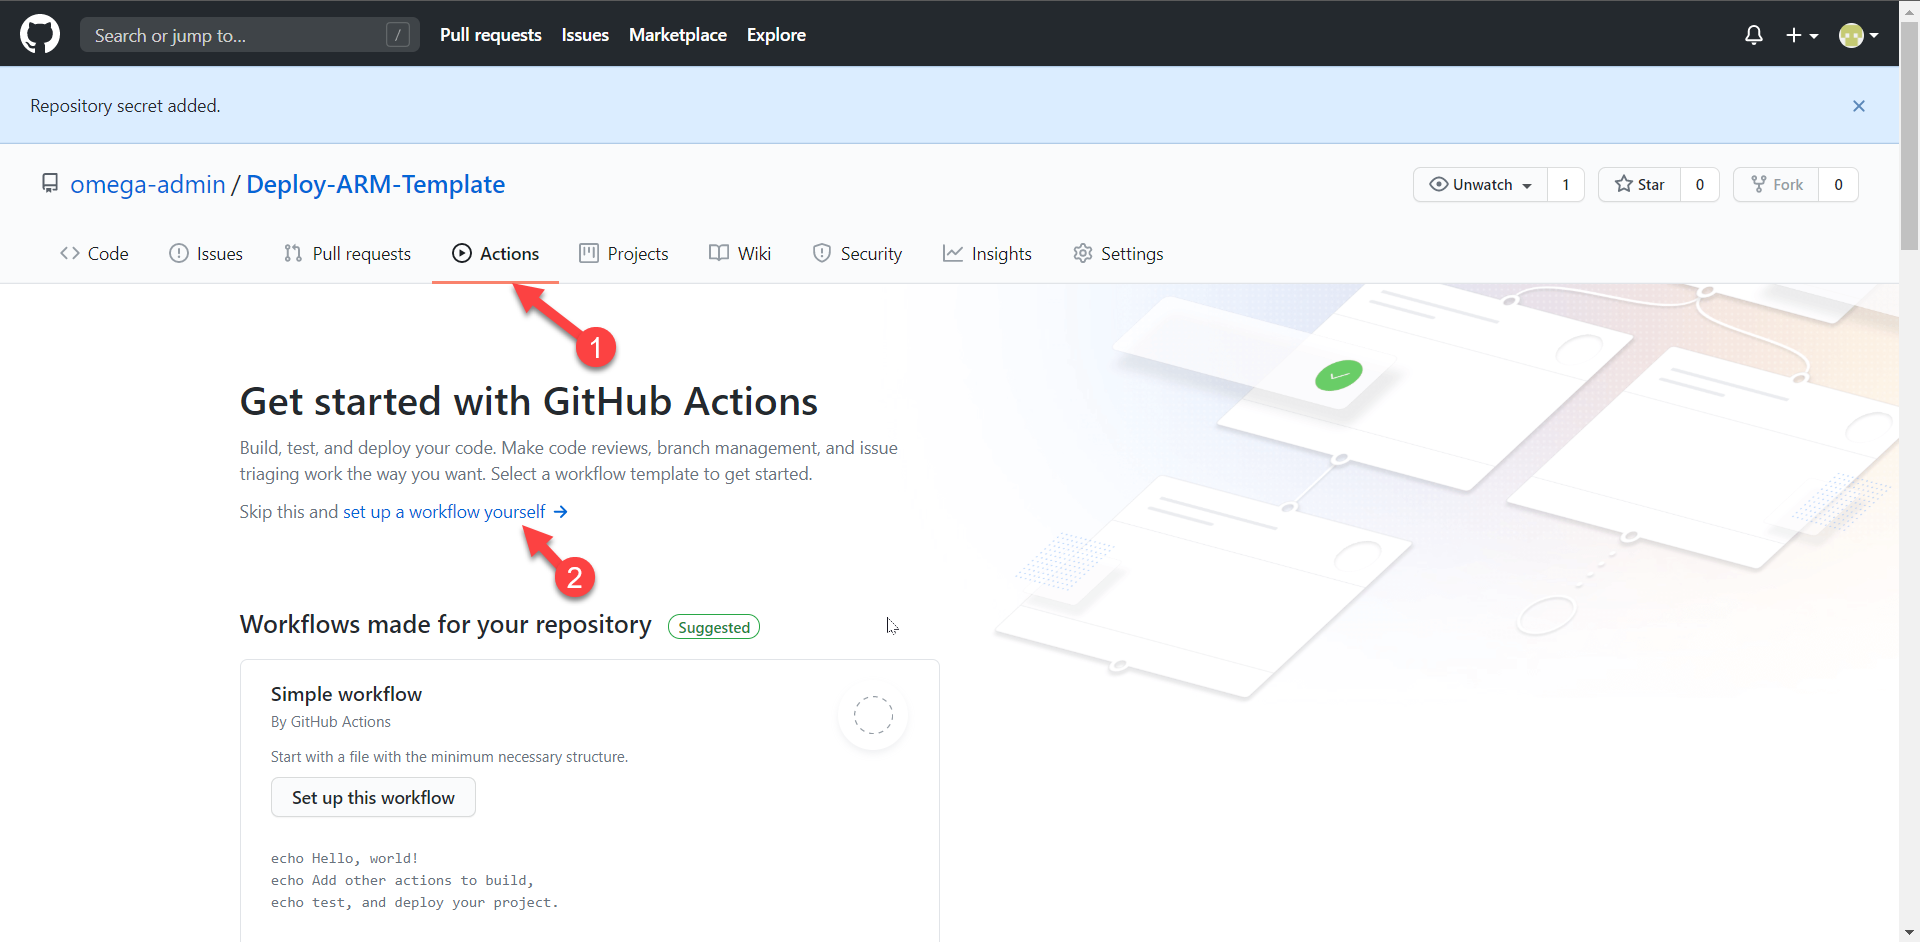
Rename the workflow file if you prefer a different name instead of main.yml. For example, use deployARMTemplate.yml.
Replace the content of the .yml file with the following code.
Note
The GitHub Marketplace has some custom-built actions that you can use to deploy ARM templates. This module uses the marketplace provider called Deploy Azure Resource Manager (ARM) Template.
name: Deploy ARM Template

on:
  push:
    branches:
      - main
env:
  AZURE_SUBSCRIPTION_ID: << Subscription Id >>   # set this to your Azure Subscription Id
  AZURE_RESOURCE_GROUP: GitHubActionExercise-rg   # set this to your target resource group

jobs:
  deploy-virtual-network-template:
    runs-on: ubuntu-latest
    steps:
      - name: Checkout source code
        uses: actions/checkout@main

      - name: Login to Azure
        uses: azure/login@v1
        with:
          creds: ${{ secrets.AZURE_CREDENTIALS }}

      - name: Deploy ARM Template
        uses: azure/arm-deploy@v1
        with:
          scope: resourcegroup
          subscriptionId: ${{ env.AZURE_SUBSCRIPTION_ID }}
          resourceGroupName: ${{ env.AZURE_RESOURCE_GROUP }}
          template: ./azuredeploy.json
The workflow file has three sections.
name: The name of the workflow.on: The name of the GitHub event that triggers the workflow. The workflow is triggered when a push event is on the main branch and modifies at least one file on the main branch.jobs: A workflow run consists of one or more jobs. Only one job is calleddeploy-virtual-network-template. This job has three steps.- Check out source code.
- Sign in to Azure.
- Deploy the ARM template.
Important
Verify that the secret name in the expression
creds: ${{ secrets.AZURE_CREDENTIALS }}matches the name of the secret that you saved to your repository's settings. Also verify that the ARM template name in theDeploy ARM Templatesteptemplate: $GITHUB_WORKSPACE/azuredeploy.jsonmatches the one that you saved in the repo earlier.Note
The resource group name should be
GitHubActionExercise-rgif you used the preceding Azure CLI code when you configured deployment credentials. The generated resource group name is the project name withrgappended.Select Start commit. Add a comment and description if needed.
Ensure that Commit directly to the main branch is selected, and then select Commit new file (or Commit changes).
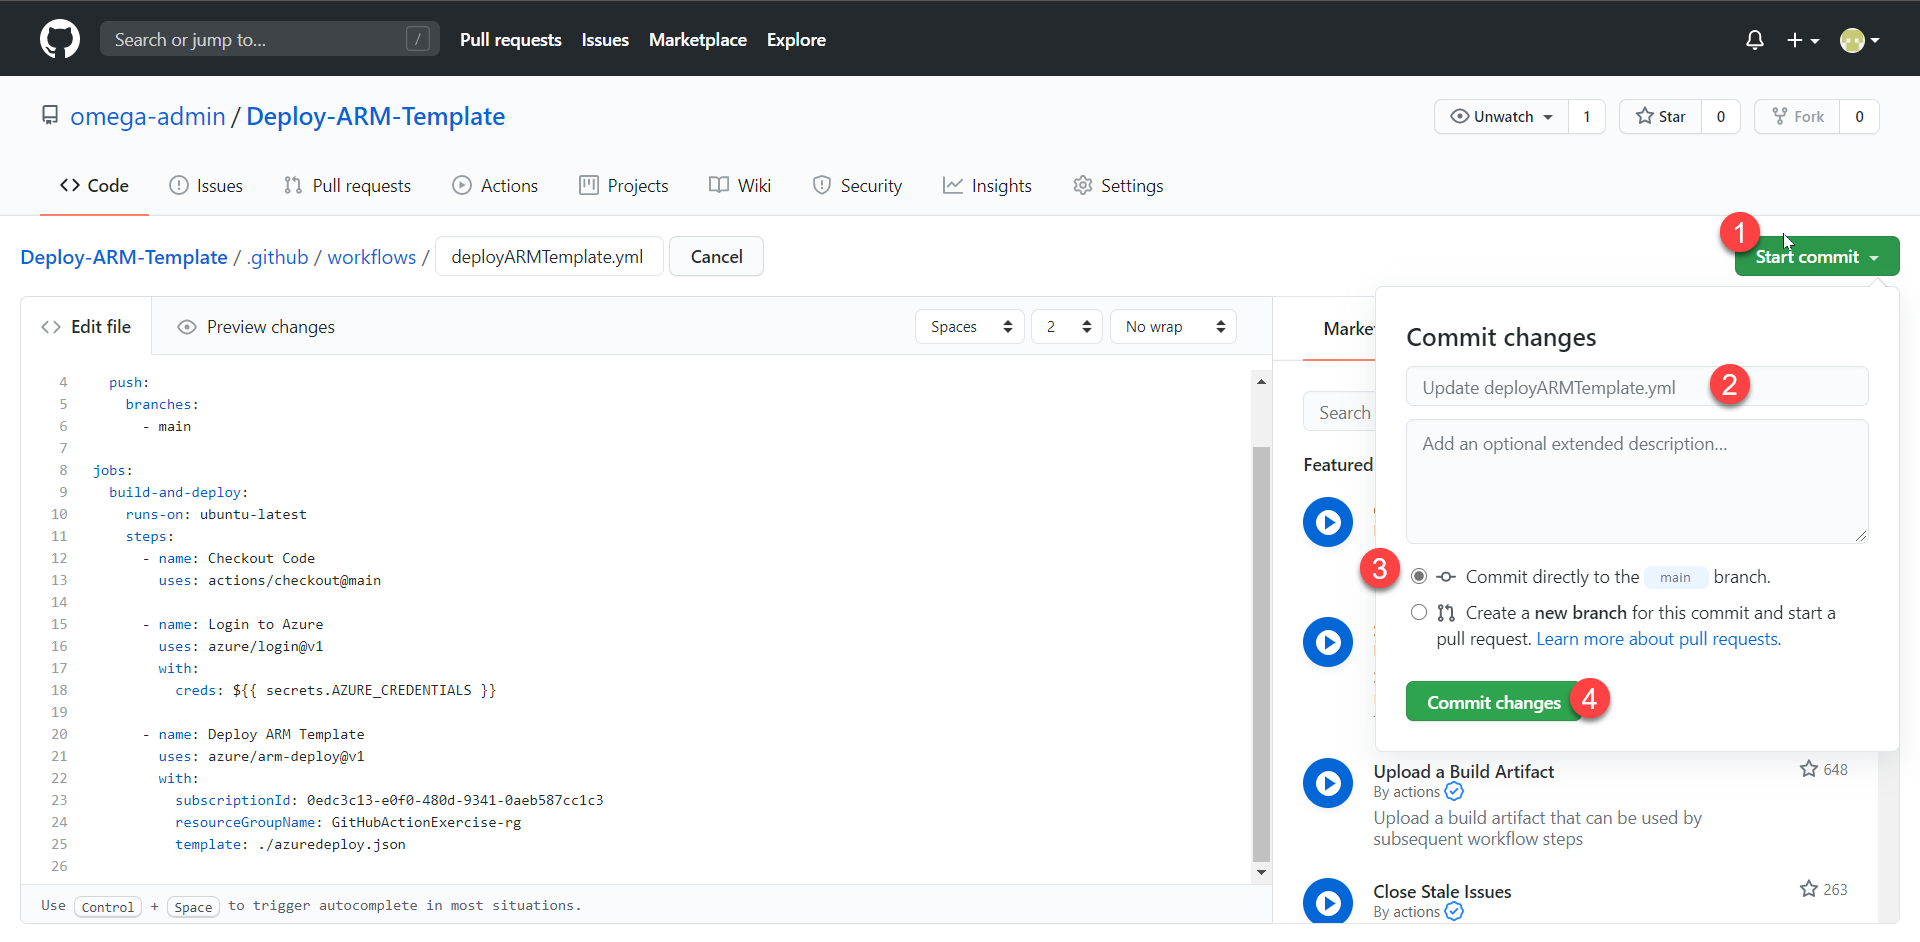
After the workflow file is created and committed to the main branch of the repo, the workflow will start automatically because the trigger in your workflow is a commit/push to the main branch.
on:
  push:
    branches:
      - main
Go to your repo and check the status of your workflow.
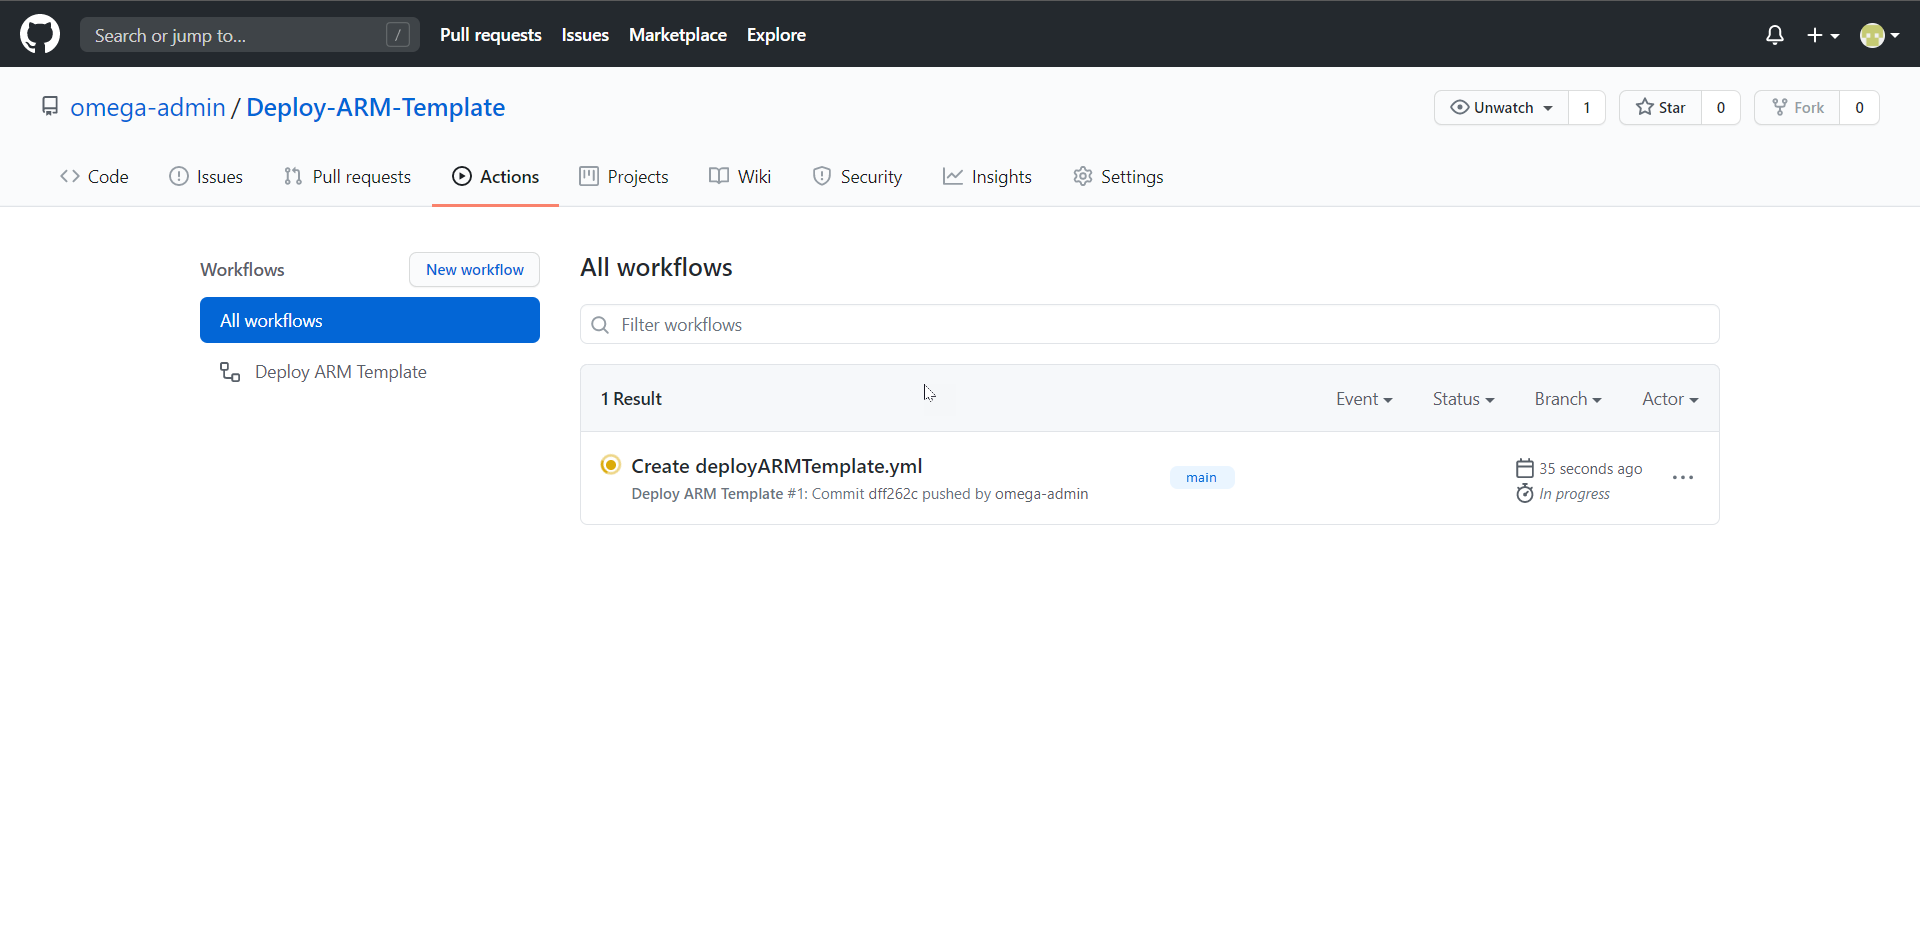
Check your deployment
When the workflow is completed, go to the Azure portal to check the deployment status.
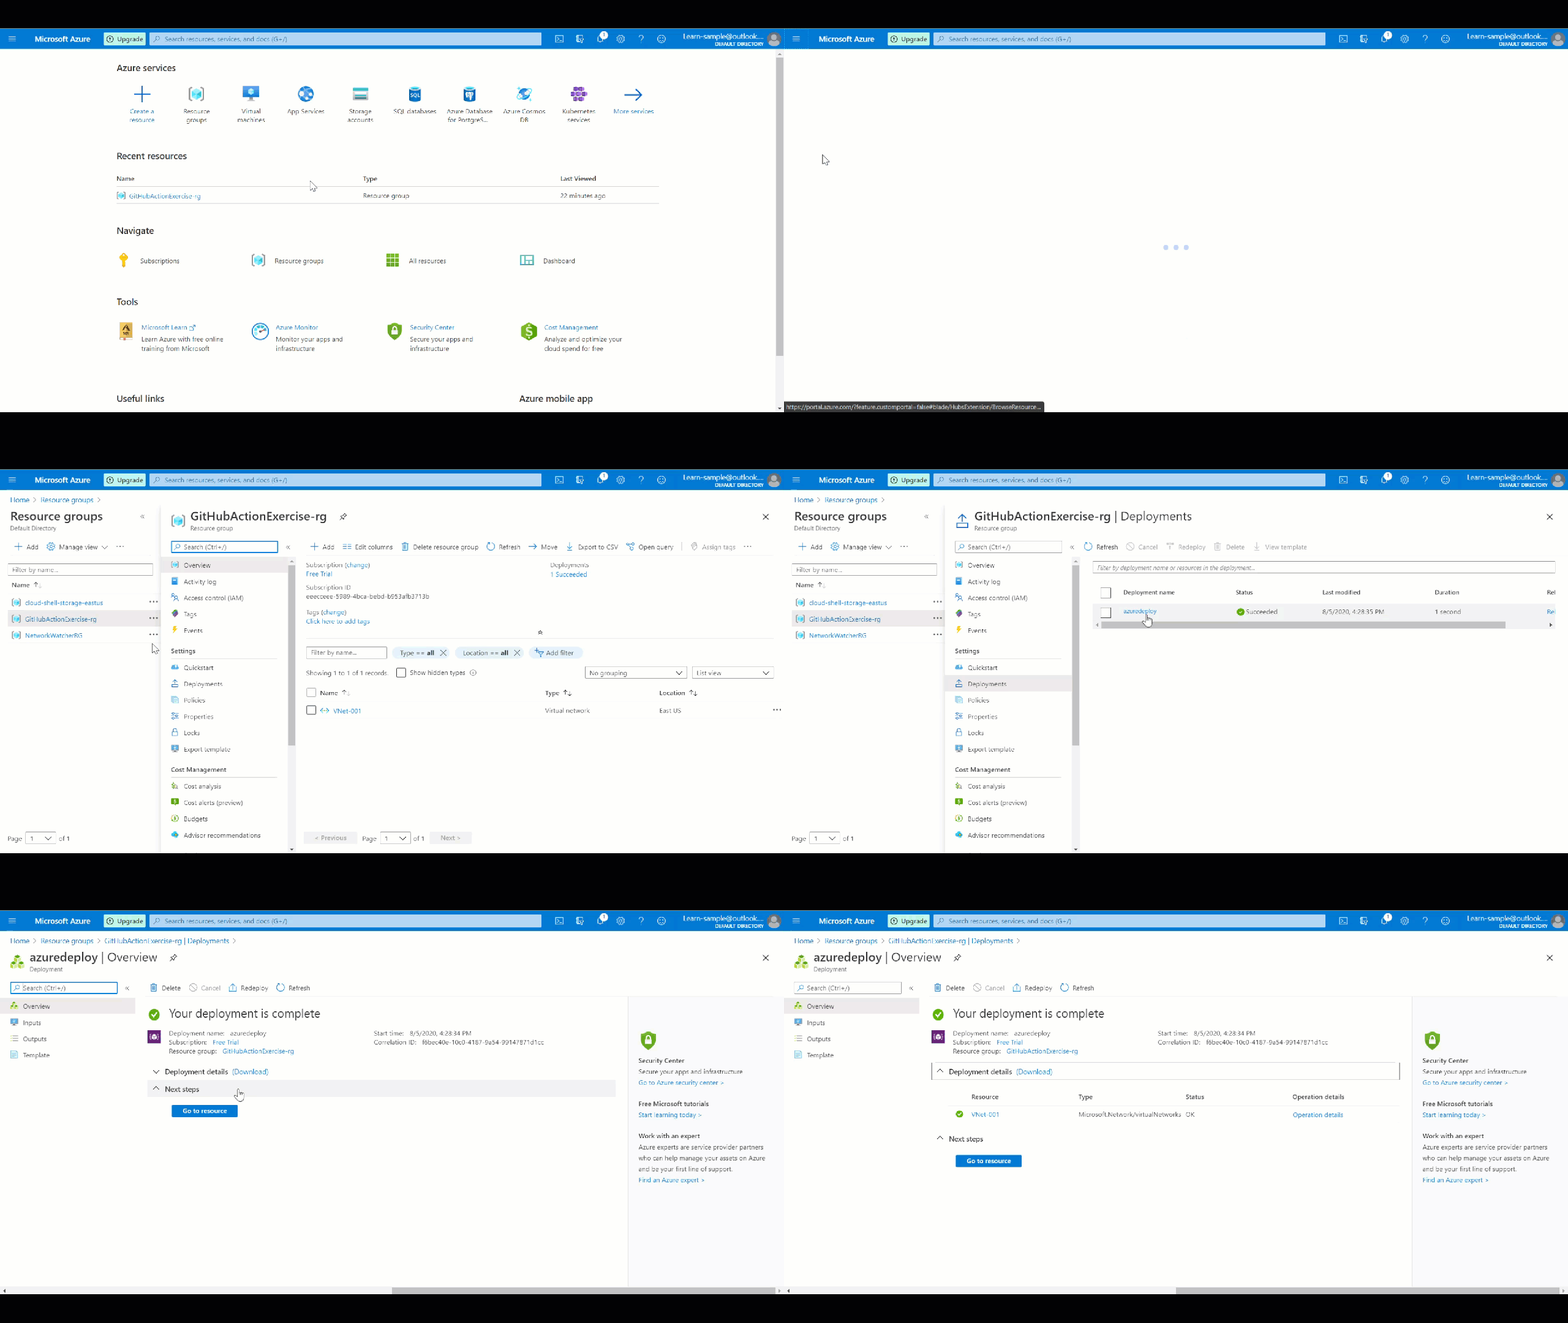
In the left pane, select Resource groups > GitHubActionExercise-rg. On the Deployments pane, verify that your deployment succeeded.
