Create a GPU Accelerated Virtual Machine
The Microsoft Azure cloud offers many Virtual Machine (VM) sizes with various features. GPU optimized VM sizes are specialized virtual machines available with single, multiple, or fractional GPUs. These sizes are designed for compute-intensive, graphics-intensive, and visualization workloads. In this section, we deploy a GPU Accelerated Virtual Machine to host an installation of the NVIDIA Triton Inference Server.
Create a GPU accelerated virtual machine
Note
Depending on your Azure Subscription configuration, you may not have the capability to deploy a GPU accelerated Virtual Machine. If that's the case, you may still proceed with this module by deploying any CPU based Virtual Machine.
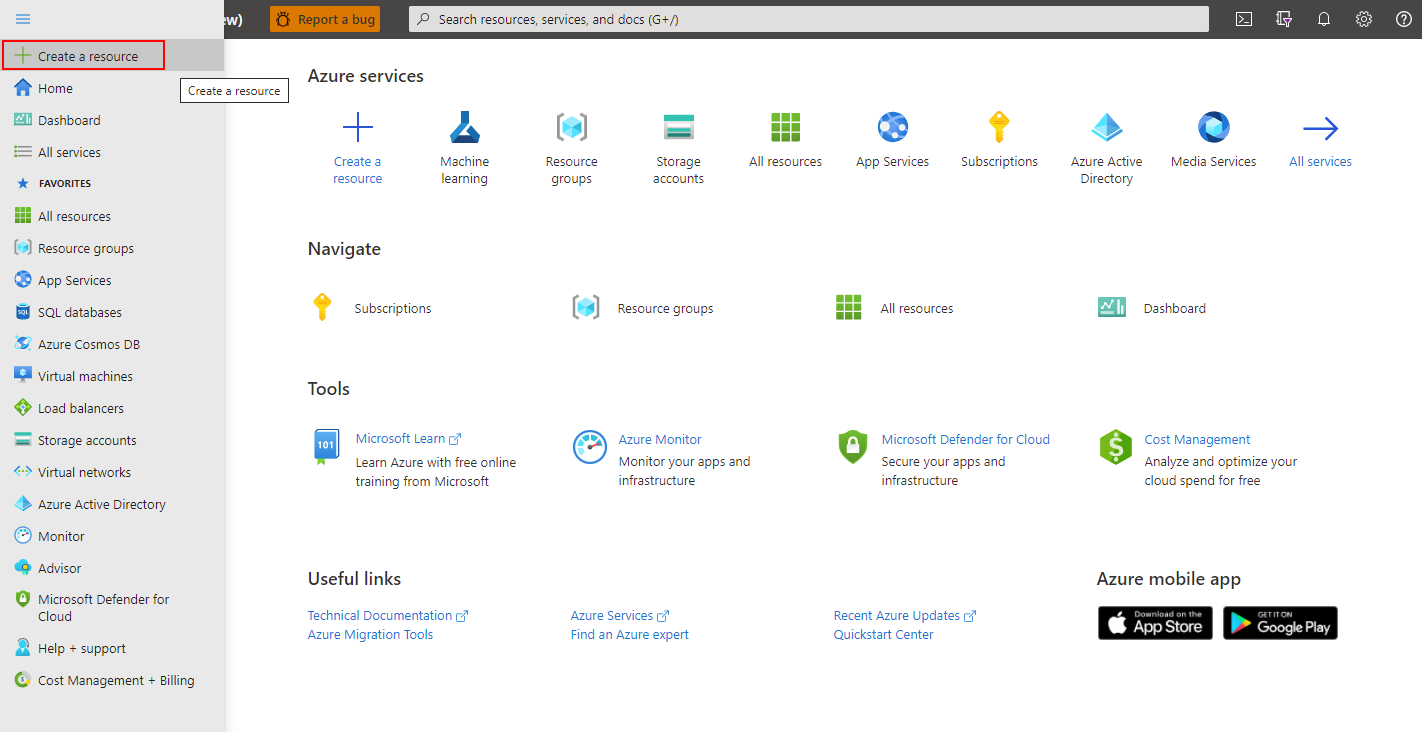
Sign in to the Azure portal and select Create a resource from the menu drop-down on the left.
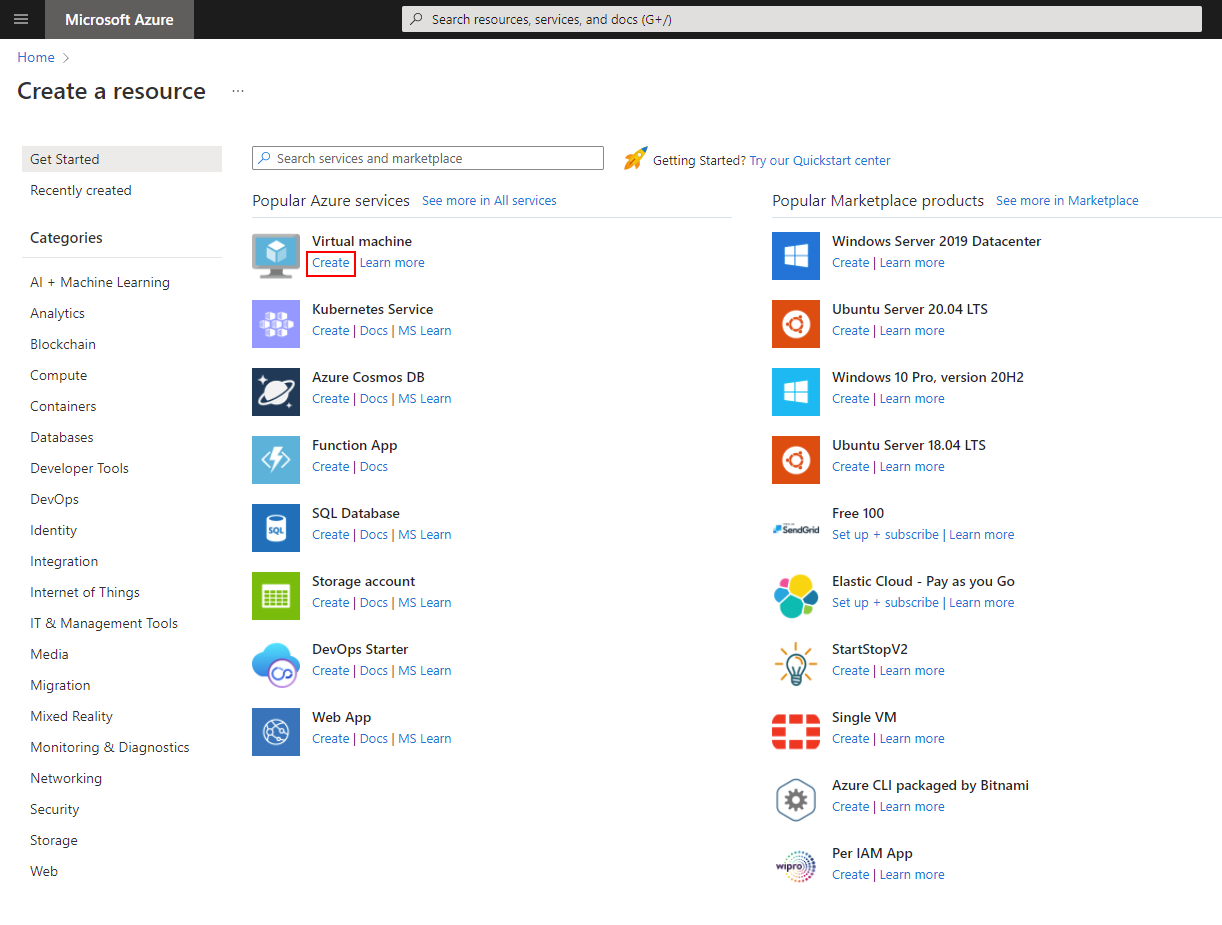
In the resulting screen, look for the virtual machine section, then select create.
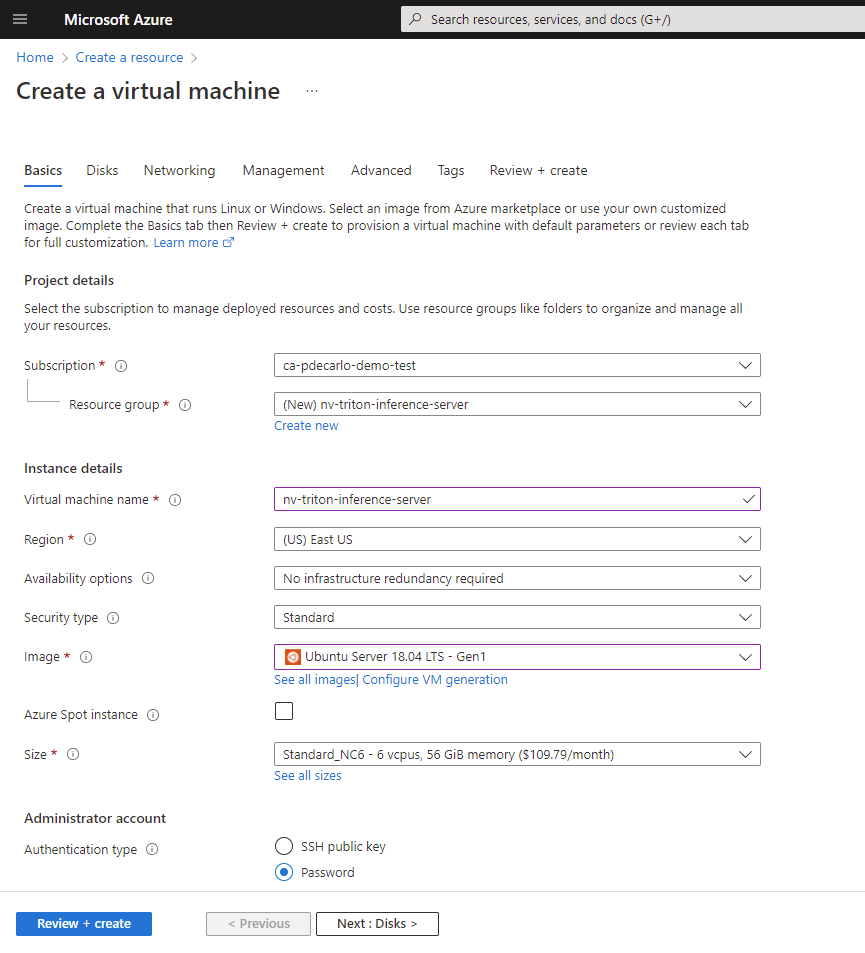
In the Basics section:
Create a new resource group.
Supply a Virtual machine name that is globally unique.
Choose an appropriate Region.
Leave Availability options at the default setting. No infrastructure redundancy required.
Leave Security type at the default setting, Standard.
For Image select Configure VM generation, then select Generation 1, then Apply.
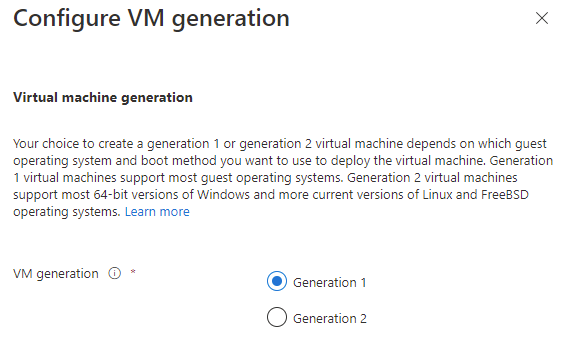
- Next, select Ubuntu Server 18.04 LTS - Gen1 in the Image section.
Leave Azure Spot instance unchecked.
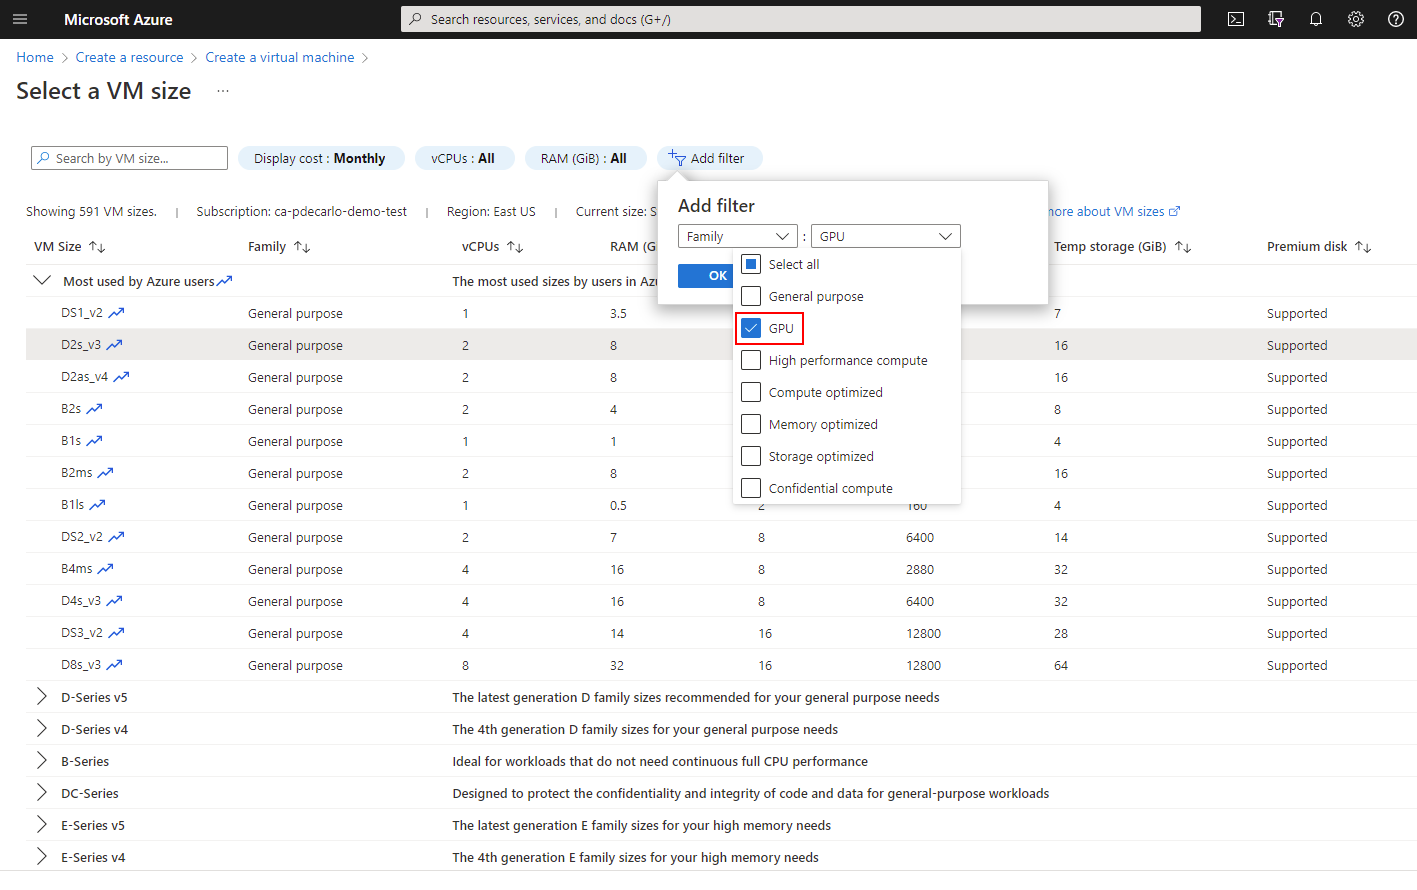
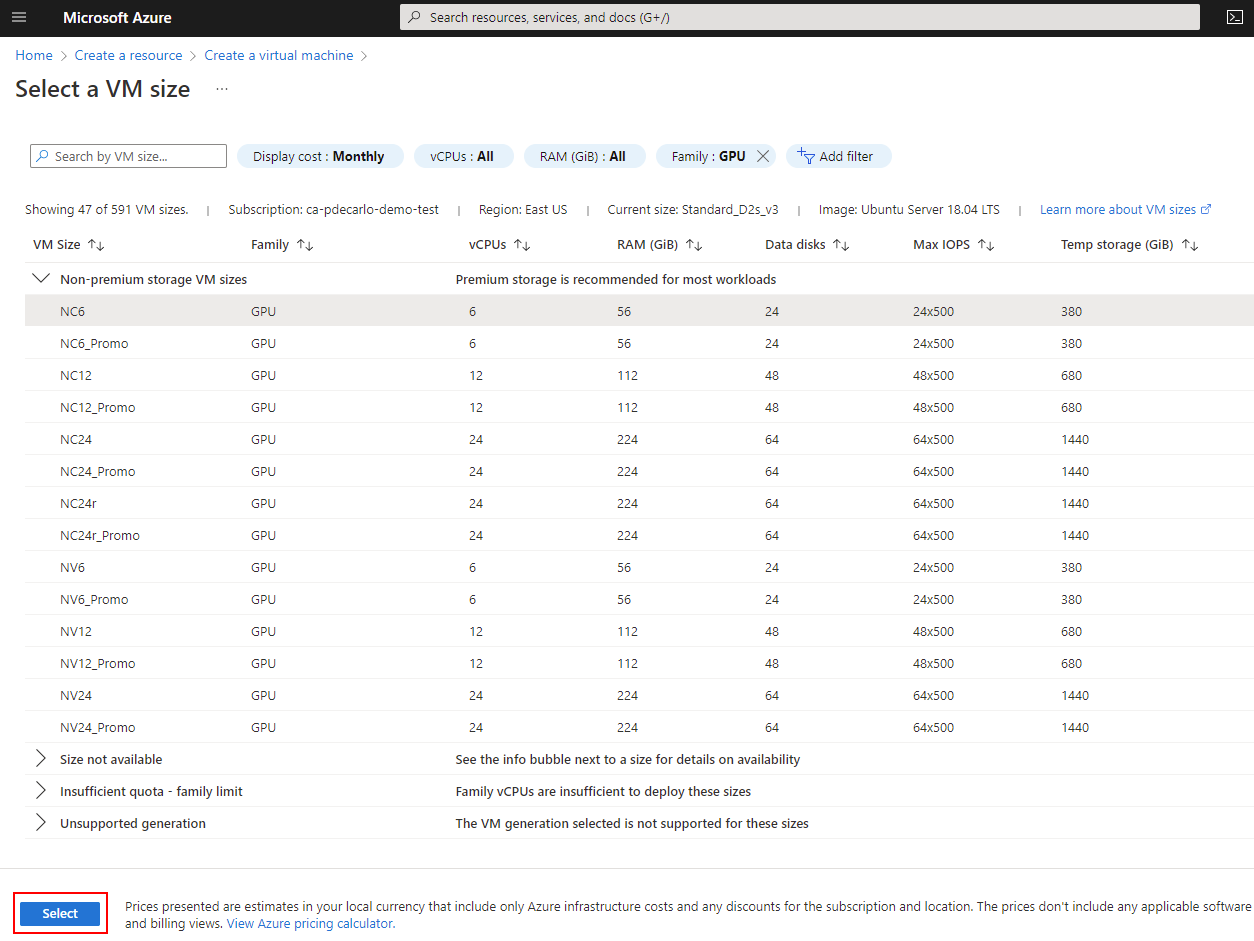
For Size, if you wish to use a CPU instance then leave this option as-is, to select a GPU accelerated offering select the See all sizes option.
In the Administrator Account section, select Password.
At this point, the selected options should look like the following image.
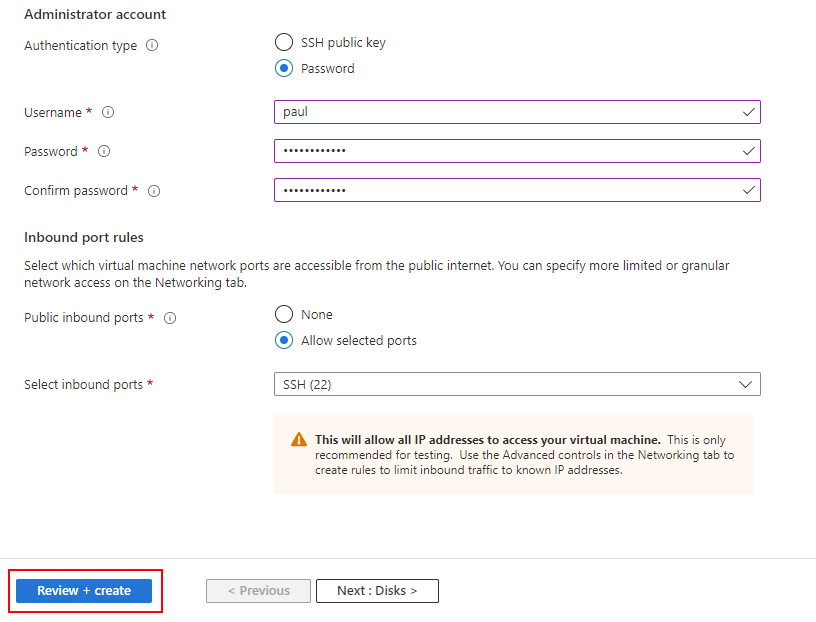
Supply a Username and Password for the Administrator Account.
In the Inbound port rules section, select Allow selected ports, then verify that Select inbound ports shows SSH (22) is enabled.
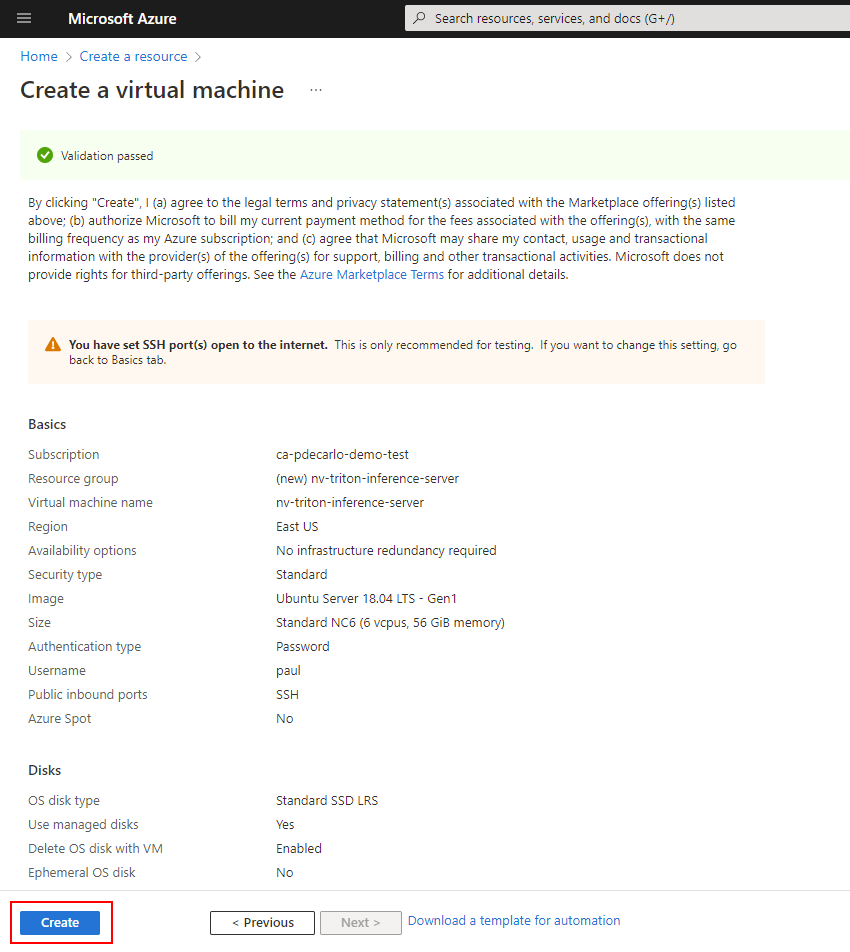
The remaining options should look like the following image. When you verify that your options look correct, select Review + create.
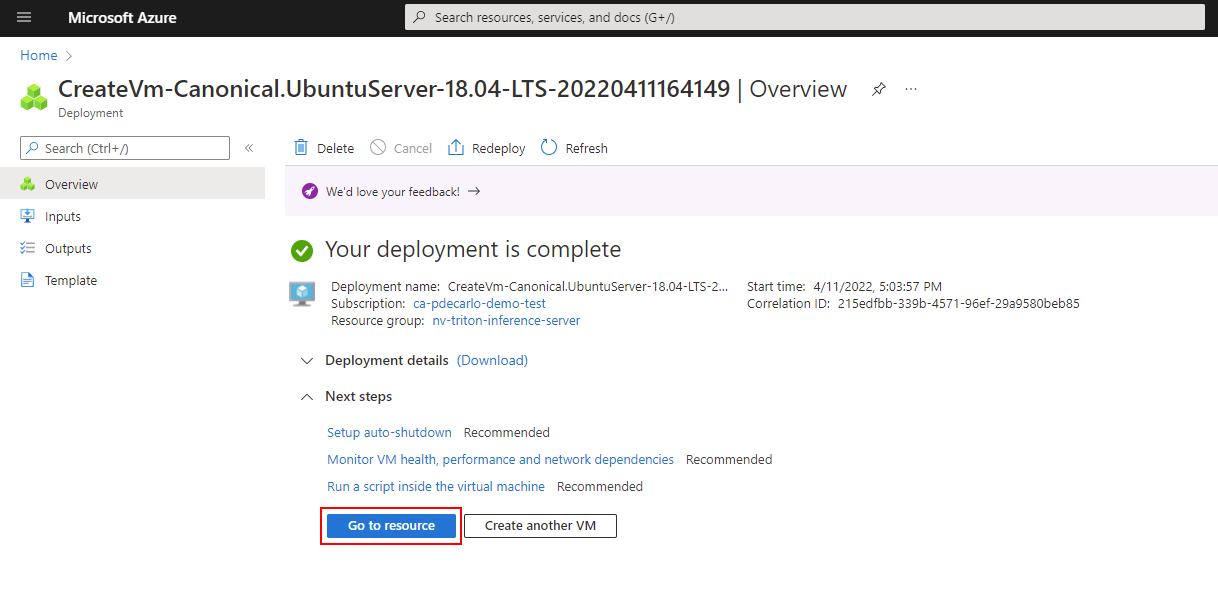
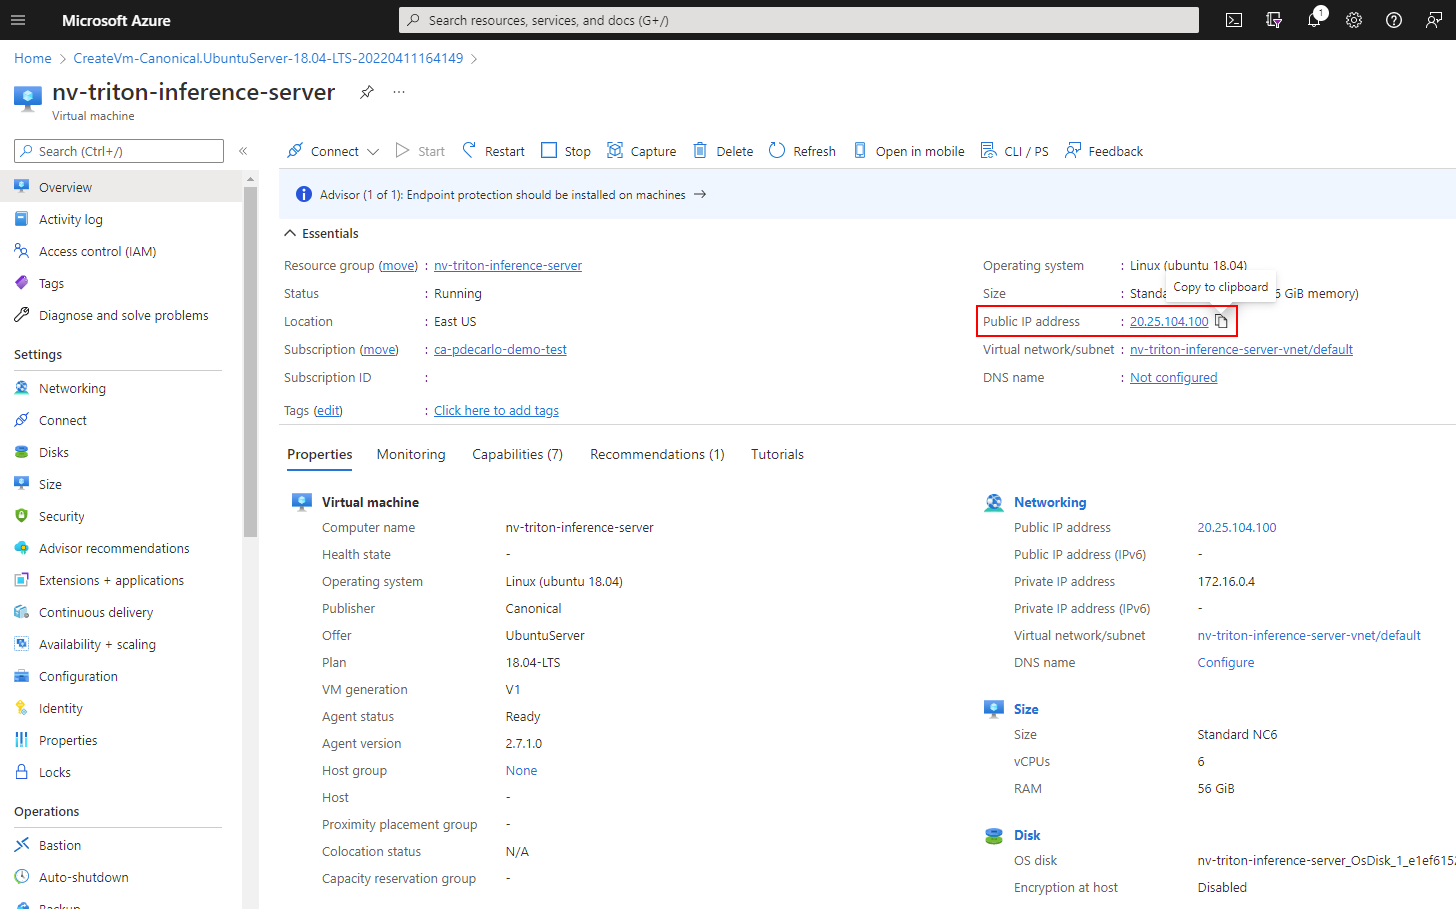
The deployment creates several resources: the virtual machine, a network security group, and a public ip address. When provisioning is complete, select the Go to resource button or navigate to your virtual machine using the Azure portal.
On the Overview screen for your virtual machine, copy the Public IP address, and save this value to your text editor of choice. We use this value to access the virtual machine via a terminal emulator such as TeraTerm or Windows Terminal.
