Create an Azure Storage Container
Now that we have an Azure Storage Account, let's create a container that allows us to store unstructured blob data. This format is ideal for storing and serving image data in a distributed fashion. We reference this data in upcoming steps when we create a Datastore in Azure Machine Learning studio.
Create an Azure Storage Container
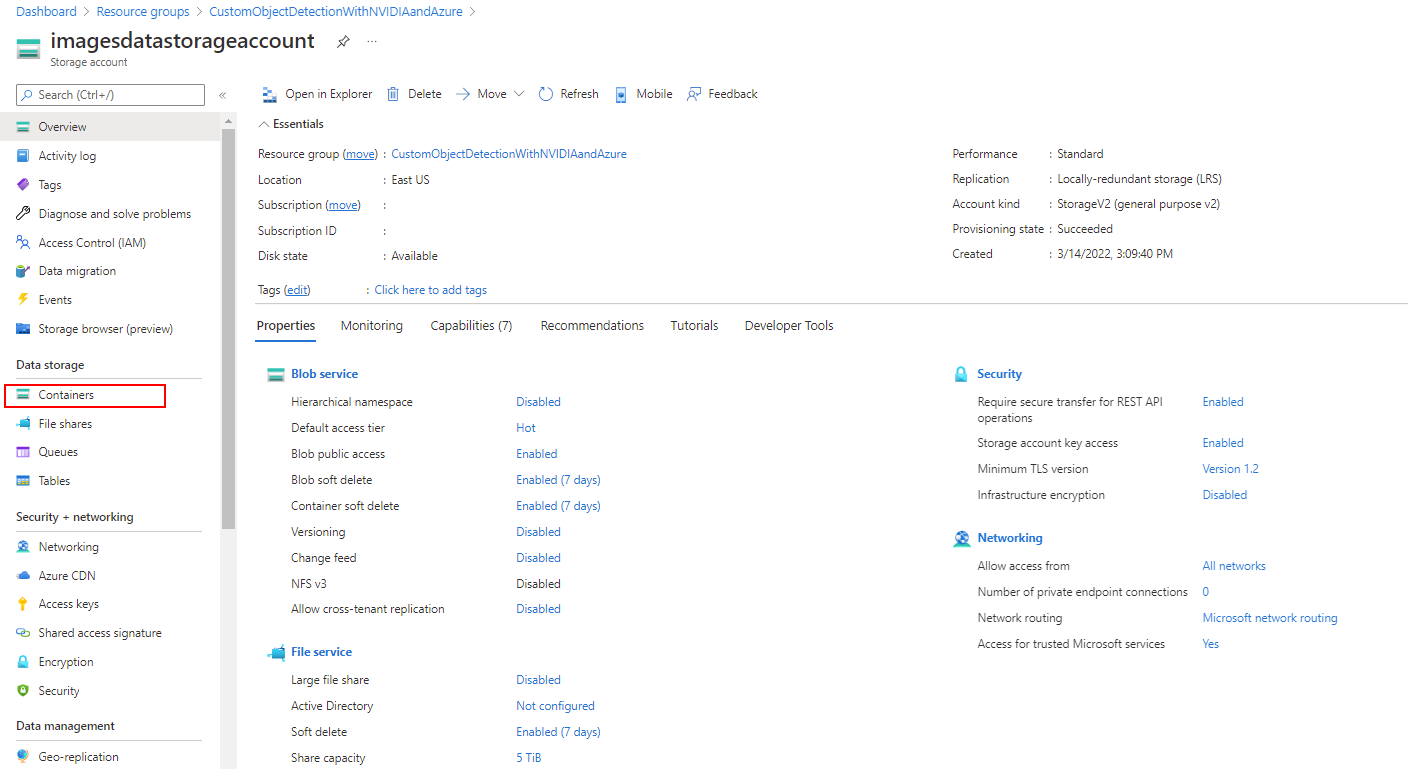
In the Azure portal, navigate to the Azure Storage Account that you created in the previous unit.
In the left menu, scroll to the Data Storage section, then select Containers.
Select the + Container+ Button, you're prompted to provide a name for your container. Keep track of this name in a secure and accessible document as you need to reference it later in the module. The container name must be lowercase, must start with a letter or number, and can include only letters, numbers, and the dash (-) character.
Set the level of public access to the container. The default level is Private (no anonymous access).
Select Create to create the container:
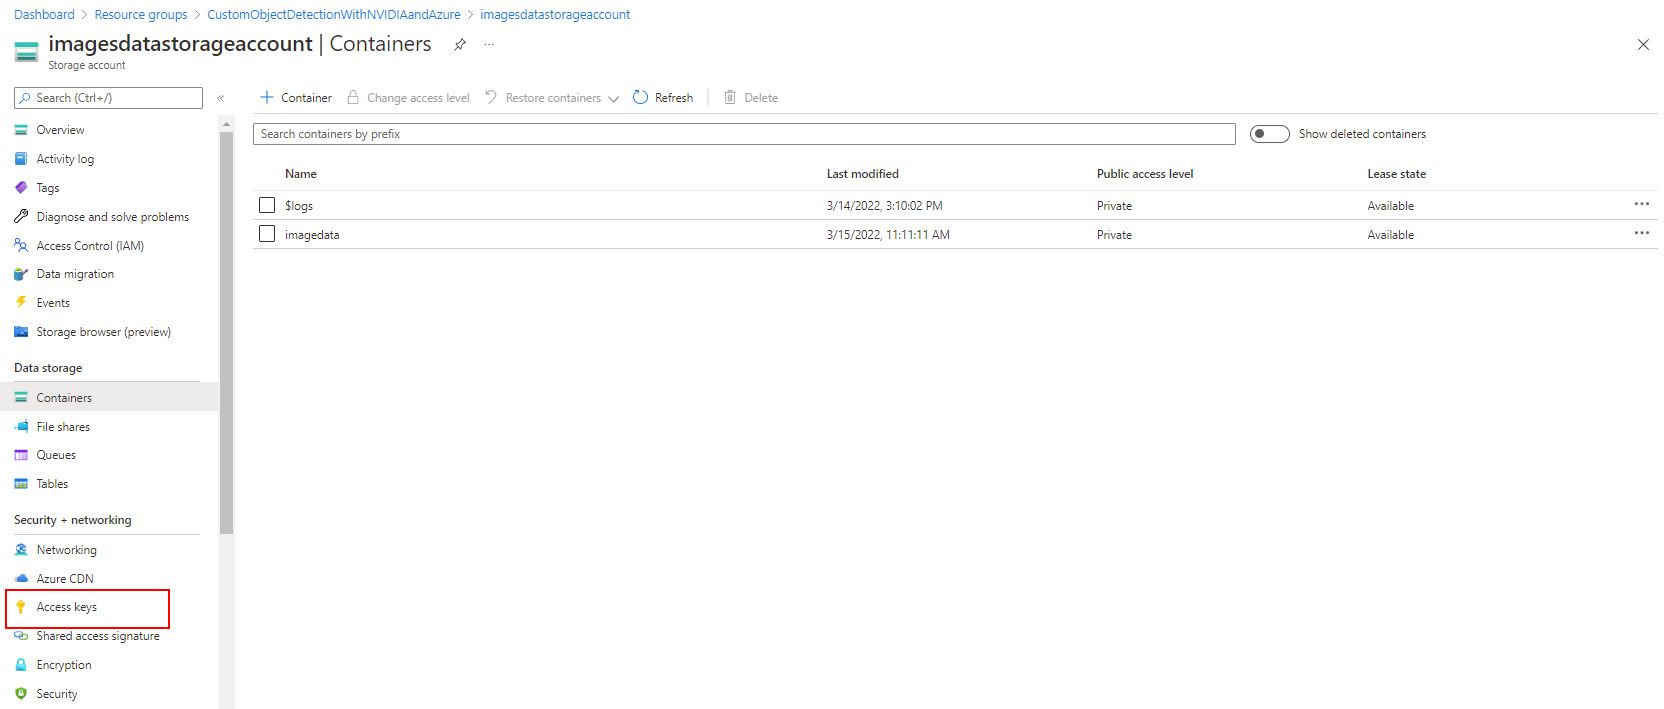
Once the container is created, select Access Keys under the Security + networking section of the left-side panel.
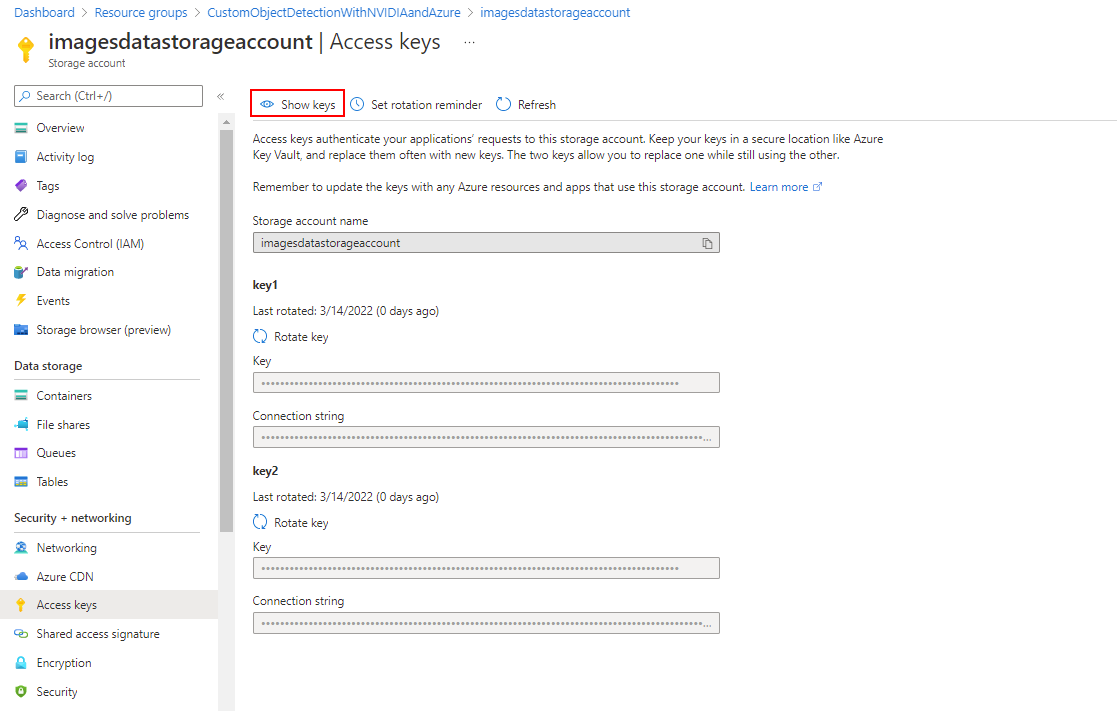
In the following screen, select the Show keys icon and copy the key to the clipboard and then record it somewhere safe and accessible. This key is needed later.
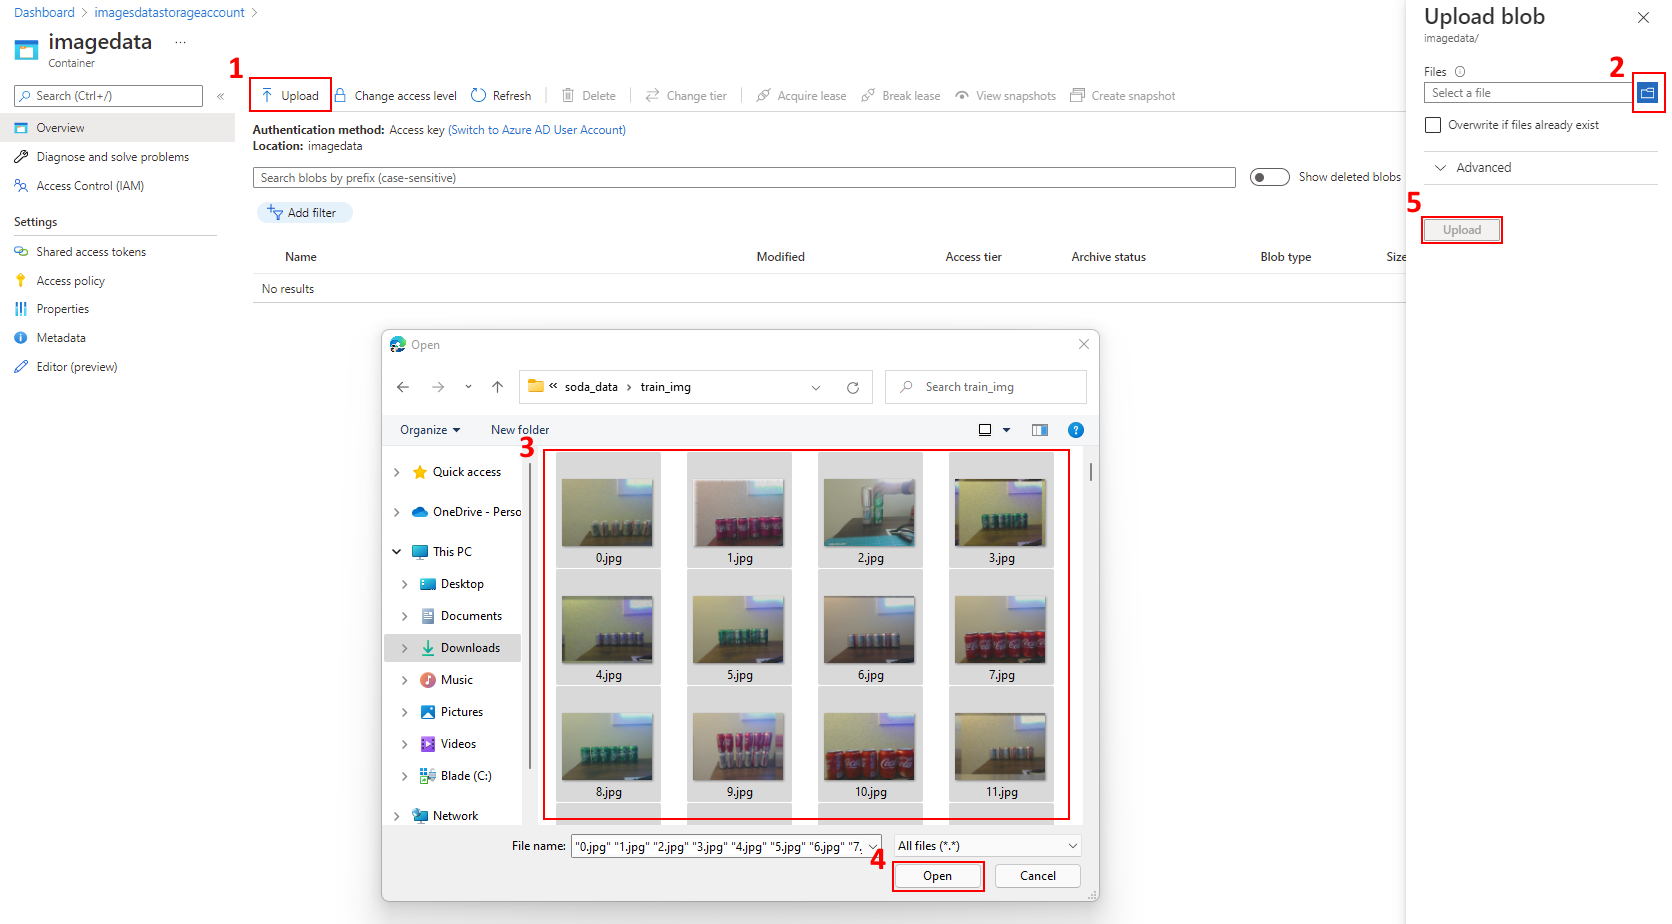
Select the Containers section on the left-side panel and select the newly created container as highlighted in the following image:
Download and extract the following provided image data. You need to decompress the included
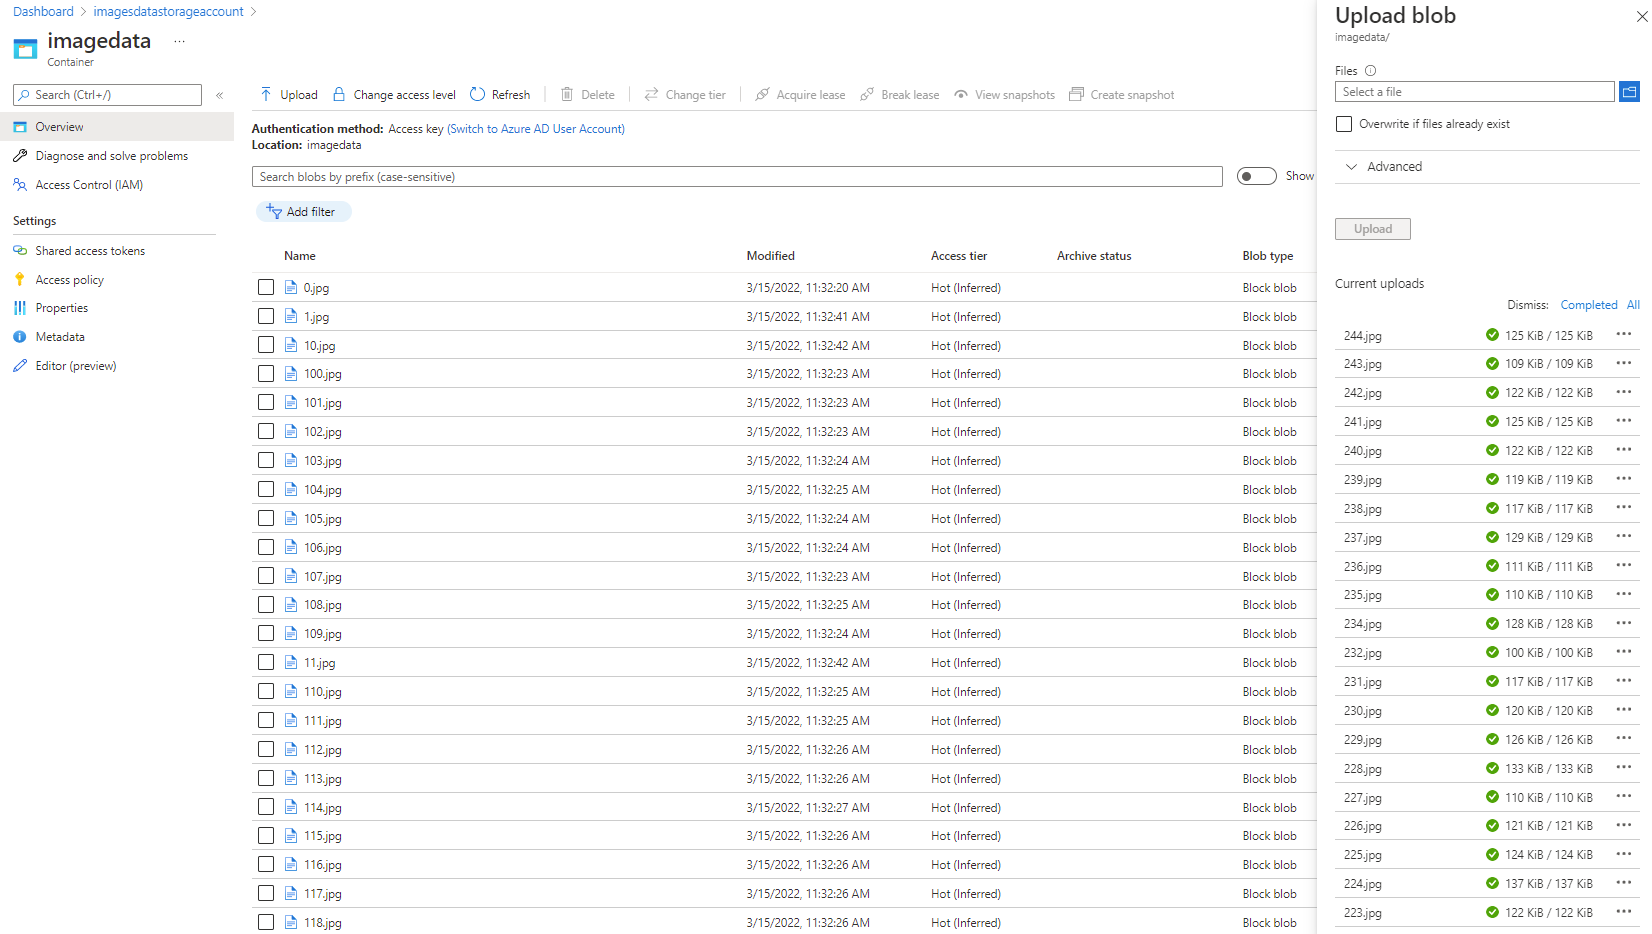
soda_data_compressed.zipfile, then follow the steps in the following image to upload the contents of thesoda_data\train_img\directory as shown. Once you select these files for inclusion, select the now highlighted Upload button to begin the transfer from your machine to the Azure Storage Container.Once completed, you should see that 245 images are added to the Azure Storage Container (0.jpg - 244.jpg). At a minimum, you need at least 10 images to train an AutoML for Images model in Azure Machine Learning studio.
At this point, you should have the Storage Account Name, Blob Container Name, and Access Key noted for future use. These values are used in the next section when we create the Azure Machine Learning Workspace.
