Exercise: Use tabbed pages with navigation pages
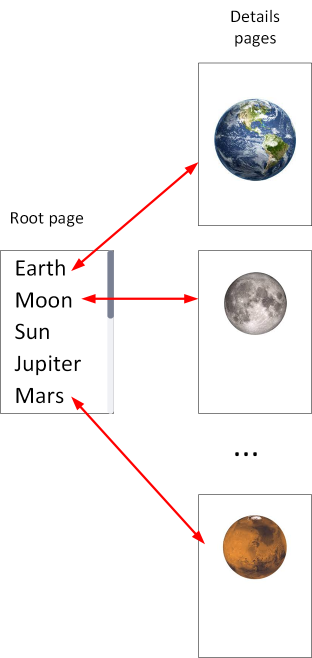
In the astronomy app, you're asked to add pages that enable the user to select different astronomical bodies and display their details. There can be any number of bodies, so creating a tab for each body isn't a feasible approach. Therefore, to enable the user to select which body to view, you decide to add another page containing a list. The user can select a body from this list and the app displays the details for that body in a new page. The list page acts as a root page for stack navigation. You add the list page as a tab in the existing user interface.

Open the starter solution
Go to the exercise3 folder in the repo that you cloned at the start of this module, and then move to the start folder.
Use Visual Studio to open the Astronomy.sln solution or the folder in Visual Studio Code.
Note
This solution contains pages and styles that aren't in the version of the app you used in the previous exercises.
In the Solution Explorer window, open the Pages folder. In addition to the MoonPhasePage, SunrisePage, and AboutPage files, this folder contains two more pages:
AstronomicalBodiesPage. This page contains four buttons that enable the user to select the details for the Sun, the Moon, the Earth, or Halley's Comet. The current version of the app is simply a proof of concept. In the future, this page enables the user to select from a larger list.
AstronomicalBodyPage. This page is used to display the information for an astronomical body.
The AstronomicalBodiesPage is already added as a tab on the page that appears when the Astronomy flyout is clicked.
Add a route for the details page
To navigate to the AstronomicalBodyPage, you need to set up a route by registering it in the constructor of the AppShell class:
public AppShell()
{
    InitializeComponent();

    Routing.RegisterRoute("astronomicalbodydetails", typeof(AstronomicalBodyPage));
}
Navigate to the details page
Now we need to perform the navigation. In AstronomicalBodiesPage.xaml.cs, create click-event handlers for each
Buttonon the page.public AstronomicalBodiesPage() { InitializeComponent(); btnComet.Clicked += async (s, e) => await Shell.Current.GoToAsync("astronomicalbodydetails"); btnEarth.Clicked += async (s, e) => await Shell.Current.GoToAsync("astronomicalbodydetails"); btnMoon.Clicked += async (s, e) => await Shell.Current.GoToAsync("astronomicalbodydetails"); btnSun.Clicked += async (s, e) => await Shell.Current.GoToAsync("astronomicalbodydetails"); }Whenever a
Buttonis clicked, the app navigates to the AstronomicalBodyPage page. But we still need to send what type of astronomical body to display.To send data to the AstronomicalBodyPage, add a query parameter string to the routing information. The string is of the form
?astroName=astroBodyToDisplay.btnComet.Clicked += async (s, e) => await Shell.Current.GoToAsync("astronomicalbodydetails?astroName=comet"); btnEarth.Clicked += async (s, e) => await Shell.Current.GoToAsync("astronomicalbodydetails?astroName=earth"); btnMoon.Clicked += async (s, e) => await Shell.Current.GoToAsync("astronomicalbodydetails?astroName=moon"); btnSun.Clicked += async (s, e) => await Shell.Current.GoToAsync("astronomicalbodydetails?astroName=sun");To receive the data on the AstronomicalBodyPage, first create a class-level property to hold the incoming data. Name it
AstroName.string astroName; public string AstroName { get => astroName; set { astroName = value; // this is a custom function to update the UI immediately UpdateAstroBodyUI(astroName); } }Here, the
UpdateAstroBodyUI(astroName)is a helper function used to update the user interface immediately when theAstroNameproperty is set.Then you need to decorate the class with an annotation that maps the incoming query parameter to the property you created.
[QueryProperty(nameof(AstroName), "astroName")]
public partial class AstronomicalBodyPage
{
    ...
}
Start the app and select the tab titled: Bodies.
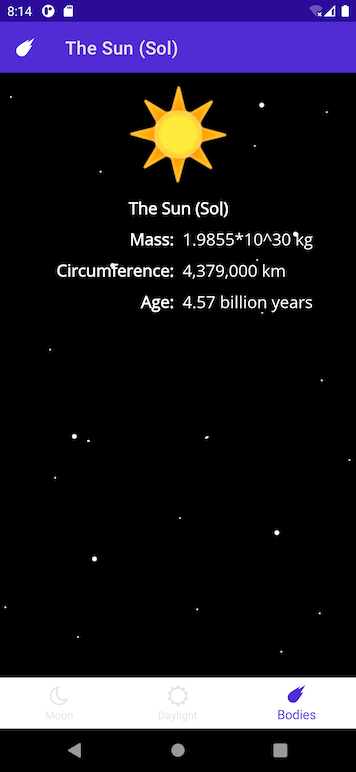
Select the Sun button. The details for the Sun should appear. The navigation bar should contain a back arrow that allows the user to return to the list of bodies. The remaining tabs are still visible and active:

Close the app and return to Visual Studio or Visual Studio Code.