Set up fixed compensation components
Before you can create fixed compensation plans for your employees in Dynamics 365 Human Resources, you need to set up the following components:
Compensation levels - compensation levels are used to define levels for compensation plans within your organization. You can create discrete levels for three types of compensation plans: Grade, Band, and Step. Levels are associated with jobs and any positions that are related to a job reference.
Reference points - you must set up reference points to represent ranges in the range utilization matrix. This matrix can be used to control pay rate equality without regard to an individual employee’s performance or the overall performance of your company. For example, you can ensure employees that are paid lower in their range get a higher percentage pay increase than employees who are paid at a higher range. Reference points are configured to represent a range within the matrix.
Compensation grids - compensation grids are used to define the structure of your organization’s compensation structure. Within Dynamics 365 Human Resources, you configure compensation regions, pay frequencies, rules, and controls to ensure compensation is managed in a transparent and consistent manner.
Pay frequencies - you configure pay frequencies to define the time periods for compensation. For example, you might have pay frequencies of annual salary or hourly pay. You can also use pay frequencies to consider things like converting pay amounts to monthly, weekly, bi-weekly, or hourly pay frequencies.
Set up compensation levels
You can use compensation levels to set compensation for various jobs to help guarantee that the employees who hold those jobs are paid fairly.
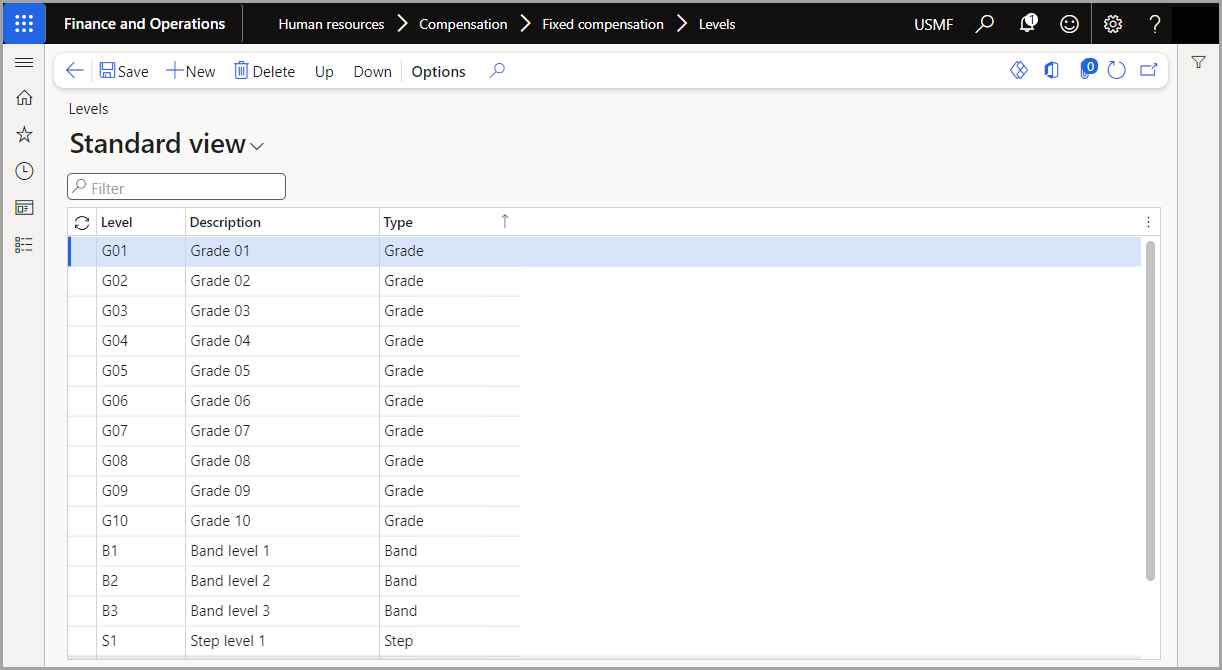
In Dynamics 365 Finance and operations apps, go to Human Resources > Compensation > Fixed compensation > Levels.
Select New and then enter values for Level, Description, and Type. For example, you might set up Grade levels like the screenshot below.
In the Type column, use the Up and Down buttons to place the levels in correct order according to their type. By setting compensation levels on a job, you help guarantee that all employees who hold a position for that job are paid at the same level.
Select Save in the Action Pane and close the page.
Configure reference points
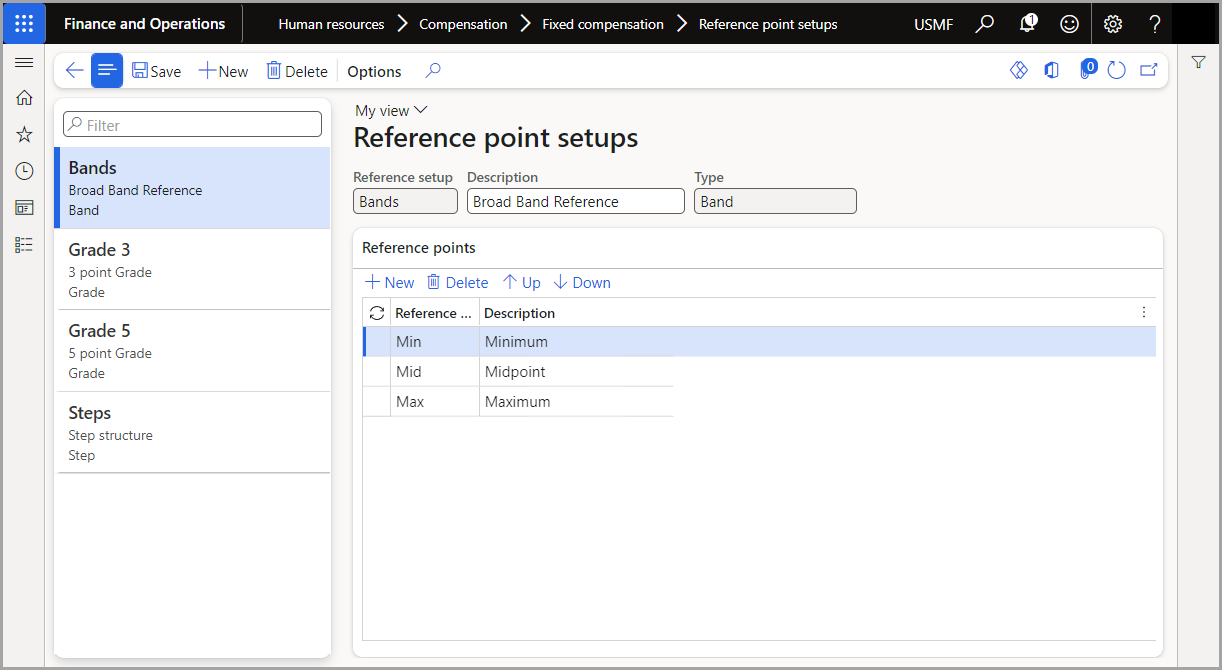
Reference points are the columns in the grid that define the compensation ranges for each level. The compensation level is the row in the grid. Typical reference points for a plan of the grade type are a minimum, a midpoint, and a maximum. Follow the steps to set up compensation reference points:
Go to Human resources > Compensation > Fixed compensation > Reference point setups.
Select New in the Action Pane.
Enter values for Reference setup, Type, and Description.
Note
There are three Types of reference points you can select from. To allow for a more flexible plan you would select Band this type of reference point will allow you to define a minimum and maximum threshold for reference points. Grade is a more granular setup where you might have smaller increments for fixed compensation.
Under Reference points, specify the reference points that you want to use. For example, if you're setting up fixed compensation by band, you might set a minimum, midpoint, and maximum reference point.
Select Save and close the page.
Create compensation grids
After you have set up compensation levels and reference points, you can combine them to create a compensation grid.
Go to Human resources > Compensation > Fixed compensation > Compensation grids.
Select New in the Action Pane.
In the Grid field, enter the name for the compensation grid you're configuring.
In the Type field, select the type of compensation plan you're configuring.
In the Reference setup field, select a reference point you previously configured for this compensation grid.
Next, select the Currency that the compensation grid uses.
Enter an Effective date and an Expiration date. If you don't have an expiration date, enter Never.
Select Save.
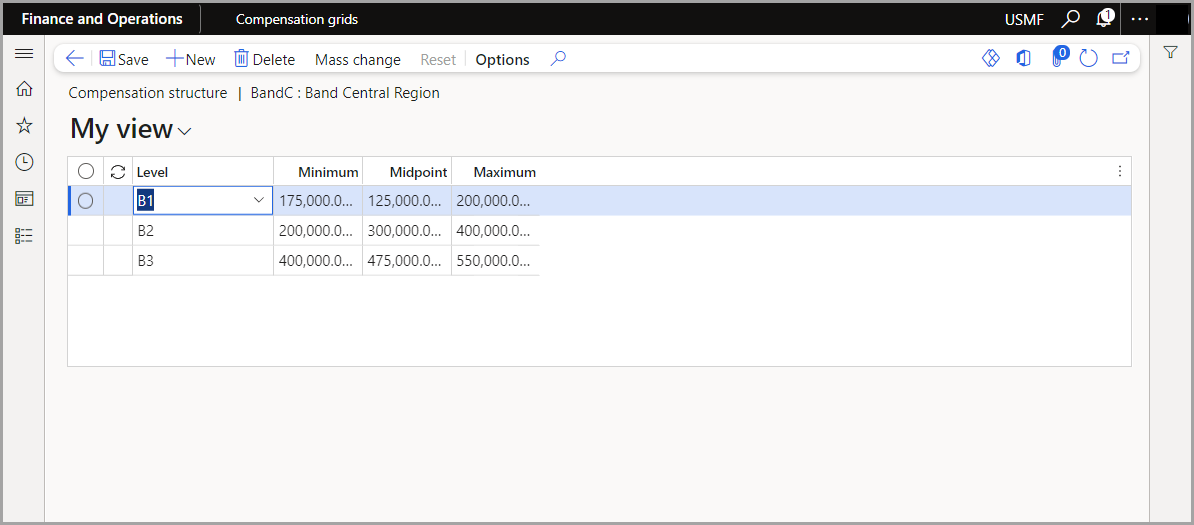
Select Compensation structure in the Action Pane to add levels and amounts to your compensation grid.
To add a new level, select New in the Action pane.
Select a Level in the Level dropdown menu, and then enter amounts for Minimum, Midpoint, and Maximum.
Note
If you want to update multiple levels in your compensation grid by the same percentage or a fixed amount, select Mass changes in the Action Pane.
Select Save.
Set up pay frequencies
Pay frequencies define how an employee's wage or salary is being specified (for example USD 10.00 per hour versus USD 50,000.00 per year) and the conversion between the hourly, weekly, monthly (12 months), and annual rates. For example, a company that uses a 38-hour work week for its hourly employees. They set up a pay frequency that has an hourly rate of 1, a weekly rate of 38, a monthly rate of 164.6666666667, and an annual rate of 1,976. These conversions are used to calculate the various pay rates that appear on an employee's fixed compensation record.
Follow the steps below to set up pay rate frequencies:
Go to Human resources > Compensation > Fixed compensation > Pay rate frequencies.
Select New in the Action Pane.
In the Pay rate field, enter a value to identify the new Pay rate conversion record.
Enter a Description for the Pay rate conversion.
In the Period field, select the conversation that is used for the pay frequency. For example, if you have employees that are paid an annual salary you would select Annual. If you're configuring a pay rate conversion for employees that are paid weekly, you would select Weekly in the Period field.
Enter the conversion values for Annual, Monthly (12), Weekly, and Hourly.
Select Save.
Define fixed compensation actions
You can use fixed compensation actions when you set or apply changes to an employee's fixed compensation. Fixed compensation actions let you provide descriptive names for the types of actions that a compensation and benefits manager can perform. Different action types have special logic behind them so that they can be used at specific times.
For example, when the fixed compensation is set up for an employee, only actions that have a type of Hire/Rehire can be used. In this case, you might want to create three different actions of the Hire/Rehire type and then name them Hire, Rehire, and Transfer. Then, you have a more descriptive explanation of why the fixed compensation was given to an employee or why it was changed.
To set up a fixed compensation action, follow these steps:
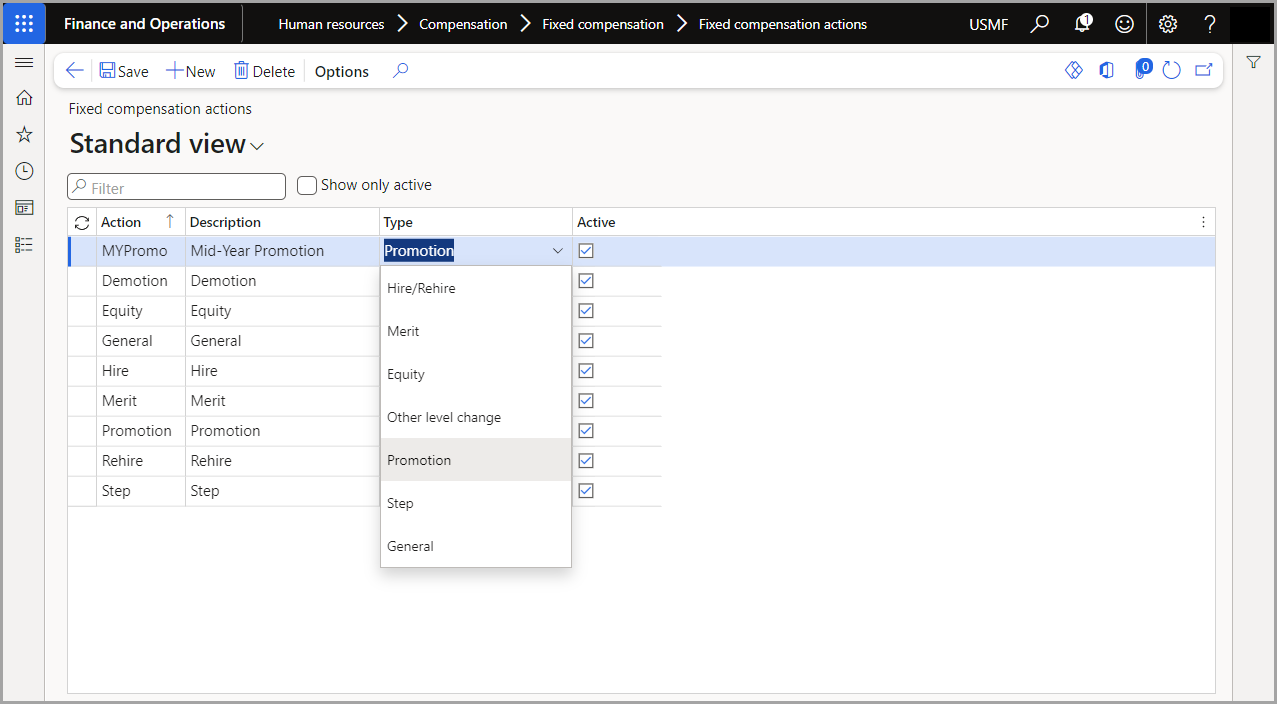
Go to Human resources > Compensation > Fixed compensation > Fixed compensation actions.
Select New in the Action Pane.
Enter values for Action and Description, for example "Hire".
In the Type field, select the type of action you're creating. For example, if you're setting up an action for “Hire” you would select the Hire/Rehire type.
Select Save.
For more information, see Create a fixed compensation plan.


