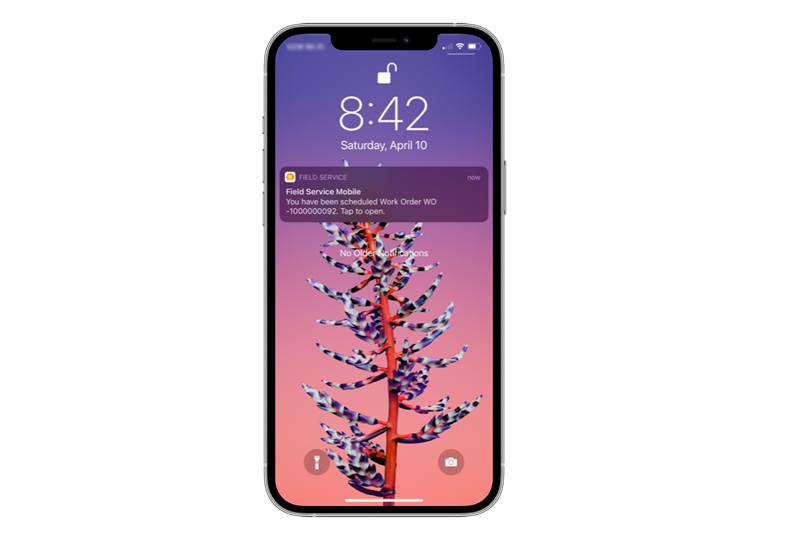
Configure push notifications
Throughout the day, as frontline workers are in the field, certain situations might occur that they should be aware of. For example, they might be assigned to work on an emergency work order rather than the one that they were originally scheduled for because they're the closest qualified person. If they're not alerted to the change, it's possible that they might go to their originally scheduled work item. In the Field Service Mobile app, push notifications let you send updates to frontline workers through their mobile phones or tablets.
Push notifications can be used to:
Notify workers when they've been assigned a booking.
Remind workers to enter important business data.
Important
Setup and configuration of push notifications requires an understanding of how to create cloud flows in Power Automate and how to use the Dataverse connector.
For more information, see Overview of cloud flows.
For more information, see Microsoft Dataverse.
Prerequisites
To use push notifications in the Field Service Mobile app, you'll need to meet the following prerequisites:
Installed Microsoft Power Automate
Downloaded the Dynamics 365 Field Service Mobile app v13.20101.19+ for iOS or v3.20101.19+ for Android devices
Provided consent for notifications in your device's settings for the Field Service Mobile app
Reviewed the privacy notes for Field Service push notifications
Turn on Push notifications included with Field Service
Field Service includes a template to enable push notifications for new bookings. Additionally, you can create push notifications based on custom triggers. For example, you can use a cloud flow to send a push notification to frontline workers on their mobile devices when they are booked for a work order.
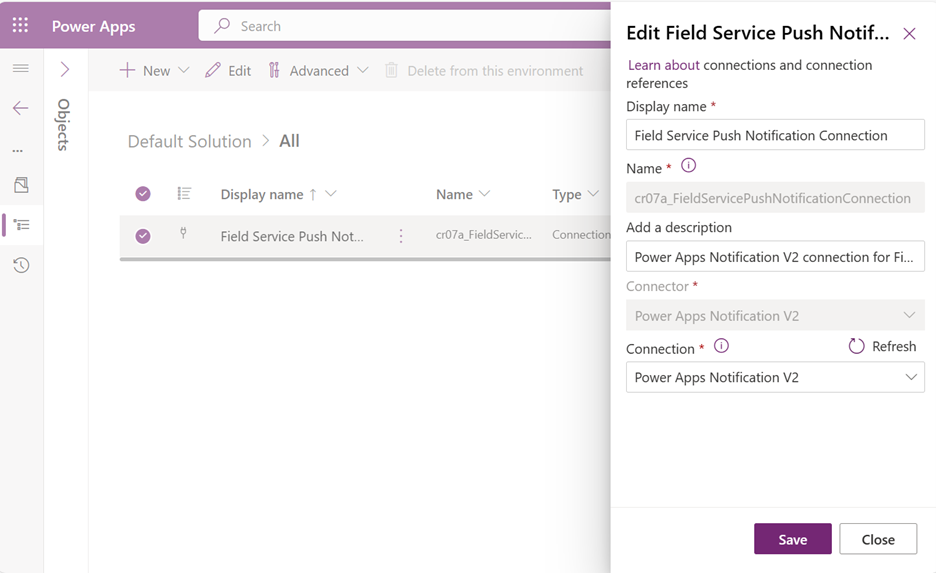
To enable the necessary items, sign in to Power Apps and select the environment with your Field Service installation. In the Default Solution, create the following two connection references:
- Field Service Push Notification Connection: Use the Power Apps Notification V2 connector.
- Dataverse Connection Reference: Use the Microsoft Dataverse connector.
To learn more about turning on push notifications, see Turn on push notifications included with Field Service
Create a push notification
In Field Service, when a frontline worker is scheduled for a task, the system creates what is called a Bookable Resource Booking record. This record contains logistical and informational data that is related to the booking. This record is one that would need to serve as the basis for triggering and pushing the notification.
After you have decided which record will be used, review the ensuing example of how to accomplish this task with a cloud flow in Power Automate. While each scenario will be slightly different, at a high level, the process will resemble the following course of actions:
Create and define when to trigger the flow.
Identify the bookable resource who is assigned to the booking.
Define the condition (optional).
Identify the Field Service Mobile user to notify.
Get additional information (optional).
Call the push notification action.
View in the mobile app.
Create and define when to trigger the flow
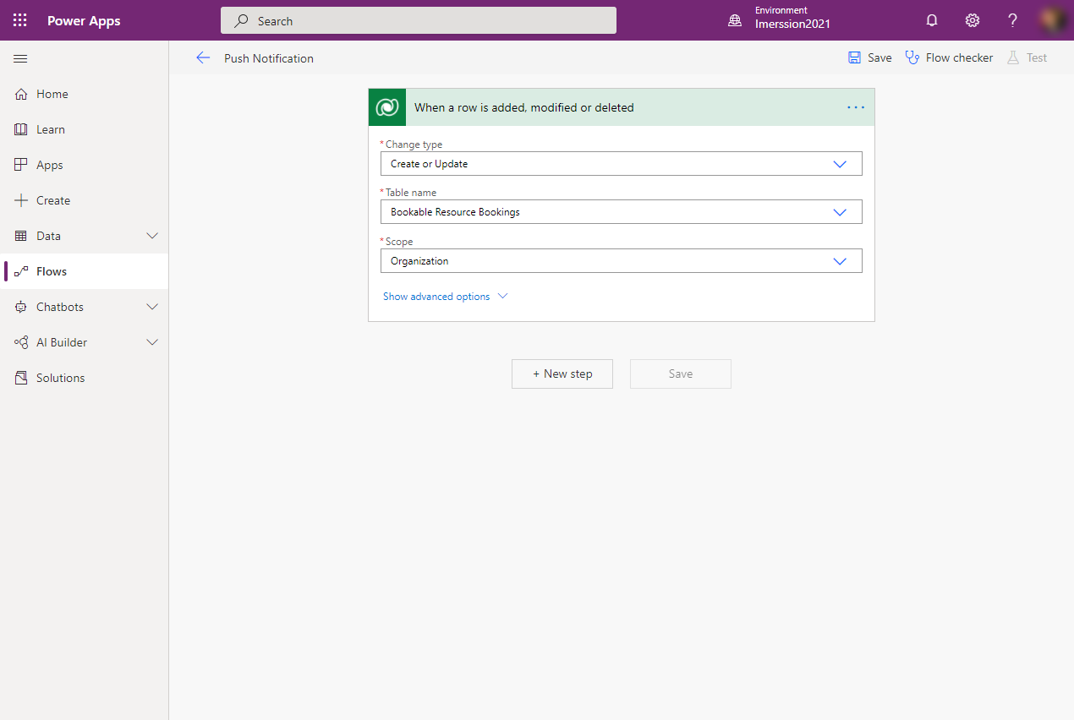
The first step is to create the flow and then specify how it will be triggered, such as indicating that the flow should be triggered when a Bookable Resource Booking is created or updated. This specification will ensure that the frontline worker is notified when a new booking is created and if an aspect like date or time has changed on an existing booking.
Because all Field Service information that is related to booking is stored in Dataverse, the simplest way to trigger the flow is to use the Dataverse connector. This approach provides different triggers and actions that can be used against a Dataverse instance. In this example, because you want to trigger the flow when a Bookable Resource Booking is created or updated for anyone in the organization, you'll configure the trigger as displayed in the following image.
For more information, see Triggers.
Identify the bookable resource assigned to the booking
Each booking is assigned to a bookable resource, which can represent:
- An internal user
- An independent contractor
- A facility
- A piece of equipment that can be used to complete a work order
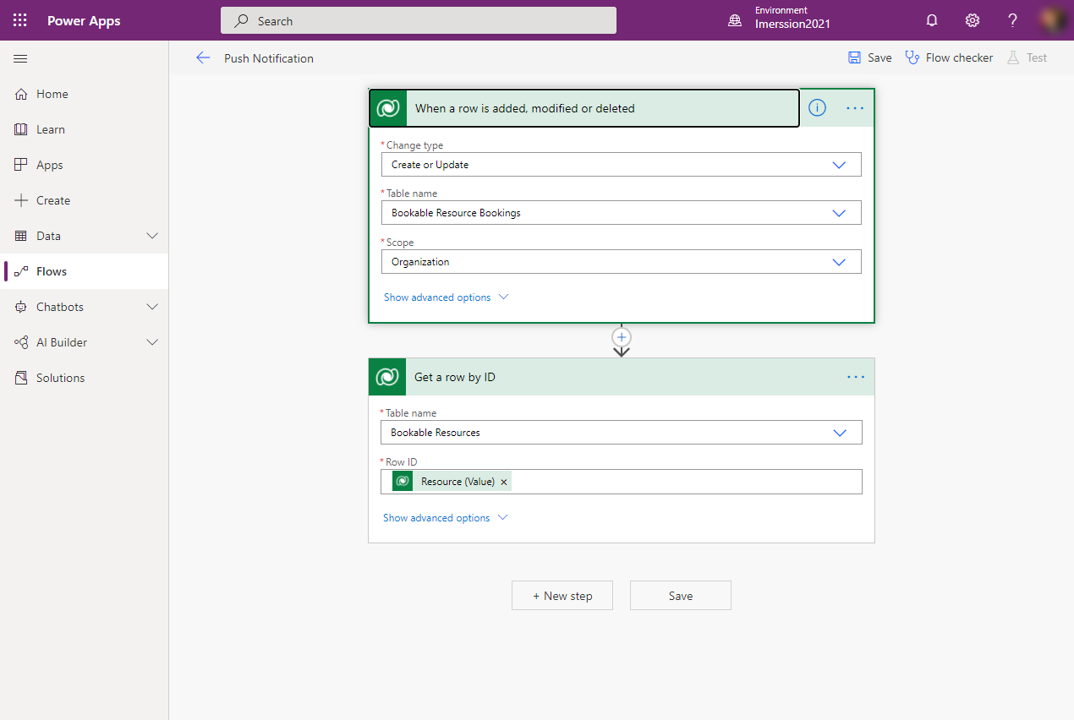
To ensure that the push notifications are sent to the correct person, you'll need to identify the resource that the booking is assigned with. The Dataverse connector contains an action called Get a row by ID, which you can use to reference a specific record. In this example, you're passing through the resource who is assigned to the booking to get their record from the Bookable Resources table.
For more information, see Get a row by ID.
Create a condition to isolate only resources that are users
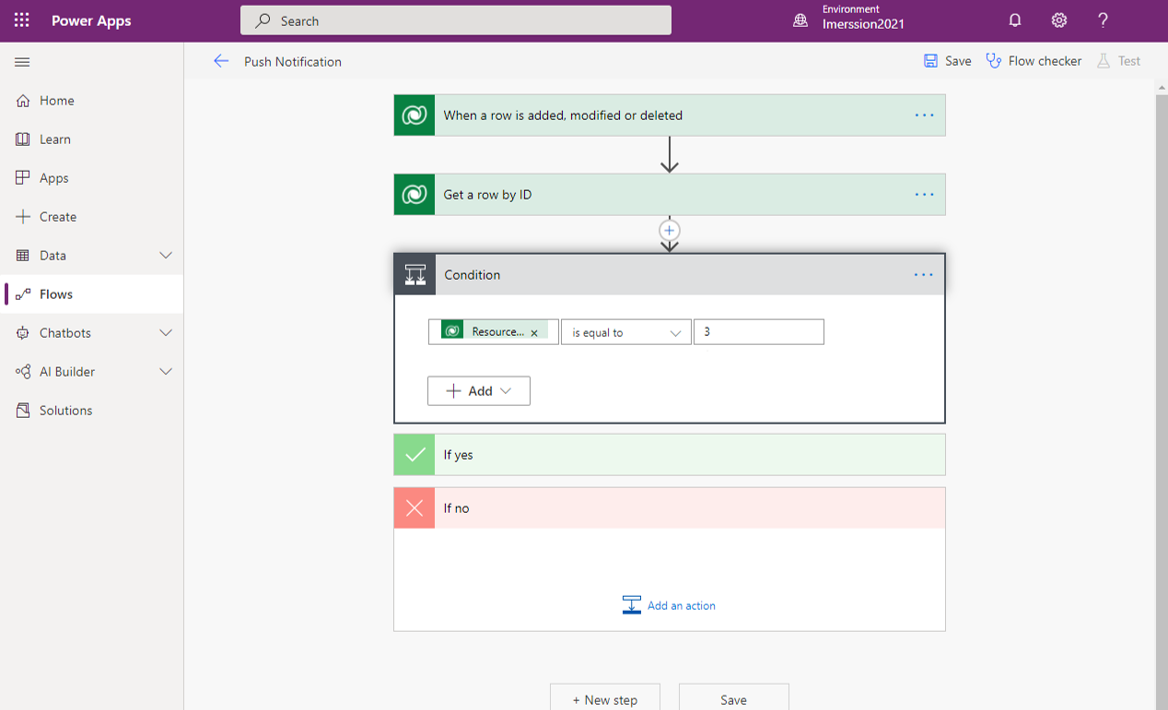
Resources can be internal users, independent contractors, a facility, or a piece of equipment. Internal users are the resources who will use the mobile application, so we highly recommend that you add a condition to your flow that checks whether the resource has the Resource type set to User. This setting helps ensure that push notifications are only sent to resources who are users, rather than resources that represent equipment, resource pools, and contractors.
Important
While defining a condition isn't required, it's best practice and will help you reduce potential errors in your flow and help make troubleshooting easier in the future.
For more information, see Add a condition to a cloud flow.
Identify the Field Service Mobile user to notify
After you have identified that the resource is a user, you'll need to get information from their user record so that you can push the notification to the correct Field Service Mobile app user. This process is like what you did when initially identifying the bookable resource that the booking was assigned to. The only major difference in this process is that you will add this information to the Yes area of the condition and then pass the user value that is stored on the bookable resource record to identify which user to get.
Get additional information
You might want to include other related information in the push notification that you send to the user. For example, you might want to include the work order number that is associated with the booking as part of the notification. If you plan to include other details from related records, such as a work order, you'll need to capture that information as you did for the user.
Call the push notification action
After you have identified the user to send the notification to and the data to include, your final step is to create and define the details of the notification. Microsoft Power Apps Notifications V2 connector includes the Send a push notification V2 action. This action can be used to send push notifications to canvas and model-driven applications. As mentioned previously, Field Service Mobile is a model-driven application.
To ensure that push notifications work as intended and are being pushed to the correct application, define the following information:
Mobile app - Defines the type of application that it is, such as an app from Power Apps or Field Service. In this instance, you'll be selecting Field Service.
Your app - Defines the specific app that you want to set up the notification for.
As the frontline worker interacts with the notification, you can define the behavior that is associated with it. For example, if the push notification is related to a new booking that is assigned to them, you can open the booking when the user interacts with the notification.
The following fields help define what that interaction looks like:
Open app - Defines whether the mobile application opens when they select the item.
Entity - Defines the table that contains the information to display. If it's a booking, set this field to Bookable Resource Booking.
Form or view - Defines which form or view in the application to use to present the information. In this example, because you want to view details about the booking and work order, you will select the existing Form - Booking and Work Order form.
Record ID - Defines the actual record that you want to display.
A main advantage of using Power Automate flows is the ability to use dynamic information for previous steps. In this scenario, you can insert information that you previously collected, such as work order and resource details. For example, you could insert the Primary Email field from the user record into the Recipients Items field to define who to send the notification to. You could also insert a dynamic value, such as the work order number, into the message that will be sent.
The following screenshot shows the process of creating a push notification to the frontline worker (bookable resource) when a new booking has been assigned. The push notification, when selected, will open the Bookable Resource Booking record on the Booking and Work Order form.
View in the Field Service Mobile app
For frontline workers to receive push notifications, they'll need to ensure that they've enabled notifications in the application. They can accomplish this task when the app is launched or from the Settings area of the application.
After push notifications have been enabled, the Power Automate flow will be triggered when a booking is created or updated. Push notifications will be shown to the frontline worker who is using the mobile phone or tablet. Frontline workers who are in the field don't need to be in the app or using their device to receive push notifications.
