Configure holidays for auto attendants and call queues
You can use Microsoft Teams Holidays to define holiday periods globally, which can then be linked to auto attendants to provide alternate messages, routing to callers when people in your organization will be following different working hours or won't be available. For example, you might create a holiday for New Year's Day when your organization may be closed.
The holidays you create here are available when you set up an auto attendant, each with its own greeting and call routing settings.
Create a holiday
To create a holiday, follow these steps in the Teams admin center:
In the Microsoft Teams admin center, go to Voice > Holidays.
Select New holiday.
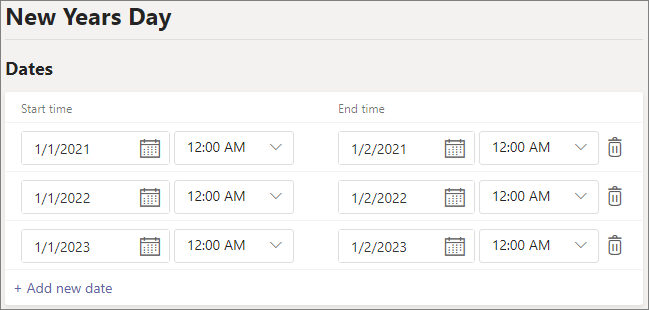
Enter a name for the holiday.
Select Add new date.
Under Start time, select the calendar icon and choose the date when you'd like the holiday to begin.
Use the drop-down list to select a start time for the holiday.
Under End time, select the calendar icon and choose the date when you'd like the holiday to end.
Use the drop-down list to select an end time for the holiday. The End time must be after the Start time.
Note
If the holiday is for one full day (i.e., a 24-hour period), the End time should be set to the next day and the time to 12:00 AM. For example, if your organization is closed on January 1 for New Year's Day, set the Start time to January 1 at 12:00 AM and set the End time to January 2 at 12:00 AM
Optionally, add more dates for recurring holidays.
Select Save.
Change a holiday
To change a holiday
In the Microsoft Teams admin center, go to Voice > Holidays.
Select the holiday from the list.
Under Start time, select the calendar icon and choose the date when you'd like the holiday to begin.
Use the drop-down list to select a start time for the holiday.
Under End time, select the calendar icon and choose the date when you'd like the holiday to end.
Use the drop-down list to select an end time for the holiday. The End time must be after the Start time.
Select Save.