Extend an existing business event
Business events are extensible, which means that you can add fields and business logic to existing business events so that a subscriber can use the added functionality.
To extend an existing business event, you need to create code extensions. Business events consist of two classes: a business event class and a business event contract class.
Typically, you can create a code extension for the business event contract class, depending on the business requirements for extending a business event.
Create a code extension for a business event contract class
To create a code extension for a business event, follow these steps.
Go to the business event catalog in Dynamics 365 finance and operations apps, System administration, Setup, Business events, Business event catalog and then find the business event that you want to extend. The class name for the business event is defined in the Business event ID field.
Find the class in Microsoft Visual Studio by searching for the name in Application Explorer.
Right-click or activate the context menu for the class name and then select Create code extension. This action creates a new code extension named class name_model_Extension in your project in Solution Explorer.
After you open the class, you can add new functionality, as the following code sample illustrates:
 [ExtensionOf(classStr(SalesInvoicePostedBusinessEventContract))]
 final class SalesInvoicePostedBusinessEventContract_MB500_Extension
 {
     private CustName name;

     [DataMember(‘Name’), BusinessEventsDataMember(“@AccountsReceivable:OrganizationName”)]
     public CustName parmName(CustName _name = name)
     {
         name = _name;

         return name;
     }

     public static SalesInvoicePostedBusinessEventContract newFromCustInvoiceJour(CustInvoiceJour _custInvoiceJour)
     {
         var contract = next newFromCustInvoiceJour(_custInvoiceJour);
         contract.myInitialize(_custInvoiceJour);

         return contract;
     }

     private void myInitialize(CustInvoiceJour _custInvoiceJour)
     {
         name = _custInvoiceJour.InvoicingName;
     }
 }
In the code sample, the SalesInvoicePostedBusinessEventContract class is extended and a new data member is created and initialized. Business data members use a data member name and a label.
Typically, an initialize() method on the contract class is called with a buffer from a table.
For the newFromCustInvoiceJour method, a Chain of Command (CoC) is created and a new method called myInitialize is added. The myInitialize method sets the new data member. Because the initialize() method is in the SalesInvoicePostBusinessEventContract class and therefore private, you can’t create CoC for this method.
Save the new class and then build the project in Solution Explorer.
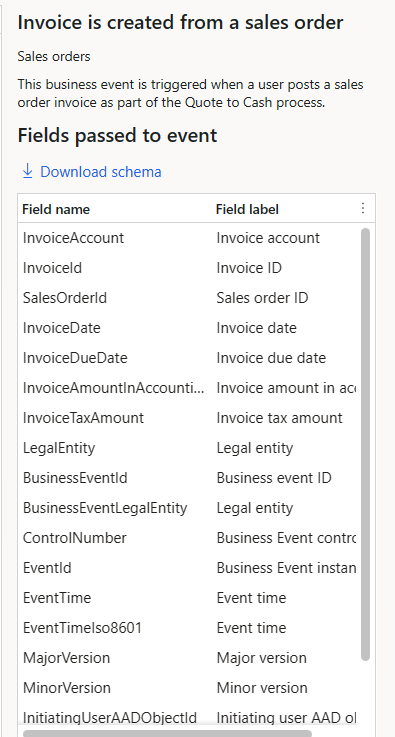
Go to the Business event catalog and find the customized business event. Notice that the schema has changed and the new member is added, as the following screenshot shows.
After you extend a business event in finance and operations apps, subscribers should be able to use the new functionality.
In the previous unit Consume business events, a Microsoft Power Automate flow was created by using the same business event. The following image shows how you can use the Get a record function to retrieve a name. Additionally, the image shows the addition of the data member for the name and that the Get a record function is no longer needed.
To update Parse JSON with the new schema, remove the Get a record function and then update Send an email (V2) to use the new data member:
- Find the business event in the business event catalog in finance and operations apps, and then download the updated schema.
- Go to the flow in Power Automate, and then select Edit on the flow.
- Select Parse JSON, Generate from a sample.
- Copy the downloaded schema into the dialog that opened when you selected Generate from a sample, and then select Done.
- Change the type of integer to a number in the schema.
- Select Get a record and remove it by selecting the ellipsis (…) on the box, and then select Delete. Confirm the deletion when you’re prompted.
- Select Send an email (V2). Notice that the dynamic field from CustomersV3 is removed. Add a name from JSON instead.
- Select Save to save the flow.
The flow in Power Automate should now resemble the following image.
You'll notice that Get a record is removed and the body for the email has changed to use Name from the JSON.
Test the business event extension
To test the business event extension, follow these steps.
- Open finance and operations, and select Accounts Receivable in the navigation pane, and then select Orders, All sales orders.
- Find a sales order with a status of Delivered and then select Invoice, Invoice to update the sales order.
The Power Automate flow runs and sends an email by using the extension, as the following image illustrates.
When you review the flow’s history, notice that the name is set to Whale Wholesales and is used in the email.


