Exercise - Update webpages generated with Copilot
In this exercise, you'll update the additional pages of your website created in the previous exercise. You'll add content to the pages using Copilot.
Update the About Us page
Sign in to your Power Pages environment.
On the Home page, under Active sites, identify the Contoso Real Estate Power Pages site that you previously created and then select Edit.
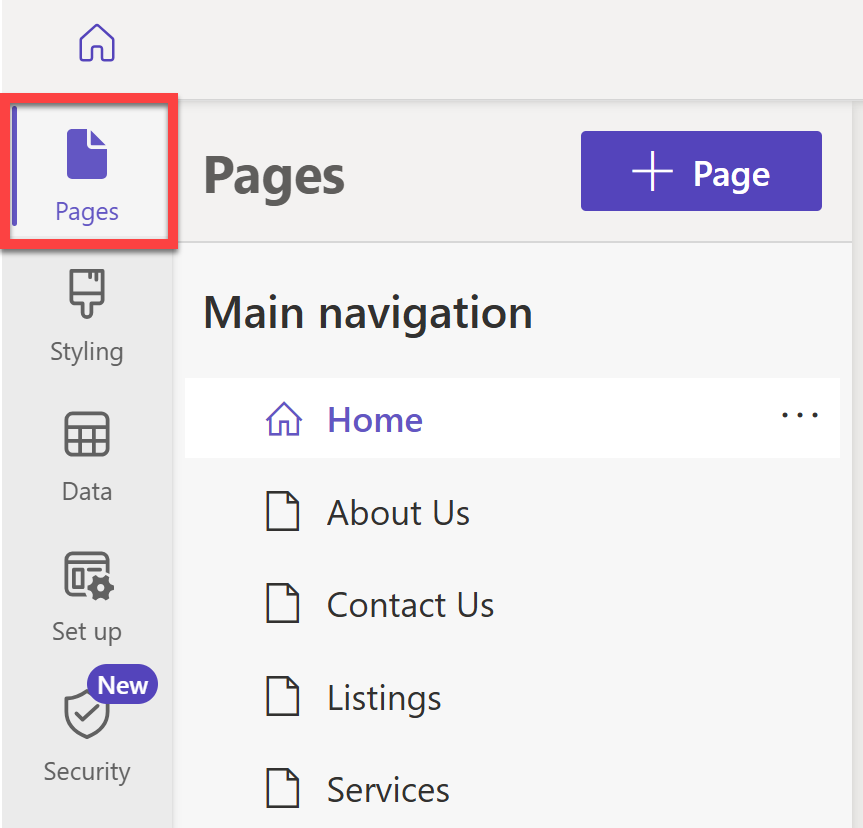
In Power Pages design studio, select Pages on the left pane to access the Pages workspace.
Select About Us to open the About Us page in the design studio.
Delete all sections between the Header and Footer sections.
Under the Site Header, select Add a section > One third left.
This section layout gives the section a two-column layout where the left column occupies one-third of the section width.
On the left column, select Text and change the text type from Paragraph to Heading 2.
Change the text to
Our Vision.Select the plus icon below the Our Vision heading and then select Text again.
Clear the default text so that the text box is empty. Then select Copilot in the toolbar.
In the Describe the text you need pane, enter
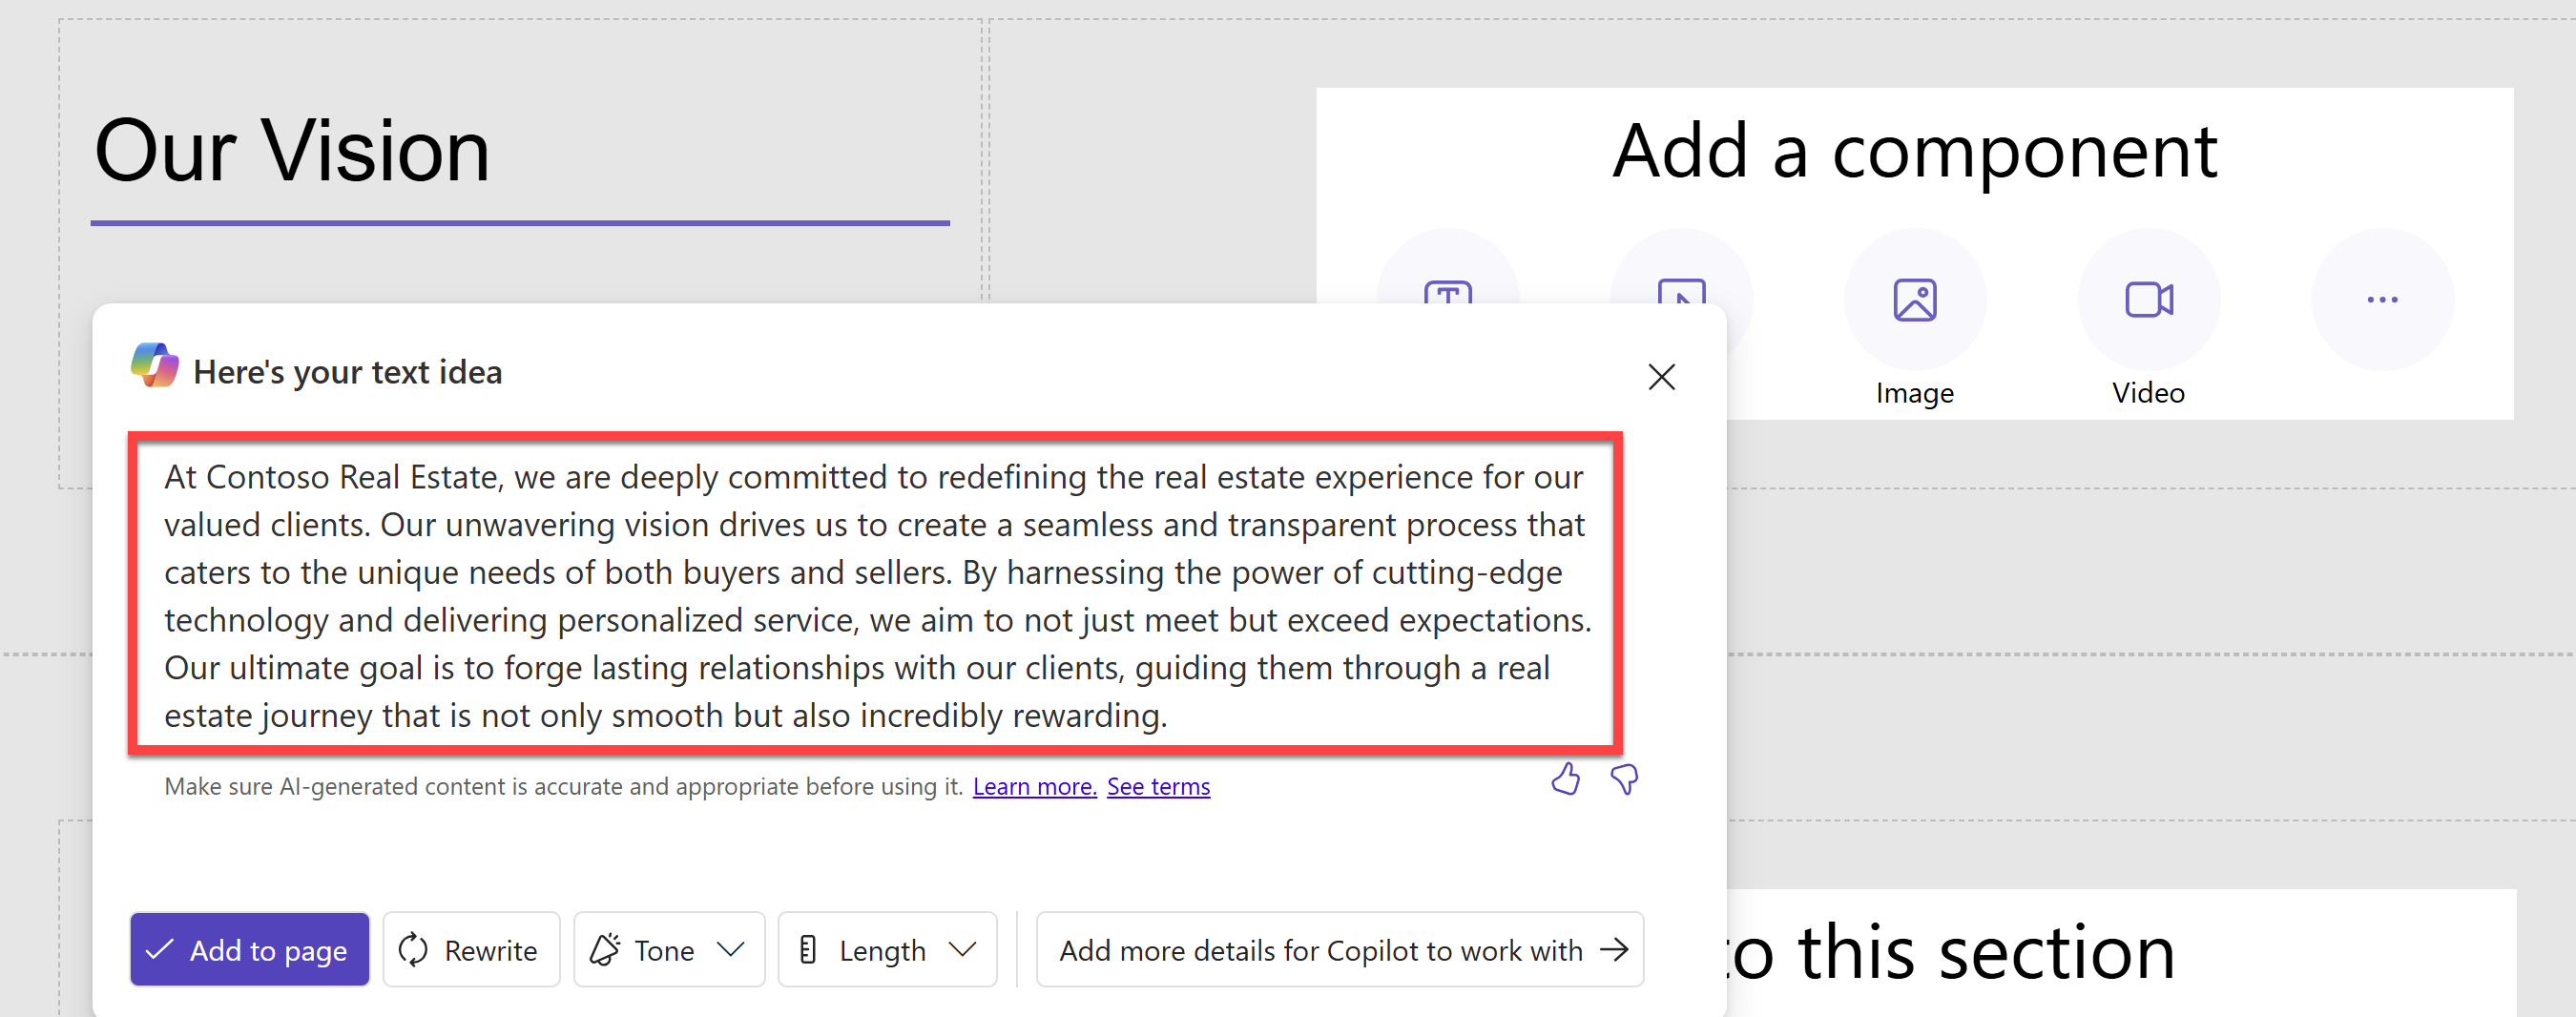
Two paragraphs describing the vision of the Contoso Real Estate company.Press Enter and Copilot will generate text:
You can play with the options to Rewrite, change the Tone, or increase and decrease the Length of the text until you are satisfied with the content.
Select Add to page to add the generated text to the page.
On the right column of the section, select Image > Stock Images and search for
office building. Select an image that you like and then select Insert.Add a new section to highlight the company team.
- Use the One third right layout.
- Set Our Team as the heading.
- Use Copilot to generate a paragraph describing the team.
- An image of a team.
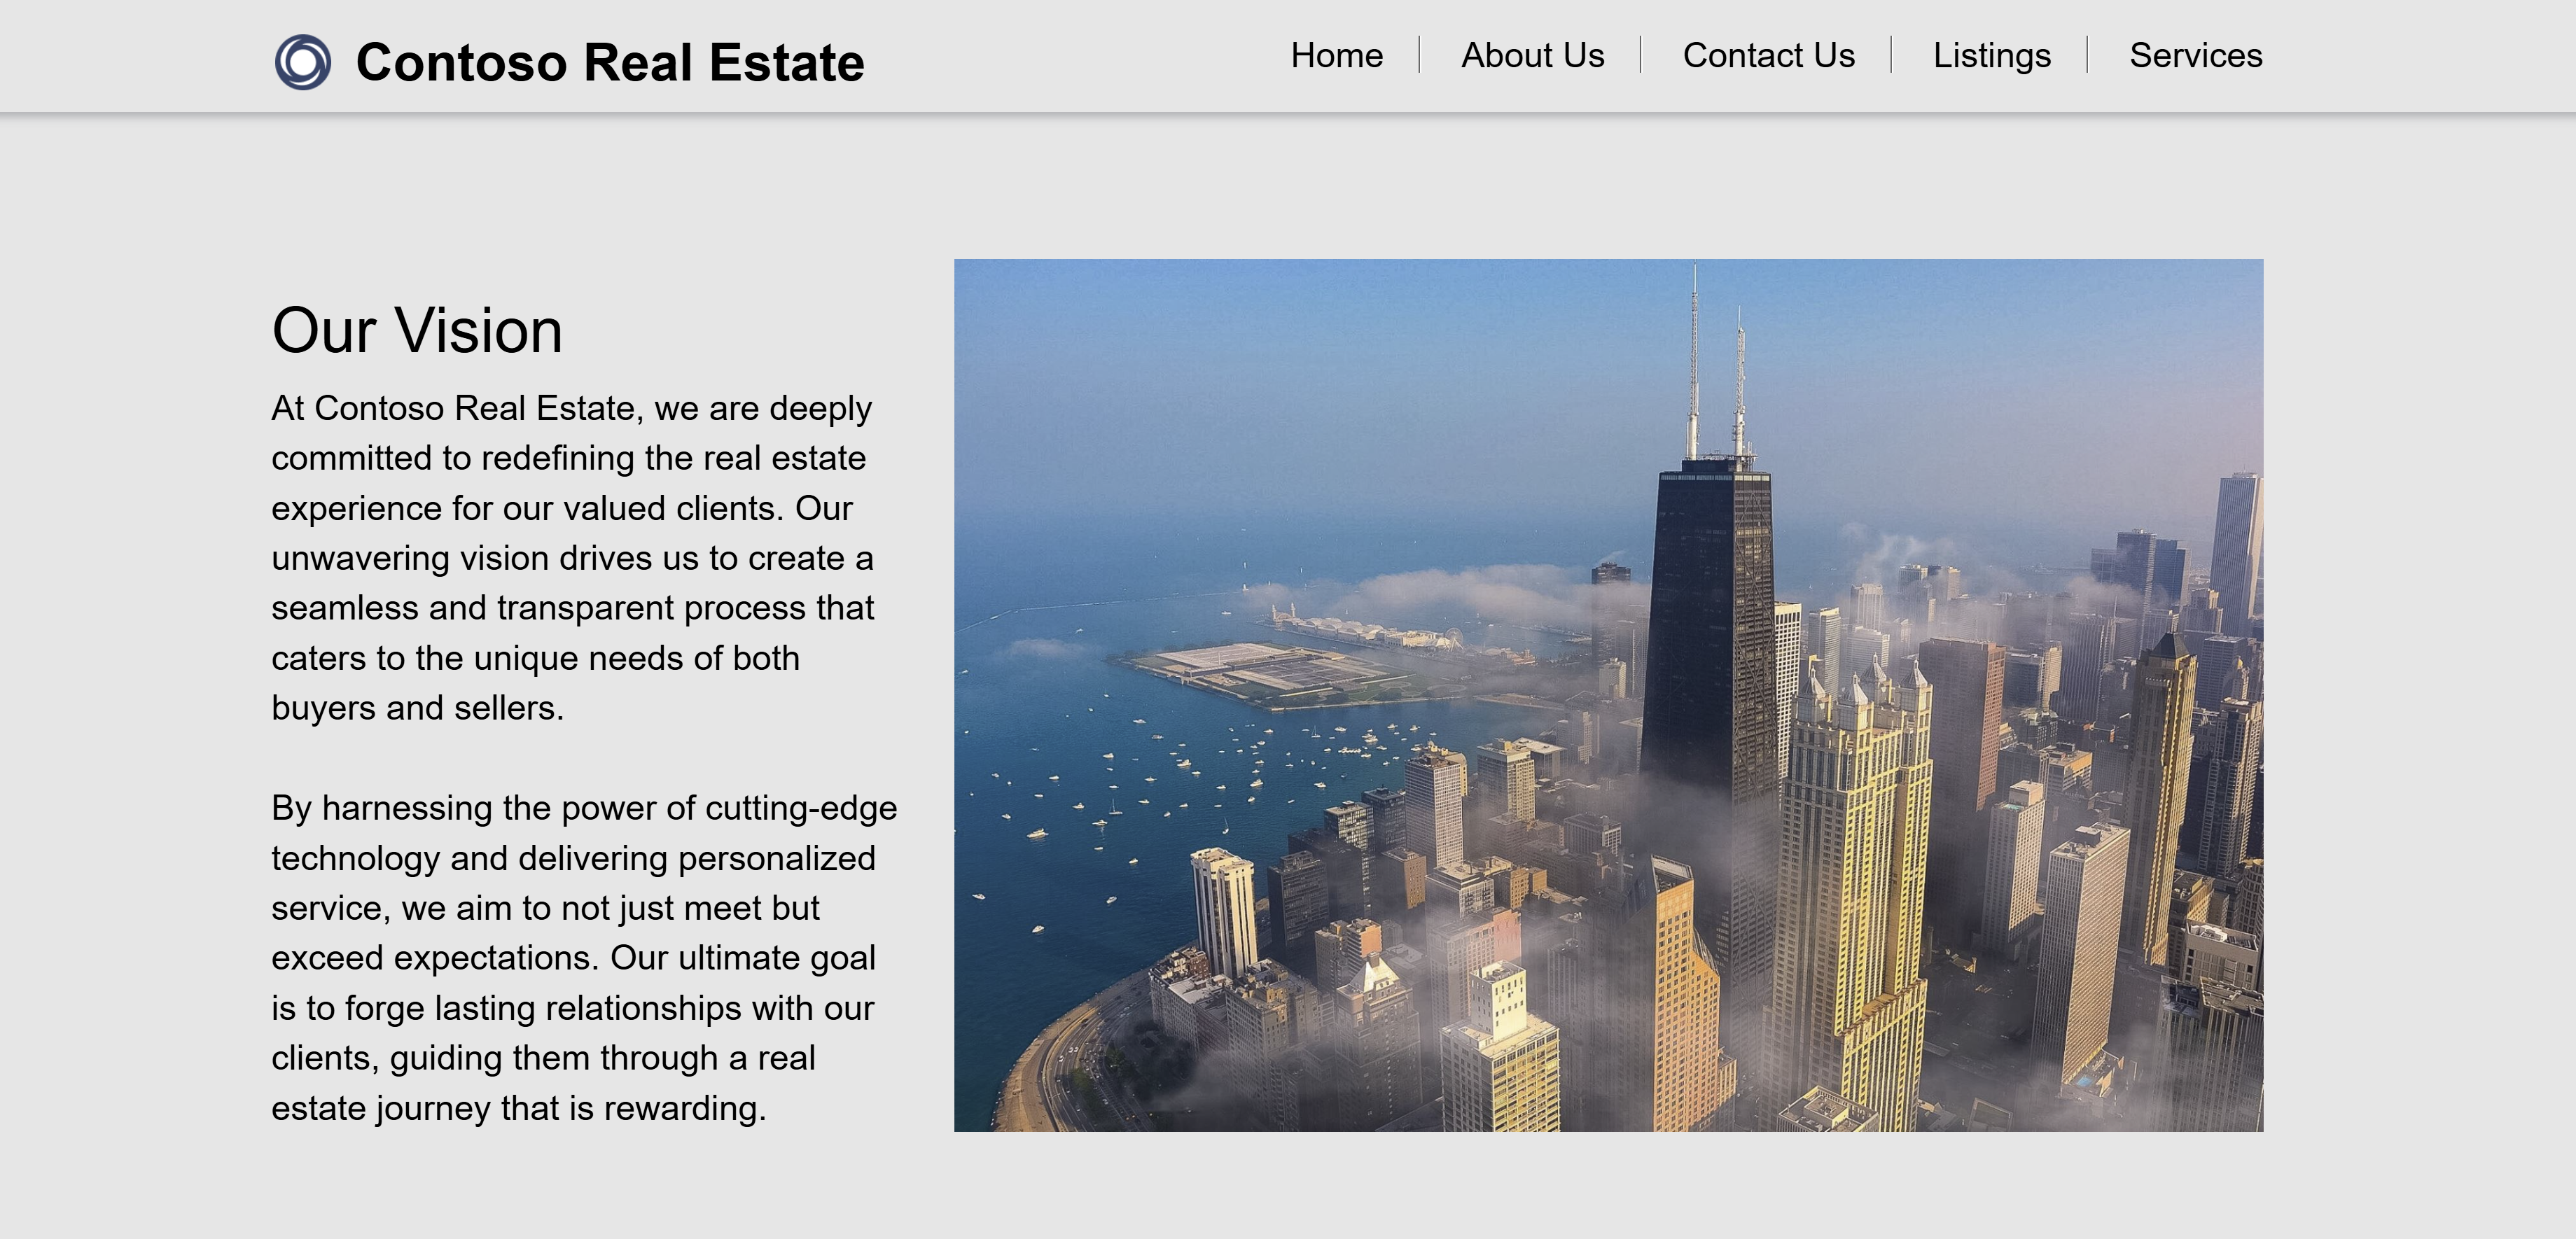
So it looks something like this:
Add a button below the Our Team text to navigate to the Contact Us page.
Update the Listings page
On the left pane under Pages, select Listing to open the Listing page in the design studio.
Delete all sections between the Header and Footer sections.
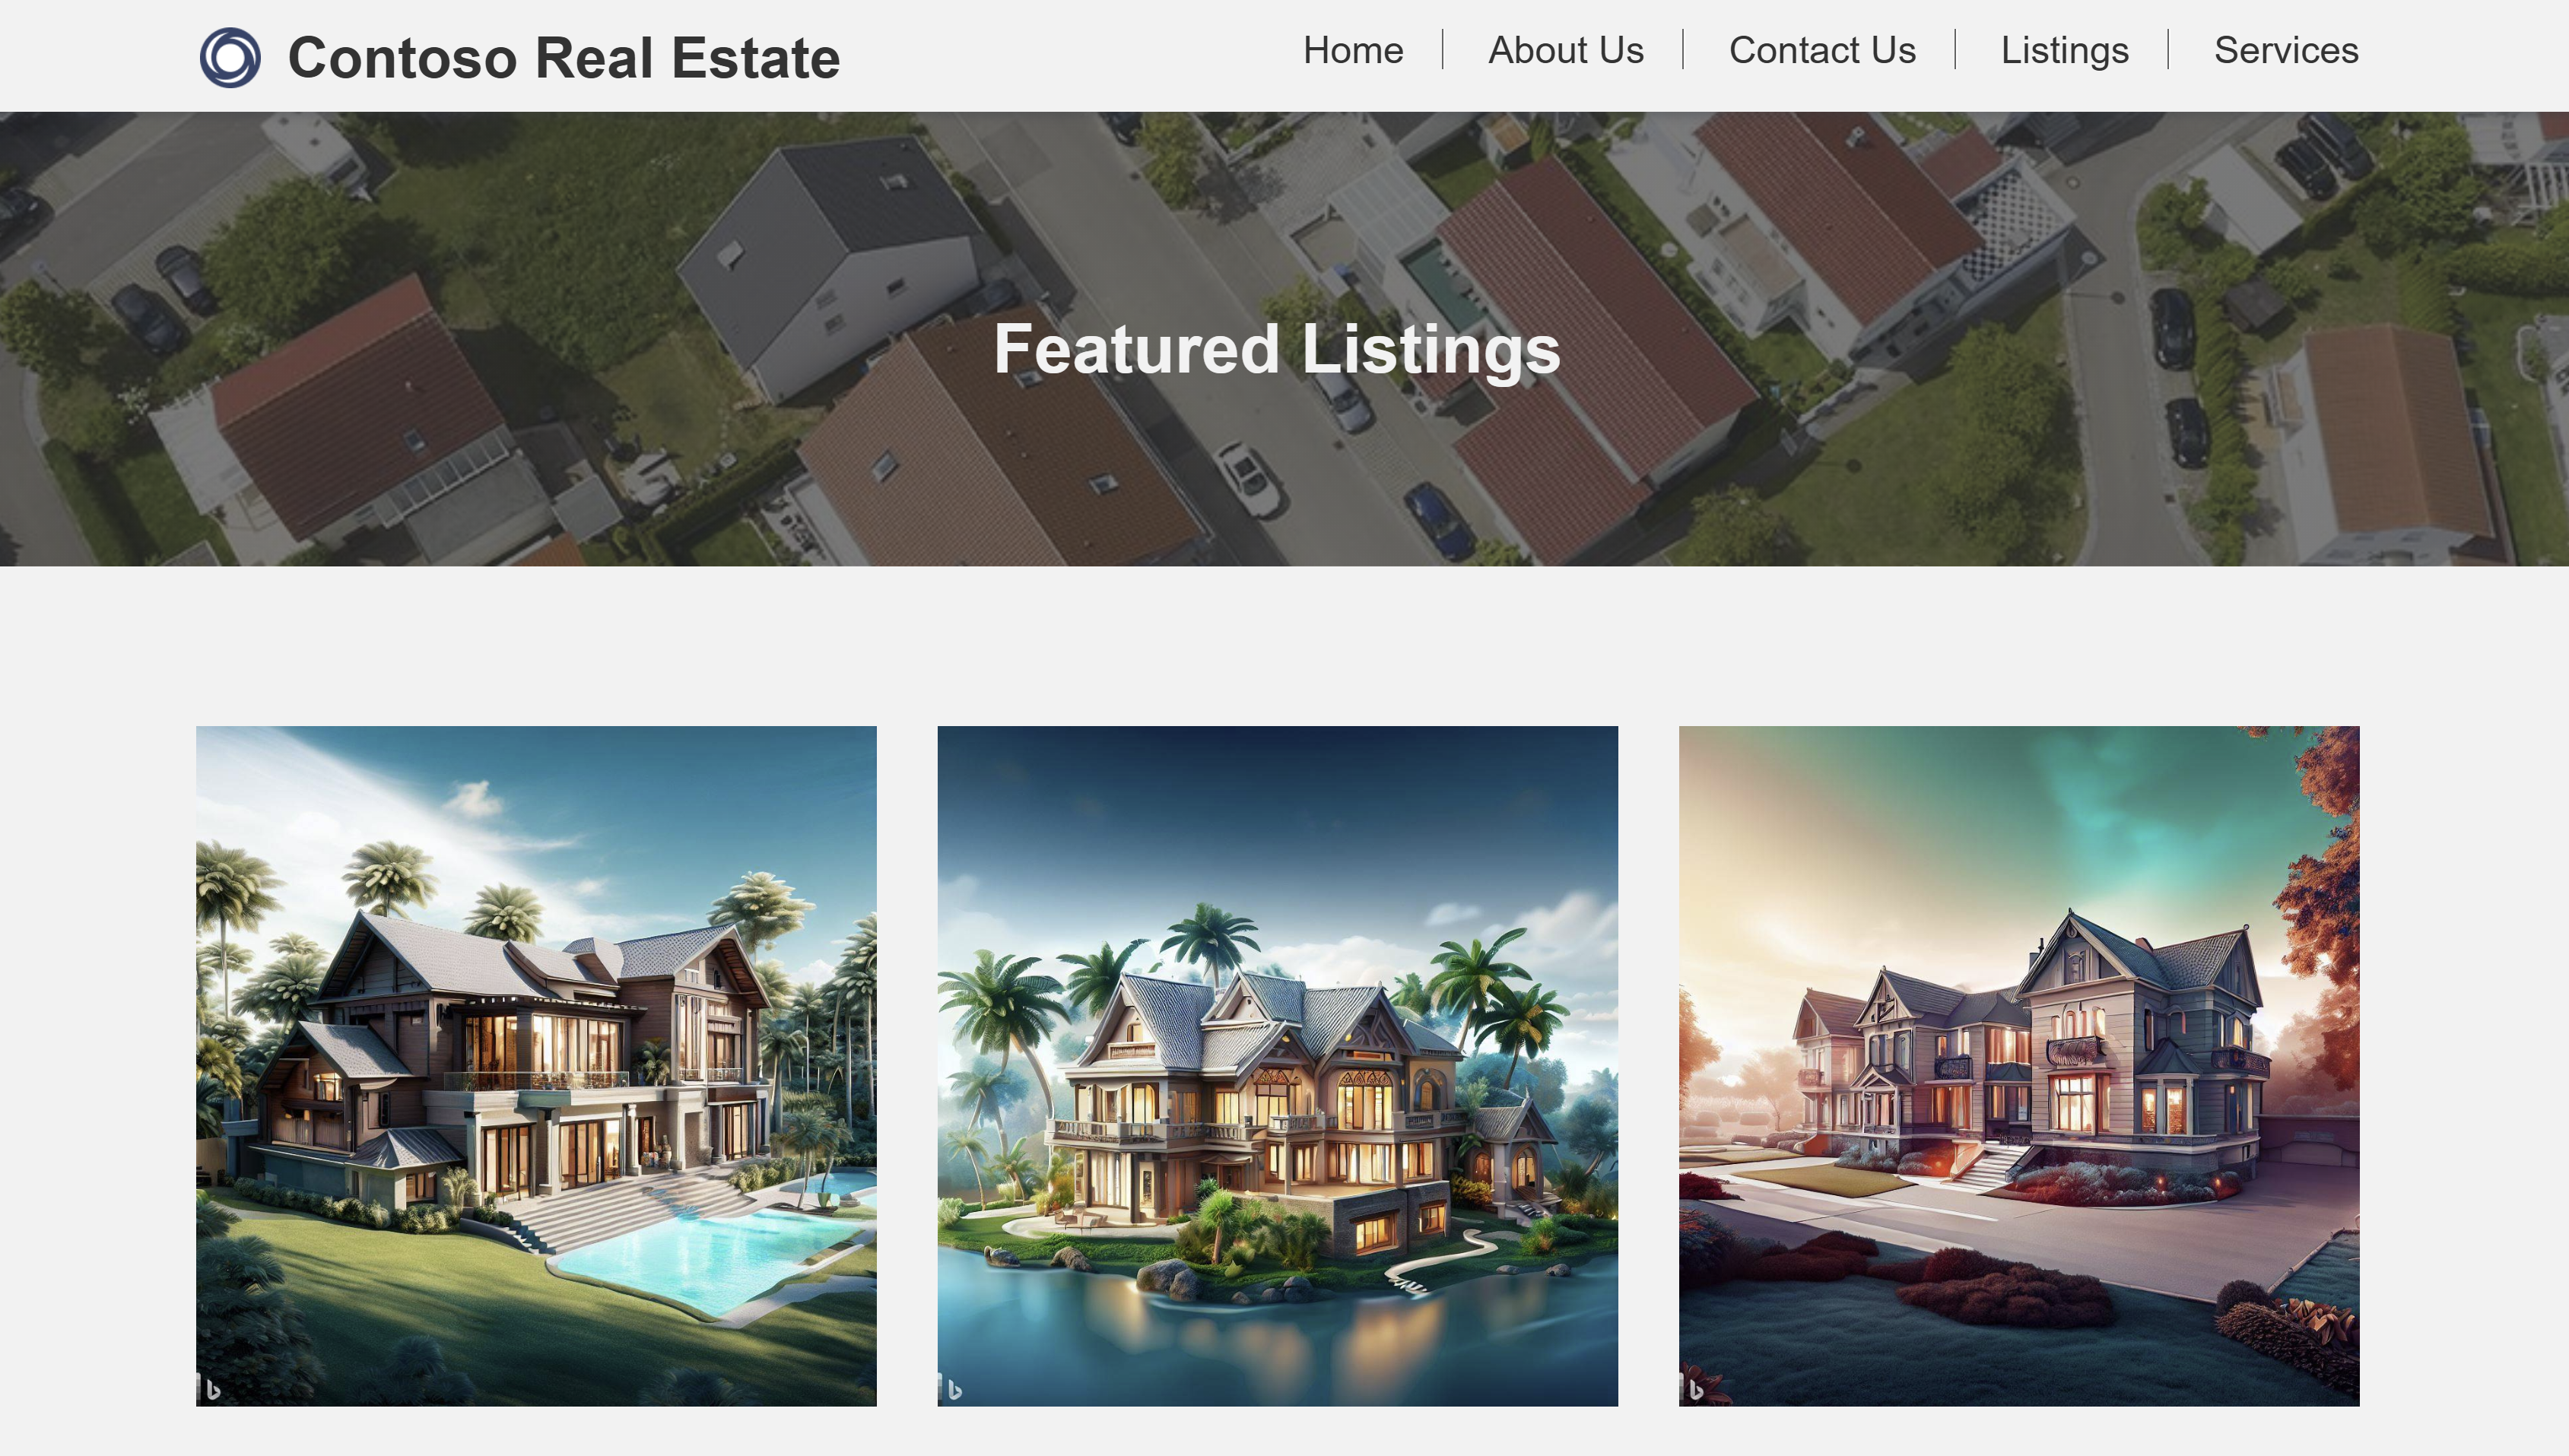
Add a section and then select Edit background on the toolbar. Select Image > Add an image.
Select Stock images and search for
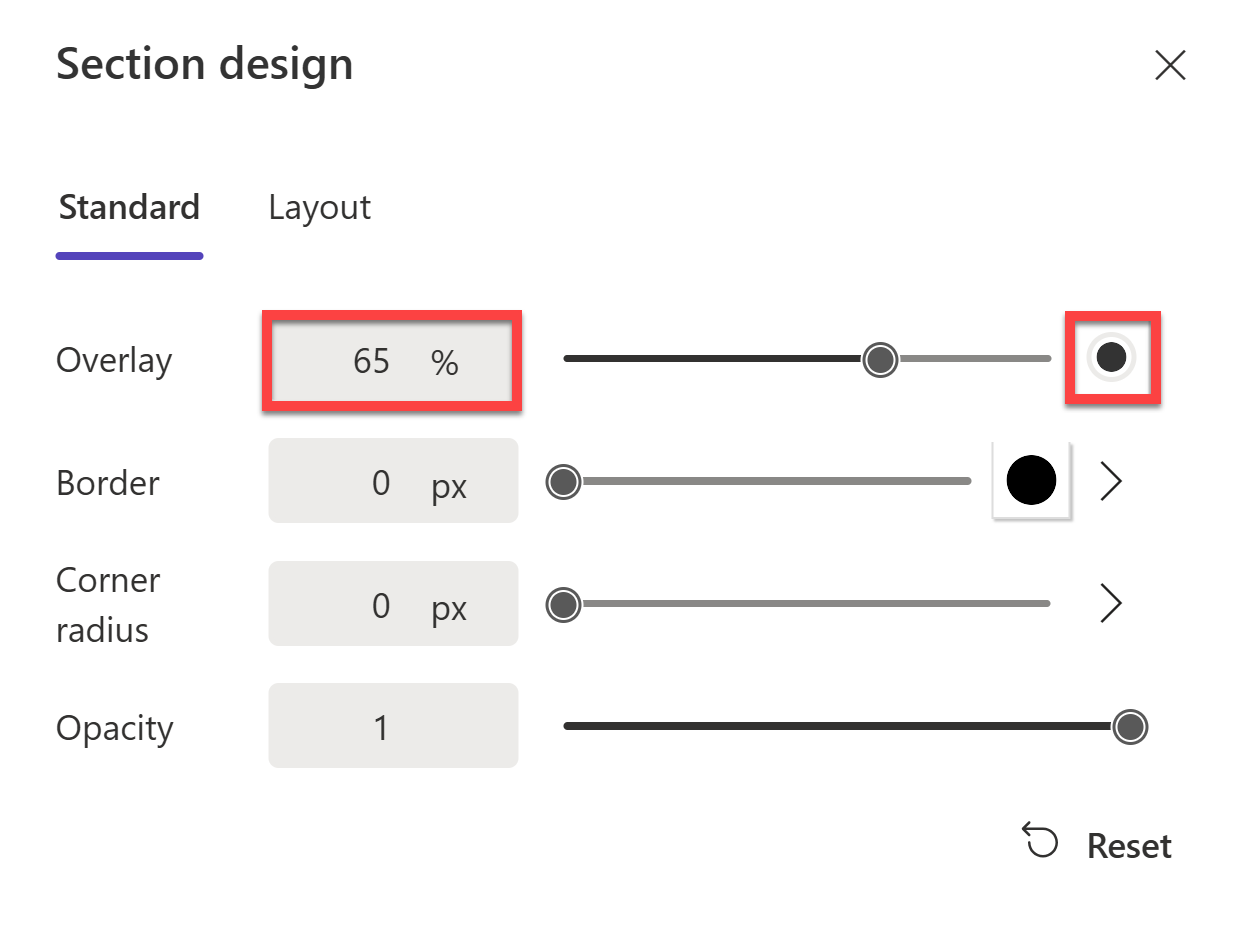
house. Select an image that you like and then select Insert.Hover over and select the section and then select the Design icon on the toolbar.
Under the Standard tab, set the Overlay to
65%. Also set the Overlay Color to Black or a dark color.Exit the Design pane.
On top of the image, select Text and change the text type from Paragraph to Heading 2. Change the Text color to White or a color that is visible on the image.
Select the Design icon on the toolbar. Under the Typography tab, set the Font weight to
Bold. Exit the Design pane.Set the Alignment to Center Align and change the text to
Featured Listings.Open up the Copilot pane and enter
Create a new section to show real estate listingsand press Enter.Select Keep it to add the generated section to the page.
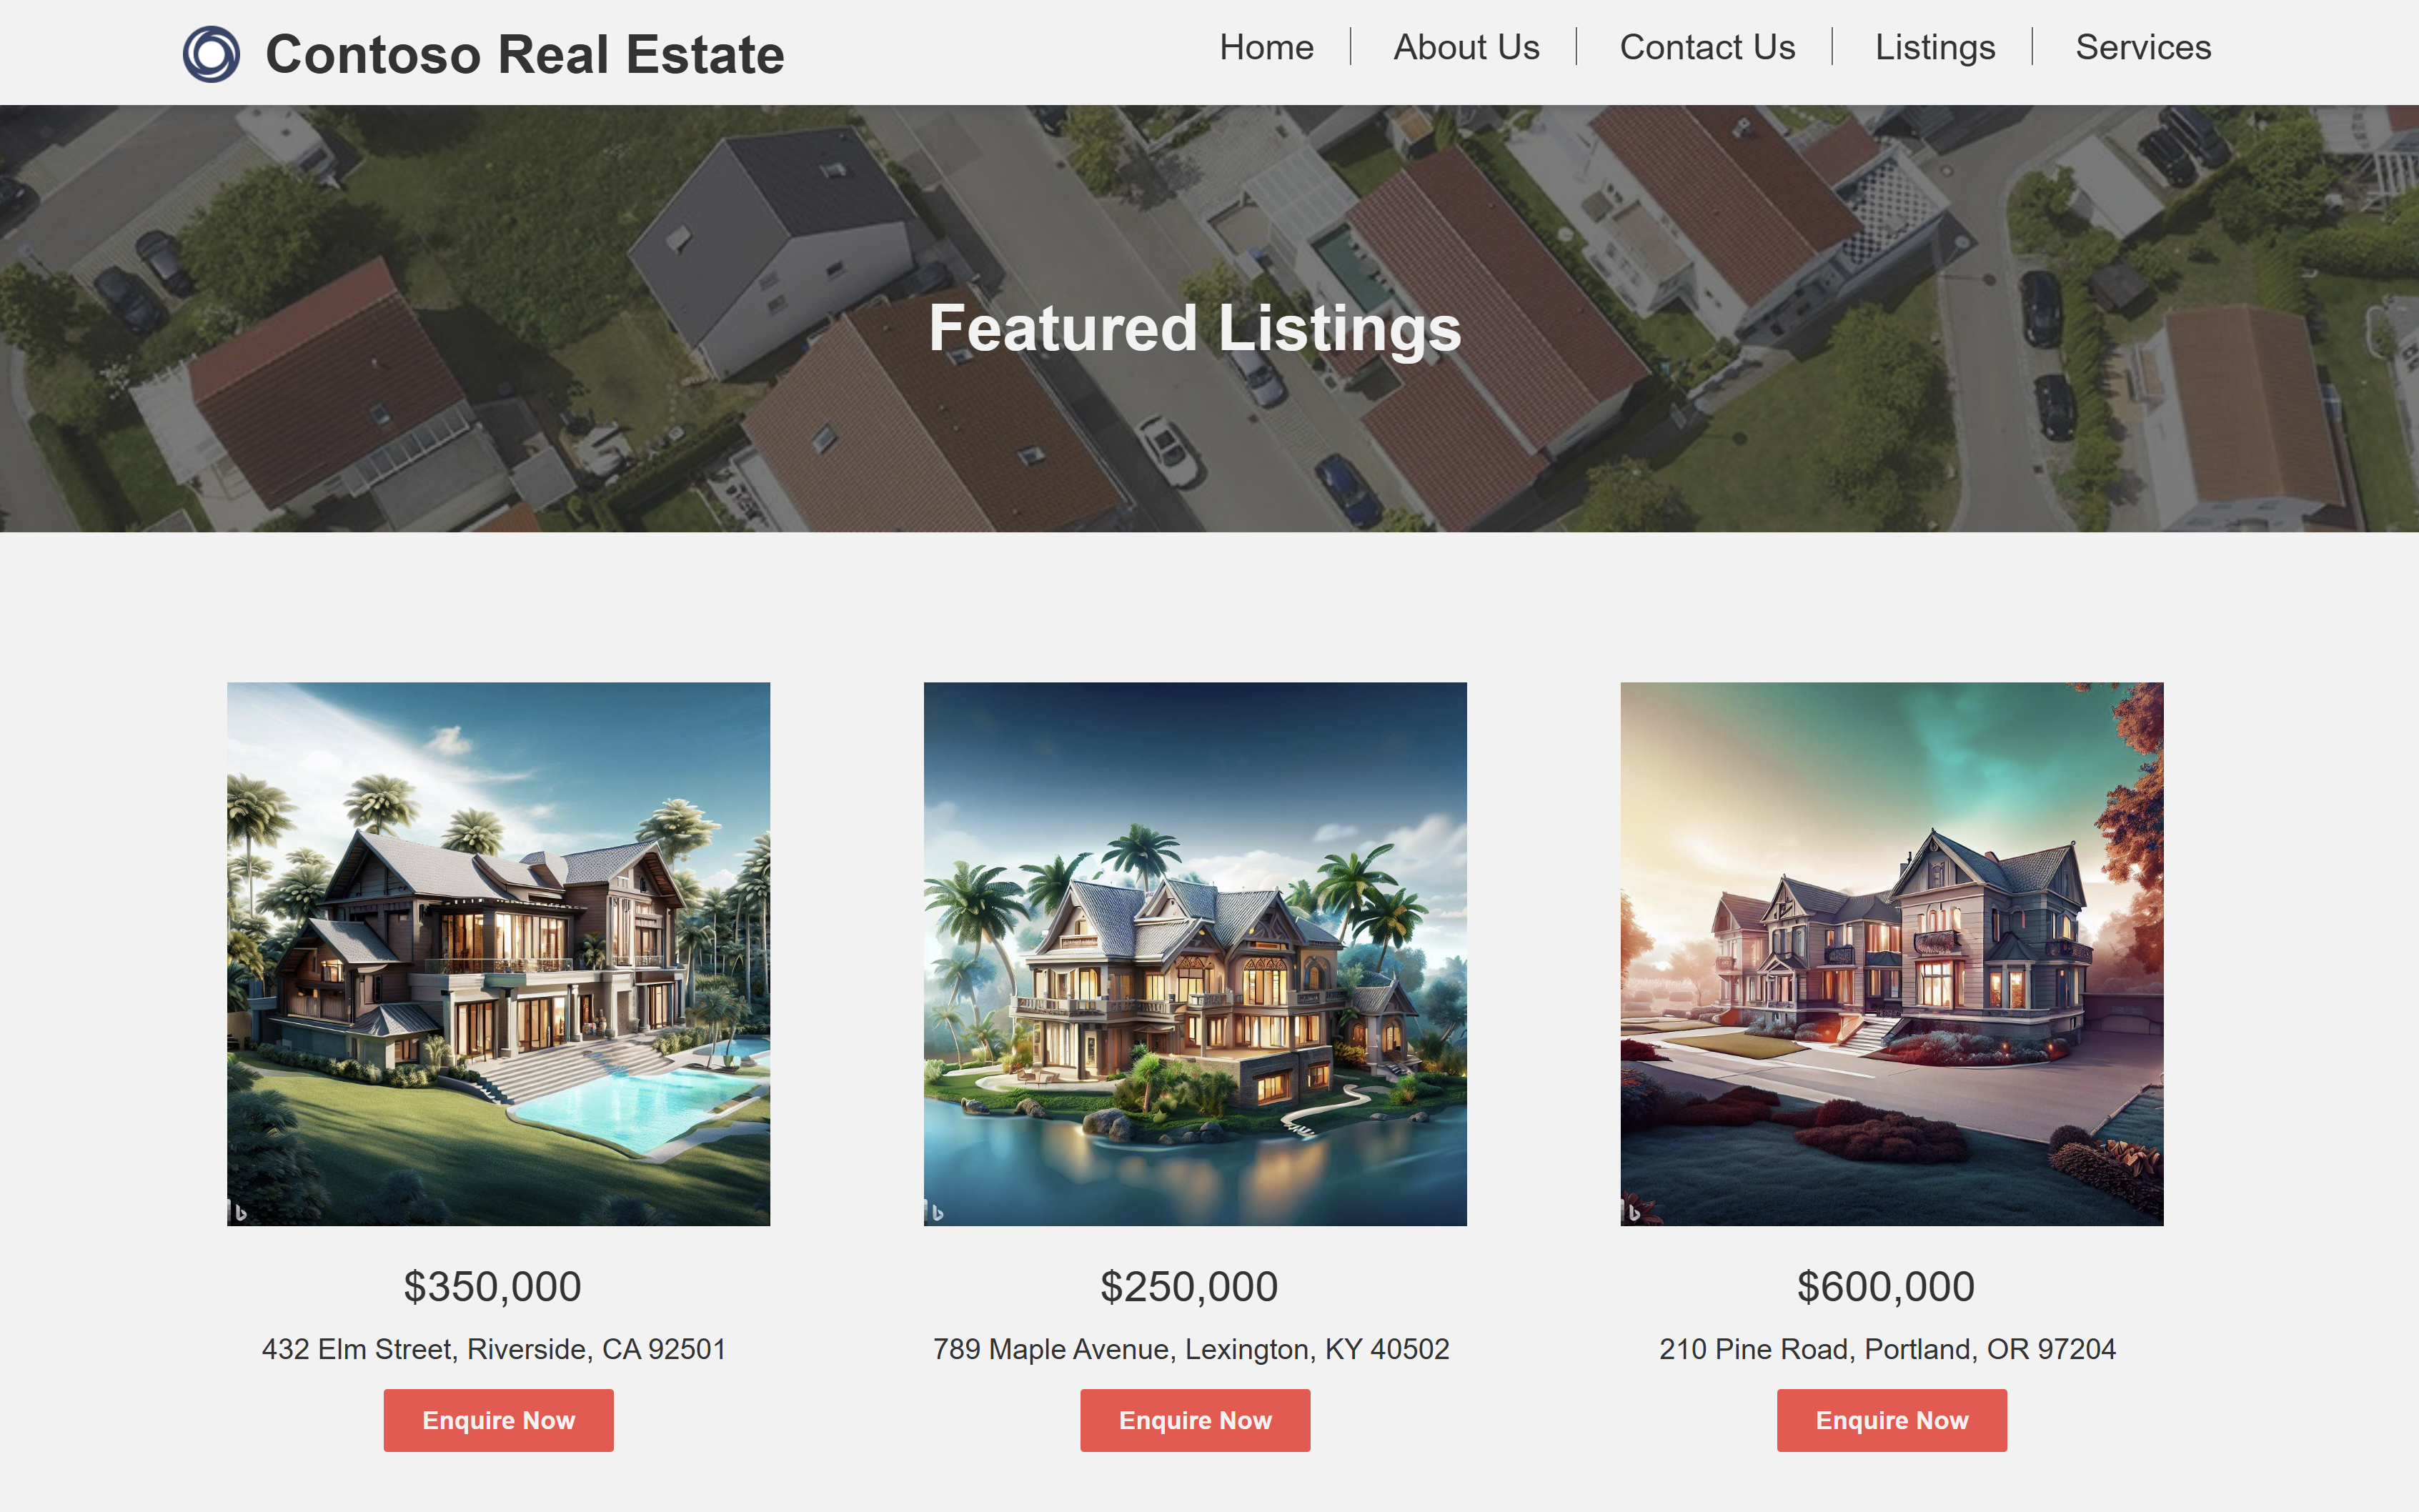
Use a combination of Copilot and the in-product toolbar to update the section to display at least 3 listings. The section should have a 3 Column layout.
Note
You will be hardcoding the data for the Real Estate Listings. Usually, this data would be connected to a data source like a SharePoint list or a Dataverse table or any external data source.
Then you would use a Custom Component to display the data in a visually appealing way. However, this is outside the scope of this module.
If you would like to learn more, you can check out the Use code components in Power Pages article.
Each column should contain an image. Use the URL option to add the images.
- For the first image, select Image > URL and enter this URL:
https://raw.githubusercontent.com/microsoft/PowerPlatformAdvocates/main/MSLearn/AIModule/Images/property1.jpg - For the second image, use this URL:
https://raw.githubusercontent.com/microsoft/PowerPlatformAdvocates/main/MSLearn/AIModule/Images/property2.jpg - For the third image, use this URL:
https://raw.githubusercontent.com/microsoft/PowerPlatformAdvocates/main/MSLearn/AIModule/Images/property3.jpg
- For the first image, select Image > URL and enter this URL:
Each column should contain a Heading 3 text that contains the property's price.
- For the first column, use the price
$350,000. - For the second column, use the price
$250,000. - For the third column, use the price
$600,000.
- For the first column, use the price
Each column should contain Small text text that contains the property's address.
- For the first column, use the address
432 Elm Street, Riverside, CA 92501 - For the second column, use the address
789 Maple Avenue, Lexington, KY 40502 - For the third column, use the address
210 Pine Road, Portland, OR 97204
- For the first column, use the address
Each column should contain a Button that navigates to the Contact Us page.
- Button label should be
Enquire Now.
You're free to customize the section as you see fit.
- Button label should be
Setting the solution for your data
You'll now start working with Dataverse tables and data. Keeping with the theme of organizing your Real Estate Solution components, you need to set a solution for all data.
On the left pane, select Data.
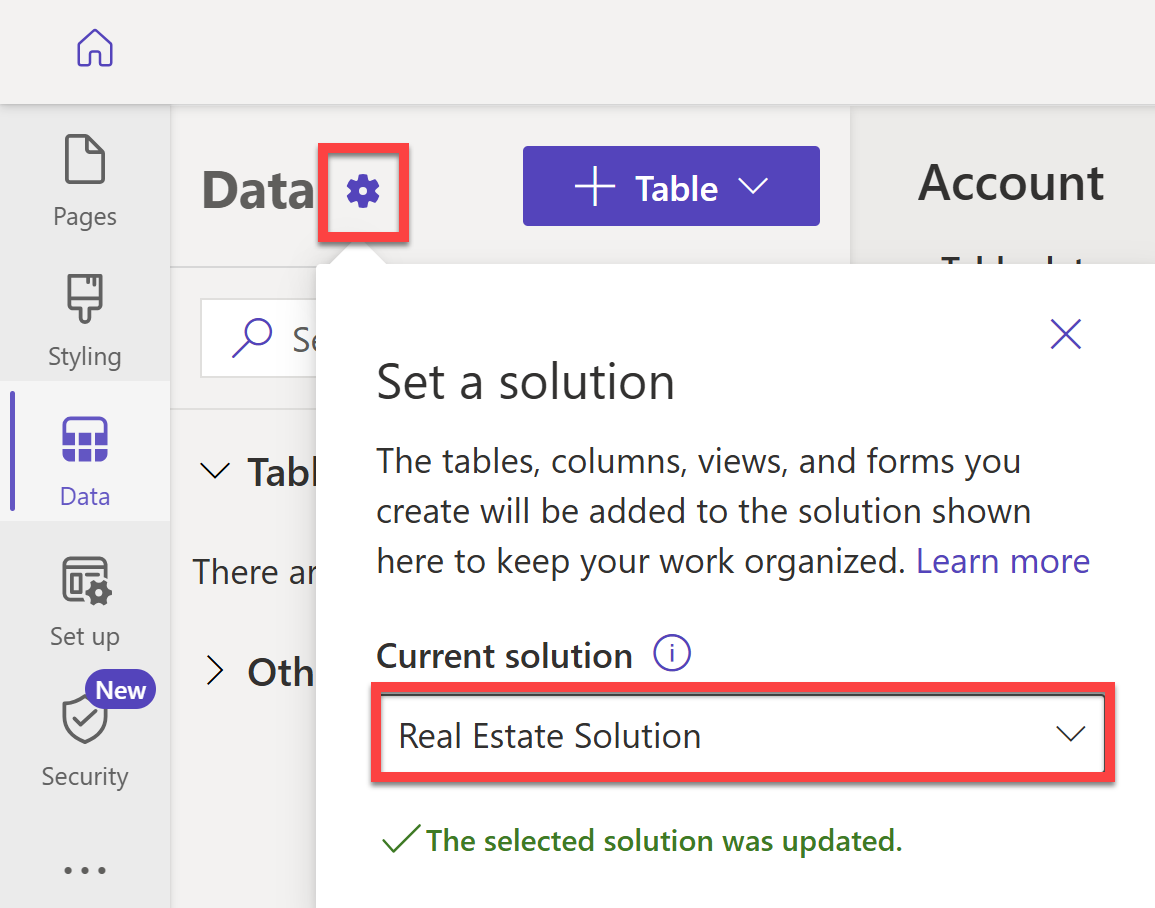
On the top of the Data pane, select the gear Set a solution icon.
Select the Real Estate Solution solution from the dropdown.
This ensures that all the data tables, columns, views, and forms that you create are added to the Real Estate Solution.
Exit the Set a solution pane.
Update the Contact Us page
On the left pane, select Pages.
Then select Contact Us to open the Contact Us page in the design studio.
Delete all sections between the Header and Footer sections.
Use the steps from the Listings page to add a title banner to the Contact Us page.
Under that, add a section with the One third left layout.
On the left column, select Text and change the text type from Paragraph to Heading 2.
Change the text to
We want to hear from you!.Select the plus icon below the We want to hear from you heading and then select Text again.
Change the text to:
Explore the world of real estate with us. Whether you're buying, selling, or investing, our expert team is here to guide you every step of the way.

Contact us today to start your real estate journey!
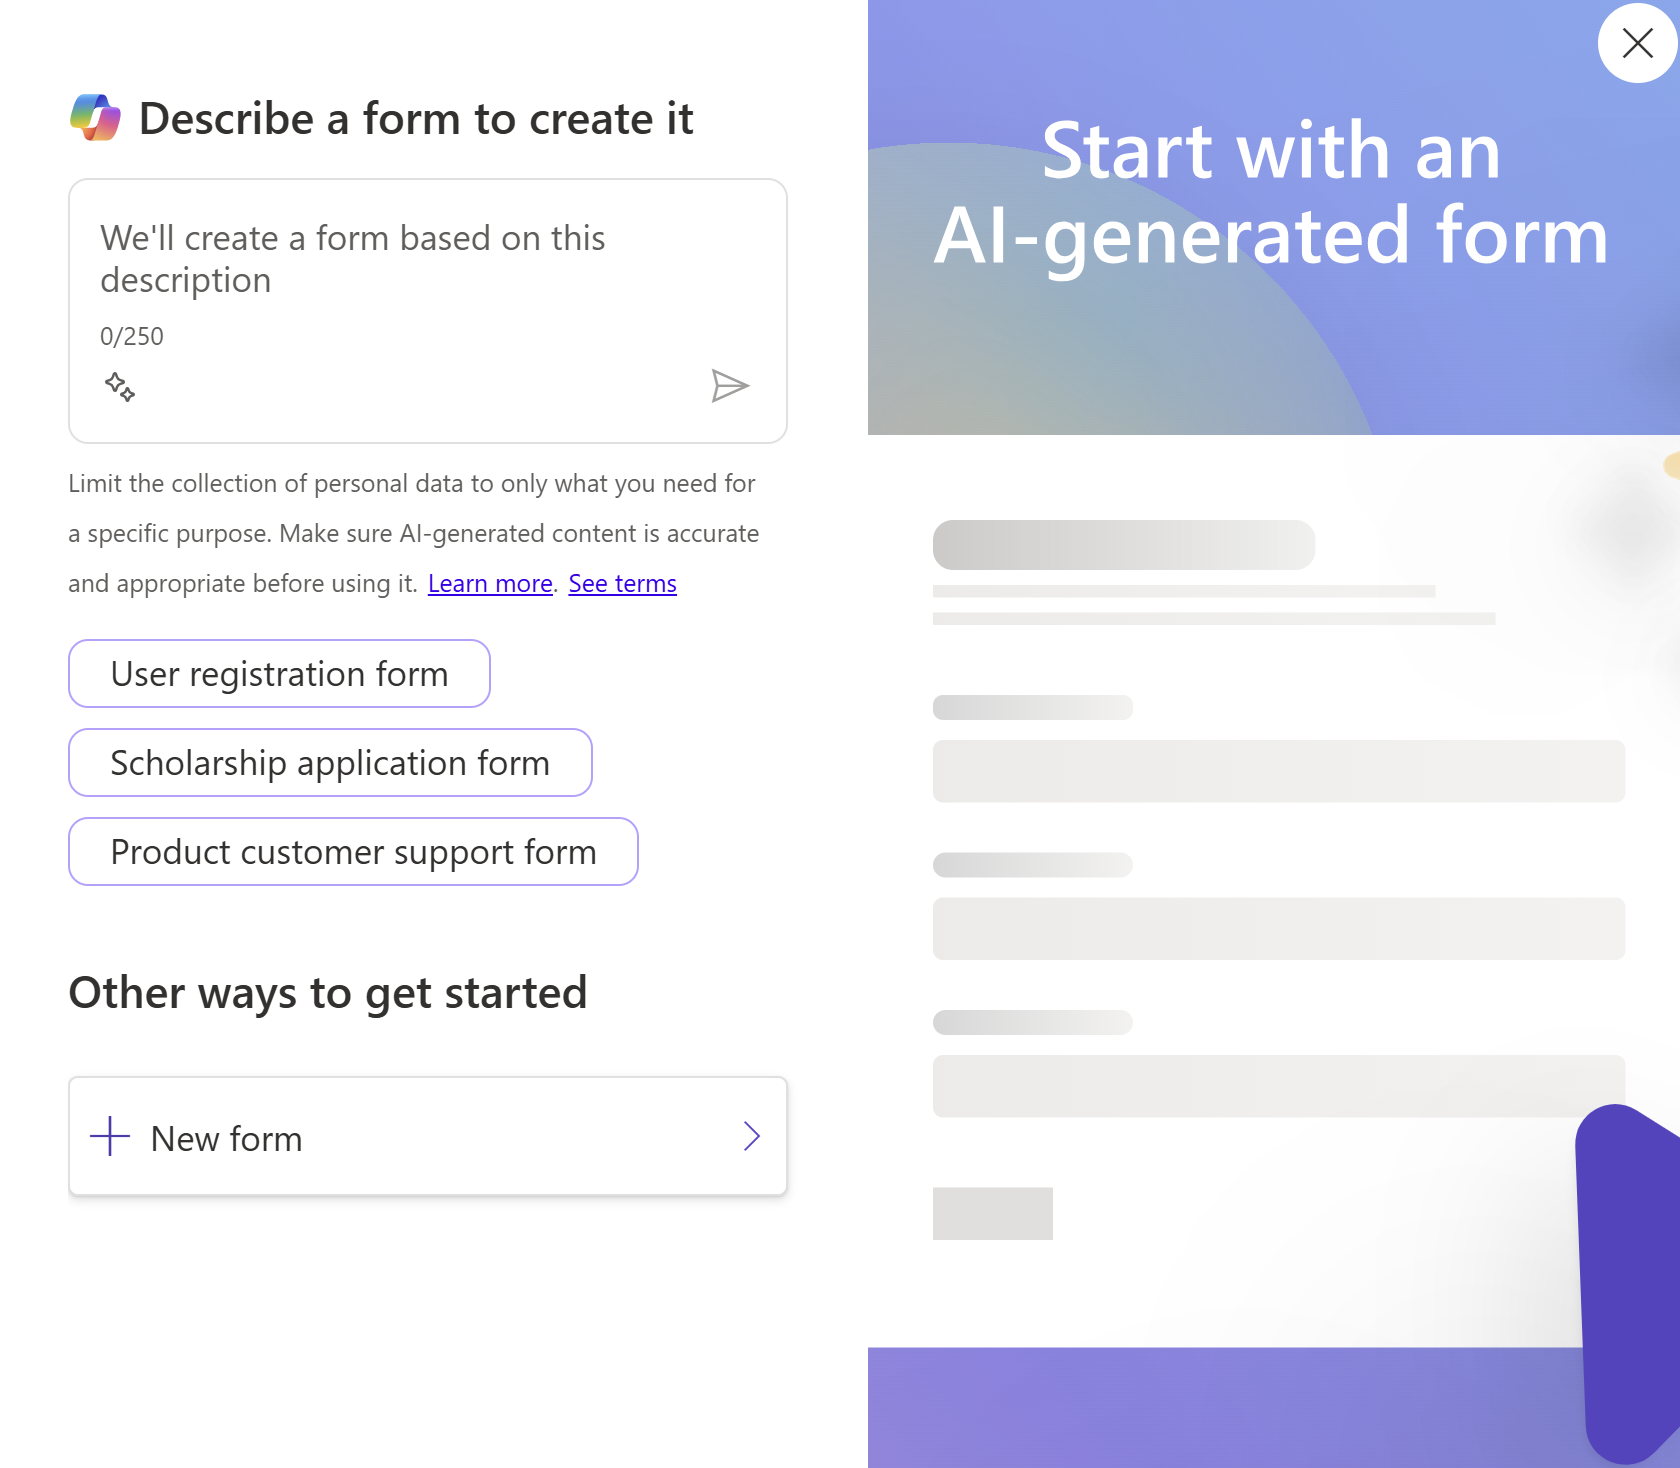
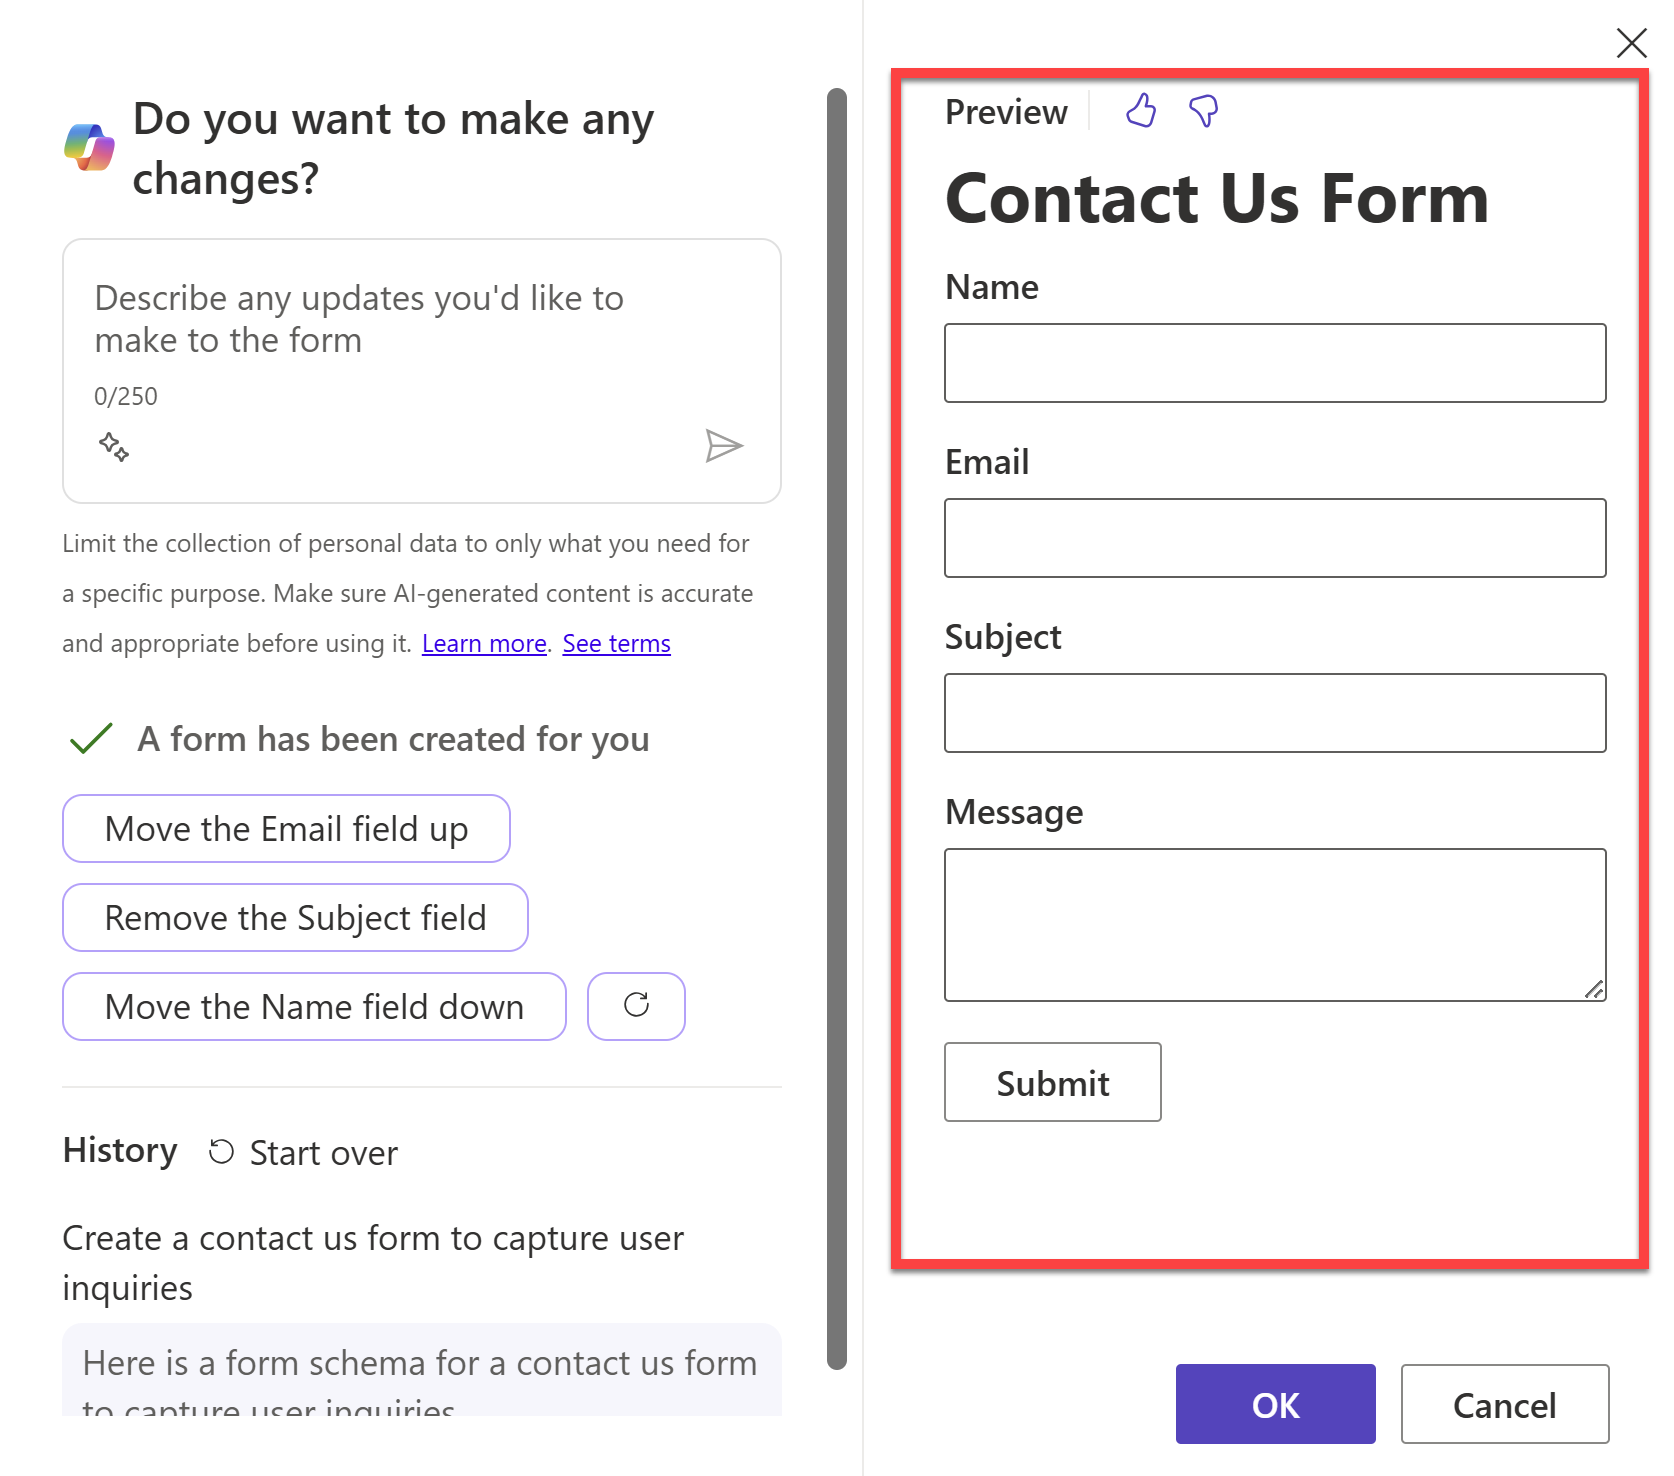
On the right column of the section, select the More ellipsis and then select Form. A pop-up appears where we can create an AI-generated form.
Under the Describe a form to create it section, enter
Create a contact us form to capture user inquiries.Press Enter and Copilot will generate a form for you. The preview of this form will be displayed on the right side of the pane.
You can continue to make changes to the form by entering new prompts like
Move the Email field uporRemove the Subject field.Once you're satisfied with the form, select OK to add the form to the page.
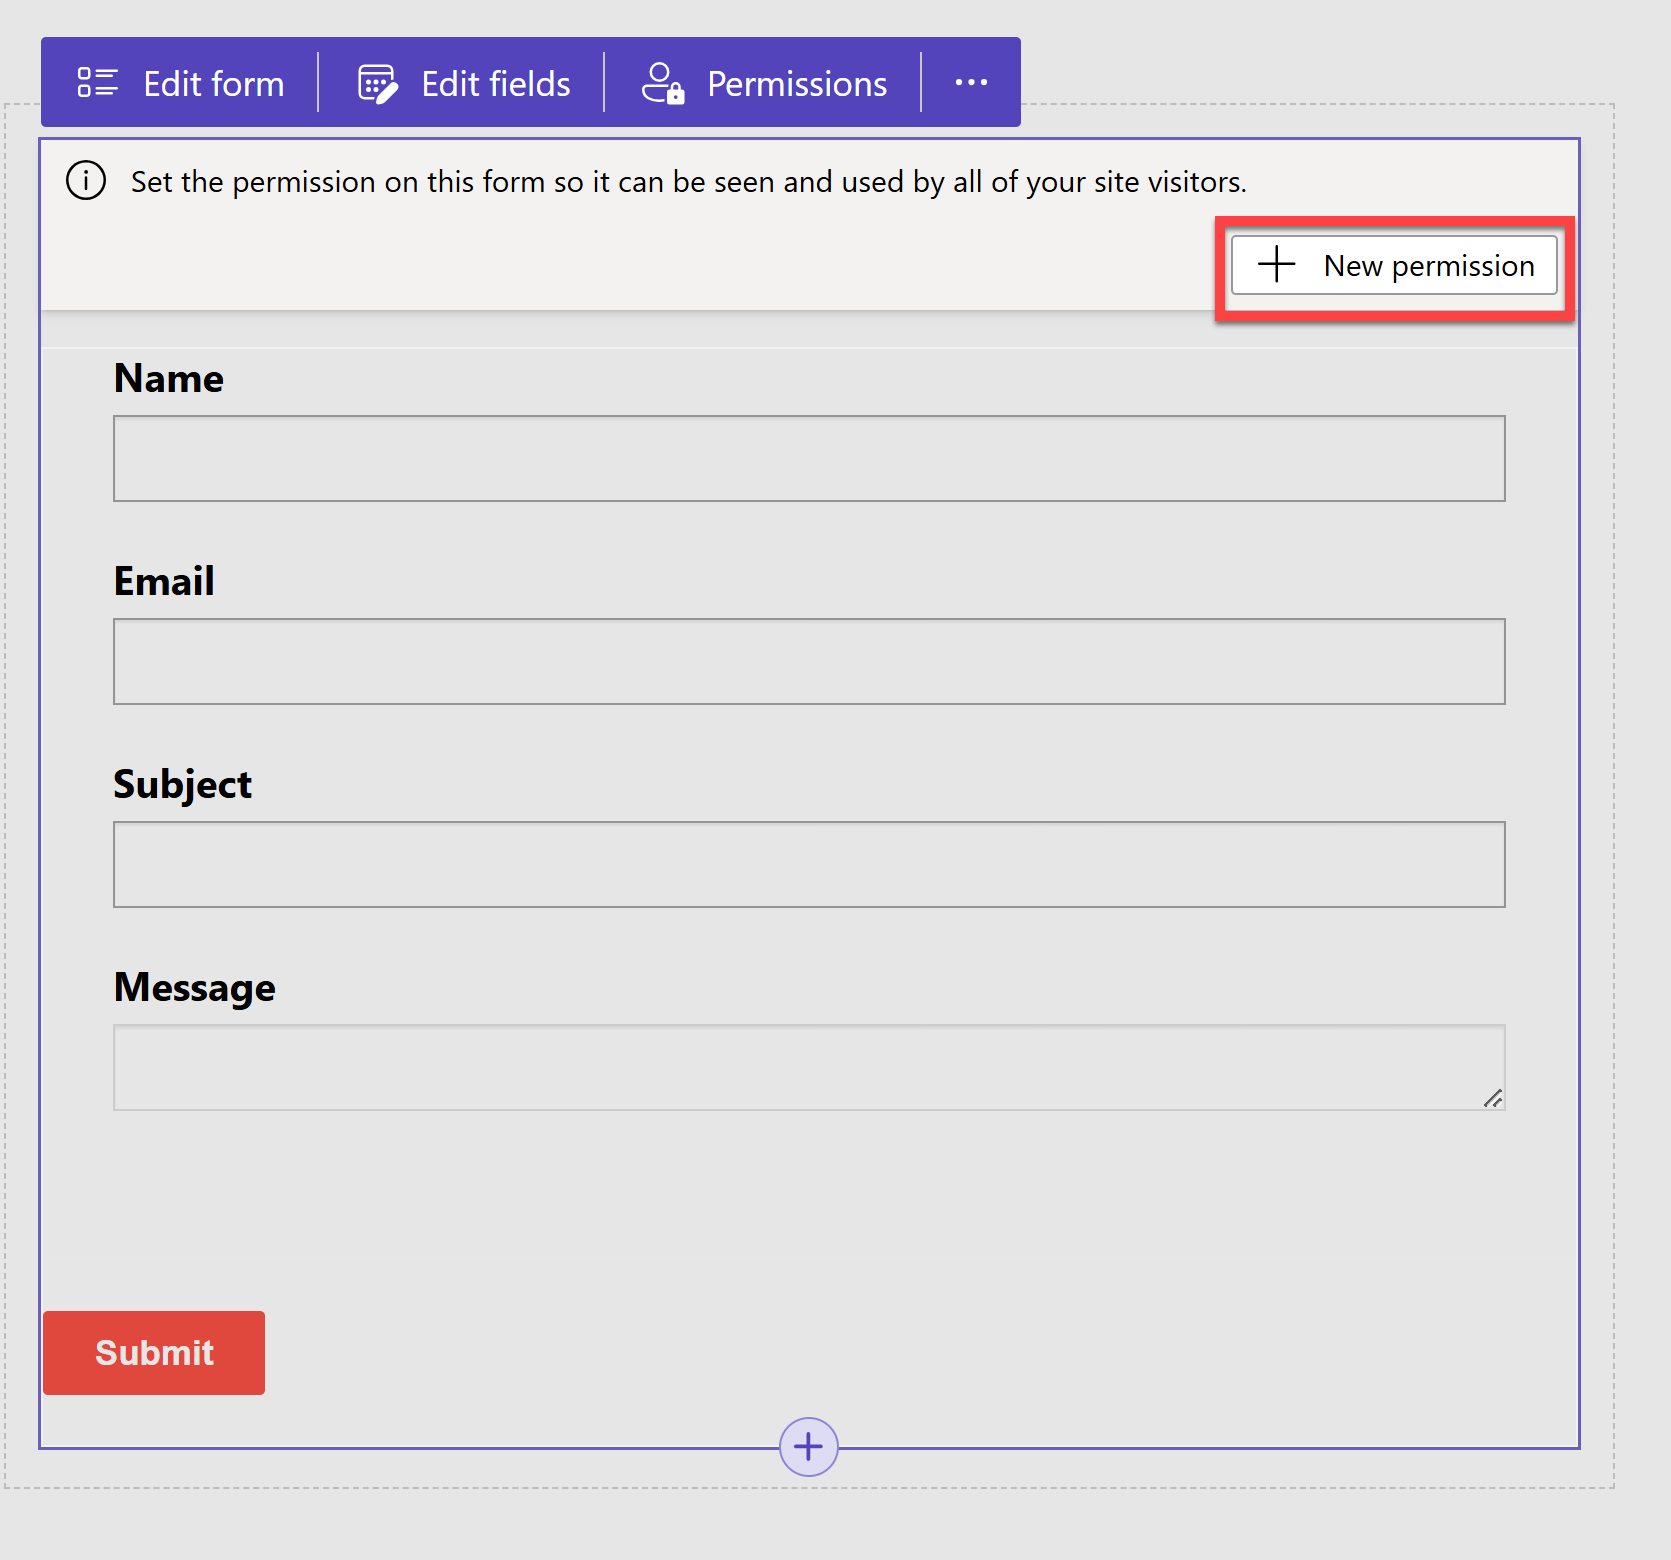
It may take a few moments to generate the form but once it's done - not only will Copilot create a form but it will also create a table in Dataverse to store the form data once submitted.
Now we need to set permissions for the form so that it can be seen and used by all users of the site. Select + New permission.
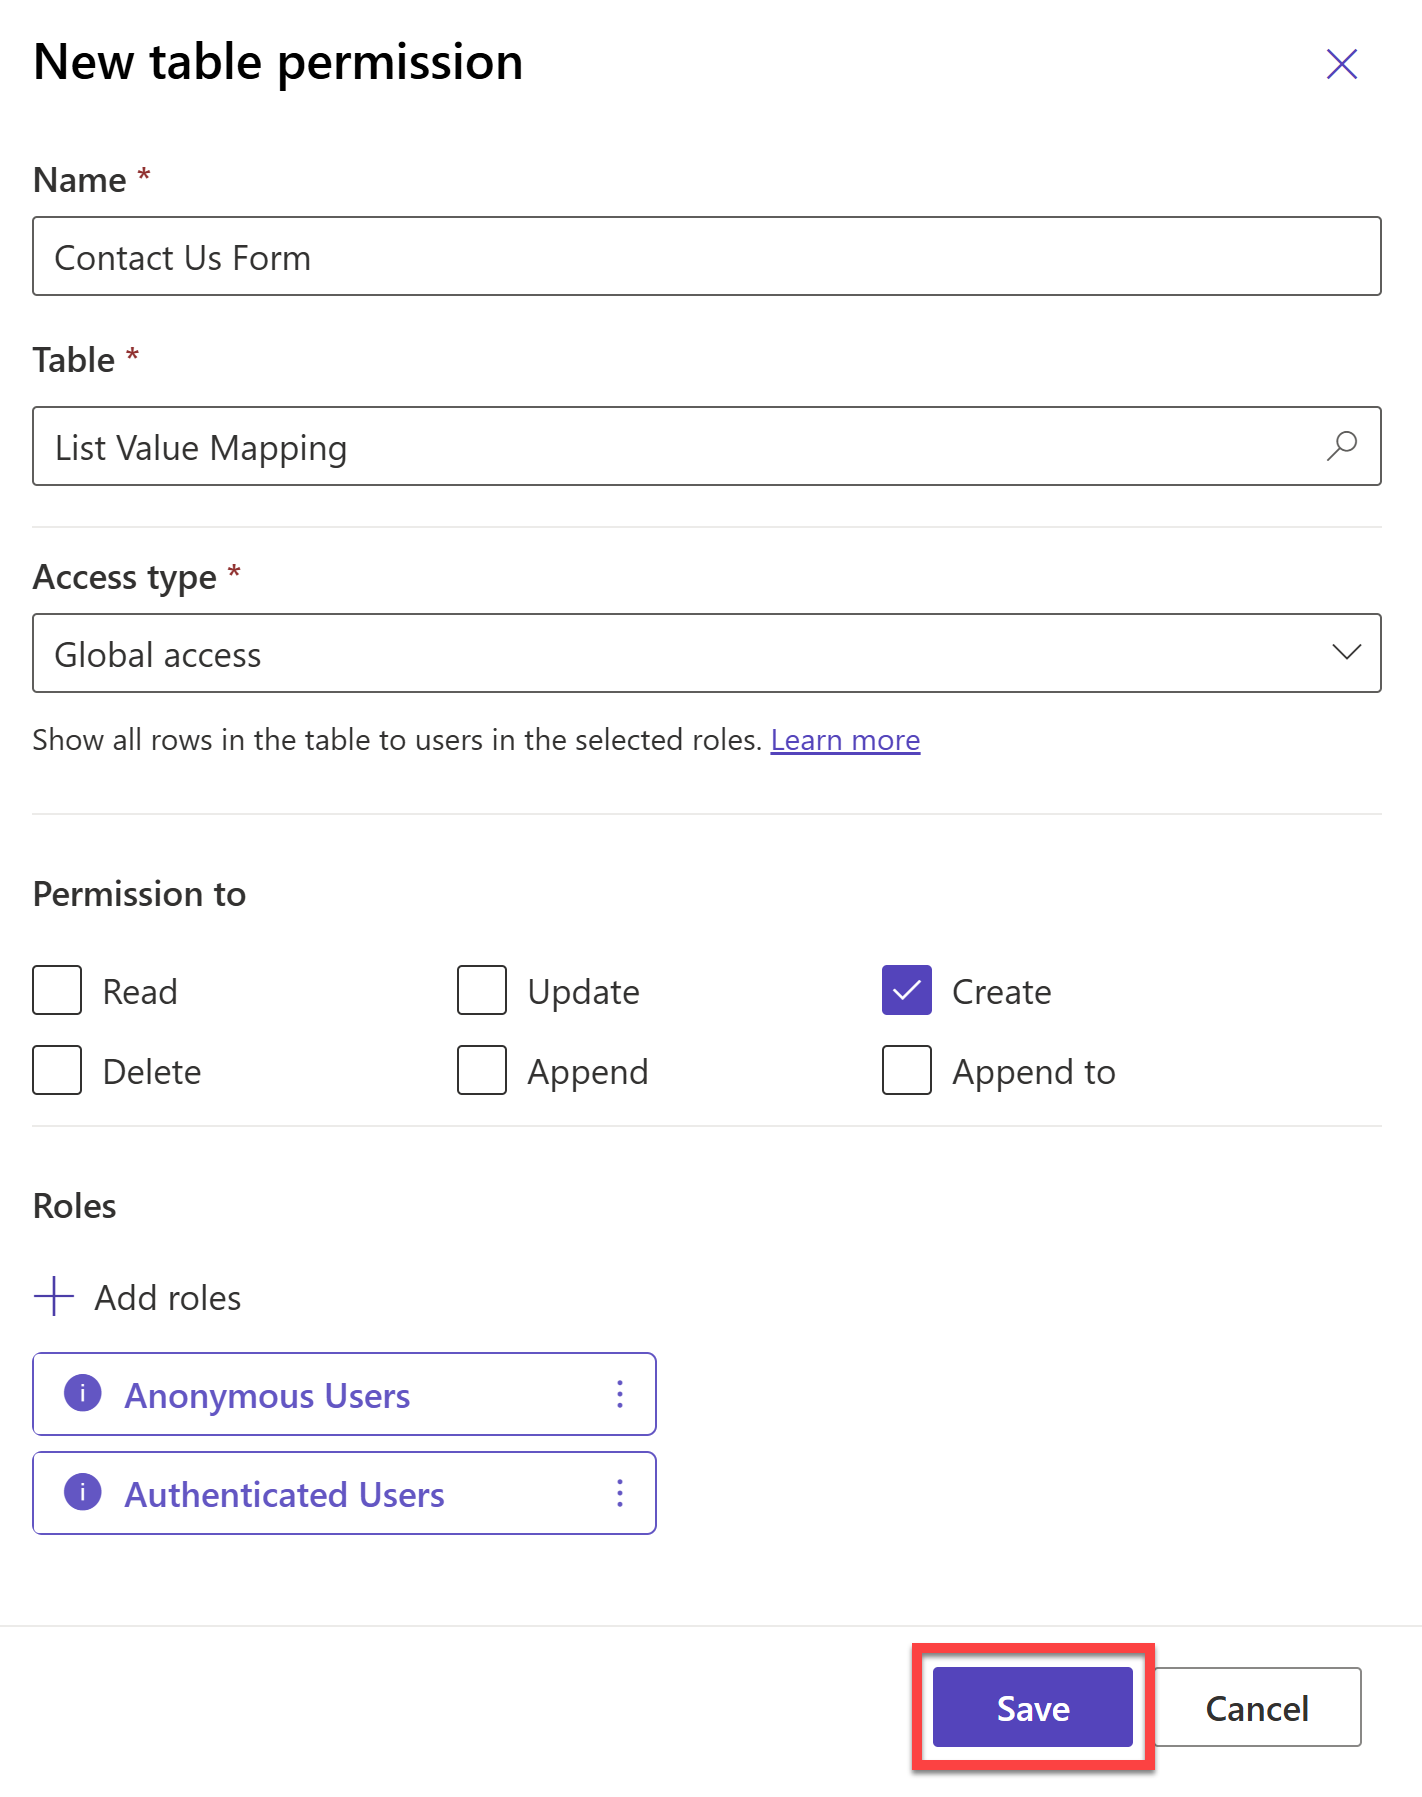
Configure the table permission as follows:
- Name:
Contact Us Form - Table: Leave the preselected table as is
- Access type:
Global Access
Note
The Global Access type applies the selected table permission and privileges to the users from the selected roles for all records.
Learn more about Access types here.
- Permission to:
Create - For Roles, select + Add roles and then select Anonymous and Authenticated users.
Select Save to save the permission.
Select Save again on the The data displayed in your site can be seen by anyone. pane.
Note
In a previous module, you configured a flow to use AI to analyze the content of an email sent from a user.
You can configure a similar flow to capture the form data from the Contact Us form and then use AI to analyze the content of the form submission and perform actions based on the content.
This is outside the scope of this module, but you can learn more about configuring Power Automate cloud flows in the Power Pages configuration documentation
- Name:
Update the Services page
Use your creativity and knowledge gained thus far to update the Services page. Use a combination of Copilot and the in-product toolbar to add any content, that you see fit, to the page.

