Exercise: Create the phone number translator app
In this exercise, you construct the UI for the phone dialer app and implement the logic behind this UI.
You build a UI that takes advantage of the UI capabilities of .NET MAUI (Multi-platform Application User Interface) and the .NET MAUI Essentials package to dial the phone.
The app lets the user type text into an input field, and translates that text to numeric digits. It uses the letters that show up on a telephone keypad as the basis for translation. For example, the letters cab translate to 222 because the digit 2 has all three letters a, b, and c.
You continue with the Phoneword solution you created in the previous exercise.
Add a new C# source file to the app
Open the Phoneword solution in Visual Studio if you don't already have it open.
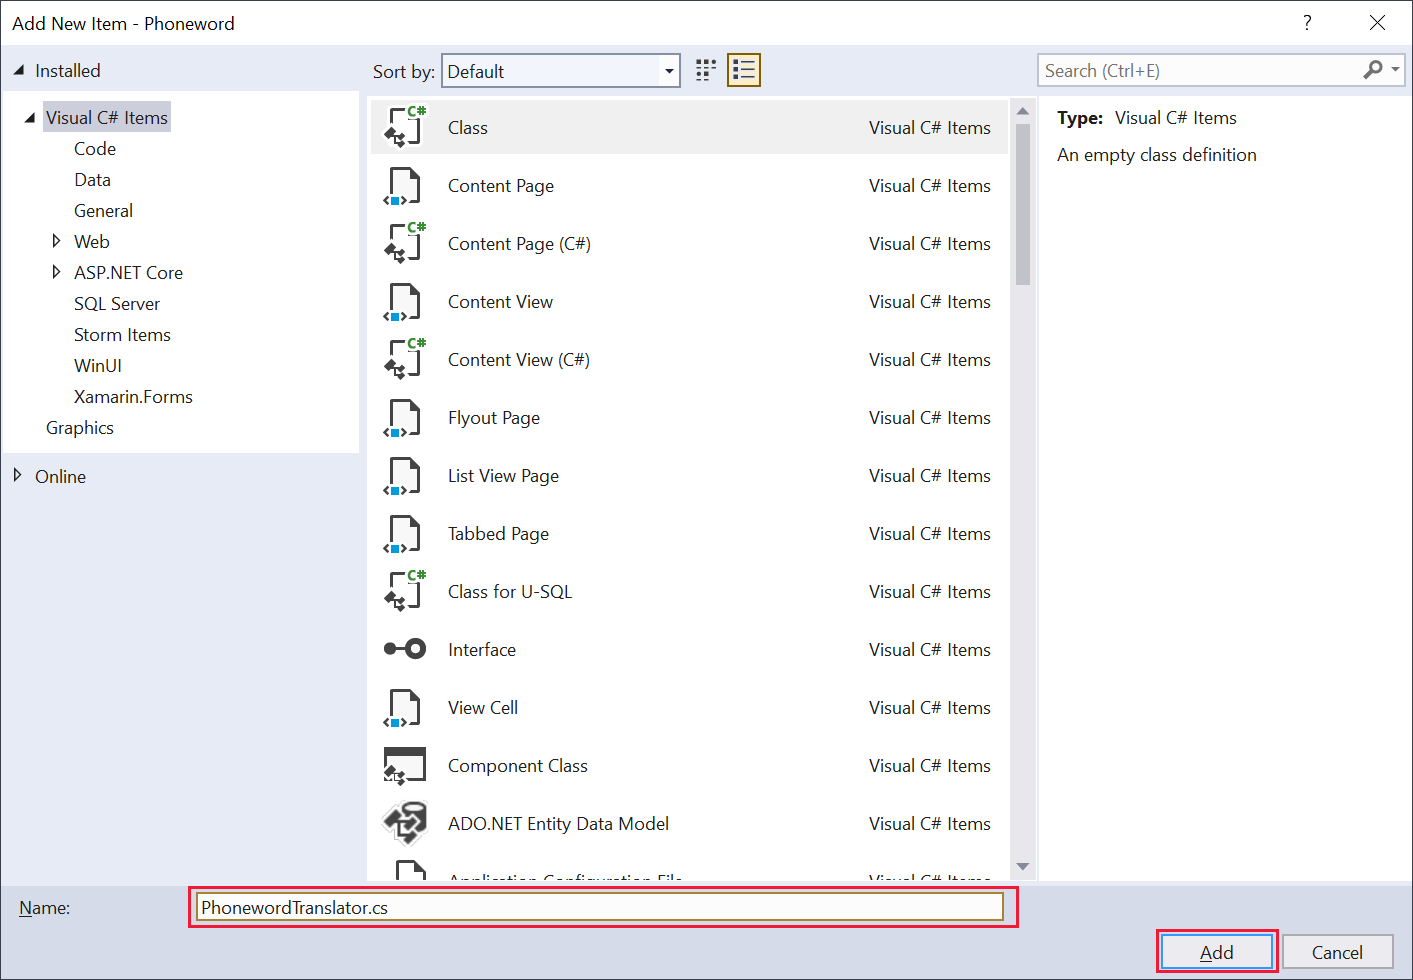
In the Solution Explorer window, right-click the Phoneword project, select Add, and select Class.
In the Add New Item dialog box, name the class file PhonewordTranslator.cs, then select Add.
Add the translation logic
Replace the content of the class file with the following code and save the file. The static method ToNumber in the PhonewordTranslator class translates the number from alphanumeric text into a regular numeric phone number.
using System.Text;

namespace Phoneword;
public static class PhonewordTranslator
{
	public static string? ToNumber(string raw)
	{
		if (string.IsNullOrWhiteSpace(raw))
			return null;

		raw = raw.ToUpperInvariant();

		var newNumber = new StringBuilder();
		foreach (var c in raw)
		{
			if (" -0123456789".Contains(c))
				newNumber.Append(c);
			else
			{
				var result = TranslateToNumber(c);
				if (result != null)
					newNumber.Append(result);
				// Bad character?
				else
					return null;
			}
		}
		return newNumber.ToString();
	}

	static bool Contains(this string keyString, char c)
	{
		return keyString.IndexOf(c) >= 0;
	}

	static readonly string[] digits = {
		"ABC", "DEF", "GHI", "JKL", "MNO", "PQRS", "TUV", "WXYZ"
	};

	static int? TranslateToNumber(char c)
	{
		for (int i = 0; i < digits.Length; i++)
		{
			if (digits[i].Contains(c))
				return 2 + i;
		}
		return null;
	}
}
Create the UI
Open the MainPage.xaml file in the Phoneword project.
Remove the
ScrollViewcontrol and its contents, leaving just theContentPagecontrol:<ContentPage xmlns="http://schemas.microsoft.com/dotnet/2021/maui" xmlns:x="http://schemas.microsoft.com/winfx/2009/xaml" x:Class="Phoneword.MainPage"> </ContentPage>Add a
VerticalStackLayoutcontrol with vertical orientation and a spacing of 15 units and padding of 20 units to the ContentPage:<ContentPage ... > <VerticalStackLayout Spacing="15" Padding="20"> </VerticalStackLayout> </ContentPage>Add a
Labelcontrol to the StackLayout:<ContentPage ... > <VerticalStackLayout ...> <Label Text = "Enter a Phoneword" FontSize ="20"/> </VerticalStackLayout> </ContentPage>Add an
Entrycontrol to the StackLayout, below the label. AnEntrycontrol provides a text box into which the user can enter data. In this code, the propertyx:Namegives the control a name. You reference this control in the code for the app later:<ContentPage ... > <VerticalStackLayout ...> <Label .../> <Entry x:Name = "PhoneNumberText" Text = "1-555-NETMAUI" /> </VerticalStackLayout> </ContentPage>Add two
Buttoncontrols to the VerticalStackLayout, after the Entry control. Both buttons currently do nothing, and the second is disabled initially. You add the code to handle theClickedevent for these two buttons in the next task:<ContentPage ... > <VerticalStackLayout ...> <Label .../> <Entry ... /> <Button x:Name = "TranslateButton" Text = "Translate" Clicked = "OnTranslate"/> <Button x:Name = "CallButton" Text = "Call" IsEnabled = "False" Clicked = "OnCall"/> </VerticalStackLayout> </ContentPage>
Respond to the TranslateButton button tap
In the Solution Explorer window, expand the MainPage.xaml entry and open the MainPage.xaml.cs code-behind file.
In the
MainPageclass, remove thecountvariable and theOnCounterClickedmethod. The class should look like this:namespace Phoneword; public partial class MainPage : ContentPage { public MainPage() { InitializeComponent(); } }Add the
translatedNumberstring variable and the followingOnTranslatemethod to theMainPageclass, after the constructor. TheOnTranslatemethod retrieves the phone number from theTextproperty of theEntrycontrol and passes it to the staticToNumbermethod of thePhonewordTranslatorclass that you created earlier.public partial class MainPage : ContentPage { ... string? translatedNumber; private void OnTranslate(object sender, EventArgs e) { string enteredNumber = PhoneNumberText.Text; translatedNumber = PhonewordTranslator.ToNumber(enteredNumber); if (!string.IsNullOrEmpty(translatedNumber)) { // TODO: } else { // TODO: } } }Note
You fill in the missing TODO bits of this code in the next step.
In the
OnTranslatemethod, add code to change theTextproperty of the Call button to append the successfully translated phone number. You can use the value you stored in the translatedNumber field. Also, enable and disable the button based on the successful translation. For example, ifTranslateNumberreturned null, disable the button, but if it was successful, enable it.private void OnTranslate(object sender, EventArgs e) { string enteredNumber = PhoneNumberText.Text; translatedNumber = Core.PhonewordTranslator.ToNumber(enteredNumber); if (!string.IsNullOrEmpty(translatedNumber)) { CallButton.IsEnabled = true; CallButton.Text = "Call " + translatedNumber; } else { CallButton.IsEnabled = false; CallButton.Text = "Call"; } }
Create the event method for the CallButton button
Add the
OnCallevent handling method to the end of theMainPageclass. This method makes use of asynchronous operations, so mark it asasync:public partial class MainPage : ContentPage { ... async void OnCall(object sender, System.EventArgs e) { } }In the
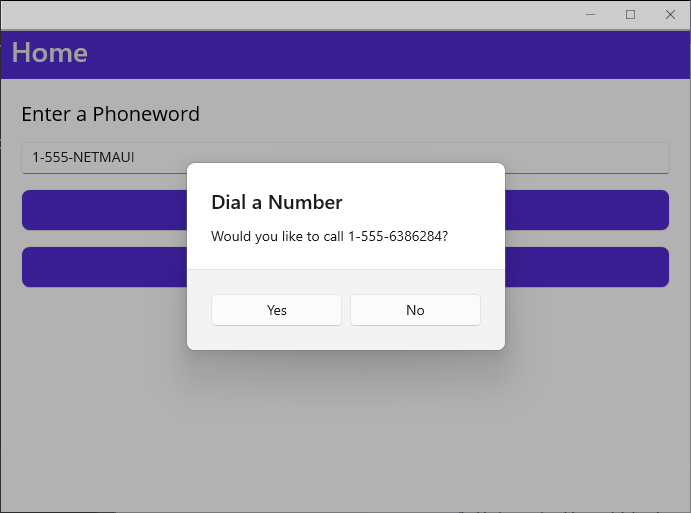
OnCallmethod, prompt the user, by using the Page.DisplayAlert method, to ask if they'd like to dial the number.The parameters to
DisplayAlertare a title, a message, and two strings used for the Accept and Cancel button text. It returns a Boolean indicating whether the Accept button was pressed to dismiss the dialog box.async void OnCall(object sender, System.EventArgs e) { if (await this.DisplayAlert( "Dial a Number", "Would you like to call " + translatedNumber + "?", "Yes", "No")) { // TODO: dial the phone } }
Test the application
In the Visual Studio toolbar, select the Windows Machine profile and start debugging.
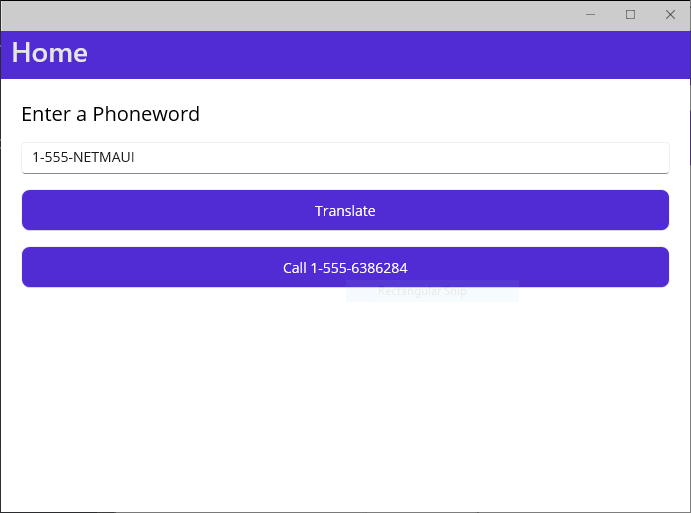
Tap the Translate button to convert the default text to a valid phone number. The caption on the Call button should change to Call 1-555-6386284:
Tap the Call button. Verify that a prompt appears asking you to confirm the operation. Select No.
Return to Visual Studio and stop debugging.
Dial the phone number
In the MainPage.xaml.cs code-behind file, edit the OnCall method and replace the TODO comment with the following
try/catchblocks:async void OnCall(object sender, System.EventArgs e) { if (await this.DisplayAlert( "Dial a Number", "Would you like to call " + translatedNumber + "?", "Yes", "No")) { try { if (PhoneDialer.Default.IsSupported && !string.IsNullOrWhiteSpace(translatedNumber)) PhoneDialer.Default.Open(translatedNumber); } catch (ArgumentNullException) { await DisplayAlert("Unable to dial", "Phone number was not valid.", "OK"); } catch (Exception) { // Other error has occurred. await DisplayAlert("Unable to dial", "Phone dialing failed.", "OK"); } } }The PhoneDialer class in the Microsoft.Maui.ApplicationModel.Communication namespace provides an abstraction of the phone dialing functionality (and others) for the Windows, Android, iOS (and iPadOS), and macOS platforms. The static Open method attempts to use the phone dialer to call the number provided as the parameter.
The following steps show how to update the Android application manifest to enable Android to use the phone dialer. Windows, iOS, and MacCatalyst, applications follow the same general principle, except that you specify a different capability in the manifest depending on the operating system.
In the Solution Explorer window, expand the Platforms folder, expand the Android folder, right-click the AndroidManifest.xml file, and select Open with > Automatic Editor Selector (XML). Select OK.
Add the following XML snippet inside the manifest node, after the existing content for this node.
<?xml version="1.0" encoding="utf-8"?>
<manifest xmlns:android="http://schemas.android.com/apk/res/android">
    ...
    <queries>
        <intent>
            <action android:name="android.intent.action.DIAL" />
            <data android:scheme="tel"/>
        </intent>
    </queries>
</manifest>
Save the file.
In the Visual Studio toolbar, select the Android Emulators/Pixel 7 - API 35 (or similar) profile and start debugging.
When the app appears in the emulator (it can take a few minutes), enter a phone number (or accept the default) select Translate, then select Call.
In the Dial a Number alert, select Yes. Verify that the Android phone dialer appears with the number you provided in the app.

Return to Visual Studio and stop debugging.
Summary
In this exercise, you added a custom UI to your application by using pages and views. You also added support for placing a call by using platform-specific APIs available in Android.