Edit and test recorded actions
Your next task is to edit the recorded actions. We edit our flow by adding variables at the input steps, since it's unlikely we're going to have our flow hardcode the same information each time. Then we run it through one more test.
Add input variables to the flow
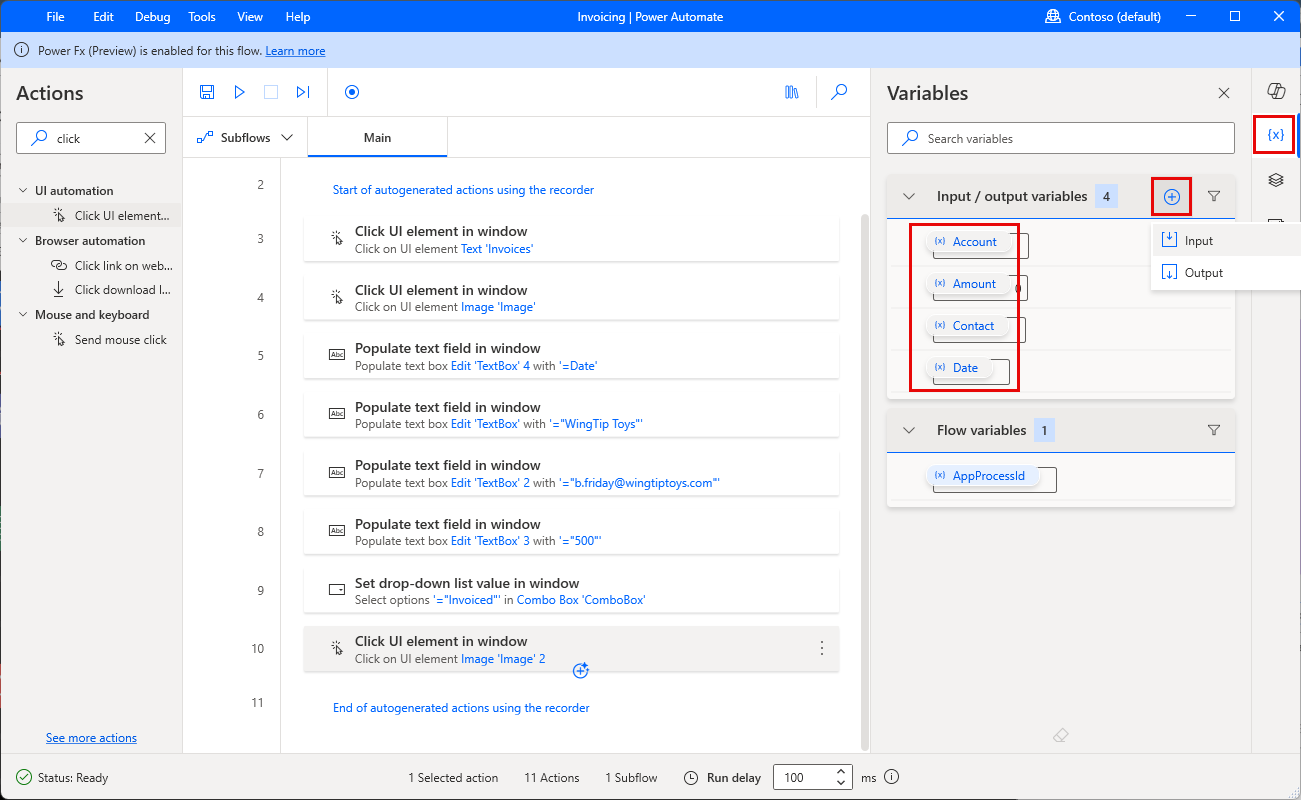
Since we're going to be using our cloud flow to pass variables to our desktop flow, we need to add some input variables to our desktop flow. You can add input variables by selecting the {x} icon to bring up the Variables panel on the right side of your screen. You can find the icon positioned directly under the Copilot icon.
To add a variable, select the circled + icon under the Input / output variables. You then can add an Input or Output variable.
Add the following four input variables:
Account
Variable name: Account
Data type: Text
External name: Account
Description: The name of the account
Amount
Variable name: Amount
Data type: Text
External name: Amount
Description: The amount of the invoice
Contact
Variable name: Contact
Data type: Text
External name: Contact
Description: The contact email address
Date
Variable name: Date
Data type: Text
External name: Date
Description: The invoice date
Edit your flow steps to incorporate variables
Now that we defined our input variables, we can replace the hard coded inputs we recorded previously with the variables we created. You can edit the list of recorded actions by selecting the More actions ellipsis (...) menu that appears while hovering over each action and then selecting Edit. In the subsequent dialog, you can correct mistakes that you made during recording. For example, you can reorder, copy, or delete actions as needed.
Let's start with the flow step where we entered the date. Hover to select More actions, then Edit.
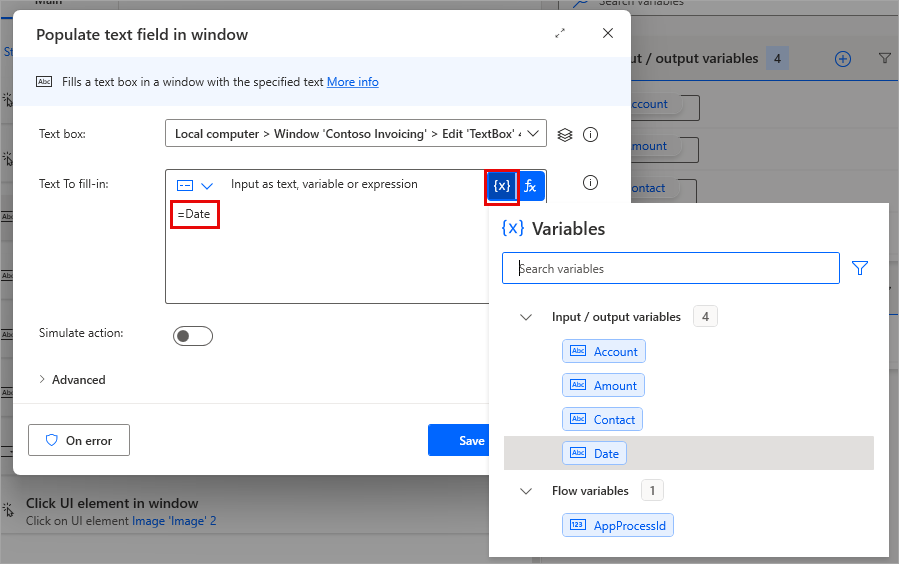
In the Text To fill-in, delete the current input, then select your variable icon {x}, and select your Date variable from the Variables popup. The formula automatically inputs an equals sign, followed by "Date." To record the change, save the step.
This image shows the variable icon, the Variables selection popup, and what your Text To fill-in field looks like.
Continue editing the remaining steps of your flow as follows:
Replace "WingTip Toys" with the Account variable
Replace
b.friday@wingtiptoys.comwith the Contact variableReplace "500" with the Amount variable
Save your flow, then test it by selecting the Run (play) icon in the toolbar. Avoid using your computer to perform actions while the test is running.
As you tested the flow, you saw the Contoso Invoicing app open on your screen, and then blank entries went in for the Date, Account, Contact, and Amount fields, and then a blank entry saved in "Invoices." That's how we designed it! In a future unit in this learning path, we pass dynamic data into the flow.
When your test is successful, select the Save icon.


