Exercise - Add a Bicep deployment task to the pipeline
You've created a basic pipeline, and you've configured your Azure and Azure Pipelines environments to connect. Now, you're ready to deploy your website's Bicep file to Azure from your pipeline.
In this exercise, you'll:
- Add a Bicep file to your repository.
- Add a pipeline step to deploy your Bicep file.
- Run your pipeline again and verify that it successfully deployed your website.
Add your website's Bicep file to the Git repository
You've already prepared your website's Bicep file. You can use the Bicep file to deploy different configurations of the website resources, depending on the environment and configuration. Here, you add your Bicep file to your repository.
Open the Visual Studio Code Explorer.
In the deploy folder, create a new file named main.bicep. Make sure you create the file inside the deploy folder, and not at the root of the repository:
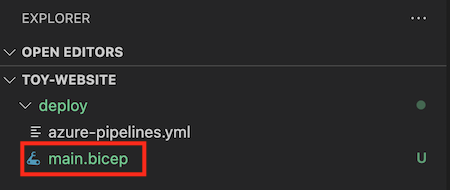
Copy the following code into the main.bicep file:
@description('The Azure region into which the resources should be deployed.')
param location string = resourceGroup().location

@description('The type of environment. This must be nonprod or prod.')
@allowed([
  'nonprod'
  'prod'
])
param environmentType string

@description('Indicates whether to deploy the storage account for toy manuals.')
param deployToyManualsStorageAccount bool

@description('A unique suffix to add to resource names that need to be globally unique.')
@maxLength(13)
param resourceNameSuffix string = uniqueString(resourceGroup().id)

var appServiceAppName = 'toy-website-${resourceNameSuffix}'
var appServicePlanName = 'toy-website-plan'
var toyManualsStorageAccountName = 'toyweb${resourceNameSuffix}'

// Define the SKUs for each component based on the environment type.
var environmentConfigurationMap = {
  nonprod: {
    appServicePlan: {
      sku: {
        name: 'F1'
        capacity: 1
      }
    }
    toyManualsStorageAccount: {
      sku: {
        name: 'Standard_LRS'
      }
    }
  }
  prod: {
    appServicePlan: {
      sku: {
        name: 'S1'
        capacity: 2
      }
    }
    toyManualsStorageAccount: {
      sku: {
        name: 'Standard_ZRS'
      }
    }
  }
}

var toyManualsStorageAccountConnectionString = deployToyManualsStorageAccount ? 'DefaultEndpointsProtocol=https;AccountName=${toyManualsStorageAccount.name};EndpointSuffix=${environment().suffixes.storage};AccountKey=${toyManualsStorageAccount.listKeys().keys[0].value}' : ''

resource appServicePlan 'Microsoft.Web/serverfarms@2022-03-01' = {
  name: appServicePlanName
  location: location
  sku: environmentConfigurationMap[environmentType].appServicePlan.sku
}

resource appServiceApp 'Microsoft.Web/sites@2022-03-01' = {
  name: appServiceAppName
  location: location
  properties: {
    serverFarmId: appServicePlan.id
    httpsOnly: true
    siteConfig: {
      appSettings: [
        {
          name: 'ToyManualsStorageAccountConnectionString'
          value: toyManualsStorageAccountConnectionString
        }
      ]
    }
  }
}

resource toyManualsStorageAccount 'Microsoft.Storage/storageAccounts@2022-09-01' = if (deployToyManualsStorageAccount) {
  name: toyManualsStorageAccountName
  location: location
  kind: 'StorageV2'
  sku: environmentConfigurationMap[environmentType].toyManualsStorageAccount.sku
}
Save your changes to the file.
In the Visual Studio Code terminal, run this code to stage the changes, commit the changes, and push the changes to your repository:
git add deploy/main.bicep
git commit -m 'Add Bicep file'
git push
Replace the pipeline steps
Next, update your pipeline definition to deploy your Bicep file to Azure by using the service connection.
In Visual Studio Code, open the deploy/azure-pipelines.yml file.
Before the
jobs:line, addvariables:to define a variable nameddeploymentDefaultLocation:trigger: none pool: vmImage: ubuntu-latest variables: - name: deploymentDefaultLocation value: westus3 jobs:To remove the
scriptstep from the pipeline definition, delete the bottom two lines of the file.Tip
When you work in Visual Studio Code and have installed the Azure Pipelines extension, try using the Ctrl+Space key combination. It shows a context menu with suggested elements to add at your current cursor position.
At the bottom of the file, add a task that uses the
AzureResourceManagerTemplateDeploymenttask to deploy your Bicep file:jobs: - job: steps: - task: AzureResourceManagerTemplateDeployment@3 inputs: connectedServiceName: $(ServiceConnectionName) deploymentName: $(Build.BuildNumber) location: $(deploymentDefaultLocation) resourceGroupName: $(ResourceGroupName) csmFile: deploy/main.bicep overrideParameters: > -environmentType $(EnvironmentType) -deployToyManualsStorageAccount $(DeployToyManualsStorageAccount)Note
It's a good idea to type this code yourself instead of copying and pasting it from this module. Pay attention to the file's indentation. If your indentation isn't correct, your YAML file won't be valid. Visual Studio Code indicates errors by displaying squiggly lines.
This step uses a system variable,
$(Build.BuildNumber), to name the deployment. The variable can help you easily see which pipeline run a deployment corresponds to.The
locationtask property is required by theAzureResourceManagerTemplateDeploymenttask. It specifies the Azure region into which a resource group should be created. In this exercise, you already created a resource group and so the location you specify here doesn't matter. But you need to provide the value anyway. Here, you set it to the value of thedeploymentDefaultLocationvariable that you set in a previous step.Save your changes to the file. Your file should look like this example:
trigger: none pool: vmImage: ubuntu-latest variables: - name: deploymentDefaultLocation value: westus3 jobs: - job: steps: - task: AzureResourceManagerTemplateDeployment@3 inputs: connectedServiceName: $(ServiceConnectionName) deploymentName: $(Build.BuildNumber) location: $(deploymentDefaultLocation) resourceGroupName: $(ResourceGroupName) csmFile: deploy/main.bicep overrideParameters: > -environmentType $(EnvironmentType) -deployToyManualsStorageAccount $(DeployToyManualsStorageAccount)In the Visual Studio Code terminal, stage your changes, commit them to your repository, and push them to Azure Repos:
git add deploy/azure-pipelines.yml
git commit -m 'Add deployment task to pipeline'
git push
Add pipeline variables
In your browser, select Pipelines.
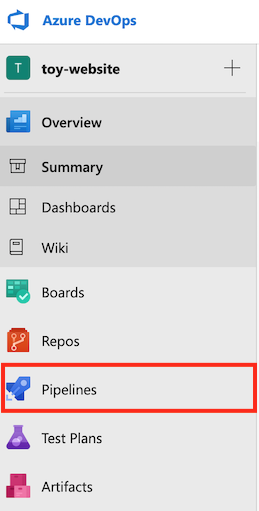
Select your pipeline.

Select Edit.

Select Variables.

Select New variable.
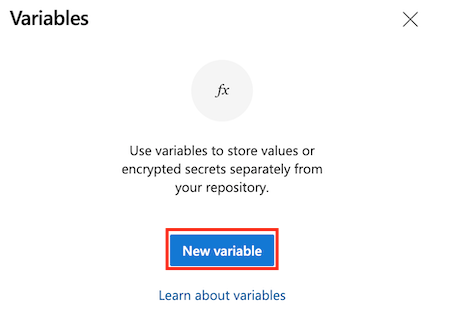
In Name, enter ServiceConnectionName. In Value, enter ToyWebsite.
Leave the checkboxes cleared, and select OK.
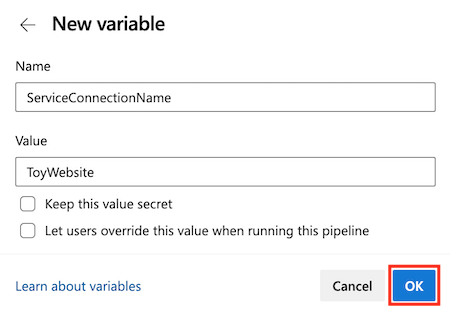
To create more variables, select +.

Create the following variables the same way you created the ServiceConnectionName variable:
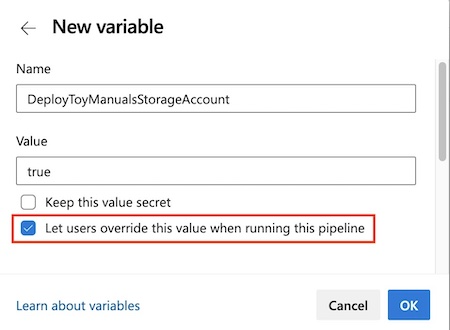
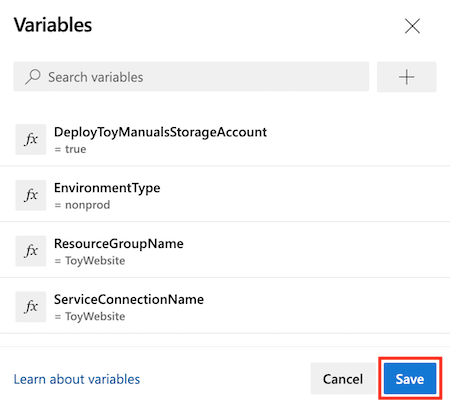
Variable name Value ResourceGroupName ToyWebsite EnvironmentType nonprod Complete the steps again to create a variable named DeployToyManualsStorageAccount, with a value of true. For this variable, select the Let users override this value when running this pipeline checkbox.
When you've created all four variables, select Save.
Run your pipeline
Now, you're ready to run your pipeline!
Your template includes a storage account, which your website team uses to store instruction manuals for toys. Because you're still testing your environment, you don't need to deploy the storage account every time you deploy the website. So, you created a Bicep parameter to control whether the storage account is deployed. Here, you run the pipeline and override the deployment so that it doesn't deploy the storage account this time.
Select Run.

The Run pipeline pane appears. On this pane, you can configure settings for this specific run of the pipeline.
Select Variables.
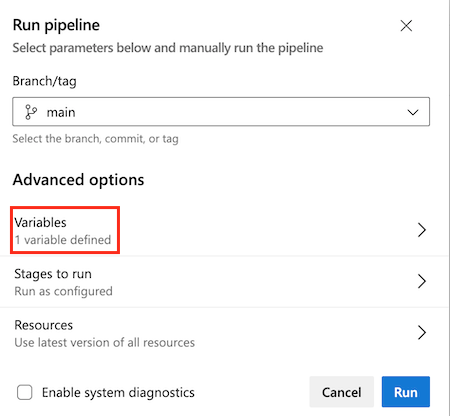
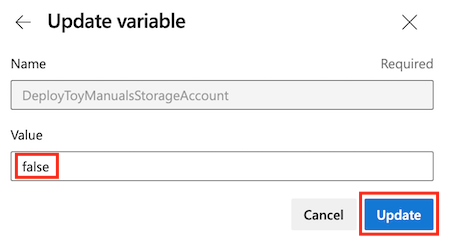
Select the DeployToyManualsStorageAccount variable and change its value to false. Then select Update.
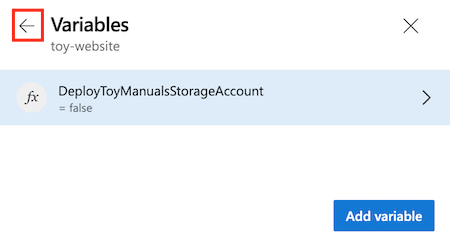
Select the back arrow.
To start a new pipeline run, select Run. The pipeline might take a few minutes to start. After the pipeline starts, the deployment might take a few minutes to finish.
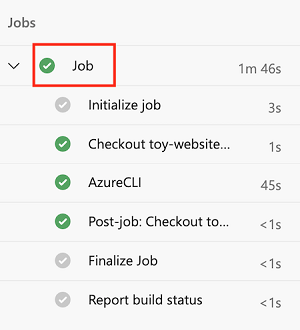
To open the job, in the Jobs section select Job. You can monitor the job as it runs, or you can wait until the job completes to review its history.
Wait for the job to finish.
Select Job.
Select 1 queue time variable used.
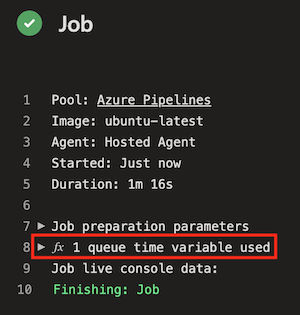
The overridden value for this pipeline run is shown. The
DeployToyManualsStorageAccountvariable's value is false because you overrode the original value.Inspect the rest of your pipeline output.
The pipeline shows a successful deployment.
Verify the deployment
Go to the Azure portal.
In the left menu, select Resource groups.
Select ToyWebsite.
In Overview, view the deployment status. You can see that one deployment succeeded.
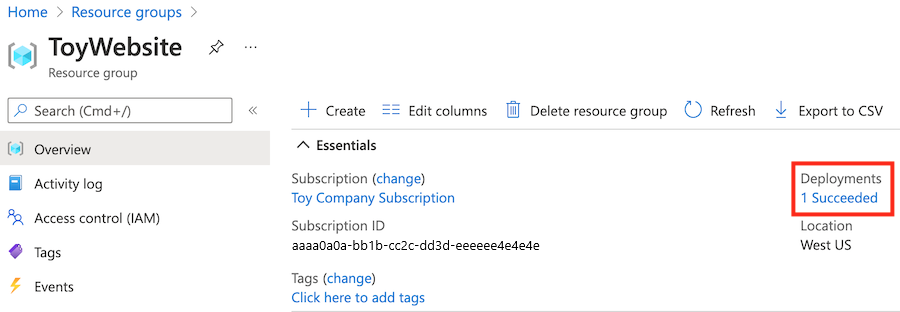
Select 1 Succeeded to see the details of the deployment.
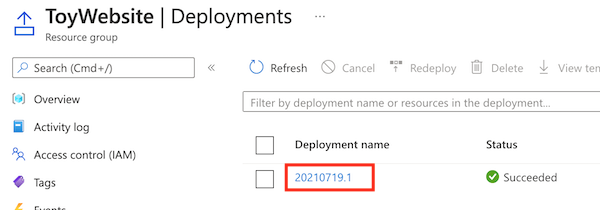
The deployment name is the same as the name of the pipeline run.
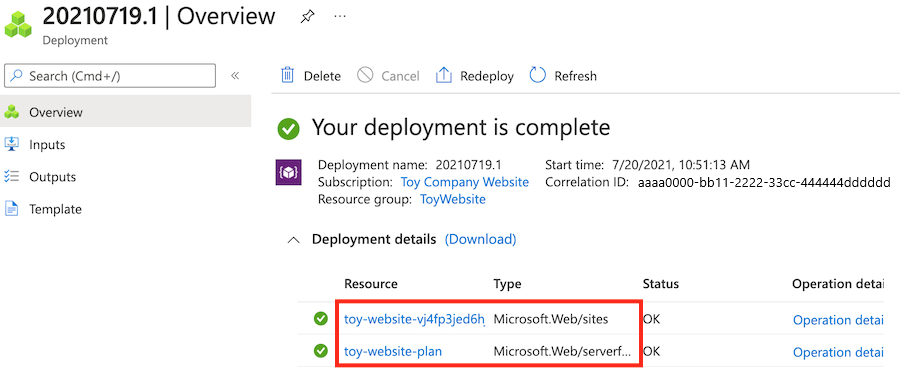
To see what resources were deployed, select the deployment. To expand the deployment to see more details, select Deployment details. In this case, there's an Azure App Service plan and an app.
