Exercise - Create a service connection
Before you can deploy your toy company's website by using a pipeline, you need to create a service connection for your pipeline to use. In this exercise, you'll:
- Create a resource group for your website.
- Create an Azure Pipelines service connection and configure it to access the resource group.
This exercise requires that you have permissions to create applications and service principals in your Microsoft Entra directory. If you can't meet this requirement with your current Azure account, you can get a free trial and create a new Azure subscription and tenant.
Important
The final exercise in this module contains important cleanup steps. Be sure to follow the cleanup steps even if you don't complete this module.
Sign in to Azure
To work with service principals in Azure, sign in to your Azure account from the Visual Studio Code terminal. Be sure that you've installed the Azure CLI tools.
In the Terminal menu, select New Terminal. The terminal window usually opens in the lower half of your screen.
The default shell is typically pwsh, as shown on the right side of the terminal window.

Select the Launch Profile dropdown list, and then select Azure Cloud Shell (Bash).
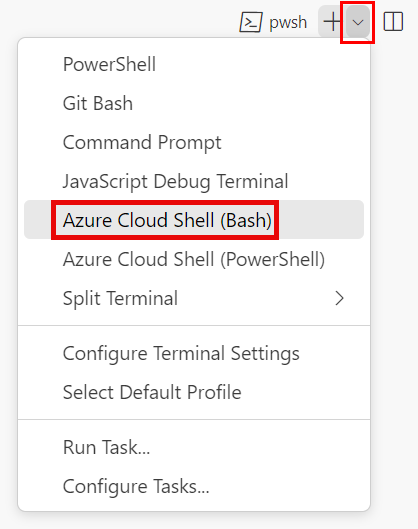
A new shell opens.
Sign in to Azure by using the Azure CLI
In the Visual Studio Code terminal, run the following command to sign in to Azure:
az loginIn the browser that opens, sign in to your Azure account.
To deploy this template to Azure, sign in to your Azure account from the Visual Studio Code terminal. Be sure that you've installed Azure PowerShell, and sign in to the same account that you used to activate the sandbox.
In the Terminal menu, select New Terminal. The terminal window usually opens in the lower half of your screen.
The default shell is typically pwsh, as shown on the right side of the terminal window.

Select the Launch Profile dropdown list, and then select Azure Cloud Shell (PowerShell).
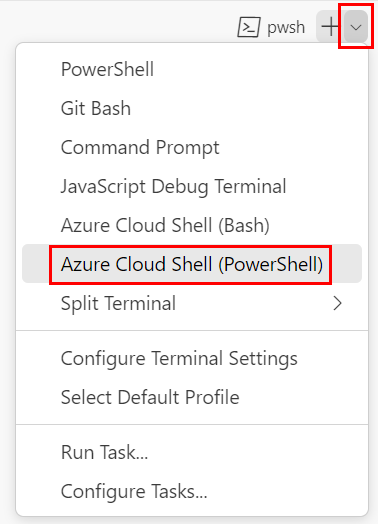
A new shell opens.
Sign in to Azure by using Azure PowerShell
In the Visual Studio Code terminal, run the following command to sign in to Azure:
Connect-AzAccountIn the browser that opens, sign in to your Azure account.
Create a resource group in Azure
To create a new resource group, run this Azure CLI command in the Visual Studio Code terminal:
az group create --name ToyWebsite --location westus3
To create a resource group, run this Azure PowerShell command in the Visual Studio Code terminal:
New-AzResourceGroup -Name ToyWebsite -Location westus3
Create a service connection in Azure Pipelines
Next, create a service connection in Azure Pipelines. This process automatically creates a service principal in Azure. It also grants the service principal the Contributor role on your resource group, which allows your pipeline to deploy to the resource group.
In your browser, select Project settings.

Select Service connections > Create service connection.
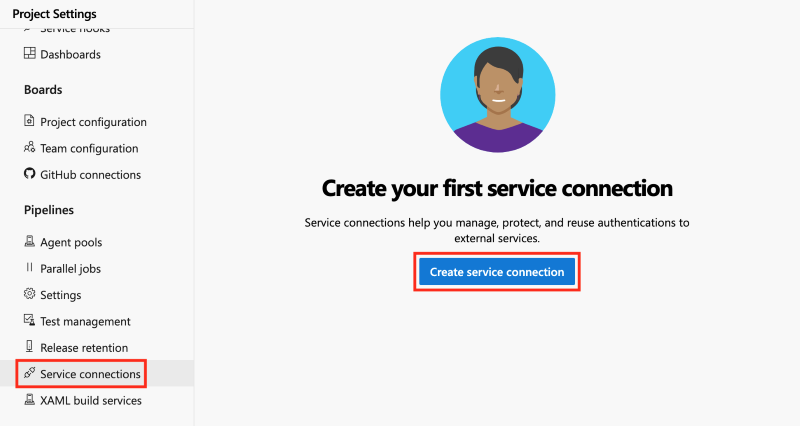
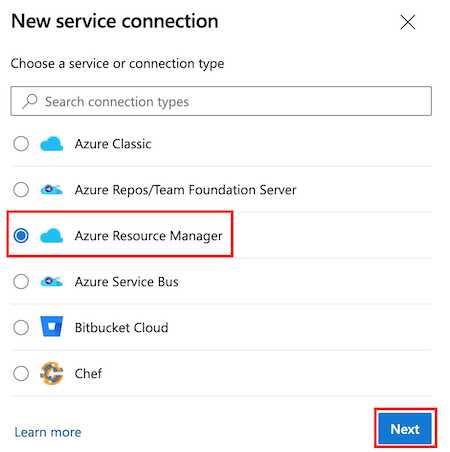
Select Azure Resource Manager > Next.
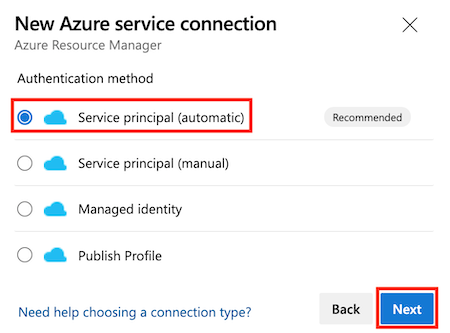
Select Service principal (automatic) > Next.
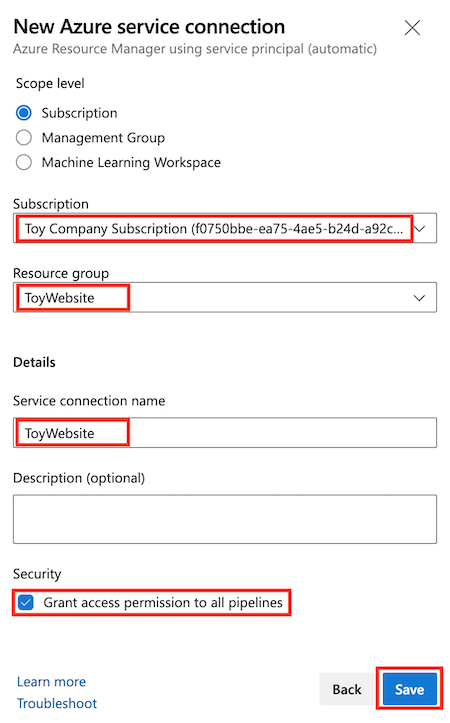
In the Subscription drop-down, select your Azure subscription.
A popup window might appear, asking you to sign in to Azure. If it does, enter your credentials and sign in.
In the Resource group drop-down, select ToyWebsite.
In Service connection name, enter ToyWebsite. Ensure that the Grant access permission to all pipelines checkbox is selected.
Tip
For simplicity, you're giving every pipeline access to your service connection. When you create real service connections that work with production resources, consider restricting access to only the pipelines that need them.
Select Save.
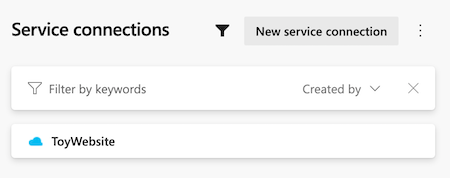
In Service connections, verify that your new service connection is shown in the list of service connections.
