Exercise - Create the AccidentTable and relationships
In this exercise, you build the main AccidentTable and build out the relationships with the other tables that you created previously.
On the main menu, select Tables.
Select New table > New table.
In the Properties section under Display name enter:
AccidentTable.Switch to the Primary column tab and under Display name enter:
AccidentId.Select Save.
Under the columns and data pane, find and select the AccidentId field and select Edit column.
Change Data type to Autonumber.
Select Save.
Create the AccidentDescription column. Select + (New column) in the columns and data pane.
In the New column pane on the right of the screen, enter/check the following information:
Display name -
AccidentDescriptionData type - Single line of text (default)
Required - Business required
Searchable - checked (default)
Select Save.
Add another new column with this information:
Display name -
AccidentDateData type - Date and time
Format - Date and time
Required - Business required
Searchable - checked (default)
Select Save.
Add another new column with the following information:
Display name -
ManagerCommentsData type - Single line of text (default)
Required - Optional (default)
Searchable - checked (default)
Save it to continue.
Create a yes/no choice column with this data:
Display name -
ManagerReviewedData type - Choice > Yes/no
Required - Optional (default)
Searchable - checked (default)
Choices - No or Yes (defaults)
Default choice - No
Save it. Now for the lookup columns.
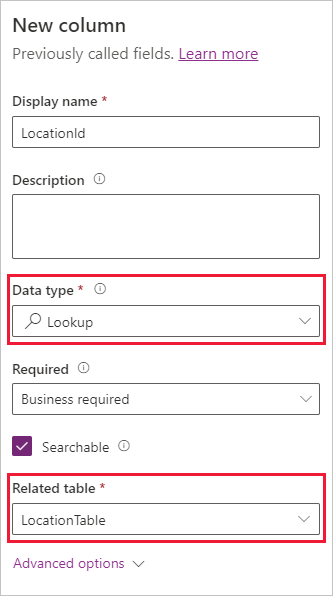
Create the LocationId lookup column.
Display name -
LocationIdData type - Lookup
Required - Business required
Searchable - checked (default)
Related table - LocationTable (enter
LocationTablein the search field and select it from the narrowed search list)Note
In the Related table dropdown menu, you select which table to look up values from. Selecting LocationTable that you created in the previous exercise will create a many-to-one relationship: many in the AccidentTable to one in the LocationTable.
After you have saved all changes, the relationships that you created in the table will be visible. Save the new column.
Create the AccidentTypeId lookup column.
Display name -
AccidentTypeIdData type - Lookup
Required - Business required
Searchable - checked (default)
Related table - TypeofAccidentTable (begin typing
TypeofAccidentTableand select it).
Save your new column.
Note
This selection will create a many-to-one relationship: many in the AccidentTable to one in the AccidentTypeTable.
Next, we create the many-to-many relationship:
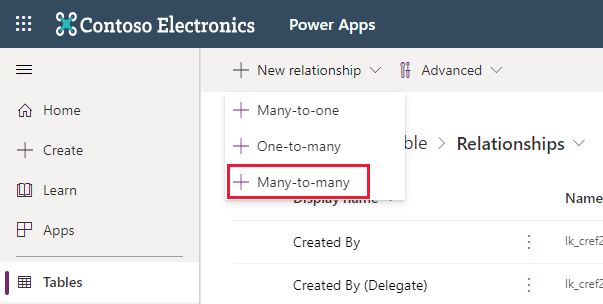
In the Schema pane in the top middle of the Tables screen, select Relationships.
Select New relationship from the command bar and then select + Many-to-many.
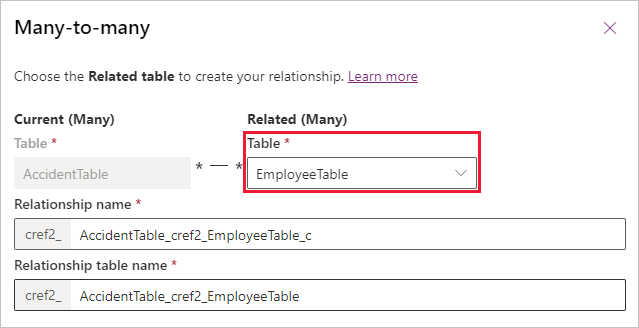
The Many-to-many pane appears on the right side of your screen. In the Related (Many) search field, enter
EmployeeTableand select the EmployeeTable that you created in the previous exercise.By default, Dataverse provides a Relationship name and a Relationship table name. You can choose to update and rename those default names. For this exercise, you can keep the default names.
When you're finished, select Done.
Your Relationships list shows the other relationships (Many-to-one) that were created when you added the lookup columns in the previous steps. You can filter the list by relationship type to change the view.
We've now created several tables and have related them together. As we continue to build our Accident Tracking app, in the next learning module, we'll work on Views and Forms for the tables we created in this module. Let's do a quick knowledge check before we continue!


