Configure Benefits management parameters
Before you can create benefit plans in Dynamics 365 Human Resources and enroll employees in them, you must configure the following parameters:
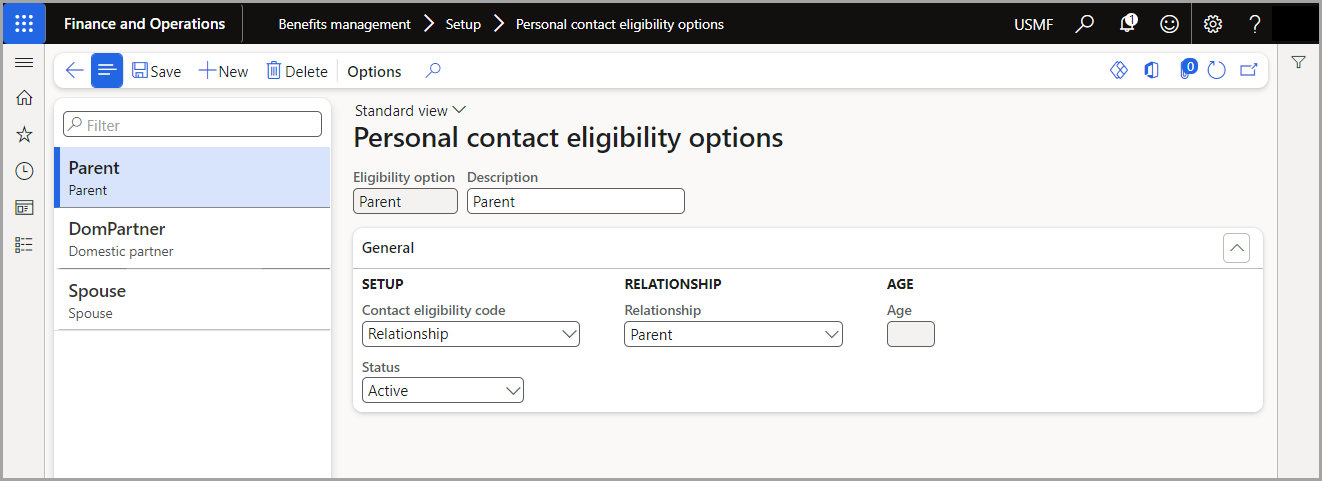
Personal contact eligibility options
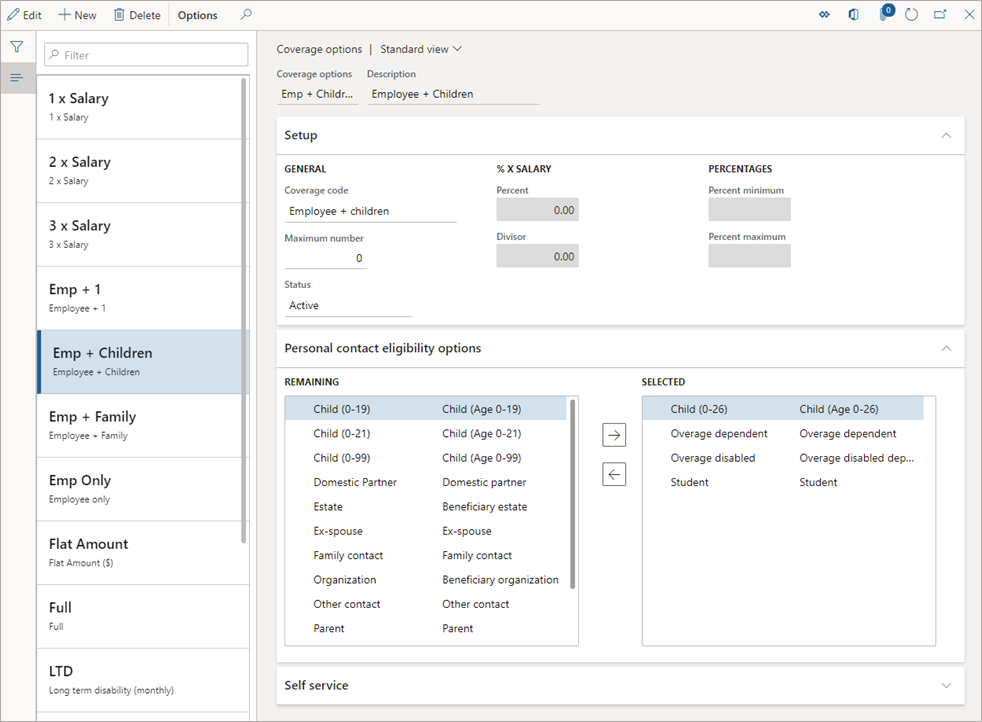
Coverage options for the plans
Plan types
Eligibility rules
Rates (including tier rates, if needed)
Deductions
Payment frequencies
Create personal contact eligibility options
Personal contacts are divided into two categories:
Dependents - Individuals who are covered under your plans.
Beneficiaries - Individuals or beneficiary organizations who benefit from your plans. Beneficiaries usually include students, spouses, children, or trusts.
You can configure personal contact eligibility options from the Benefits management module then selecting Setup > Personal contact eligibility options.
For more information, see Configure personal contact eligibility options.
Create coverage options for the plans
Coverage options indicate who should be covered or how much coverage is available. For example, for a medical plan, you might have the following options:
Employee only
Employee + 1
Family
For an insurance plan, you might offer life insurance coverage with the following options:
1 x Salary
2 x Salary
3 x Salary
You can configure coverage options from the Benefits management module, then Setup > Coverage options.
For more information, see Create coverage options.
Create plan types
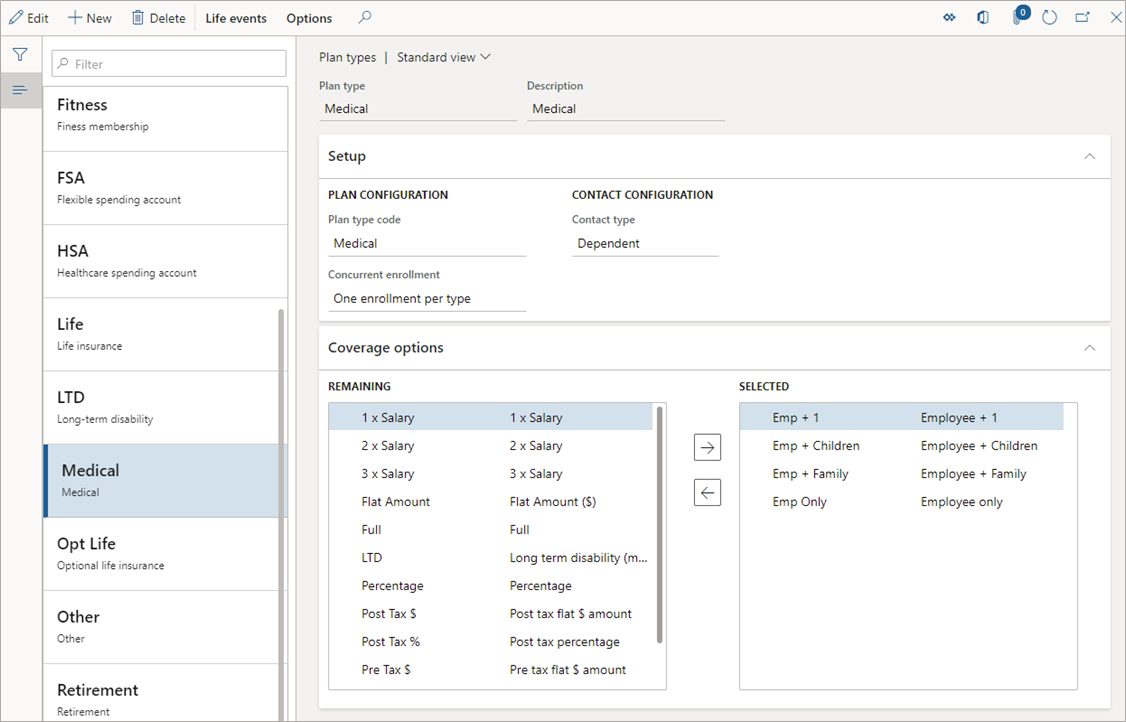
In the Benefits management workspace, under Setup, select Plan types. This page displays the types of plans that Human Resources supports. The following information on this page impacts the options that are available when you create a new benefit plan:
Plan type code - Impacts what displays on the Configuration tab when you set up the benefit plan.
Concurrent enrollment - Determines whether multiple enrollments are allowed. For Medical, you'd usually set Concurrent enrollment to One enrollment per type.
Contact type - Allows dependents or beneficiaries to be added to a plan. If you set Contact type to None, then employees who are enrolling in benefits can't select either a beneficiary or a dependent.
Coverage options - In this area, you will join the coverage options with the plan types. Coverage options define either the individuals who are covered by this plan type or the coverage amounts that are available for this plan type. For example, you might set a medical plan type to have coverage that is available to Employee only, Employee + 1, or Employee + Family.
For more information, see Create plan types.
Create eligibility rules
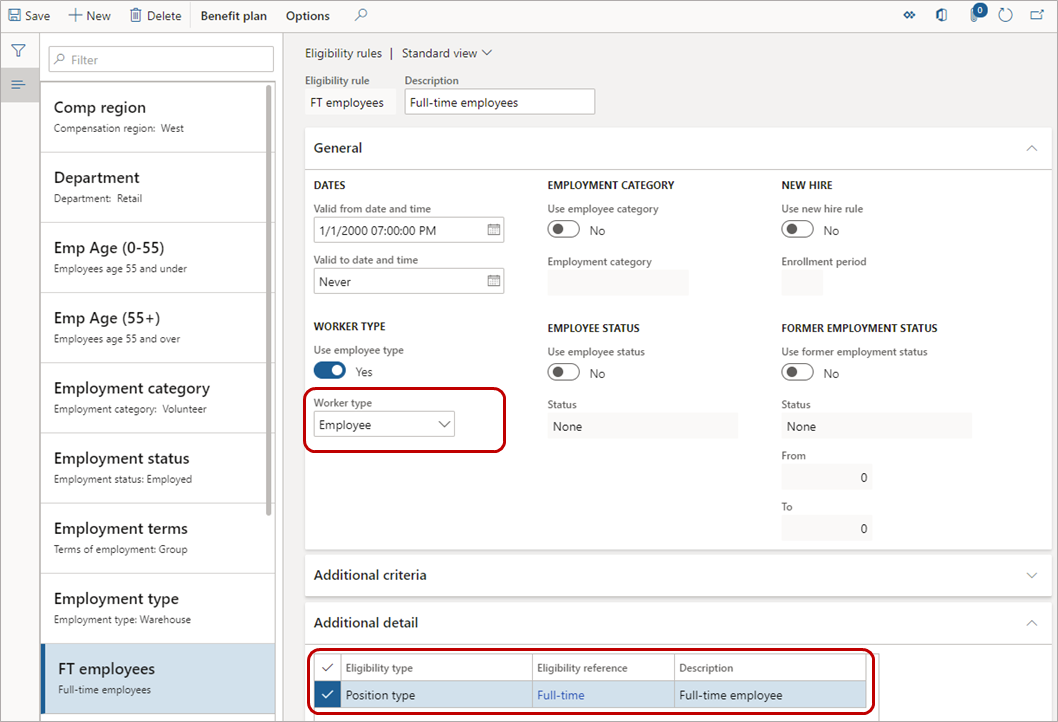
In the Benefits management workspace, under Setup, select Eligibility rules. Eligibility rules determine whether an employee is eligible for a plan. A benefit plan must have at least one eligibility rule associated with it.
You can associate multiple rules to a benefit. The employee needs to meet at least one rule to be eligible for the benefit.
For example, when you create a benefit plan later, you could apply two eligibility rules:
The first eligibility rule states that the Worker type must be Employee.
The second eligibility rule states that the Position type must be Full-time.
In this case, part-time employees who meet the first rule are eligible, even if they don't meet the criteria for the second rule.
If you want individuals to meet both criteria, you must set up a single eligibility rule that requires the individual to be both an employee and full-time, as illustrated in the following example.
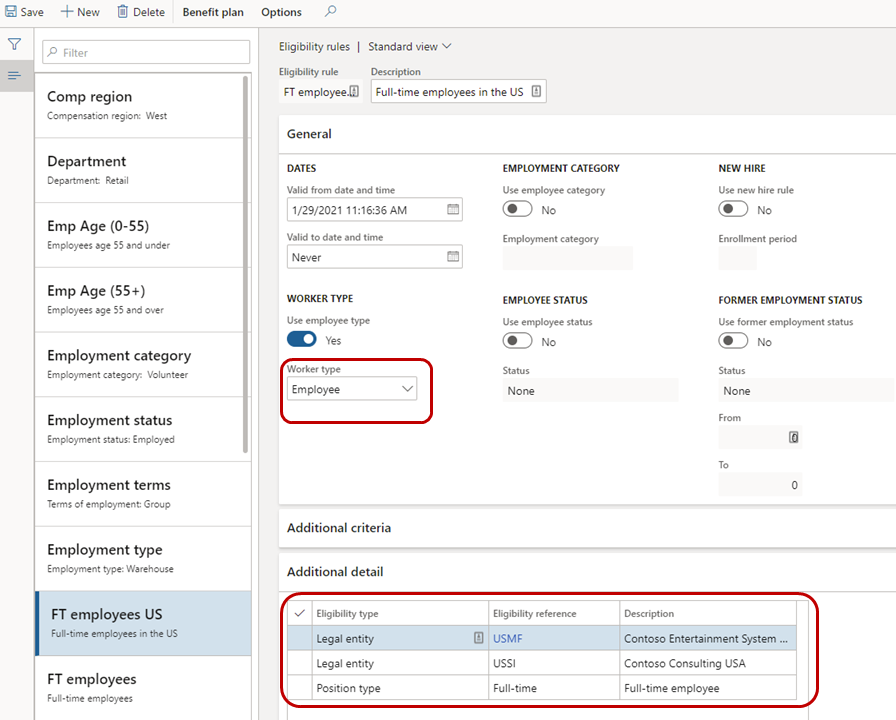
The following example shows that one more layer was added, so the eligibility rule applies to full-time employees in US-based companies. This eligibility rule includes the following settings:
Worker type is Employee
Position type is Full-time
Legal entity is USMF and USSI
Note
In this eligibility rule, the employee can be employed in USMF or USSI and meet the eligibility rule.
The order of eligibility rules is important. Place your most restrictive rules, such as those for new hires or rehires, first.
For more information, see Configure eligibility rules and options.
Create payment frequencies
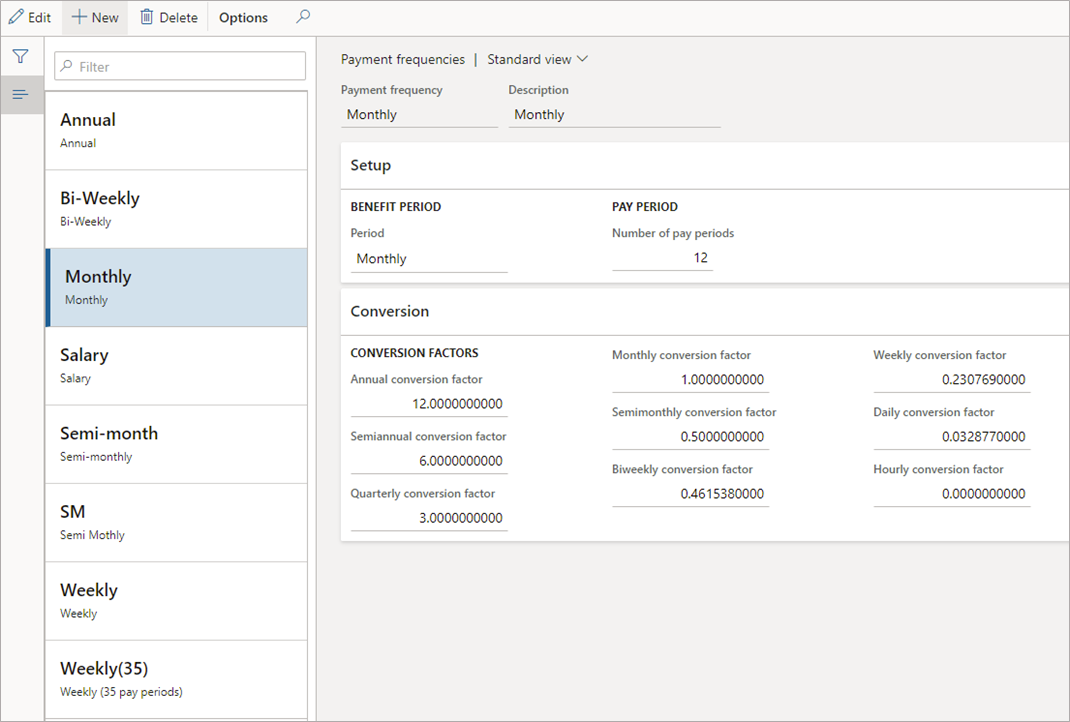
In the Benefits management module, under Setup, select Payment frequencies. You'll need to configure payment frequencies so that you can set rates for benefits. Payment frequencies help determine amounts that are owed by the employee and employer on a weekly, monthly, annual, or other rate that you set.
For more information, see Set up payment frequencies.
Create rates
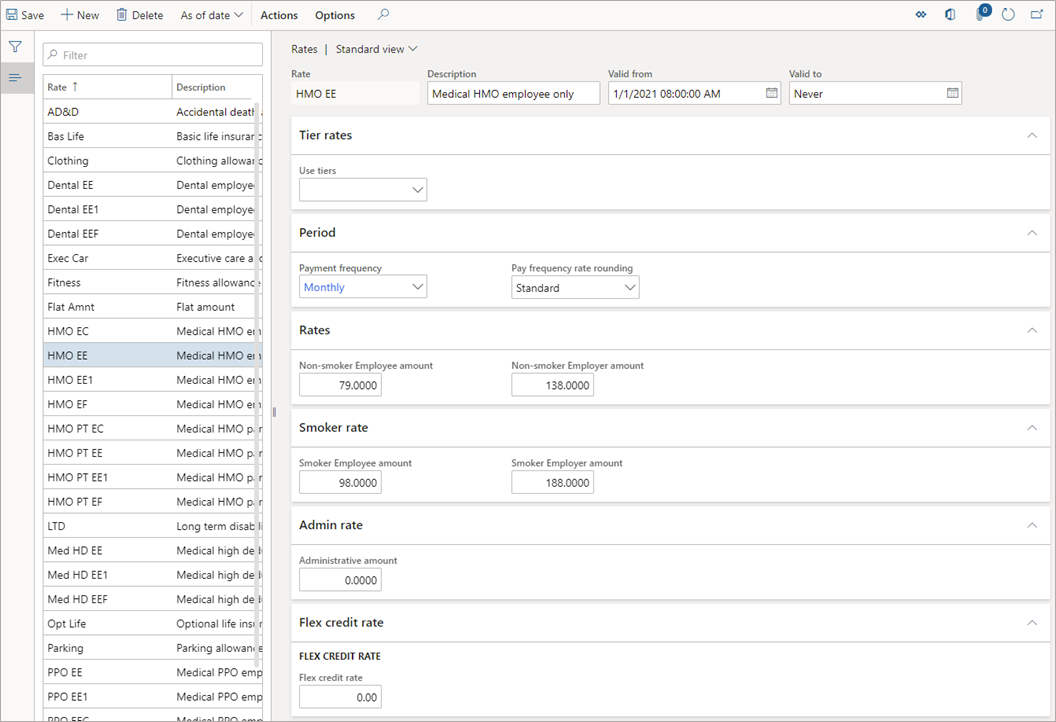
In the Benefits management module, under Setup, select Rates. Rates indicate how much a benefit costs either the employee or the employer.
Complete the following fields:
Valid from - This date should be on or before your benefit period. A good practice is to set this field to the date of your corresponding benefit plan.
Use tiers - Set this option if you need to include logic for determining a rate. For example, use tiers for a rate that increases based on age. If you have a flat rate that doesn't change, leave this field blank.
Set up tiers
If you set Use tiers to either Single tier or Double tier, select Actions at the top and then select Tier rates. Set the following fields on the Tier rates page:
Tier code - A user-defined field, often set as Tier 01, Tier 02, and so on. Putting a zero before a single-digit number ensures that tier codes remain in order when they're sorted alphabetically. For more information, see Set up tier codes.
Tier type - Select what you want to base your tier on.
Level - Enter an amount based on tier type. For example, for a rate that changes at ages 30, 60, and 90, set Tier type to Age. Enter 30 for the first level of your first tier. Then, create a new tier, select Age, and set Level to 60 to include anyone from age 30.01-60. Repeat those steps for the last tier.
Calculation type - Select from the following options:
Flat amount - Doesn't change.
Per $ amount of salary - The individual will pay based on income. For example, for every $10,000.00 USD of salary, an individual might pay $0.50.
Per $ amount of coverage - The individual will pay based on the amount of coverage. For example, for every $10,000.00 USD of insurance coverage, an individual might pay $0.50.
Rates - The amount that the employee and employer will pay for the benefit. If the employee record indicates that the employee is a smoker, then the Smoker rate will apply.
Note
The smoker indication is never shown to the employee.
For more information, see Set up tier rates.
Payment frequency - The payment frequency for the benefit provider. The rates that you enter in other sections on this page are based on the payment frequency that you set. For example, if you select Monthly and then set a rate of $100.00 USD, then the cost will be $100.00 USD each month. However, for employees who paid twice a month, the Employee self-service field will show that they'll pay $50.00 USD for that pay period.
Rates - The amount that the employee and employer will pay for the benefit. If the employee record indicates that the employee is a smoker, then the Smoker rate will apply.
Admin rate - Set this option if an amount is associated for managing the benefit.
Flex credit rate - If you're using flex credits, this field represents the flex credit cost of the benefit.
For more information, see Configure rates.
Create deductions
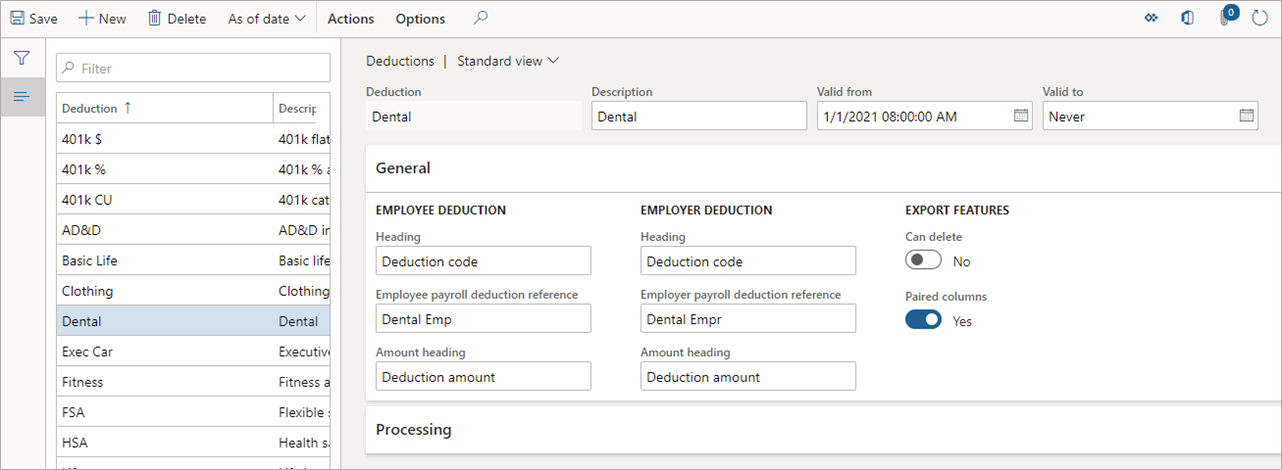
In the Benefits management module, under Setup, select Deductions. Deductions are the header information or codes that are passed into the payroll system to indicate the payroll deduction for the benefit. Set up deductions before creating benefit plans that will use them. It's good practice to set the Valid from field to be the same as your benefit plan date.
For more information, see Configure deductions.
