Manage meeting settings
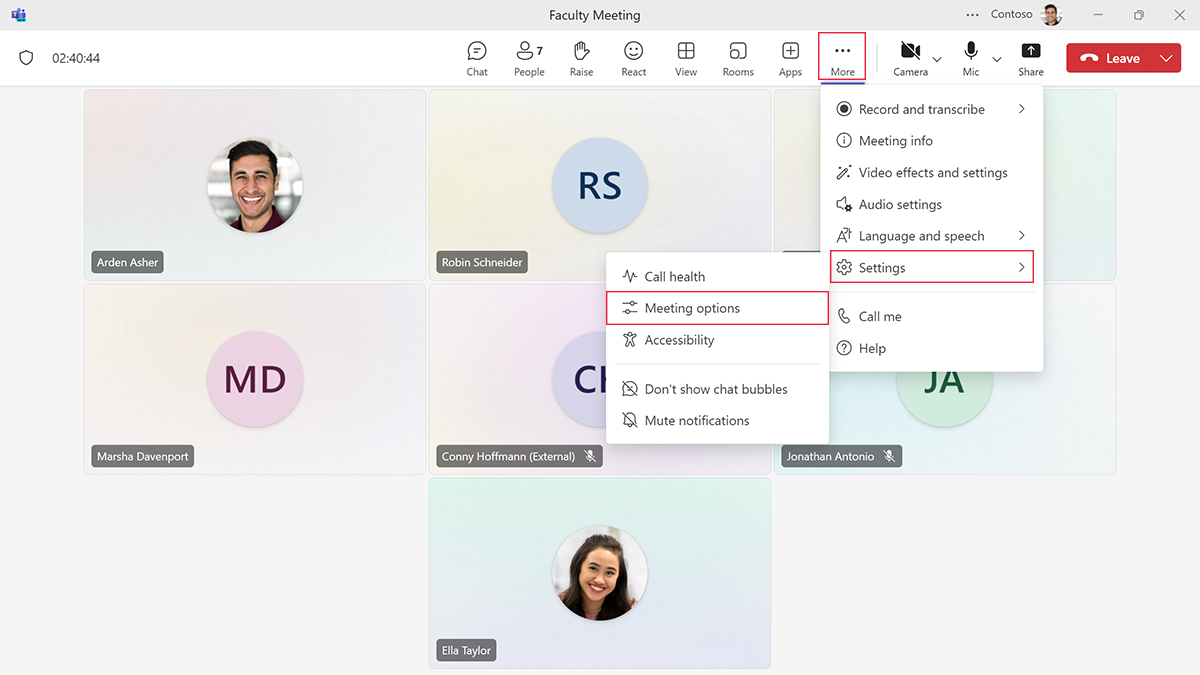
Microsoft Teams is always working to provide educators and learners ways to personalize and optimize their live and collaborative meeting experiences. While educators can manage meeting settings before the call in the meeting invitation, they can also manage them during the live call.
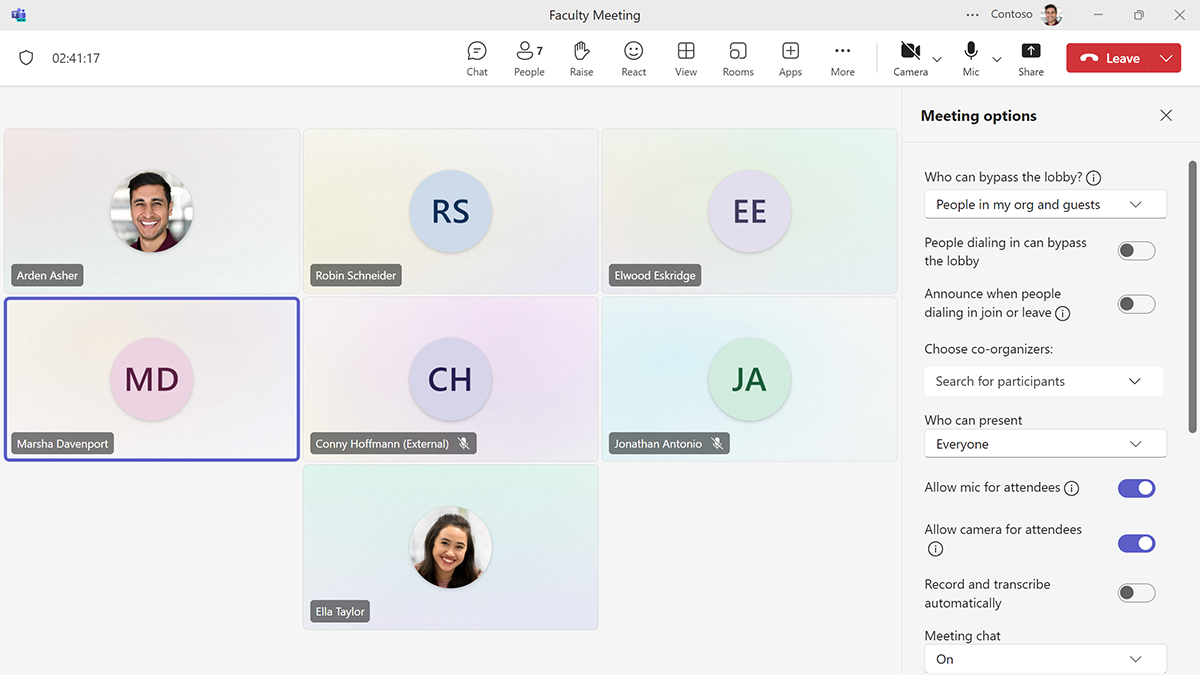
Within the meeting options, educators can:
- Require attendees to wait in the lobby while educators prepare for the call
- Prevent attendees from sharing their screens by setting who is a presenter
- Control attendees’ use of microphones and cameras
- Determine if attendees can use reactions
Mute attendees to focus on instruction
Once educators set permissions for meeting attendees, they can adjust them during the call. For example, circumstances dictate when it's the right time for learners to share audio or video.
During direct instruction, educators might want to mute the entire class, but they also have control to hard mute or unmute individual attendees. Educators can also disable a learner’s camera, which the learner can’t override. When the time is right for sharing, turn off these controls.
Educators can also:
- Adjust meeting roles by moving participants from attendee to presenter to allow them to share their screen
- Turn microphones and cameras back on to allow for questions, discussion, or collaboration
When the time comes to end the meeting, educators can control everyone’s departure. Select the Leave button and then End meeting to end the meeting for everyone.
With meeting options, educators have the flexibility to create dynamic virtual meetings that meet the needs of every call.


