Provision a shielded Linux virtual machine in the VMM fabric
This article describes how to deploy Linux shielded virtual machines (VMs) in System Center Virtual Machine Manager (VMM).
Procedure to shield a Linux VM
Windows Server 2016 introduced the concept of a shielded VM for Windows OS-based virtual machines. Shielded VMs provide protection against malicious administrator actions when the VM's data is at rest or when untrusted software is running on Hyper-V hosts. Learn more.
With Windows Server version 1709, Hyper-V introduced support for provisioning Linux shielded VMs.
Shield a Linux VM
- Create a signed template disk.
- Create a Linux shielded VM template in VMM.
- Generate a shielding data file (PDK).
- Create a Linux shielded VM by using the VM template and the PDK.
Note
If you use Wireless Application Protocol (WAP), you can provision Linux shielded VMs in the same way you provision Windows shielded VMs.
Prepare a template disk
Follow these steps to create the template disk.
In the Preparing a Linux Image section of the directions, before you install lsvmtools, install the VMM specialization agent.
Sign the template disk
Generate a certificate. You can use a self-signed certificate for testing.
Use the following sample cmdlet:
$cert = New-SelfSignedCertificate -DnsName '<<signing.contoso.com>>'Sign the disk by using a Windows Server 1709 or later machine. Use the following sample cmdlet:
Protect-TemplateDisk -Path "<<Path to the VHDX>>" -TemplateName "<<Template Name>>" -Version <<x.x.x.x>> -Certificate $cert -ProtectedTemplateTargetDiskType PreprocessedLinuxCopy the template disk and the signed image to the VMM library.
Create a Linux shielded VM template in VMM
In the VMM console library, select Create VM Template.
In Select Source, select Use an existing VM template. Browse to select the signed template disk that you added to the VMM library. Then, select Next.
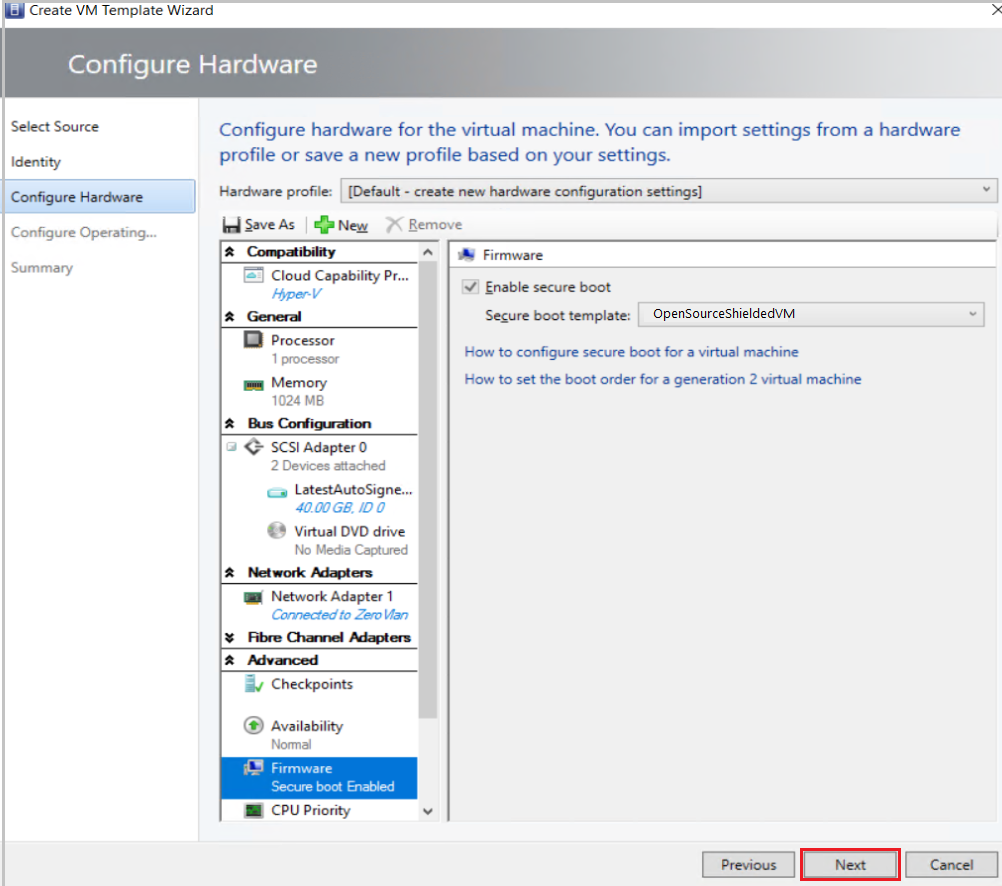
In Configure Hardware:
Under Firmware, select Enable secure boot. From the Secure boot template dropdown menu, select OpenSourceShieldedVM.
Note
This boot template is a new addition to RS3 hosts. If no RS3 hosts are in VMM, this option won't show up on the Secure boot template menu.
Select the required configuration for other hardware properties, such as processors, memory, and the VM network.

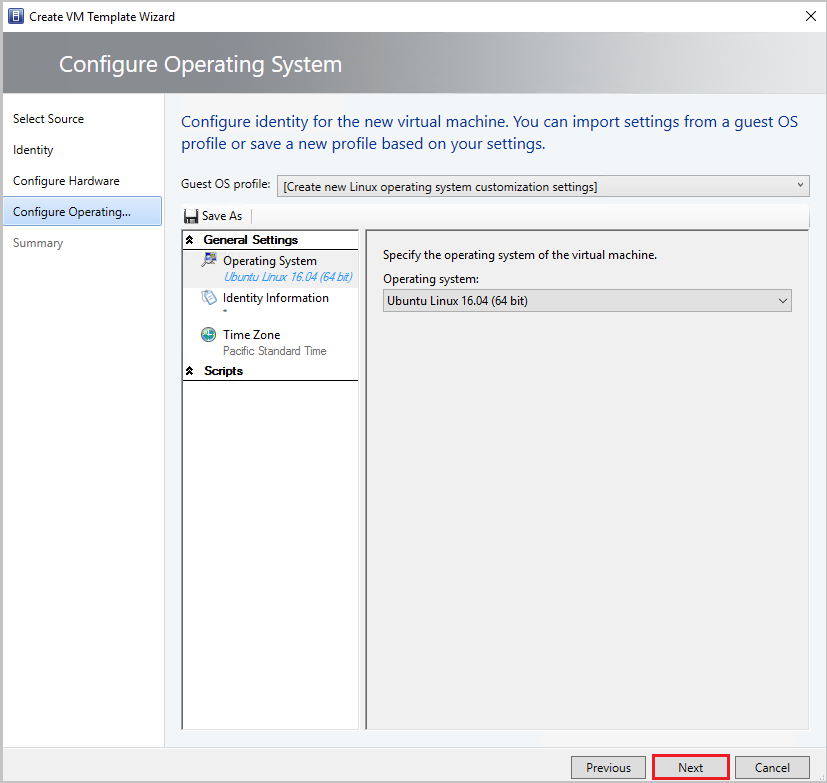
In Configure Operating System:
Select the Guest OS profile as [Create new Linux operating system customization settings].
Select the OS on the template disk that you created earlier (Ubuntu Linux).
Select Next.

In Summary, review the details and select Create to finish generation of Linux shielded VM template in VMM.
Generate the shielding data file
Before you generate the shielding data file (PDK):
- Get the guardian metadata from the Host Guardian Service (HGS).
- Extract the volume signature catalog (VSC) file.
To generate the PDK, run the following sample script on a server that's running Windows Server version 1709 or later:
# Create a VolumeSignatureCatalog file for the template disk to ensure that no one tampers with the template disk at the deployment time
# Create an owner certificate
$Owner = New-HgsGuardian –Name '<<Owner>>' –GenerateCertificates

# Import the HGS guardian
$Guardian = Import-HgsGuardian -Path <<Import the xml from pre-step 1>> -Name '<<Name of the guardian>>' –AllowUntrustedRoot

# Create the PDK file on a server running Windows Server version 1709

New-ShieldingDataFile -ShieldingDataFilePath '<<Shielding Data file path>>' -Owner $Owner –Guardian $guardian –VolumeIDQualifier (New-VolumeIDQualifier -VolumeSignatureCatalogFilePath '<<Path to the .vsc file generated in pre-step 2>>' -VersionRule Equals) -AnswerFile '<<Path to LinuxOsConfiguration.xml>>' -policy Shielded
Create a Linux shielded VM by using the VM template and the PDK
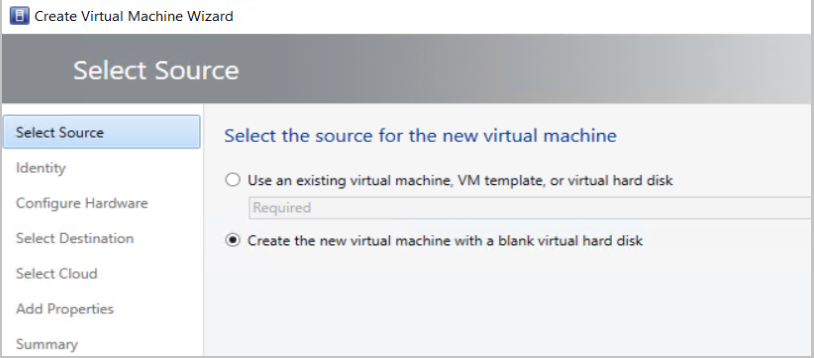
In the VMM console, select Create Virtual Machine.
Select Use an existing virtual machine, VM template, or virtual hard disk.
Select Linux shielded VM template > Next.

Name the VM and select Next.
In Configure Hardware, ensure that the details match your template settings. Then select Next.
In Configure Operating System settings, ensure the details conform to the settings you made when you created the template. Then select Next.
Select the shielding data file (PDK) that you created.
Select the destination host group, and then select Next.
Select the host by the rating that the VMM placement engine gave. Then select Next.
In Configure Settings, review the virtual machine settings and select Next.
Review the actions in Add properties and select Next.
To create the Linux shielded VM, select Create.
While provisioning the VM, the VMM specialization agent reads the Linux configuration file PDK and customizes the VM.
Next steps
- Get an overview of Guarded fabric and shielded VMs.
- Find out more about Linux shielded VM tools.