Note
Access to this page requires authorization. You can try signing in or changing directories.
Access to this page requires authorization. You can try changing directories.
Applies to:
SQL Server 2016 (13.x) Reporting Services and later
Power BI Report Server
You can view and manage the properties of a paginated report within the web portal. The web portal can launch you into Report Builder to create or edit paginated reports.
Create a paginated report
To create a new shared dataset, you can use the following steps.
Select new from the menu bar.
Select Paginated Report.
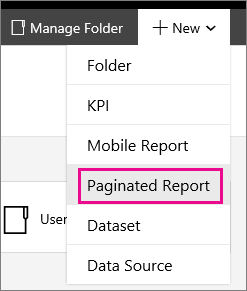
This action either launches Report Builder, or prompts you to download it.
Build your report and then select the save icon in the upper left to save the paginated report back to the report server.
Manage an existing paginated report
To manage an existing paginated report, you use the following steps.
Note
If you don't see paginated reports in the folder, make sure you are viewing paginated reports. You can select View from the menu bar in the upper right of the web portal. Make sure Paginated Reports is checked.
Select the ellipsis (...) for the dataset you want to manage.
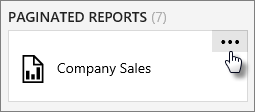
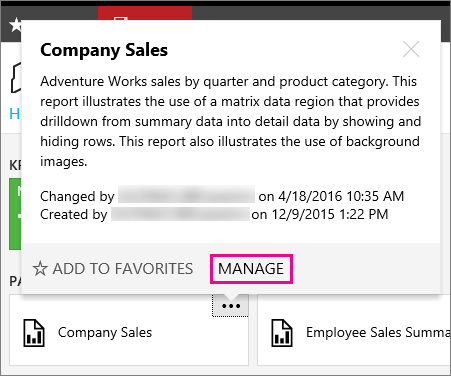
Select Manage which takes you to the edit screen.
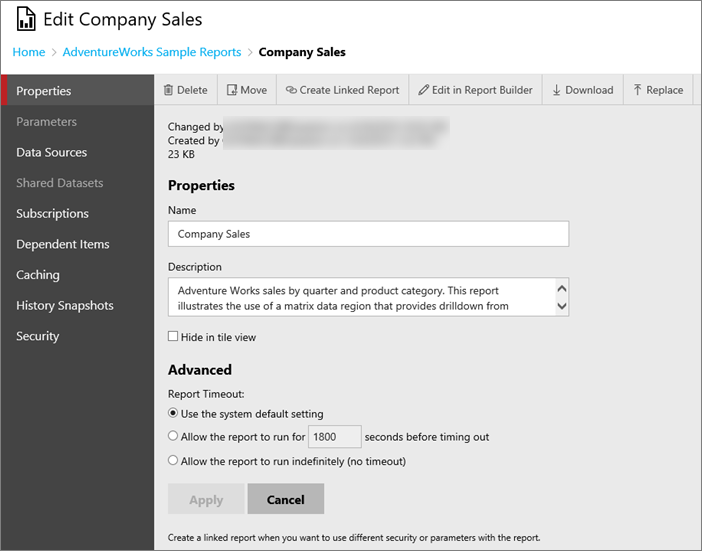
Properties
On the properties screen, you can change the name and description for the paginated report. You can also Delete, Move, Create Linked Report, Edit in Report Builder, Download or replace.
Parameters
You can modify existing parameters of a paginated report. To add a new parameter, you must edit the report in Report Builder or SQL Server Data Tools.

Data source
You can point to a shared data source, or enter connection information for a custom data source.
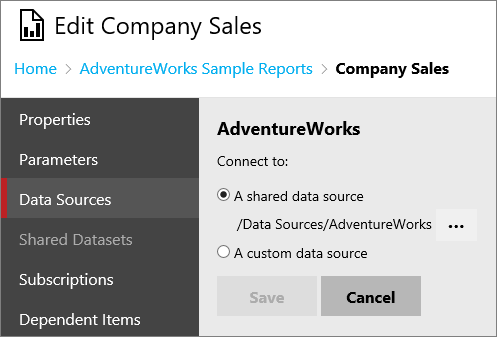
The following options are used to specify a custom data source.
Type
Specify a data processing extension that is used to process data from the data source. For a list of built-in data extensions, see [Data Sources Supported by Reporting Services (SSRS)]. Other data processing extensions might be available from other vendors.
Connection string
Specify the connection string that the report server uses to connect to the data source. The connection type determines the syntax you should use. For example, a connection string for the XML data processing extension is a URL to an XML document. In most cases, a typical connection string specifies the database server and a data file. The following example illustrates a connection string used to connect to a SQL Server database that is named MyData:
data source=(a SQL Server instance);initial catalog=MyData
A connection string can be configured as an expression so that you can specify the data source at run time. Data source expressions are defined in the report in Report Designer. Data source expressions can't be defined, viewed, or modified in the web portal. However, you can replace a data source expression by selecting Override Default to enter in a static connection string. If you want to switch back to the expression, select Revert to Default. The report server stores the original connection string in case you need to restore it. To use data source expressions, you must use the data source connection information that was originally published in the report. Shared data sources don't support the use of expressions in the connection string.
Credentials
You can specify the option that determines how credentials are obtained.
Important
If credentials are provided in the connection string, the options and values provided in this section are ignored. Note that if you specify credentials on the connection string, the values are displayed in clear text to all users who view this page.
As the user viewing the report
Use the Windows credentials of the current user to access the data source. Select this option when the credentials that are used to access a data source are the same as the ones used to sign into the network domain. This option works best when Kerberos authentication is enabled for your domain, or when the data source is on the same computer as the report server. If Kerberos isn't enabled, Windows credentials can't be passed to another service, or remote machine. If more computer connections are required, you get an error instead of the data you expect.
A report server administrator can disable the use of Windows integrated security for accessing report data sources. If this value is grayed out, the feature isn't available.
Don't use this option if you plan to schedule or subscribe to this report. Scheduled or unattended report processing requires credentials that can be obtained without user input or the security context of a current user. Only stored credentials provide this capability. For this reason, the report server prevents you from scheduling report or subscription processing if the report is configured for the Windows integrated security credential type. If you choose this option for a report that is already subscribed to or that has scheduled operations, the subscriptions and scheduled operations stop.
Using these credentials
Store an encrypted user name and password in the report server database. Select this option to run a report unattended (for example, reports initiated by schedules or events instead of user action).
You can also choose the type of credential to use. Either Windows authentication (Windows user name and password), or a specific database credential (Database user name and password) such as SQL authentication.
If the account is a Windows credential, the account you specify must have sign-in locally permissions on the computer that hosts the data source used by the report.
Select Log in using these credentials, but then try to impersonate the user viewing the report to allow delegation of credentials, but only if a data source supports impersonation. For SQL Server databases, this option sets the SETUSER function. For Analysis Services, this uses EffectiveUserName.
By Prompting the user viewing the report for credentials
Each user must enter in a user name and password to access the data source. You can define the prompt text that requests user credentials. For example, "Enter a user name and password to access the data source."
You can also choose the type of credential to use. Either Windows authentication (Windows user name and password), or a specific database credential (Database user name and password) such as SQL authentication.
Without any credentials
This method allows you to not provide any credentials for the data source. If a data source requires a user sign-in, choosing this option has no effect. You should only choose this option if the data source connection doesn't require user credentials.
To use this option, you must configure the unattended execution account for your report server. The unattended execution account is used to connect to external data sources when other courses of credentials aren't available. If you specify this option and the account isn't configured, the connection to the report data source fails and report processing doesn't occur. For more information about this account, see Configure the unattended execution account (Report Server Configuration Manager).
Subscriptions
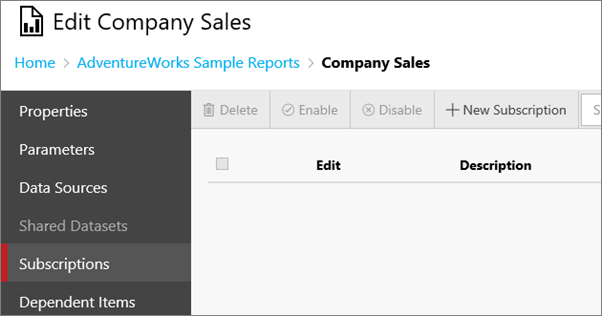
A Reporting Services subscription is a configuration that delivers a report at a specific time or in response to an event, and in a file format that you specify. For example, every Wednesday, save the MonthlySales.rdl report as a Microsoft Word document to a file share. Subscriptions can be used to schedule and automate the delivery of a report and with a specific set of report parameter values. For more information, see Work with subscriptions (web portal).
Dependent items
Use the Dependent Items page to view a list of items that are referencing this report. The icon for each item type indicates what it is. You can then select the ellipsis (...) on each item to manage those items further.
Cache
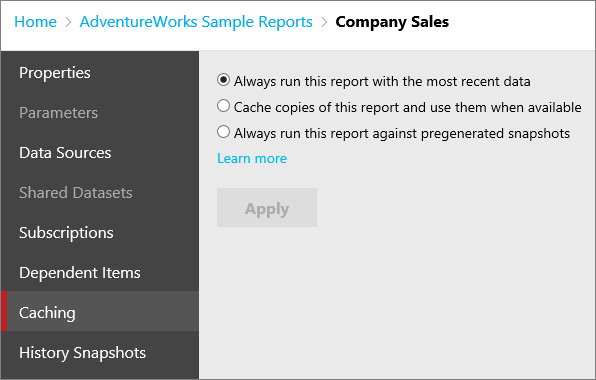
You have options when it comes to caching data for a paginated report. You start off with a simple selection.
Always run this report with the most recent data issues queries to the data source every time you run the report. This results in an on-demand report that contains the most up-to-date data. A new instance of the report will be created each time the report is opened which will contain the results of a new query. With this approach, if 10 users open the report at the same time, 10 queries are sent to the data source for processing.
Cache copies of this report and use them when available places a temporary copy of the data in a cache for later use. Caching usually improves performance because the data is returned from the cache instead of running the dataset query again. With this approach, if 10 users open the report, only the first request results a query to the data source. The report is then cached, and the remaining nine users view the cached report.
Always run this report against pregenerated snapshots caches the report layout and data for a given time period. You can run a report as a report snapshot to prevent the report from being run at arbitrary times (for example, during a scheduled backup). The snapshot can be refreshed on a schedule. [Learn more]
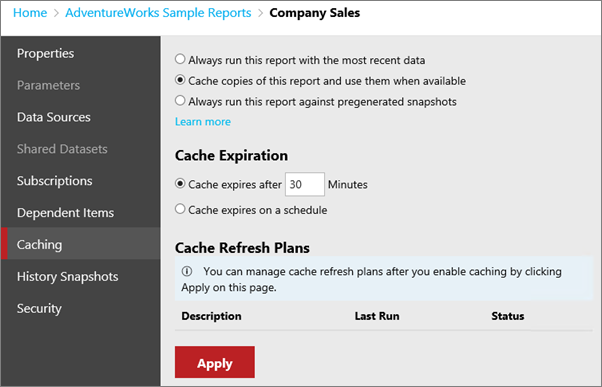
Selecting Cache Copies of this report and use them when available presents you with some more options.
For more information, see Work with snapshots (web portal).
Cache expiration
You can control whether you want to expire the cache, for the paginated report, after a certain amount of time, or if you would prefer to do that on a schedule. You can use a shared schedule.
Note
This does not refresh the cache.
Cache Refresh Plans
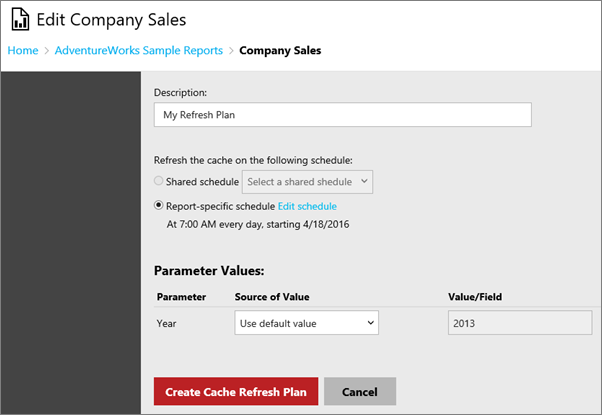
You can use Cache Refresh Plans to create schedules for preloading the cache with temporary copies of data for a paginated report. A refresh plan includes a schedule and the option to specify or override values for parameters. You can't override values for parameters that are marked read-only. You can create and use more than one refresh plan.
Default role assignments that enable you to add, delete, and change paginated reports for cache refresh plans are Content Manager, My Reports, and Publisher.
After you apply the cache option mentioned previously, you can then define a cache refresh plan. To do that, select the Manage Refresh Plans link that appears after you apply the cache settings. This link takes you to the cache refresh plan page.
To create a new cache refresh plan, select New Cache Refresh Plan. You can then enter a name for the plan and specify a schedule. If the dataset has parameters defined, you see those parameters listed and be able to provide values unless they're marked as read-only.
Once you're done, you can select Create Cache Refresh Plan.
Note
SQL Server Agent needs to be running to create a cache refresh plan.
You can then Edit or Delete plans that are listed. The New From Existing option is enabled when one, and only one, cache refresh plan is selected. This option creates a new refresh plan that is copied from the original plan. The cache refresh plan page opens prepopulated with details from the plan that was selected. You can then modify the refresh plan options and save the plan with a new description.
History snapshots
Use the History Snapshots page to view report snapshots that are generated and stored over time. Depending on options that are set, report history might contain only the more recent snapshots.
Report history is always viewed within the context of the report from which it originates. You can't view the history of all reports on a report server in one place.
To generate a snapshot, the report must be able to run unattended (that is, it must use stored credentials; parameterized reports must contain default parameter values for all parameters). Snapshots can be generated manually or as a scheduled operation.
You can select a report history snapshot to view it. Snapshots that appear in report history are distinguished only by the date and time at which they were created. There's no visual indication to distinguish whether a snapshot was generated in response to a schedule or a manual operation.
Security
Use the Security properties page to view or modify the security settings that determine access to the report. This page is available for items that you have permission to secure.
Access to items is defined through role assignments that specify the tasks that a group or user can perform. A role assignment consists of one user or group name and one or more role definitions that specify a collection of tasks.
Edit Item Security
Select to change how security is defined for the current item.