Note
Access to this page requires authorization. You can try signing in or changing directories.
Access to this page requires authorization. You can try changing directories.
Learn how to package and deploy a workflow in SharePoint with SharePoint Designer 2013.
Note
SharePoint 2010 workflows have been retired since August 1, 2020 for new tenants and removed from existing tenants on November 1, 2020. If you’re using SharePoint 2010 workflows, we recommend migrating to Power Automate or other supported solutions. For more info, see SharePoint 2010 workflow retirement.
Overview of the workflow packaging capabilities of SharePoint Designer 2013
SharePoint Designer 2013 provides the capability to save a workflow as a template. Saving a workflow as a template is also known as packaging the workflow. After the workflow is saved as a template, it can then be imported into other SharePoint environments and used without the need to redevelop the workflow. Not all workflow types can be saved as a template. The following matrix shows the workflow types that can be saved as a template.
Support, by platform, for saving a workflow as a template
| Workflow type | SharePoint 2010 Workflow platform | SharePoint Workflow platform |
|---|---|---|
| List Workflow |
No |
Yes |
| Site Workflow |
No |
Yes |
| Reusable Workflow |
Yes |
Yes |
Note
SharePoint contains two different workflow platforms: the SharePoint 2010 Workflow platform and the SharePoint Workflow platform. Both platforms are available in SharePoint. For more information about the two workflow, see Getting started with SharePoint workflow.
Packaging a workflow by using SharePoint Designer 2013
The process for packaging a workflow involves saving the workflow to a template file by using SharePoint Designer 2013. A workflow package is in the form of a Web Solution Package (WSP) file and has a .wsp extension. To package a workflow follow these steps.
Package a workflow
Open an existing workflow, or develop a new workflow, in SharePoint Designer 2013.
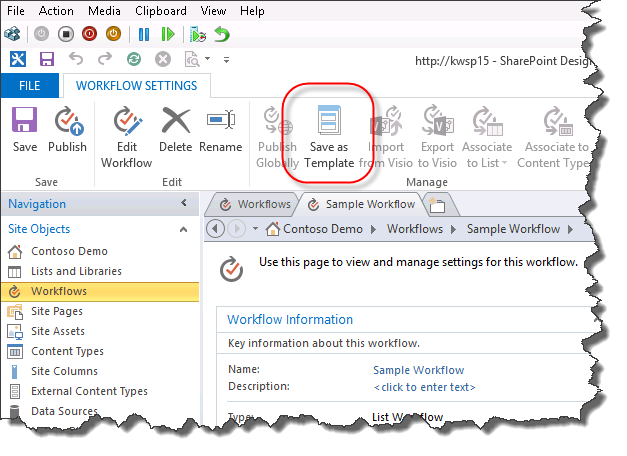
On the Workflow Settings tab in the ribbon, click the Save as Template button in the Manage section as shown in the figure.
Figure: Save workflow as template
An informational dialog box appears to let you know the template has been saved to the Site Assets library.
Click the Site Assets library to view the workflow template as shown in the figure.
Figure: A workflow template in Site Assets
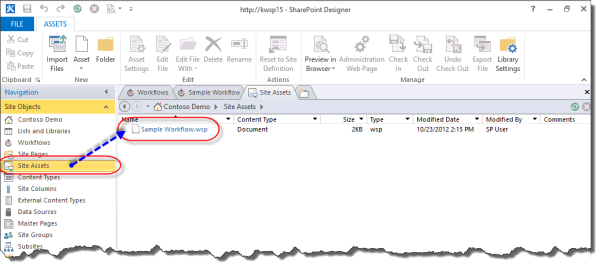
Tip: A workflow template automatically saves to the Site Assets library of the site collection in which the workflow resides.
Deploying a workflow package to SharePoint
You can deploy a workflow package to a SharePoint farm or site that is different from the farm or site in which it was developed. In order for a workflow deployment to be successful two items must be fulfilled:
All workflow dependencies such as lists, libraries, columns, and content types must already exist on the new site.
Each dependency must have the exact name of the source dependency.
If a workflow is deployed and the exact dependencies do not exist then the result will be an error.
Before you can deploy a workflow you must first export the workflow template from the source SharePoint farm. To export a workflow template, follow this procedure.
Export a workflow template
Open SharePoint Designer 2013 and navigate to the Site Assets library where the template is located.
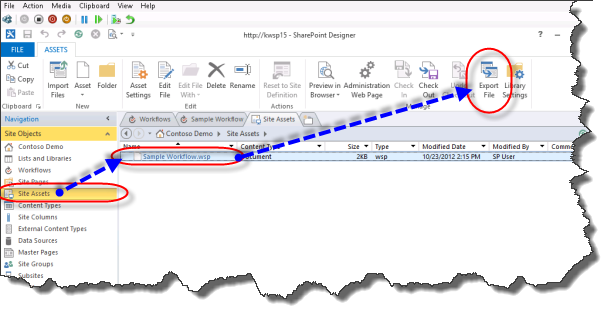
Select the workflow template you want to export by clicking it.
Click the Export File button to save the template file to your local computer or a network drive, as shown in the figure.
Figure: Export workflow template from SharePoint Designer 2013
To deploy a workflow package follow this procedure.
Deploy a workflow solution
Open Internet Explorer and navigate to the SharePoint site collection where you want to deploy the workflow.
Click Site Actions and select Site Settings.
In the Web Design Galleries section click Solutions.
Note
You must be on the Site Settings page for the site collection in order to see the Solutions gallery. If you are on the Site Settings page for a sub-site then the Solutions gallery is not visible.
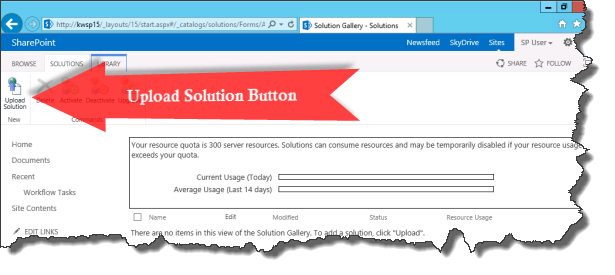
Click the Upload Solution button to upload the solution as shown in the figure.
Figure: Upload Solution button
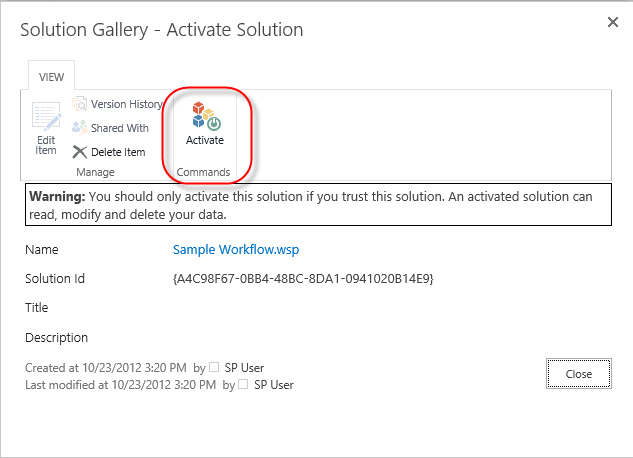
Activate the solution by clicking the Activate button as shown in the figure.
Figure: Activate Solution dialog and button
After a workflow solution has been activated for a site collection, it is available as a feature for all sub-sites. To activate the workflow feature for a sub-site, follow this procedure.
Activate the workflow feature
Open Site Settings on the site where you wish to activate the workflow feature.
In the Site Actions group, click Manage site features.
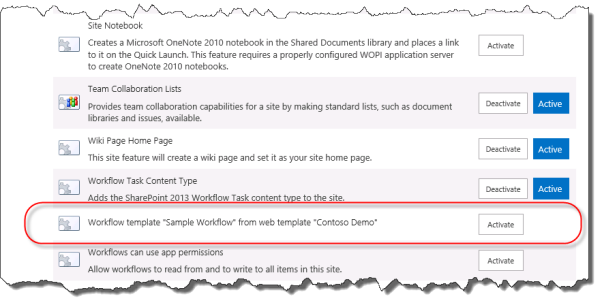
Click Activate next to the workflow feature as shown in the figure.
Figure: Activate workflow feature for site
