Creating User Interface Objects in Xamarin.iOS
Apple groups related pieces of functionality into “frameworks” which equate to Xamarin.iOS namespaces. UIKit is the
namespace that contains all the user interface controls for iOS.
Whenever your code needs to reference a user interface control, such as a label or button, remember to include the following using statement:
using UIKit;
All the controls discussed in this chapter are in the UIKit namespace, and each user control class name has the UI prefix.
You can edit UI controls and layouts in three ways:
- Xamarin iOS Designer – Use Xamarin’s built-in layout designer to design screens. Double-click storyboard or XIB files to edit with the built-in designer.
- Xcode Interface Builder – Drag controls onto your screen layouts with Interface Builder. Open the storyboard or XIB file in Xcode by right-clicking the file in the Solution Pad and choosing Open With > Xcode Interface Builder.
- Using C# – Controls can also be programmatically constructed with code and added to the view hierarchy.
New Storyboard and XIB files can be added by right-clicking on an iOS project and choosing Add > New File....
Whichever method you use, control properties and events can still be manipulated with C# in your application logic.
Using Xamarin iOS Designer
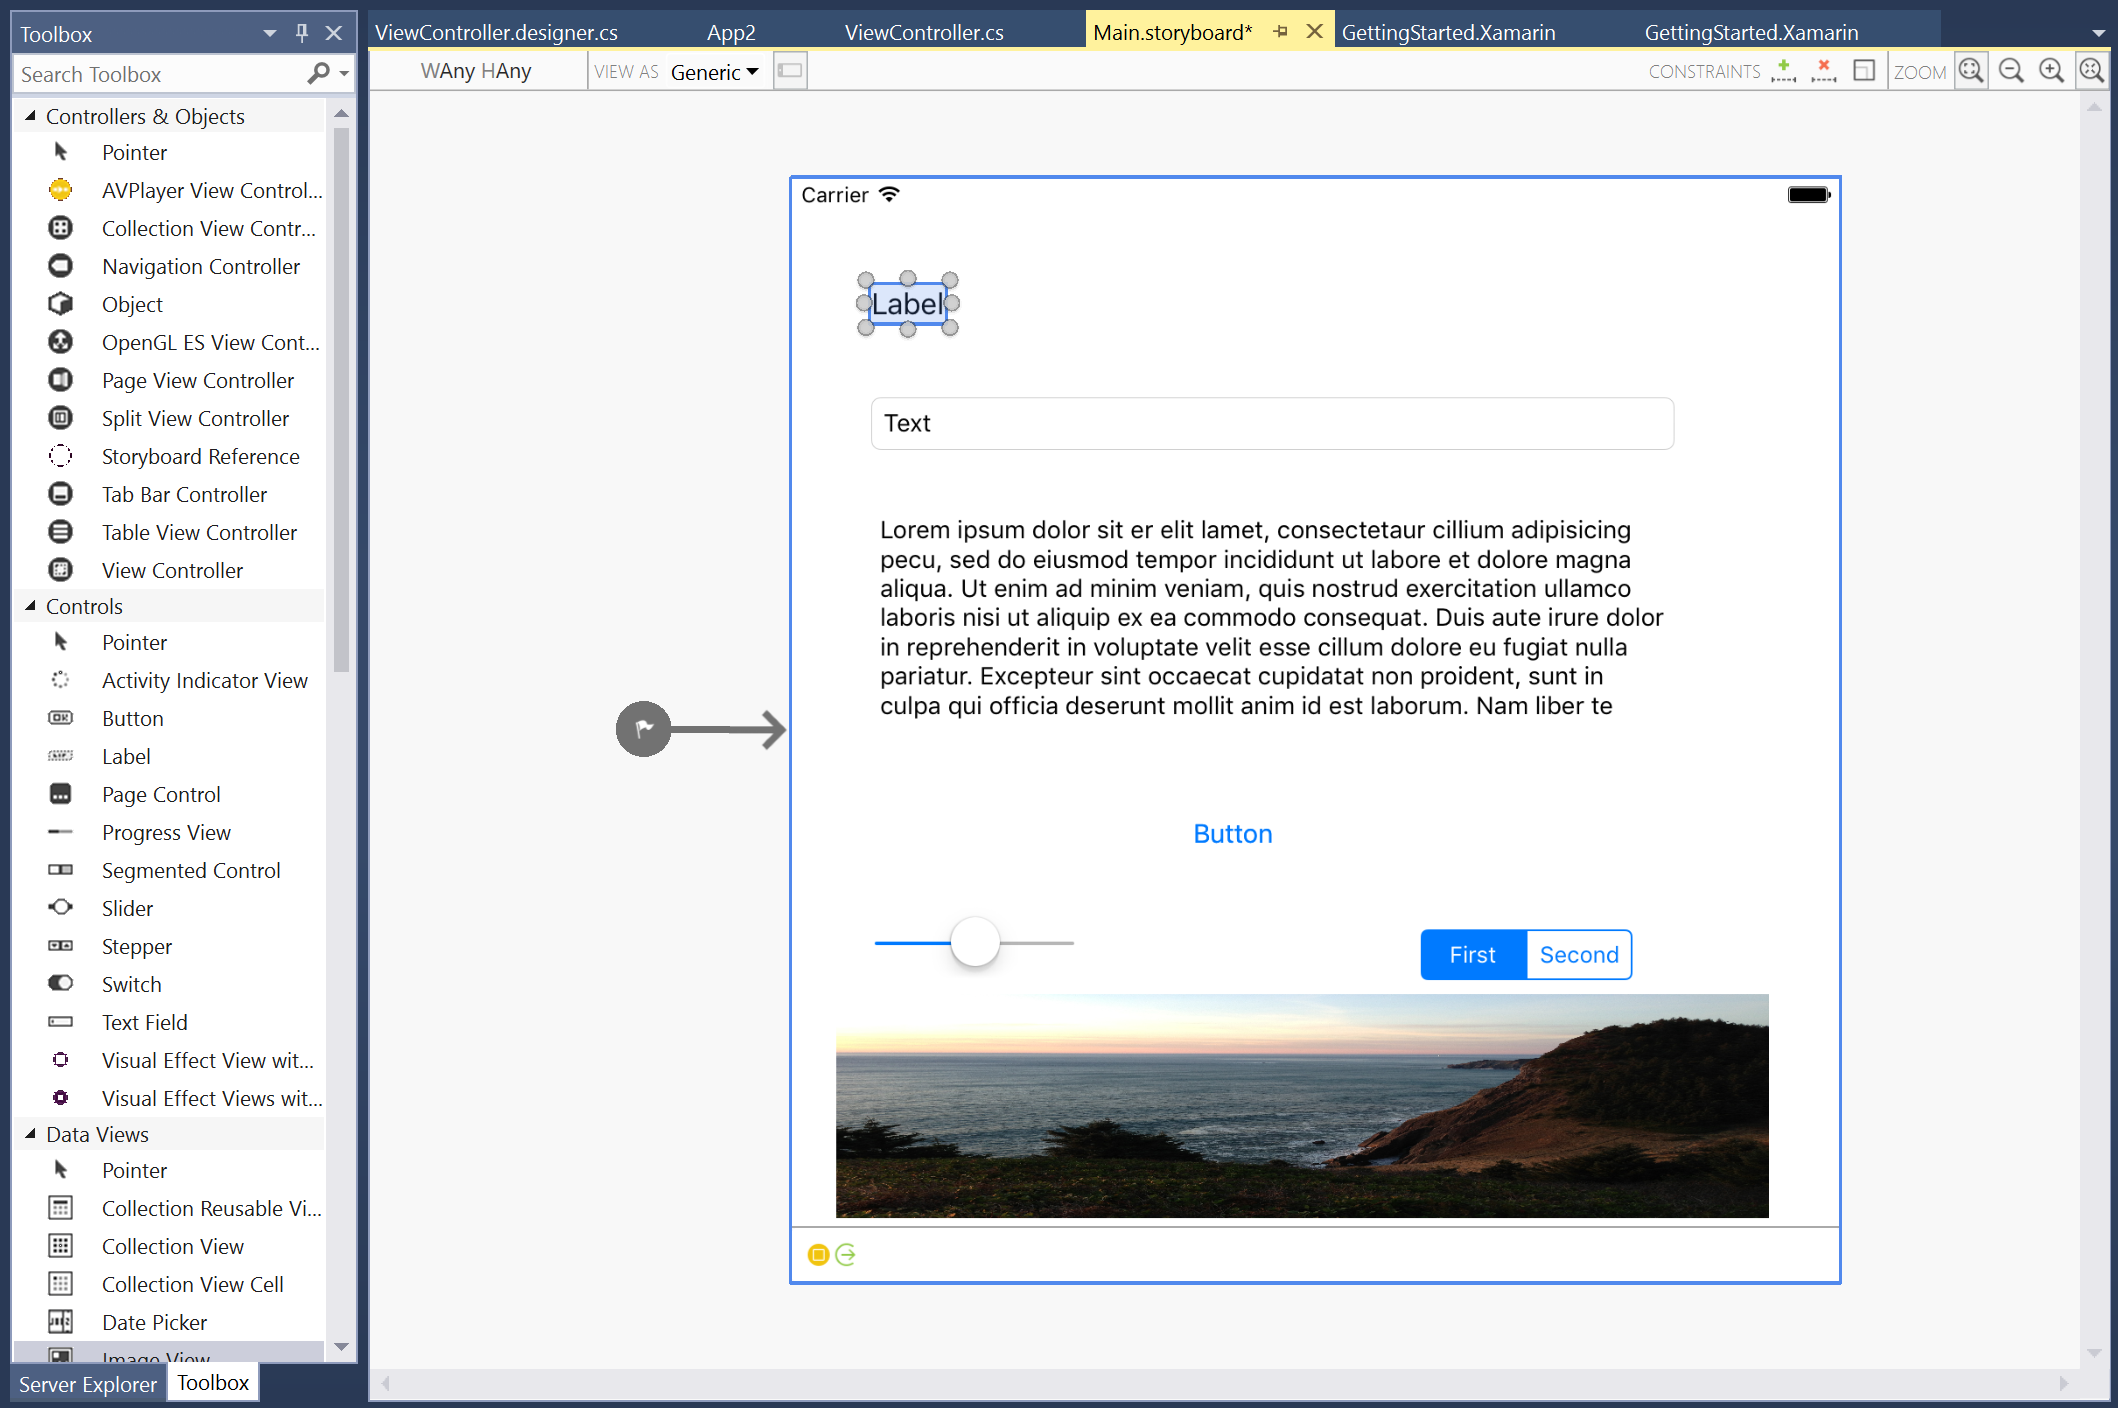
To start creating your user interface in the iOS Designer, double-click on a storyboard file. Controls can be dragged onto the design surface from the Toolbox as illustrated below:
When a control is selected on the design surface the Properties Pad will show the attributes for that control. The Widget > Identity > Name field, which is populated in the screenshot below, is used as the Outlet name. This is how you can reference the control in C#:
For a deeper dive into using the iOS designer, refer to the Introduction to the iOS Designer guide.
Using Xcode Interface Builder
If you are unfamiliar with using Interface Builder, refer to Apple's Interface Builder documents.
To open a Storyboard in Xcode, right-click to access the context menu for the storyboard file and choose to open with the Xcode Interface Builder:
Controls can be dragged onto the Design Surface from the Object Library illustrated below:
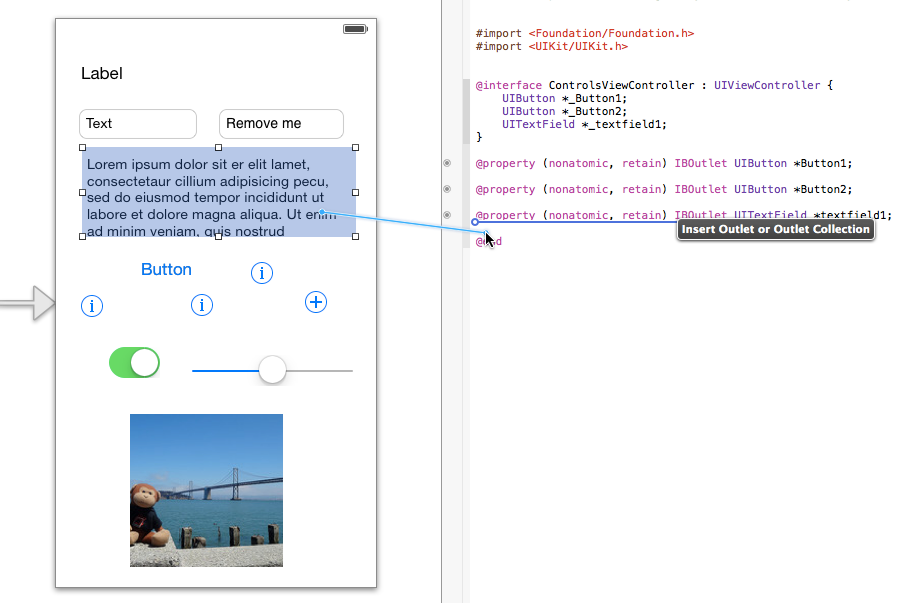
When you design your UI with Interface Builder you must create an Outlet for each control that you wish to reference in C#. This is done by turning on the Assistant Editor using the center Editor button on the Xcode toolbar button:
Click on a user interface object; then Control Drag into the .h file. To Control Drag, hold down the
control key then click and hold over the user interface object that you are creating the outlet (or action) for. Keep
holding down the Control key while you drag into the header file. Finish dragging below the @interface definition. A
blue line should appear with a caption Insert Outlet or Outlet Collection, as illustrated in the screenshot below.
When you release the click you will be prompted to provide a name for the Outlet, which will be used to create a C# property that can be referenced in code:
For more information on how Xcode's Interface Builder integrates with Visual Studio for Mac, refer to the Xib Code Generation document.
Using C#
If you decide to programmatically create a user interface object using C# (in a View or View Controller, for example), follow these steps:
- Declare a class level field for the user interface object. Create the control itself once, in
ViewDidLoadfor example. The object can then be referenced throughout the lifecycle methods of the View Controller (eg.ViewWillAppear). - Create a
CGRectthat defines the frame of the control (its X and Y coordinates on the screen, as well as its width and height). You'll need to make sure you have ausing CoreGraphicsdirective for this. - Call the constructor to create and assign the control.
- Set any properties or event handlers.
- Call
Add()to add the control to the view hierarchy.
Here is a simple example of creating a UILabel in a View Controller using C#:
UILabel label1;
public override void ViewDidLoad () {
    base.ViewDidLoad ();
    var frame = new CGRect(10, 10, 300, 30);
    label1 = new UILabel(frame);
    label1.Text = "New Label";
    View.Add (label1);
}
Using C# and Storyboards
When View Controllers are added to the Design Surface, two corresponding C# files are created in the project. In this example, ControlsViewController.cs and ControlsViewController.designer.cs have been created automatically:
The ControlsViewController.cs file is intended for your code. This is where the View lifecycle methods such as
ViewDidLoad and ViewWillAppear are implemented and where you can add your own properties, fields and methods.
The ControlsViewController.designer.cs is generated code containing a partial class. When you name a control on the design surface in Visual Studio for Mac, or create an outlet or action in Xcode, a corresponding property, or partial method, is added to the designer (designer.cs) file. The code below shows an example of code generated for two buttons and a text view,
where one of the buttons also has a TouchUpInside event.
These elements of the partial class enable your code to reference the controls and respond to the actions that are declared on the design surface:
[Register ("ControlsViewController")]
    partial class ControlsViewController
    {
        [Outlet]
        [GeneratedCodeAttribute ("iOS Designer", "1.0")]
        UIKit.UIButton Button1 { get; set; }

        [Outlet]
        [GeneratedCodeAttribute ("iOS Designer", "1.0")]
        UIKit.UIButton Button2 { get; set; }

        [Outlet]
        [GeneratedCodeAttribute ("iOS Designer", "1.0")]
        UIKit.UITextField textfield1 { get; set; }

        [Action ("button2_TouchUpInside:")]
        [GeneratedCodeAttribute ("iOS Designer", "1.0")]
        partial void button2_TouchUpInside (UIButton sender);

        void ReleaseDesignerOutlets ()
        {
            if (Button1 != null) {
                Button1.Dispose ();
                Button1 = null;
            }
            if (Button2 != null) {
                Button2.Dispose ();
                Button2 = null;
            }
            if (textfield1 != null) {
                textfield1.Dispose ();
                textfield1 = null;
            }
        }
    }
}
The designer.cs file should not be manually edited – the IDE (Visual Studio for Mac or Visual Studio) is responsible for keeping
it synchronized with the Storyboard.
When user interface objects are added programmatically to a View or ViewController, you instantiate and manage the object references yourself, and therefore no designer file is required.


