Use features of the Remote Desktop client for Windows when connecting to Azure Virtual Desktop
Once you've connected to Azure Virtual Desktop using the Remote Desktop client, it's important to know how to use the features. This article shows you how to use the features available in the Remote Desktop client for Windows.
There are multiple options:
Remote Desktop client for Windows: A standalone MSI installer. When installed, the application name is Remote Desktop.
Remote Desktop app for Windows: Comes from the Microsoft Store. When installed, the application name is Remote Desktop.
Tip
To ensure a seamless experience, you should download Windows App, which replaces the Remote Desktop client. Windows App is the gateway to securely connect to any devices or apps across Azure Virtual Desktop, Windows 365, and Microsoft Dev Box. For more information, see What is Windows App.
Note
Your admin can choose to override some of these settings in Azure Virtual Desktop, such as being able to copy and paste between your local device and your remote session. If some of these settings are disabled, please contact your admin.
Select a tab for the platform you're using.
Refresh or unsubscribe from a workspace or see its details
Select a tab below for the version of the Remote Desktop client for Windows that you're using.
To refresh or unsubscribe from a workspace or see its details:
Open the Remote Desktop application on your device.
Select the three dots to the right-hand side of the name of a workspace where you'll see a menu with options for Details, Refresh, and Unsubscribe.
- Details shows you details about the workspace, such as:
- The name of the workspace.
- The URL and username used to subscribe.
- The number of desktops and apps.
- The date and time of the last refresh.
- The status of the last refresh.
- Refresh makes sure you have the latest desktops and apps and their settings provided by your admin.
- Unsubscribe removes the workspace from the Remote Desktop client.
- Details shows you details about the workspace, such as:
User accounts
Select a tab below for the version of the Remote Desktop client for Windows that you're using.
Manage user accounts
You can save a user account and associate it with workspaces to simplify the connection sequence, as the sign-in credentials will be used automatically. You can also edit a saved account or remove accounts you no longer want to use.
User accounts are stored and managed in Credential Manager in Windows as a generic credential.
To save a user account:
Open the Remote Desktop app on your device.
Double-click one of the icons to launch a session to Azure Virtual Desktop. If you're prompted to enter the password for your user account again, enter the password and check the box Remember me, then select OK.
To edit or remove a saved user account:
Open Credential Manager from the Control Panel. You can also open Credential Manager by searching the Start menu.
Select Windows Credentials.
Under Generic Credentials, find your saved user account and expand its details. It will begin with RDPClient.
To edit the user account, select Edit. You can update the username and password. Once you're done, select Save.
To remove the user account, select Remove and confirm that you want to delete it.
Display preferences
Select a tab below for the version of the Remote Desktop client for Windows that you're using.
Display settings for each remote desktop
If you want to use different display settings to those specified by your admin, you can configure custom settings.
Open the Remote Desktop application on your device.
Right-click the name of a desktop connection, for example SessionDesktop, then select Settings.
Toggle Use default settings to off.
On the Display tab, you can select from the following options:
Display configuration Description All displays Automatically use all displays for the desktop. If you have multiple displays, all of them will be used.
For information on limits, see Compare the features of the Remote Desktop clients.Single display Only a single display will be used for the remote desktop. Select displays Only select displays will be used for the remote desktop. Each display configuration in the table above has its own settings. Use the following table to understand each setting:
Setting Display configurations Description Single display when in windowed mode All displays
Select displaysOnly use a single display when running in windows mode, rather than full screen. Start in full screen Single display The desktop will be displayed full screen. Fit session to window All displays
Single display
Select displaysWhen you resize the window, the scaling of the desktop will automatically adjust to fit the new window size. The resolution will stay the same. Update the resolution on resize Single display When you resize the window, the resolution of the desktop will automatically change to match.
If this is disabled, a new option for Resolution is displayed where you can select from a pre-defined list of resolutions.Choose which display to use for this session Select displays Select which displays you want to use. All selected displays must be next to each other. Maximize to current displays Select displays The remote desktop will show full screen on the current display(s) the window is on, even if this isn't the display selected in the settings. If this is off, the remote desktop will show full screen the same display(s) regardless of the current display the window is on. If your window overlaps multiple displays, those displays will be used when maximizing the remote desktop.
Input methods
You can use touch input, or a built-in or external PC keyboard, trackpad and mouse to control desktops or apps. Select a tab below for the version of the Remote Desktop client for Windows that you're using.
Use touch gestures and mouse modes in a remote session
You can use touch gestures to replicate mouse actions in your remote session. If you connect to Windows 10 or later with Azure Virtual Desktop, native Windows touch and multi-touch gestures are supported.
The following table shows which mouse operations map to which gestures:
| Mouse operation | Gesture |
|---|---|
| Left-click | Tap with one finger |
| Right-click | Tap and hold with one finger |
| Left-click and drag | Double-tap and hold with one finger, then drag |
| Right-click | Tap with two fingers |
| Right-click and drag | Double-tap and hold with two fingers, then drag |
| Mouse wheel | Tap and hold with two fingers, then drag up or down |
| Zoom | With two fingers, pinch to zoom out and move fingers apart to zoom in |
Keyboard
There are several keyboard shortcuts you can use to help use some of the features. Some of these are for controlling how the Remote Desktop client displays the session. These are:
| Key combination | Description |
|---|---|
| CTRL+ALT+HOME | Activates the connection bar when in full-screen mode and the connection bar isn't pinned. |
| CTRL+ALT+PAUSE | Switches the client between full-screen mode and window mode. |
Most common Windows keyboard shortcuts, such as CTRL+C for copy and CTRL+Z for undo, are the same when using Azure Virtual Desktop. When you're using a remote desktop or app in windowed mode, there are some keyboard shortcuts that are different so Windows knows when to use them in Azure Virtual Desktop or on your local device. These are:
| Windows shortcut | Azure Virtual Desktop shortcut | Description |
|---|---|---|
| CTRL+ALT+DELETE | CTRL+ALT+END | Shows the Windows Security dialog box. Also applicable in fullscreen mode. |
| ALT+TAB | ALT+PAGE UP | Switches between programs from left to right. |
| ALT+SHIFT+TAB | ALT+PAGE DOWN | Switches between programs from right to left. |
| WINDOWS key, or CTRL+ESC |
ALT+HOME | Shows the Start menu. |
| ALT+SPACE BAR | ALT+DELETE | Shows the system menu. |
| PRINT SCREEN | CTRL+ALT++ (plus sign) | Takes a snapshot of the entire remote session, and places it in the clipboard. |
| ALT+PRINT SCREEN | CTRL+ALT+- (minus sign) | Takes a snapshot of the active window in the remote session, and places it in the clipboard. |
Note
Keyboard shortcuts will not work when using remote desktop or RemoteApp sessions that are nested.
Keyboard language
By default, remote desktops and apps will use the same keyboard language, also known as locale, as your Windows PC. For example, if your Windows PC uses en-GB for English (United Kingdom), that will also be used by Windows in the remote session.
You can manually set which keyboard language to use in the remote session by following the steps at Managing display language settings in Windows. You might need to close and restart the application you're currently using for the keyboard changes to take effect.
Redirections
Select a tab below for the version of the Remote Desktop client for Windows that you're using.
Folder redirection
The Remote Desktop client can make local folders available in your remote session. This is known as folder redirection. This means you can open files from and save files to your Windows PC with your remote session. Redirected folders appear as a network drive in Windows Explorer.
Folder redirection can't be configured using the Remote Desktop client for Windows. This behavior is configured by your admin in Azure Virtual Desktop. By default, all local drives are redirected to a remote session.
Redirect devices, audio, and clipboard
The Remote Desktop client can make your local clipboard and local devices available in your remote session where you can copy and paste text, images, and files. The audio from the remote session can also be redirected to your local device. However, redirection can't be configured using the Remote Desktop client for Windows. This behavior is configured by your admin in Azure Virtual Desktop. Here's a list of some of the devices and resources that can be redirected. For the full list, see Compare the features of the Remote Desktop clients when connecting to Azure Virtual Desktop.
- Printers
- USB devices
- Audio output
- Smart cards
- Clipboard
- Microphones
- Cameras
App display modes
Select a tab below for the version of the Remote Desktop client for Windows that you're using.
You can configure the Remote Desktop client to be displayed in light or dark mode, or match the mode of your system:
Open the Remote Desktop application on your device.
Select Settings.
Under App mode, select Light, Dark, or Use System Mode. The change is applied instantly.
Views
You can view your remote desktops and apps as either a tile view (default) or list view:
Open the Remote Desktop application on your device.
If you want to switch to List view, select Tile, then select List view.
If you want to switch to Tile view, select List, then select Tile view.
Update the client
Select a tab below for the version of the Remote Desktop client for Windows that you're using.
By default, you'll be notified whenever a new version of the client is available as long as your admin hasn't disabled notifications. The notification will appear in the client and the Windows Action Center. To update your client, just select the notification.
You can also manually search for new updates for the client:
Open the Remote Desktop application on your device.
Select the three dots at the top right-hand corner to show the menu, then select About. The client will automatically search for updates.
If there's an update available, tap Install update to update the client. If the client is already up to date, you'll see a green check box, and the message You're up to date.
Tip
Admins can control notifications about updates and when updates are installed. For more information, see Update behavior.
Enable Insider releases
Select a tab below for the version of the Remote Desktop client for Windows that you're using.
If you want to help us test new builds of the Remote Desktop client for Windows before they're released, you should download our Insider releases. Organizations can use the Insider releases to validate new versions for their users before they're generally available.
Note
Insider releases shouldn't be used in production.
Insider releases are made available in the Remote Desktop client once you've configured the client to use Insider releases. To configure the client to use Insider releases:
Add the following registry key and value:
- Key: HKLM\Software\Microsoft\MSRDC\Policies
- Type: REG_SZ
- Name: ReleaseRing
- Data: insider
You can do this with PowerShell. On your local device, open PowerShell as an administrator and run the following commands:
New-Item -Path "HKLM:\SOFTWARE\Microsoft\MSRDC\Policies" -Force
New-ItemProperty -Path "HKLM:\SOFTWARE\Microsoft\MSRDC\Policies" -Name ReleaseRing -PropertyType String -Value insider -Force
Restart your local device.
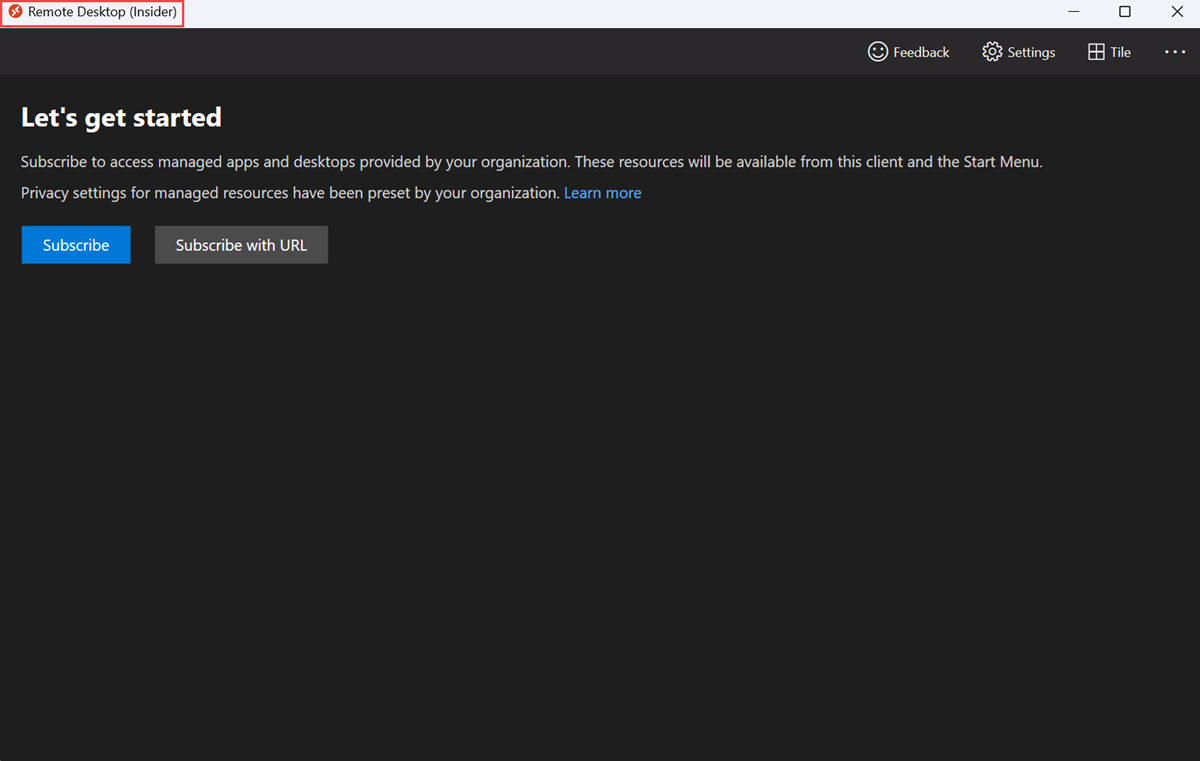
Open the Remote Desktop client. The title in the top left-hand corner should be Remote Desktop (Insider):
If you already have configured the Remote Desktop client to use Insider releases, you can check for updates to ensure you have the latest Insider release by checking for updates in the normal way. For more information, see Update the client.
Admin management
Enterprise deployment
To deploy the Remote Desktop client in an enterprise, you can use msiexec from a command line to install the MSI file. You can install the client per-device or per-user by running the relevant command from Command Prompt as an administrator:
Per-device installation:
msiexec /i <path to the MSI> /qn ALLUSERS=1Per-user installation:
msiexec /i <path to the MSI> /qn ALLUSERS=2 MSIINSTALLPERUSER=1
Important
If you want to deploy the Remote Desktop client per-user with Intune or Configuration Manager, you'll need to use a script. For more information, see Install the Remote Desktop client for Windows on a per-user basis with Intune or Configuration Manager.
Update behavior
You can control notifications about updates and when updates are installed. The update behavior of the client depends on two factors:
Whether the app is installed for only the current user or for all users on the machine
The value of the following registry key:
- Key: HKLM\Software\Microsoft\MSRDC\Policies
- Type: REG_DWORD
- Name: AutomaticUpdates
The Remote Desktop client offers three ways to update:
Notification-based updates, where the client shows the user a notification in the client UI or a pop-up message in the taskbar. The user can choose to update the client by selecting the notification.
Silent on-close updates, where the client automatically updates after the user has closed the Remote Desktop client.
Silent background updates, where a background process checks for updates a few times a day and will update the client if a new update is available.
To avoid interrupting users, silent updates won't happen while users have the client open, have a remote connection active, or if you've disabled automatic updates. If the client is running while a silent background update occurs, the client will show a notification to let users know an update is available.
You can set the AutomaticUpdates registry key to one of the following values:
| Value | Update behavior (per user installation) | Update behavior (per machine installation) |
|---|---|---|
| 0 | Disable notifications and turn off auto-update. | Disable notifications and turn off auto-update. |
| 1 | Notification-based updates. | Notification-based updates. |
| 2 (default) | Notification-based updates when the app is running. Otherwise, silent on-close and background updates. | Notification-based updates. No support for silent update mechanisms, as users may not have administrator access rights on the client device. |
URI to subscribe to a workspace
The Remote Desktop client for Windows supports the ms-rd and ms-avd (preview) Uniform Resource Identifier (URI) schemes. This enables you to invoke the Remote Desktop client with specific commands, parameters, and values for use with Azure Virtual Desktop. For example, you can subscribe to a workspace or connect to a particular desktop or RemoteApp.
For more information and the available commands, see Uniform Resource Identifier schemes with the Remote Desktop client for Azure Virtual Desktop
Provide feedback
If you want to provide feedback to us on the Remote Desktop client for Windows, you can do so by selecting the button that looks like a smiley face emoji in the client app, as shown in the following image. This will open the Feedback Hub.
![]()
To best help you, we need you to give us as detailed information as possible. Along with a detailed description, you can include screenshots, attach a file, or make a recording. For more tips about how to provide helpful feedback, see Feedback.
Next steps
If you're having trouble with the Remote Desktop client, see Troubleshoot the Remote Desktop client.